Anet A8 Electronics Case


Print Profile(0)
Description
Summary
Intent
This Thing was created since I couldn't find a case that would hold two mosfets (of the type I used) and the Anet mainboard. I either only found cases to hold the mosfet(s) or the mainboard; many also had space added for other circuit boards that weren't of interest to me.
At a later date I also modified it for a different type of mosfet and also made it a bit flexible in its design. It's now possible to use it for one or two large mosfets (the kind I use) or for one or two smaller type of mosfets (see link below).
I designed this to be as cheap and light as I could while still staying together. All the walls, bottoms and lids are all 1.2 mm thick, which might sound flimsy, but they stay together nicely (for me).
Obstacles
Since the printer bed can only handle 220 mm, I had to split the case into two pieces. By placing one of the mosfets in the divide it helps holding the two pieces together.
The case is created to work together with the Hulk Braces, created by Leo_N (thanks for a great creation Leo_N).
Parts List
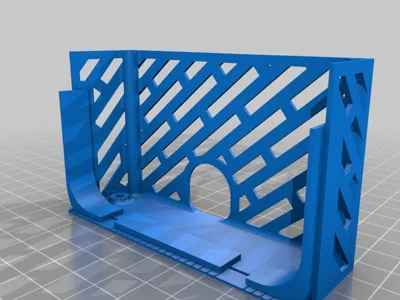
The assembled case consist of two sections, a top and bottom. Just choose the desired setup that is of interest to you.
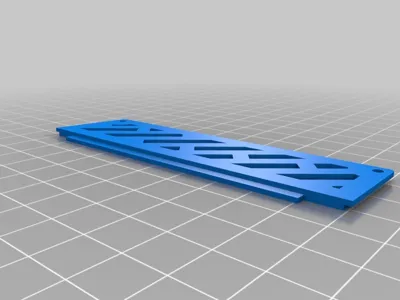
Each section consist of a case and a lid.
There is also a three different reset pins (20 mm, 21 mm or 22 mm) for the reset button. Print them all and use the one that works best.
These are the different combinations.
One large mosfet
ElectronicsCase_Bottom_Lid.stl
ElectronicsCase_Bottom_LargeMosfet.stl
ElectronicsCase_TopSmall_Lid.stl
ElectronicsCase_TopSmall_LargeMosfet.stl
One small mosfet
ElectronicsCase_Bottom_Lid.stl
ElectronicsCase_Bottom_SmallMosfet.stl
ElectronicsCase_TopSmall_Lid.stl
ElectronicsCase_TopSmall_NoMosfet.stl
Two large mosfets
ElectronicsCase_Bottom_Lid.stl
ElectronicsCase_Bottom_LargeMosfet.stl
ElectronicsCase_TopBig_Lid.stl
ElectronicsCase_TopBig_LargeMosfet.stl
Two small mosfets
ElectronicsCase_Bottom_Lid.stl
ElectronicsCase_Bottom_SmallMosfet.stl
ElectronicsCase_TopBig_Lid.stl
ElectronicsCase_TopBig_SmallMosfet.stl
Then there's the different reset pin files:
- Reset_Button_Pin_20mm.stl
- Reset_Button_Pin_21mm.stl
- Reset_Button_Pin_22mm.stl
Required Hardware
For assembling the case with two mosfets, you will need the following bolts and nuts.
If you decide on assembling any of the combinations with only one mosfet you will naturally need less bolts and nuts.
- 7 x M3x16 mm button head screws (cases to the printer).
- 7 x M3 nuts (cases to the printer).
- 11 x M3x5 - 10 mm button head screws (lids to cases).
- 12 x PC screws/harddrive (mainboard and mosfets to case).
The mosfets I used, and which I call the "large" mosfets, can be purchased from many places online.
For reference, see this link.
The mosfets that I call "small" is also available from many places online.
For reference, see this link.
Assembly
The assembly is pretty much self explanatory, but I do have to mention how and why I designed all the screw holes too small.
Most printers can't print small holes accurately, because of this I decided to create all the screw holes with a smaller diameter than required for the screw to fit.
The idea I had was to create a hole that would guide a drill. In this way you can choose whichever diameter of the screws that fit your own needs.
If you want to use the reset button, you will have to glue the reset pin to the reset button (on the lid to the bottom case).
Footnote
Let me know in the Comments section if you have any problems or requests for a change.
Also, if you Made this Thing, please post a picture.
And if you are satisfied with this Thing, please support my future work by tipping me. :)
Thank you,
Göran
Print Settings
Printer:
Anet A8
Resolution:
0.2
Infill:
100%
Notes:
Slicer Settings
- Nozzle: 0.4 mm
- Wall/Top/Bottom Thickness: 1.2 mm
- Infill: Should be used for the lids, depending on how you chose to print them. For the cases you DO NOT need support since I created support where needed.
Comments
Since most of the walls are 1.2 mm thick and you are supposed to slice with 1.2 mm walls, it won't matter if you set infill to 0% or 100%. The only affected parts would be the pillars holding the circuit boards and the lids.
I printed this in semi-transparent green PLA. Sold by Clas Ohlson in Sweden.
How I Designed This
I used Autodesk Fusion 360 to design this.

Change log
December 30, 2017
- Lowered the mainboard about 5mm since some connectors would interfere with the lid.
- Added a different setup for a different type of mosfet.
- There is now four different possibilities where you can use one or two small or large mosfets.
- Added a .step file for those that want to change something.
November 26, 2017
- Initial release
Comment & Rating (3)