AMS Riser v2 Gridfinity Drawer Complete Hotend Bin


Print Profile(6)


Description
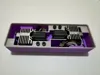
I couldn't find an option to store a complete hotend in the Gridfinity drawer for my AMS Riser V2 so I designed one that would allow it to fit. It's a tight window so it's slightly shorter than 4 height units (24.5 mm). In order for the hotend to sit low enough and not hit the top of the drawer compartment, I added some cutouts on the bottom for the fan screws. So there should be a few mm of clearance depending on your actual drawer configuration.
There is a scoop bin below the hotend that can be used to store screws or other related items.
I printed in PETG because I had a color scheme that I wanted to use. But it should work well if printed using any material.
It's “mostly” Gridfinity compliant with dimensions except for the height and stackability. Because the use case it to fit inside of a specific drawer, it didn't make sense to allow for stacking when the hotend is too tall to allow for something to fit on top of it anyway.
Inspiration and use cases came from these items:
- AMS Riser V2
- AMS Riser V2 Drawer Base + Gridfinity (Remix)
- Hotend Gridfinity tile for P1S, P1P, X1 Bambulab
One of the photos I uploaded shows my Complete Hotend model next to the Hotend tile linked above (which was created by @StuartGG). It basically just shows the difference and similarity in size with both styles side by side.
X1C, P1S, P1P (Updated)
I have an X1C so I used one of my complete hotends to prototype this model. I used feedback from some other users to adjust the model to better fit the P1S and P1P (that I cannot test because I don't have any of those nozzles). If you have one of those printers and the updated version doesn't work for your nozzles, shoot me a message and I'll see if I can adjust it even more.
User @mpolitze created a remix that worked for him if you want to give that a try or if you have trouble on the P1X series with my version.
Instructions
To insert, just put the complete hotend in the container with the fan side down. The wires should be on the right hand side. Once the hotend is resting on the base, simply tuck the wires under the shelf to the the right-hand side of the hotend (when looking at it vertically from above). They should just rest in place enough to allow the drawer to close. The shelf is angled so no supports should be needed (35 degree angle).
To remove, lift the entire hotend straight up out of the base and be sure that the wires don't get caught on anything. The shelf is angled and the edges are rounded to minimize snags. But be careful anyway to avoid damaging any of the wires or connectors.
License
You shall not share, sub-license, sell, rent, host, transfer, or distribute in any way the digital or 3D printed versions of this object, nor any other derivative work of this object in its digital or physical format (including - but not limited to - remixes of this object, and hosting on other digital platforms). The objects may not be used without permission in any way whatsoever in which you charge money, or collect fees.
Comment & Rating (39)