
Keyboard MegaShelf, sliding keyboard tray *UPDATE*

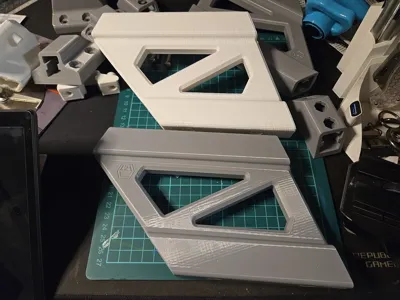
Print Profile(2)

Bill of Materials
- WoodScrews x 20: 6x1"
- T2020 x 4: AluminumExtrusion
- MachineScrew x 4: FixShelfToSlider
- T-Nuts x 4: FixShelfToSlider
Description
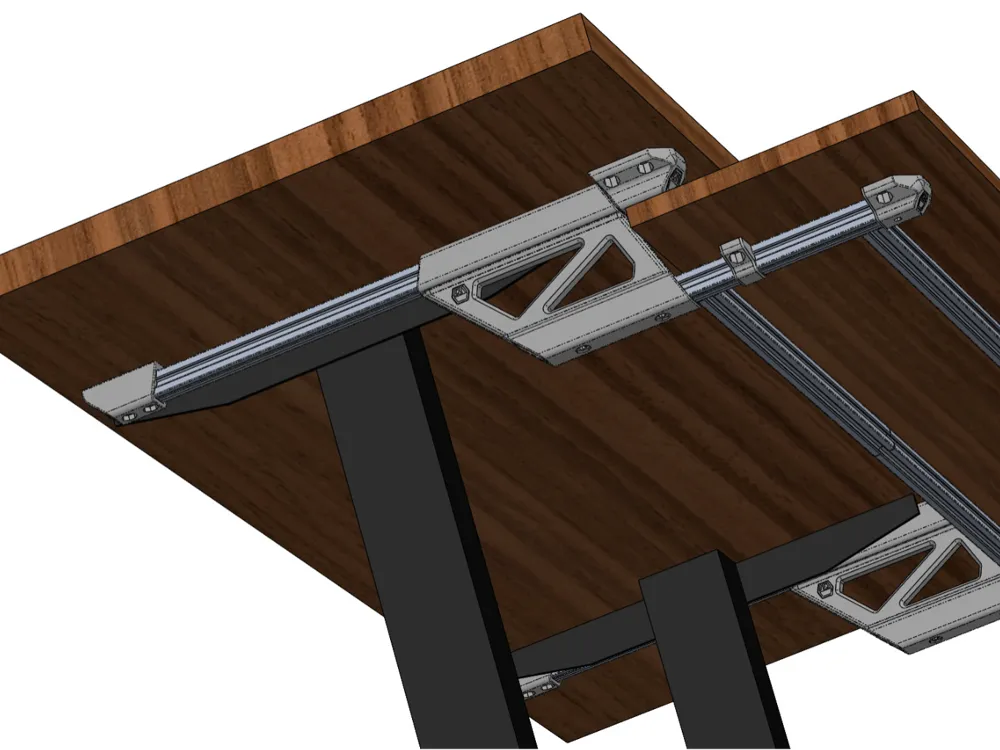
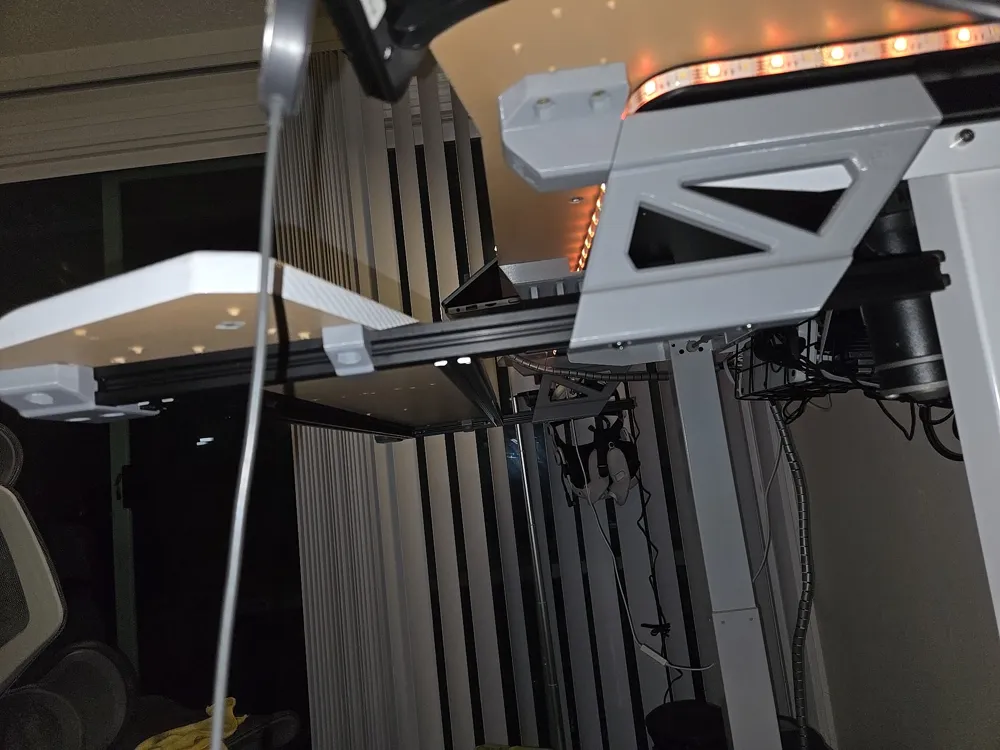
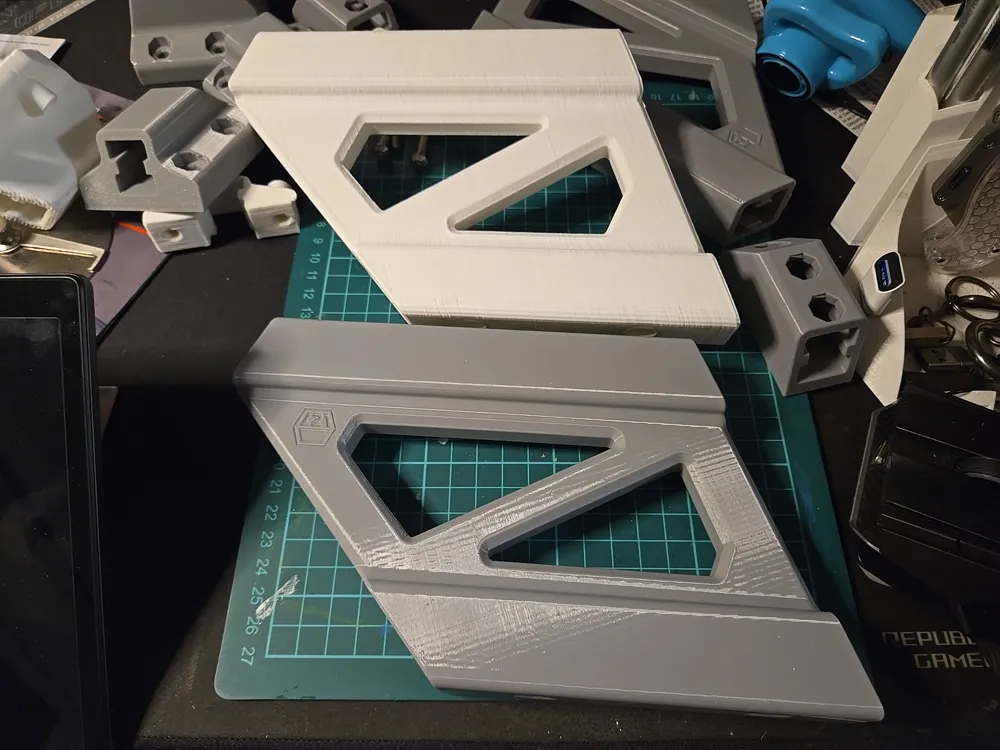
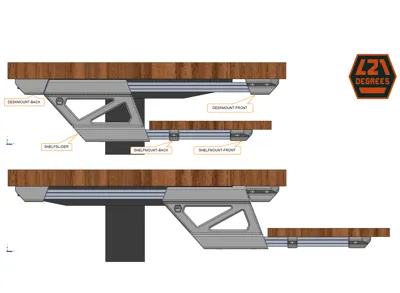
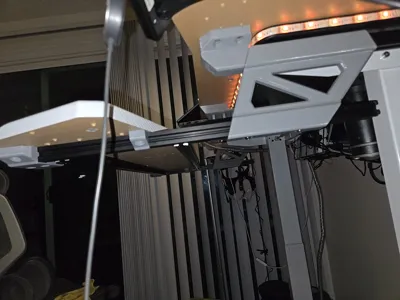
This is a set of brackets that mounts a shelf that slides under a desk. It uses T2020 aluminum extrusion for the sliding mechanism and structure.
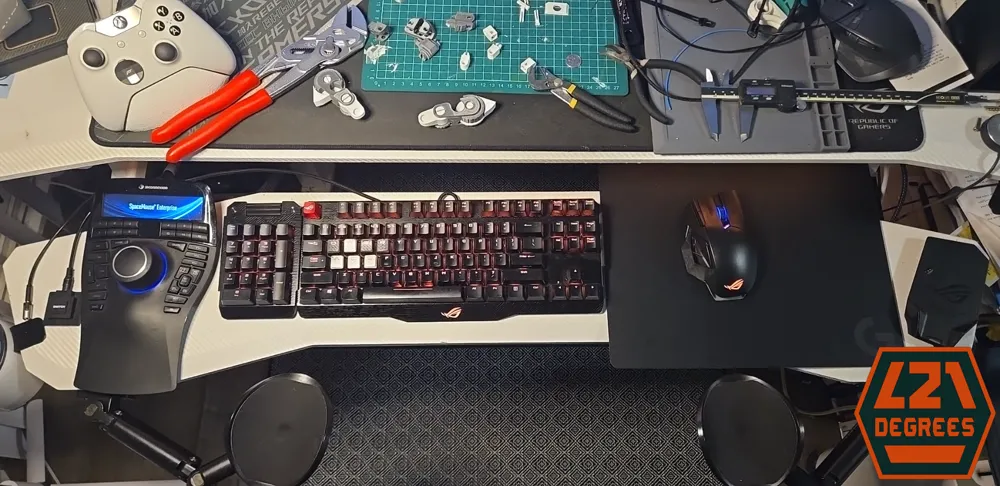
Hi! This submission is the result of my need to free desk space and lower the keyboard height as the desk is too tall for me. I spent over an hour looking for sliding keyboard trays and none met my needs/wants.
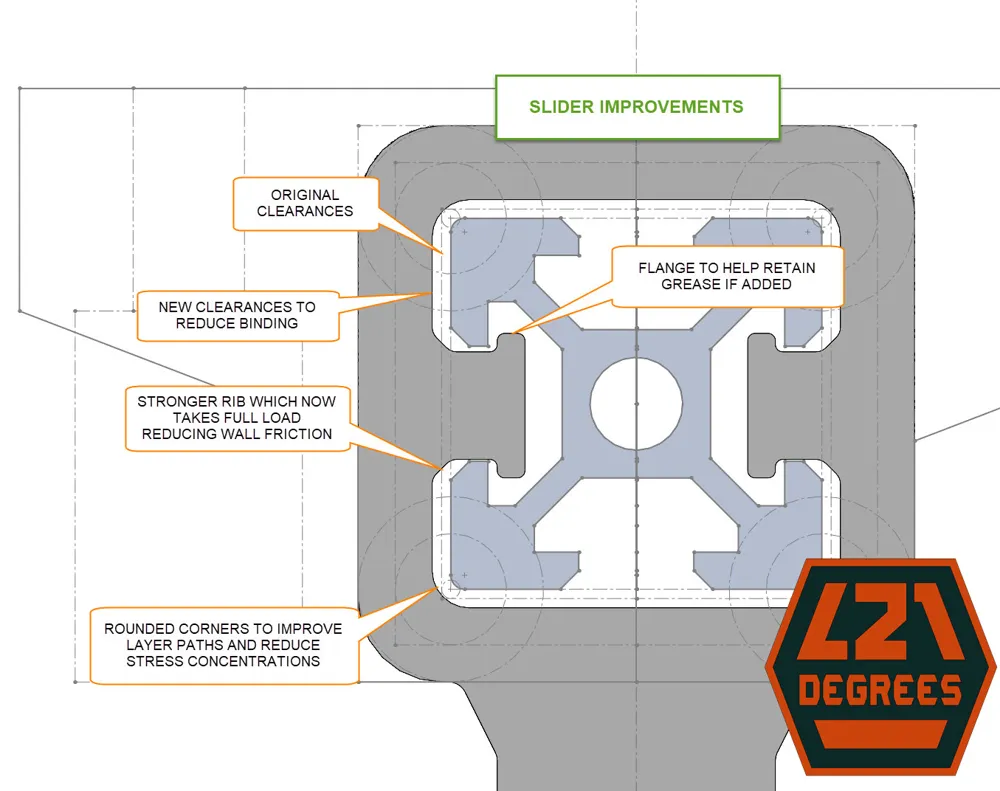
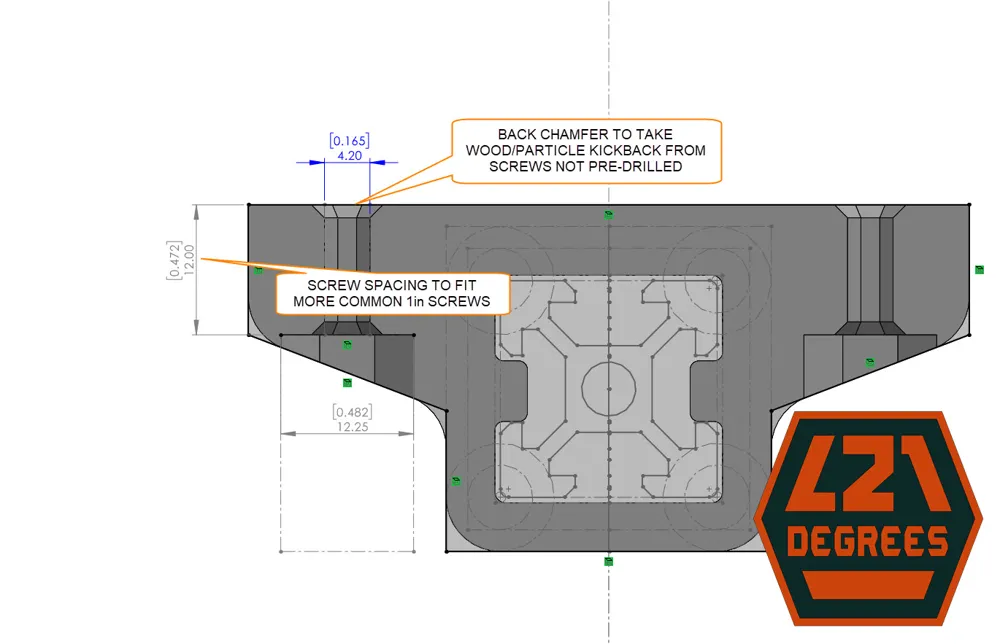
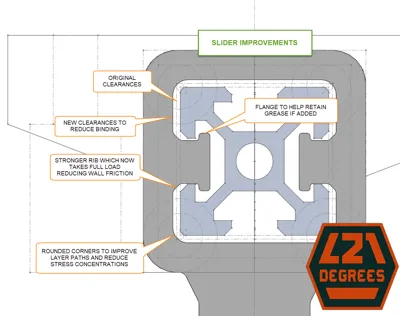
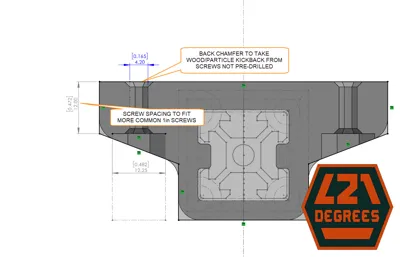
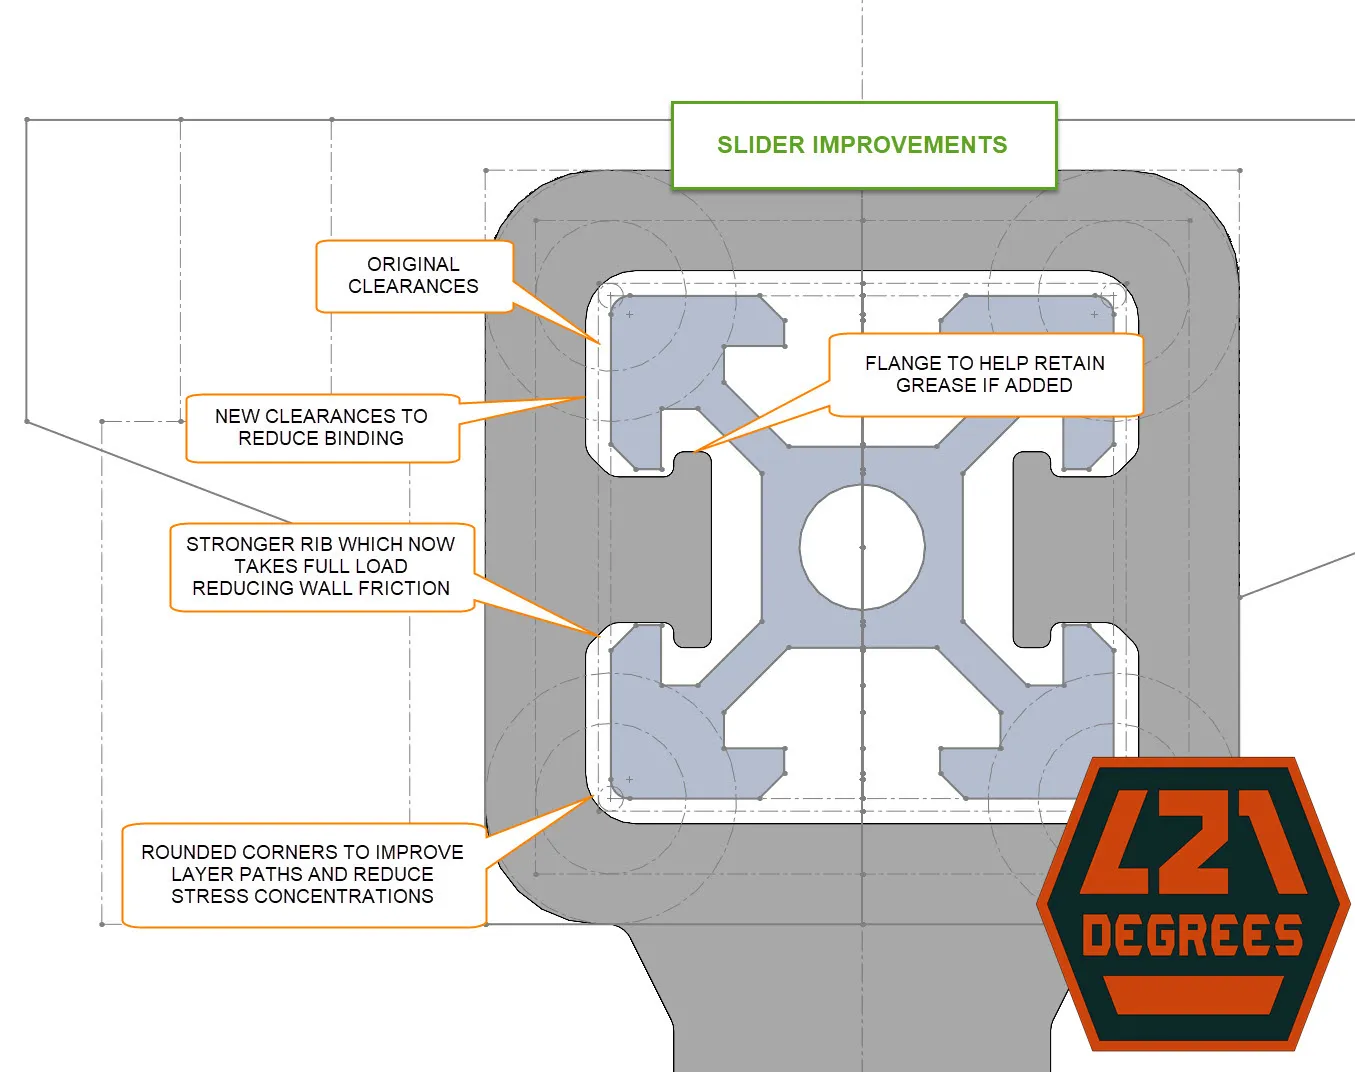
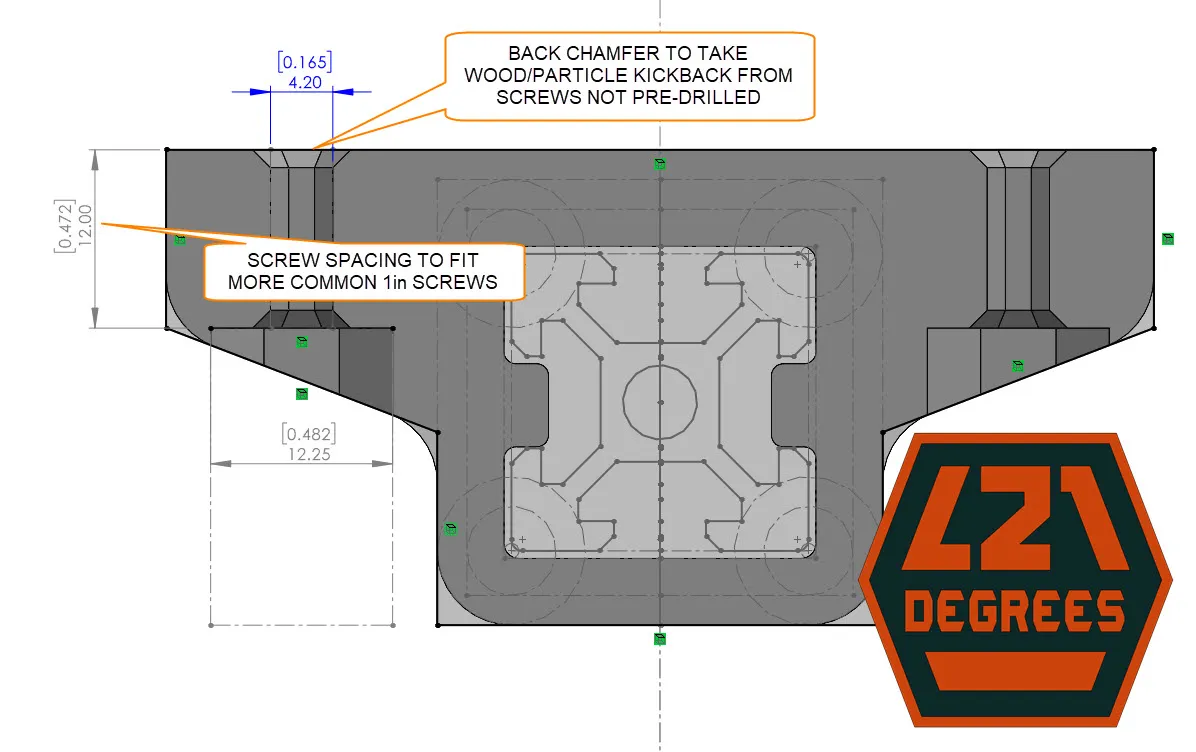
UPDATE: Models were updated to reduce sliding friction/binding, possibility to add grease, PETG is now recommended but not required and mounting screw specs were defined. Scroll to the end for more details.
Features:
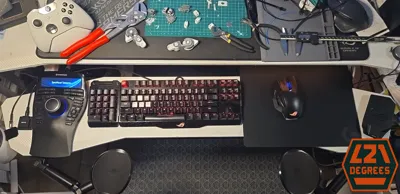
- Big enough to hold all my daily used peripherals and more
- Slides under desk to reduce footprint and add some dust protection
- Solid. Very solid. Even when extended, the natural binding of the peripheral and hand weight “locks” the shelf in any position
- Uses common or easily available materials, this aluminum extrusion is very stiff and practical
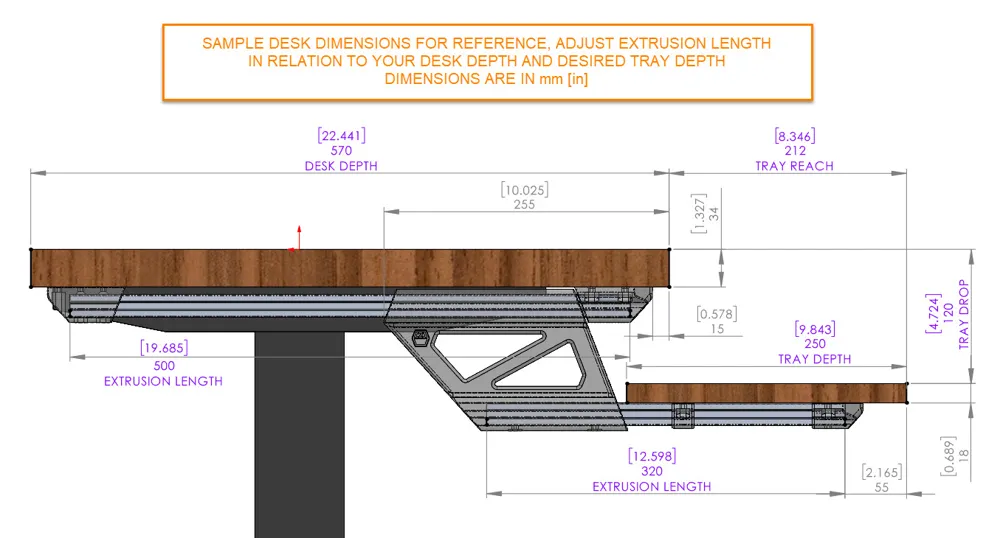
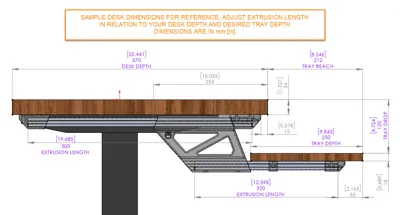
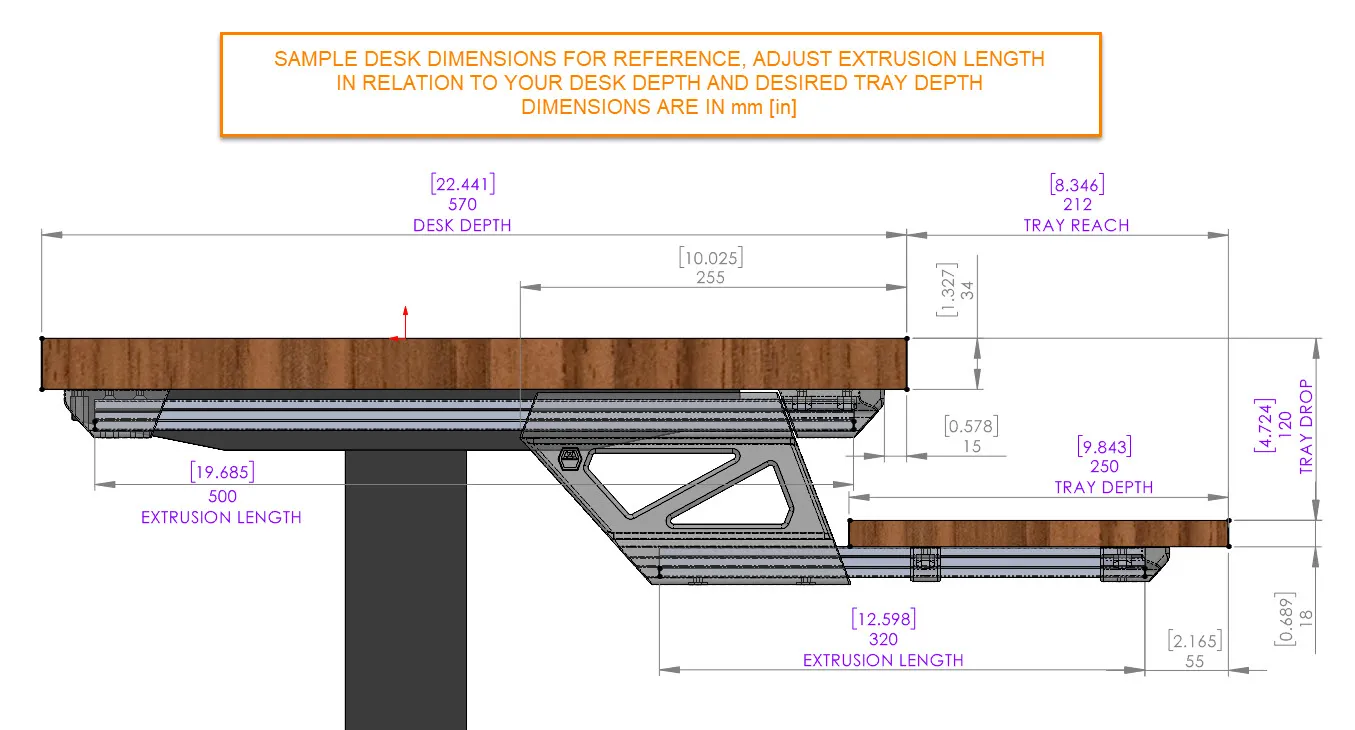
- Can be adapted to any desk and shelf size without changing the 3D prints
Design considerations:
- The front desk mount piece uses four screws since it will hold most of the weight. It can also replace the back one if wanted
- The recommended print orientation maximizes the layers along the shear forces, so I STRONGLY suggest following it
- No supports or adhesion required, nada. I've had success printing as they are but you know your printer better so decide if you want them and maybe also a brim (specially for bed slinging)
- The extrusion mating parts include an inner “rib” that makes contact in the extrusion slots before the side walls to reduce sliding friction and considerably increasing the holding strength
- Not only functional, but also spent some time shaping for a nicer look and feel, your thighs and knees will thank you when they hit them
- Designed for 1" (24-25mm) long screws, the mounting components have ½" mount spacing which allows ½" threaded depth. Please adjust for your desktop thickness accordingly.
Downsides:
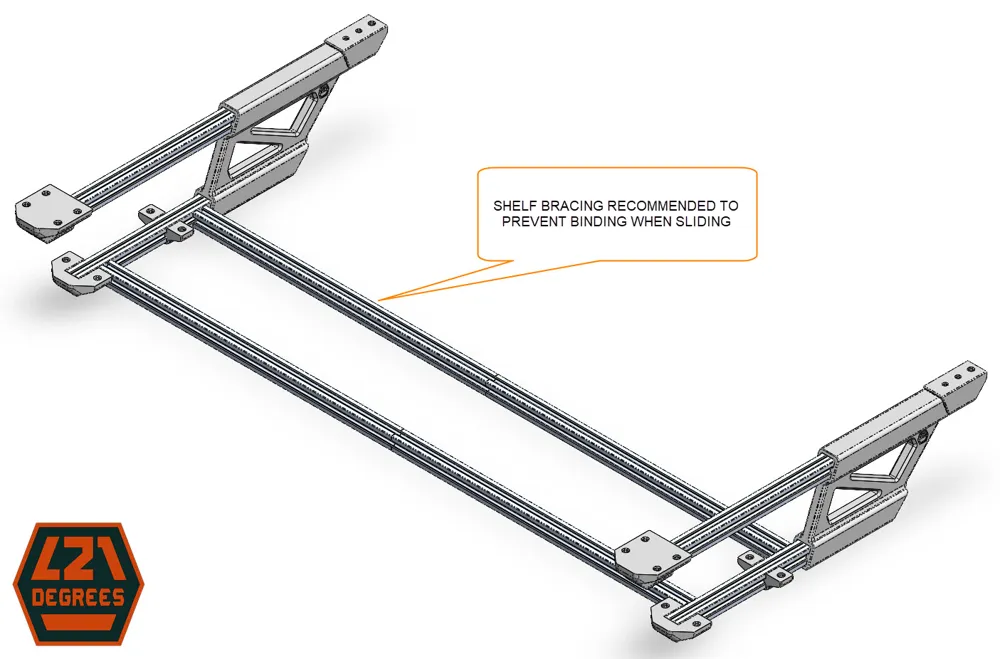
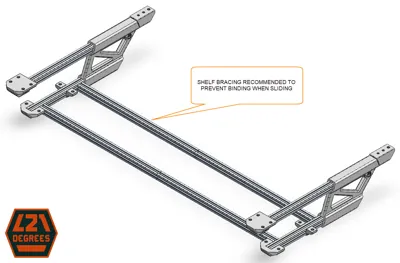
- It binds when trying to slide-in or out caused by uneven force on the ends when doing so, the solution is to frame the shelf with additional length-wise aluminum extrusion to force squareness
- Requires additional materials, like the aluminum extrusion, wood screws and machine screws plus t-slot nuts
- It doesn't make tacos but it does free your desk to hold them
- If printed in PLA, keep an eye for material residue in the sliding extrusion, from my experience, PLA was more brittle and saw plastic dust/shavings in the extrusion channel but no immediate compromise to the part integrity. PETG is a more pliable material so is now recommended
Suggested installation (straight into action version):
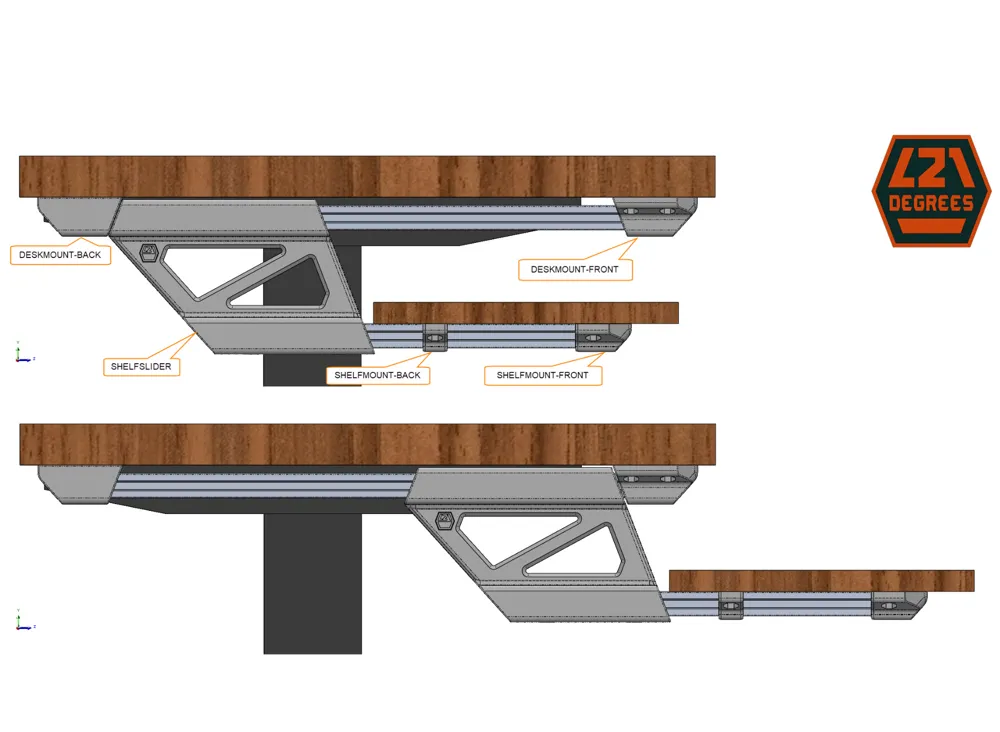
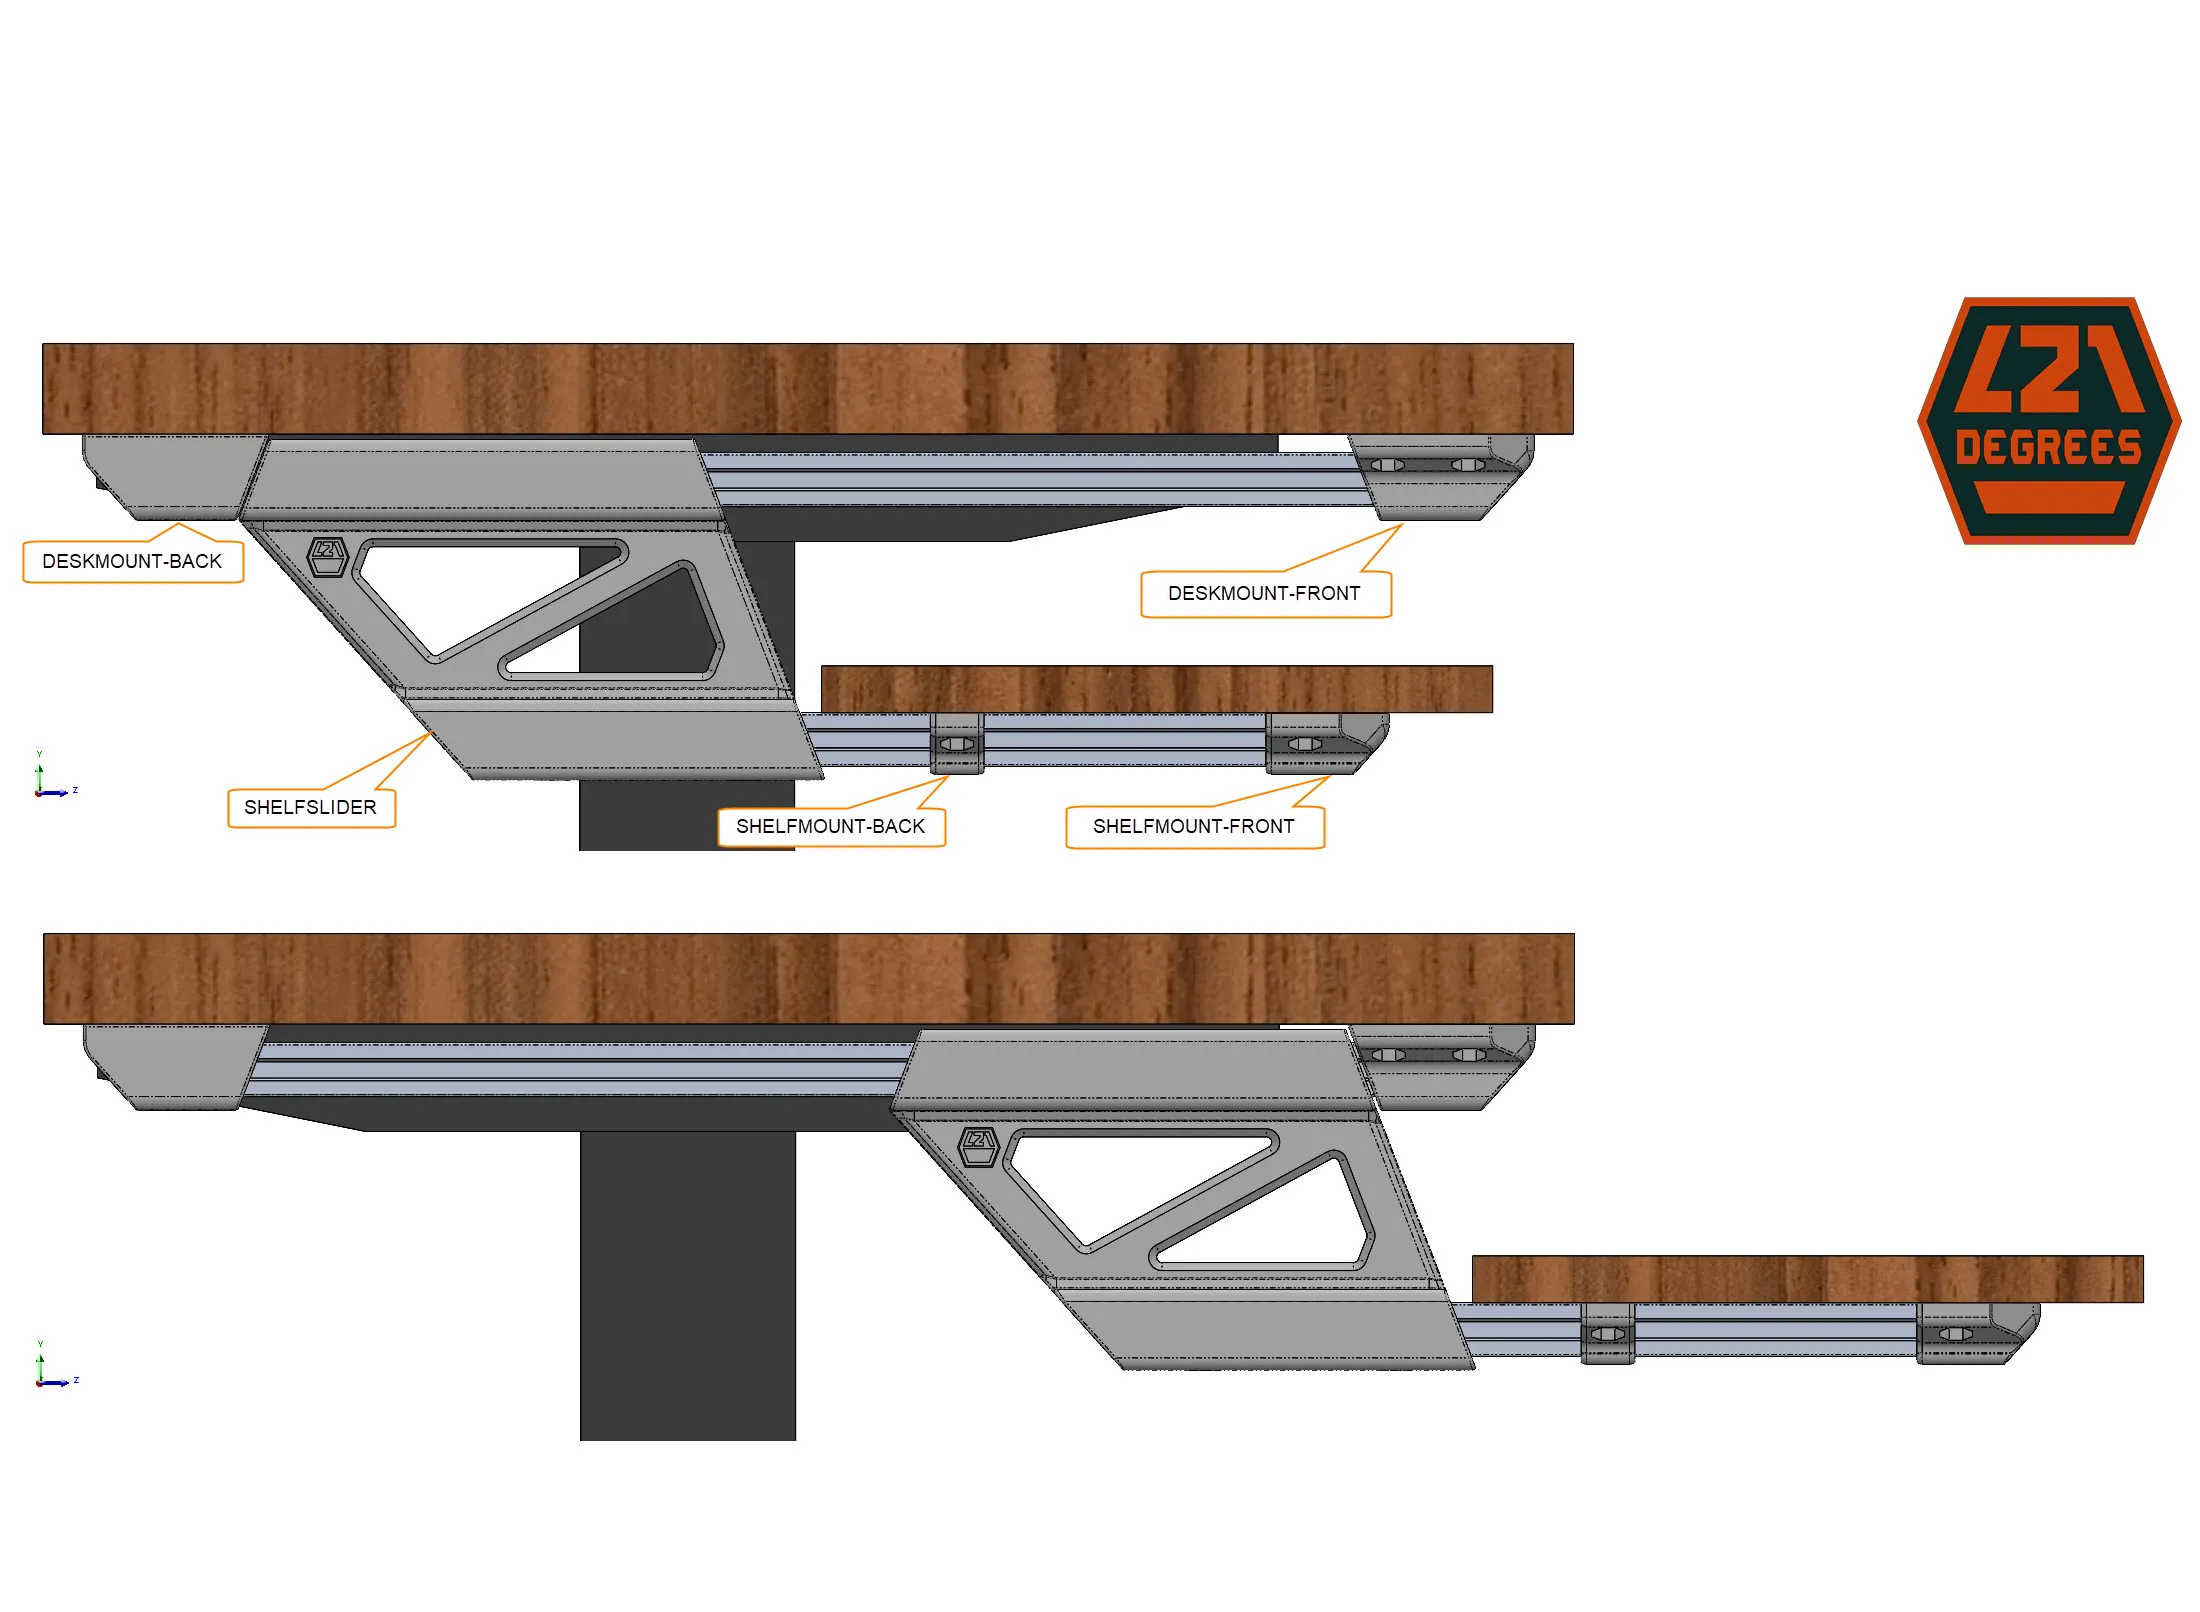
- Insert the shelf extrusion into the sliders (bottom opening, shorter), drill+tap holes then screw-in (you may use t-nuts and machine screws if you want to feel a bit fancy)
- Insert the desk extrusion into the sliders (top opening, longer)
- Screw the desk extrusion with the sliders under the desk using the desk mounts, use your Ryobi/Craftsman/Hart/Bauer/Hercules make sure they're as parallel and square as possible, maybe use a wood piece long enough to help space them, make sure that the screws are no longer than the desk thickness, I know you're pulling from the random screw bin, just compare each length to the edge of the desk
- Slide the sliders all the way to the front to expose the shelf extrusions
- Insert the shelf mounts on to the shelf extrusions
- Lay the shelf board over the shelf extrusions + shelf mounts, shift the shelf mounts to a desired/dimensioned location
- Remove the shelf board then lay it over avoiding any shelf extrusion movement, this is to allow the sliders to reset the natural resting position
- Screw the shelf in by mark shelf hole locations then drilling pilot holes
- Test sliding mechanism, loose shelf screws and tighten again if issues
- Slap that shelf and say “this thing is going nowhere”, crack open a cold can and enjoy!
Suggested installation (Engineer/trades version):
- Insert the shelf extrusion into the sliders (bottom opening, shorter), use t-nuts and machine screws you already have, you wouldn't drill into slotted aluminum extrusion like a monster
- Insert the desk extrusion into the sliders (top opening, longer)
- Dimension and mark all screw locations under the desk and shelf, ensure squareness, then drill pilot holes using your drill press, maybe design the layout using AutoCAD/SolidWorks in your Lenovo ThinkPad then CNC them
- Screw the desk extrusion with the sliders under the desk using your Milwaukee/Bosch/Dewalt/Makita/Festool, go to your screw tray organizer and grab from the tray with length labeled equal or smaller than the desk thickness
- Slide the sliders all the way to the front to expose the shelf extrusions
- Insert the shelf mounts on to the shelf extrusions
- Lay the shelf board over the shelf extrusions plus shelf mounts, screw the mounts in
- Installation is probably perfect but if issues, loose shelf screws and tighten again
- Put your laser level over the shelf and admire the perfection nodding with your head, twist-off the cap of a cold bottle and enjoy!
For the future: Can't stop thinking about using v-slot wheels for that smooth and satisfying slide but initial thoughts makes it look clunky, obtrusive, and more expensive. But I like the challenge and more options are good so stay tuned!
All-in-all, I'm extremely happy with this solution, it's very solid, holds peripherals clearing my desk and stows away. I'm publishing this free hoping that my time and effort go further than just meeting my needs, I will really appreciate any feedback and attribution.
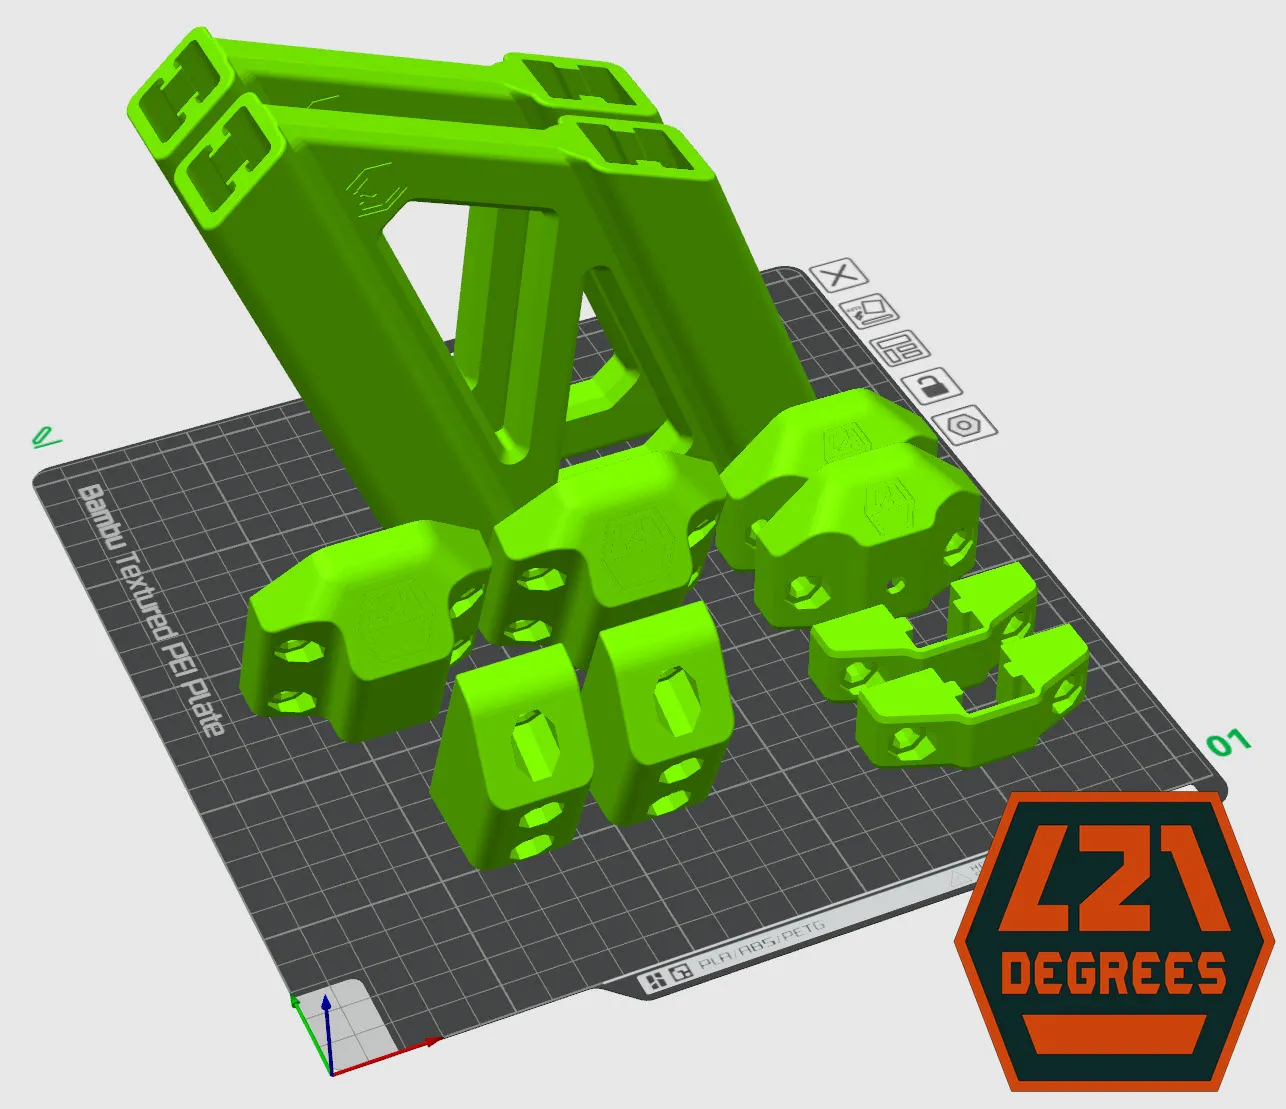
UPDATES:
Sliding mechanism changes:
Mounting screw defined:
Boost Me (for free)
You like buttons, I like buttons, you know what to do :)
License



Comment & Rating (41)