Apple iPhone Wall Clock - Components Kit 011


Print Profile(3)


Bill of Materials


Description
This 3D printable model is inspired by the Apple iPhone widget clock, designed to perfectly fit the Clock Components Kit 011. It’s easy to print and assemble—no extra parts needed besides the kit itself.
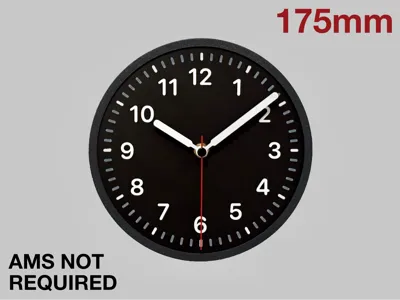
You do not need AMS to print this model, and even a basic A1 mini printer can handle the whole thing, including the two-color clock face. The hour and minute markings are applied (raised), so you can just pause at layer 13, swap the filament manually, and then resume. If you're using Bambu Studio, check out this thread for how to pause for a manual filament change.
If you are looking for something different, check out my other clock models linked below. All of the parts are interchangeable with other clock models of the same size, in case you are looking to mix things up:
- 90mm Desk Clocks:
- 175mm Wall Clocks:
- 250mm Wall Clocks
Assembly Instructions
- The model is snap-fit, so no fasteners are needed. Simply align the clock face with the outer case and press it in. Then, push the back plate into the outer case to secure the clock face. Ensure the snap-fit closes securely on all four sides.
- Insert the clock mechanism into the slot on the back of the dial, making sure it is fully seated. Attach the thin brass nut onto the post protruding from the front of the dial and tighten it.
- Start by attaching the hour hand, pushing it onto the larger part of the post until it’s snug (but don’t use excessive force). Then, attach the minute hand onto the smaller part of the post. For the second hand, remove the small pin piece from the kit’s second hand. Push the pin through the printed second hand, and insert the pin into the hole at the end of the mechanism post. Make sure all hands move freely without touching each other.
- Insert the battery into the mechanism and set the time.
Filament Notes
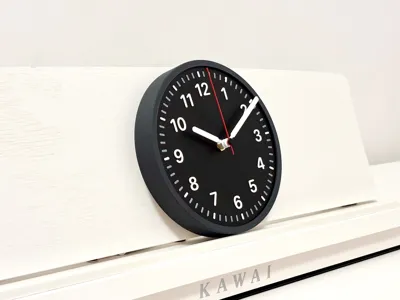
- I printed this model using black PLA-CF for the back plate, hour hand, and minutes hand, lava grey PLA-CF for the outer case, and red matte PLA for the seconds hand. The clock face is dual color, with the base in black PLA-CF and the applied hour and minute markings in white PLA basic filament.
- The model uses a thin single layer (0.16mm) for the minute markings to differentiate them from the hour markings. It will be better if you use white filaments that are translucent (such as Bambu PLA Basic White) as that will impart a darker grey color to the minute markings and a bright white color for the hour markings, similar to how it is on the Apple iPhone widget clock.
- You might also want to try using the orange matte PLA filament to match the actual color of the iPhone widget clock, and white matte PLA filament with black hour and minute markings if you prefer the light version.
Changelog
Version 1.1
- This version has an improved keyhole hanger for hanging the clock on the wall but will require the removal of supports.
- Optimized the print profile to reduce total print time to 4 hours
Disclaimer: This model has been shared for non-commercial, personal use only.
License
You shall not share, sub-license, sell, rent, host, transfer, or distribute in any way the digital or 3D printed versions of this object, nor any other derivative work of this object in its digital or physical format (including - but not limited to - remixes of this object, and hosting on other digital platforms). The objects may not be used without permission in any way whatsoever in which you charge money, or collect fees.
Comment & Rating (36)