Clean Bowden Y-Splitter
Remixed by
Copyright Claim
Clean Bowden Y-Splitter
Remixed by
Boost
9
26
10


Print Profile(1)

0.2mm layer, 3 walls, 20% infill
Designer
41 min
1 plate
Open in Bambu Studio
Boost
9
26
10
1
63
49
Released
Description
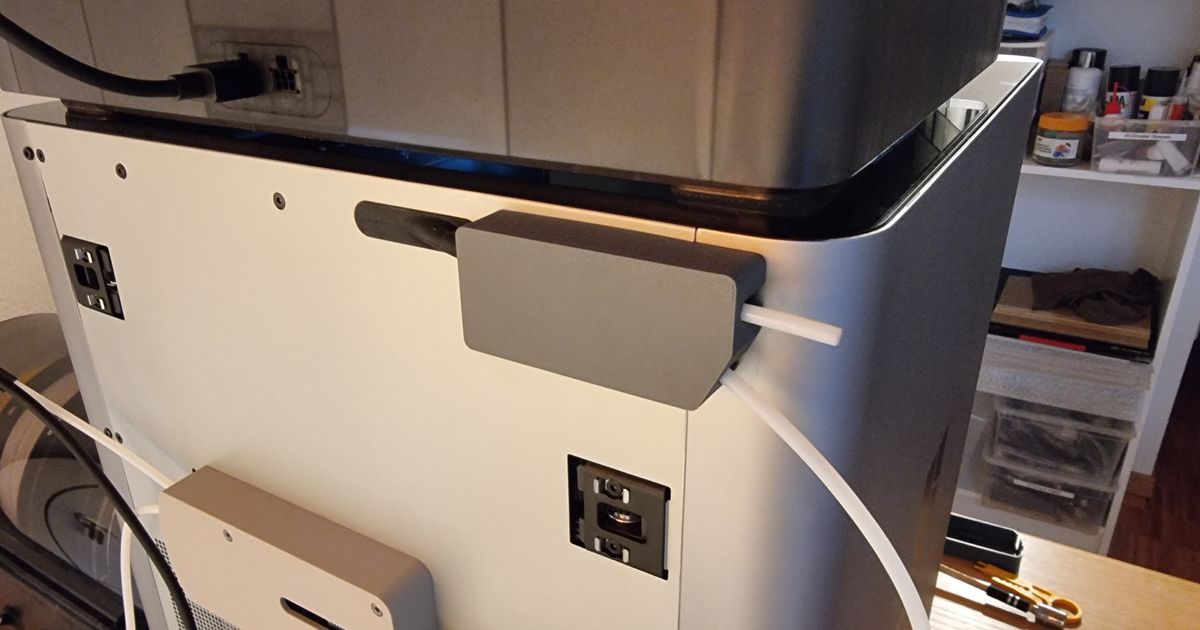
Completely encapsulated Bowden splitter so you don't have to keep disassembling the bowden tube. Print it in Bambu Gray to make it look like part of the machine. The default recommendation was ABS/PETG, but i've printed with PLA and looks fine so far.
Assembly instructions from https://www.printables.com/model/584189-clean-bowden-y-splitter
Print with ABS or PETG. Use auto rotation, no support. Don't use too much force when screwing in the PC4-M6's.
- Screw the small part to the printer (see picture), remove existing screw first.
- Remove the coupler from the printer.
- Screw in the PC4-M6's to the middle part (surfaces aligned, see picture).
- Slide in the medium part from the right.
- Fully push the left bowden tube into the medium part (see picture).
- Fully push the other tubes into the medium part.
- Attach the cover (click in).
- Enjoy the clean design :-).
You must use “UNLOAD” when removing the external filament, not manual retract. This will give the filament a clean cut and it will not stuck in the splitter.
Remark: You can switch inputs if the filament doesn't travel smoothly enough.
Comment & Rating (10)
All

what screws should i be using the left one of the two in that spot is too short and the head sticks out a 1mm
The designer has replied
0
Reply

You can use the same machine screw that's a bit longer, it's in the spare kit for the spool holder. Or you can get probably one or two threads with the existing screw itself
0
Reply
Replying to @kunday
this is the screw that came out of the hole, is it my print settings? went with the defaults that came with the project, the small piece slides on medium piece fines just scratching my head over the screw
using pla+ by sunlu


0
Reply
Replying to @quoccus
all good worked it out the tolerance was too tight I had to drill it out a bit so the screw would go in, was the same with the recess for the adjacent screw since pla doesn’t have any give to it.
(Edited)0
Reply
Is there any difference between this Bowden Splitter model (posted on Nov 29th) and the seemingly identical model posted to your account on Nov 28th (https://makerworld.com/en/models/76468#profileId-81025)?
It looks like this one has a 3 wall profile with 20% infill and the other 2 walls with 15%, but I can't tell if there are any differences to the actual models.
Thanks!
(Edited)The designer has replied
0
Reply
Ah, there is slight difference in clearance of the cover. I should have uploaded both into one print model. I'll look into it later. I'll update the description to reflect it better later. Thanks for pointing it out.
1
Reply
Replying to @kunday
Thanks for the reply and thanks for making this model available! Great work!!
0
Reply

Print Profile
0.2mm layer, 3 walls, 20% infill
printed properly in petg
I ended up using a different design, I need another part to share the same screw mount
0
Reply

Print Profile
0.2mm layer, 3 walls, 20% infill
0
Reply

Print Profile
0.2mm layer, 3 walls, 20% infill
0
Reply
No more
This remix is based on
License
This user content is licensed under a
Creative Commons Attribution-Noncommercial-Share AlikeRelated Models


© 2024 MakerWorld