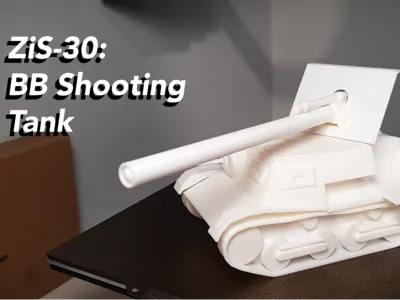
ZiS-30 - BB Shooting Tank


Print Profile(1)

Bill of Materials

Description
This BB shooting tank is modelled after the Russian ZiS-30 Tank Destroyer.
The firing mechanism takes inspiration from the mechanisms in Jaatinen3D's bb guns.
This model allows you to both position the cannons rotation horizontally but also vertically.
Tank uses a small piece to limit the horizontal rotation of the gun the mimics the ZiS-30's 30/-30° horizontal traversal
Supports are needed for all of the pieces except for the firing pin as if supports are used on that part, it will cause the hole to become filled in, making it hard to use.
My Other Models
M10 Tank Destroyer:
https://makerworld.com/en/models/682508#profileId-611016
Nashorn Tank Destroyer:
https://makerworld.com/en/models/687013#profileId-615713
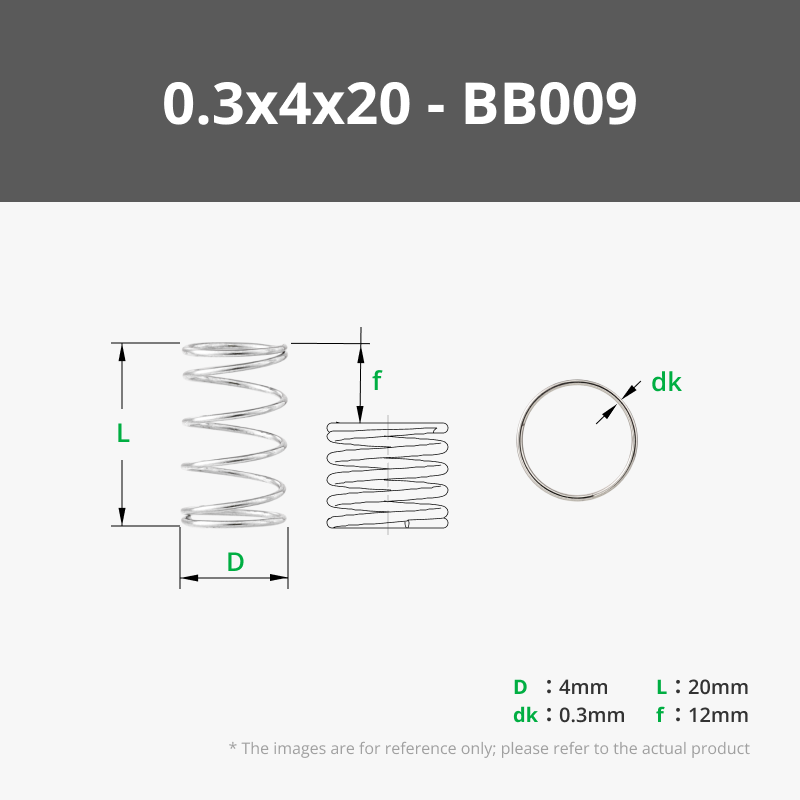
Additional Materials Required
- Small pen spring, larger pen spring may not work
- M3 bolt, at least 10mm long

Assembly
Place the barrel through the frontal shield piece and make sure the holes are aligned. Use roughly 5mm pieces of raw filament and place them all the way through the holes.


Drop the spring down the barrel first and then the firing pin, make sure the end with the hole goes in first.


screw the M3 bolt into the hole in the firing pin
Place the turret assembly into the main hull piece.


Place the small cap piece on the end of the pin of the turret assembly the comes out of the other side of the hull


Glue the bottom hull piece to the main hull piece. Make sure the back of the lower hull is flush against the lower end wall of the main hull. (glue on/around the red)


Glue the tank treads to the main tank hull. The treads should fit into the cut out area on the side of the tank. Make sure the treads face the correct way. (glue on/around the red)


Firing Instructions
- Prime the tank by pulling pack the firing pin
- insert a bb into the front
- flick the m3 screw up to fire
License
You shall not share, sub-license, sell, rent, host, transfer, or distribute in any way the digital or 3D printed versions of this object, nor any other derivative work of this object in its digital or physical format (including - but not limited to - remixes of this object, and hosting on other digital platforms). The objects may not be used without permission in any way whatsoever in which you charge money, or collect fees.
Comment & Rating (2)