Slim Parts Storage - Gridfinity 4 x 3


Print Profile(4)


Description
There is also a special rack available.
https://makerworld.com/en/models/684626#profileId-613316
The Bin is here.
https://makerworld.com/en/models/704565#profileId-634377
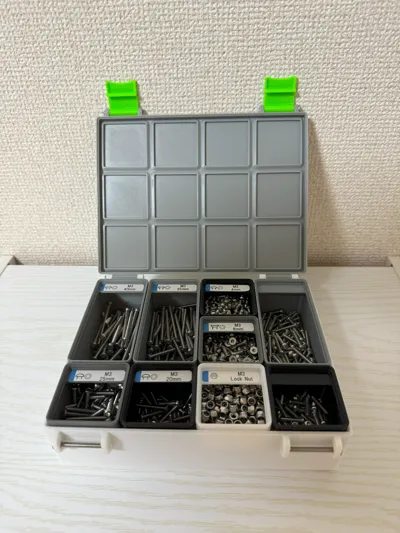
This is a slim box for gridfinity storage.
I couldn't find 3U of storage so I made one.
I tried to save materials as much as possible and print quickly.
(If you like something sturdy, you're better off looking elsewhere.)
This is recommended if you are only using it for storage or if you want to save on materials.
There are no extra features.
Update
2024/10/19
Added a loose latch. If the existing latch is difficult to close, please use this.
Assembly guide added.
2024/10/14
The license has been changed to Standard Digital File License.
Refinements
- Prints quickly and with less material.
- Each part is secured with a screw. Six M3x30 screws are required.
- The parts won't get mixed up even if you turn the box upside down.
- Bins other than the specified size may not be usable.(For example, a half-size bin.)
- It has to be precisely calibrated as it has very tight tolerances.
- “Lid” and “Latch” are common.
Printing
- Very tight tolerances! Use a well-tuned printer.
- layer height of 0.2mm
- Use 0.4mm nozzle
- Infill of 15%.
- The latch will be printed on circumference 3.
- Recommend printing the latches out of PETG.
Always print using Arachne. If you do not use Arachne, the parts will not join together and the lid will not close.

- When printing with PLA,Recommend turning off the auxiliary cooling.
Assembly Guide
- There are 3U (low model) and 6U (little higher model). Print the one you like.
If the lid hinge / latch is tight, use a 3mm drill bit to clean the holes.


If the latch is difficult to close, print out the “Loose Latch” instructions and use them.
(It's in the print profile.)
License
You shall not share, sub-license, sell, rent, host, transfer, or distribute in any way the digital or 3D printed versions of this object, nor any other derivative work of this object in its digital or physical format (including - but not limited to - remixes of this object, and hosting on other digital platforms). The objects may not be used without permission in any way whatsoever in which you charge money, or collect fees.
Comment & Rating (80)