


Print Profile(2)


Description
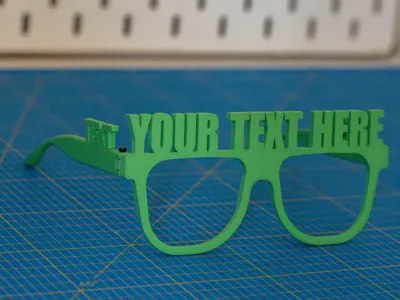
Customizable Foldable Glasses – Add Your Own Text!
Hey there, I'm excited to share my first 3D design with you. A pair of foldable glasses that you can fully customize directly in the slicer! I originally designed these for my personal use, but I'm happy to share this model if someone is interested. These glasses can be personalized with names, party themes, event celebrations, happy birthday messages, bachelor/bachelorette parties, New Year’s, you name it! 🥳
To better view the texts, I recommend to look at the plate from the bottom (Ctrl + 2). From object section, right-click on any text, select "Edit Text," and change the "Input Text" to whatever you like and make the "Size" and "Text Gap" fit your preferences, make sure the text is touching or overlap the model

If you want to keep the text only on the frame or on the branches, feel free to delete the text you don't want, in the Objects section.

Stick to characters without separate parts (like no lowercase ‘i’, 'j' or accents). Uppercase usually works well for most fonts.
The transparent rectangles you see are just geometries to hold the text, they won't be printed!

The arms are connected to the frame with a filament chunk (it's a tight fit on the branches, depending of the printed holes, you might need pliers to push it or a heat gun to gently soften it), but you can also use M2x12 screws if you have any.


If you want to use silk filament (or any filament that have weaker layer adhesion), I recommend painting the lower part of the model with the silk filament, and use a stronger layer adhesion filament for connection, like I did with my gold & black glasses.

I intentionally made them quite wide to fit most. If the front feel a bit too large, you can heat the nose section and angle the front to suit your face shape better.
It works very well with holographic plates as the visible parts of the glasses are the one getting the patterns.
Let me know how it goes and if you have any tweaks you'd recommend!
License
You shall not share, sub-license, sell, rent, host, transfer, or distribute in any way the digital or 3D printed versions of this object, nor any other derivative work of this object in its digital or physical format (including - but not limited to - remixes of this object, and hosting on other digital platforms). The objects may not be used without permission in any way whatsoever in which you charge money, or collect fees.
Comment & Rating (80)