Search models, users, collections, and posts
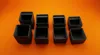
Gridfinity Deep 1x1 Divider Bins
Remixed by
IP Report


Print Profile(4)

Monochrome
Designer
4.1 h
8 plates

Accent Lip
Designer
4.3 h
8 plates

0.2mm layer, 2 walls, 20% infill
5.2 h
2 plates
Standard bin set (Universal)
2.3 h
1 plate
Open in Bambu Studio
Boost
558
2317
421
159
4.4 k
3.3 k
Released
Description
After watching standard 1x1 bins print infill layer after infill layer that could have been used for storage, this is one of the first 3D print models I've designed. I've since refined it, with the following features:
- 0.84mm thick walls - a 0.4mm nozzle will do this in 2 passes
- 0.75mm thick base - designed for 3 layers of 0.25mm (but prints fine with 0.20mm layers)
- Label shelf versions have 7mm wide label areas designed for 6mm wide labels
- No magnet holes
- Changes to fillets and chamfers
- Other minor changes
It is highly recommended to print 2 more at a time for a more consistent outer wall surface gloss. With just one bin, you might see that some sections are more glossy than others due to your filament profile's layer time limitations.
Check out this collection for my other Gridfinity models and
check out this collection for my other Honeycomb Storage Wall models.
And 2 years later, I had another go at it! Check out the spiral vase mode variants here

This remix is based on

License
This user content is licensed under a
Creative Commons Attribution-Noncommercial-Share Alike
Comment & Rating (421)