NerfLock - Half Length Nerf Dart Launcher 奈洛克发射器

Remixed by
Copyright Claim

NerfLock - Half Length Nerf Dart Launcher 奈洛克发射器

Remixed by
Boost
128
228
23

Print Profile(2)

All
A1 mini
P1S
P1P
X1
X1 Carbon
X1E
A1

(MK2 version) 0.2mm layer, 2 walls, 7% infill
Designer
9.3 h
6 plates
4.0(5)

0.2mm layer, 3 walls, 7% infill
7.6 h
2 plates

Open in Bambu Studio
Boost
128
228
23
17
216
69
Released

Description


No springs needed! 

A Glock19 based half-length nerf dart shooter with magazine. Requires only 2 rubber band and 2 optional m4x30 screws(if you don't have  screws, you can use glue to do the same thing.) to build.

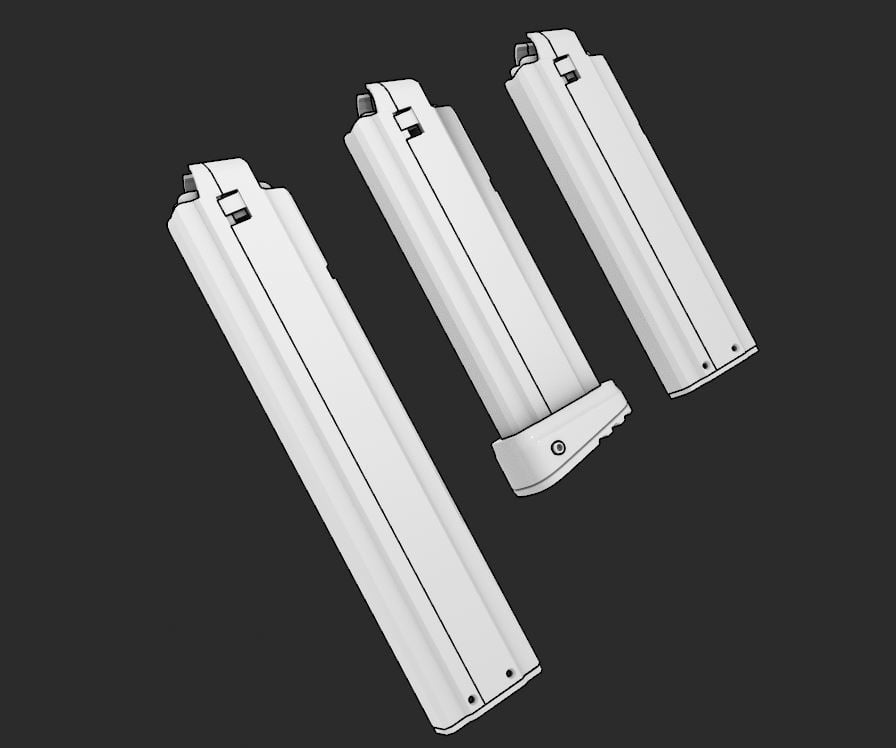
It is compatible with WORKER angled talon magazine*.(I recommend using it instead of using the printed magazine in source file from the perspective of performance and staibility. You may also require two extra m4 screw to build the printed magazine)

Printing metarial: PLA Basic


Install method:

  1. install trigger into the body 
  2. (MK2 version) Install the magazine holding mechaism, you can check the MK2 update notes below
  3. install gear part to the body (use 2 m4 screws to secure it)
  4. install slide part to the gear (slide's left side first, you probabaly need to bend the slide a little bit)
  5. put the “|-|” shape part into the shooter and install the rubber band 

*7/27 G66MK2 Update:

  Uploaded MK2 version file. Added a new magazine holding mechanism to better support long angled talon magazine, increasing the stability, and removed the clip on the printed magazine. Also provided an optional high performance gear part.


Firstly, install this part to the body then insert the cutted nerf dart head.


*6/26 Update:

    Recommend using 10-darts angled talon magazine. 

    For both printed magazine, I recommend load only 7 darts per magazine for best stability and performance.

    If you want use talon magazine with more than 10 darts or reduce the possibility of jam, please lubricate this part(using WD40 or something similar):


无需弹簧!基于格洛克19设计的弹匣式短软弹发射器,只需要2个橡皮筋+可选的2个m4螺丝即可制作!(如果没有螺丝的话可以用快干胶固定)

兼容工匠斜龙爪弹匣*,也推荐使用此弹匣,相比于本模型自带的3D打印弹匣要更稳定。

打印材料:PLA Basic


安装方法:

将Accessory盘的扳机零件安装到机身。

(仅MK2版本)安装弹匣固定装置
将Gear盘部件(也就是“机匣”,我这儿就先这么叫了)安装到机身上(使用2个M4螺丝固定)。
将套筒(Slide盘)部件安装到机匣上(先把套筒的左侧扣进去,可能需要稍微弯曲下套筒)。
将杠铃一样“|-|”形状的部放进发射器里(见封面里的放法),并安装橡皮筋即可。


*7/27 G66MK2更新:

上传了MK2版本的模型文件,增加了一个新的弹匣固定装置以更好的支持长弹匣并增加稳定性,并把原来打印弹匣的卡笋去掉了,因为现在不用卡笋即可固定弹匣。额外在套筒增加了一个皮轨,并提供了一个性能更好的机匣(把皮筋对折的话理论跑分可以超15,大约可以冲20…?)。


先把这个部件安装到枪身,然后按图上的说明加上一个剪过的软弹头即可。


*6/26更新:

推荐10发版斜龙爪弹匣

3D打印弹夹最好只装7发软弹,以保证最佳的稳定性和性能。

如果你想使用大于10发的斜龙爪弹匣,或者想减少卡弹概率,请用润滑油润滑下面区域:

Reference model modification list:

Glock 19 v6 movable trigger and slide: dig serveral holes on the model and carved some place to allow shooter mechanization to fit.

Printable Angled Taloon Magazine: used its 10 round version parts and modified its rear part's top(add a clip to make it attachable to the shooter)

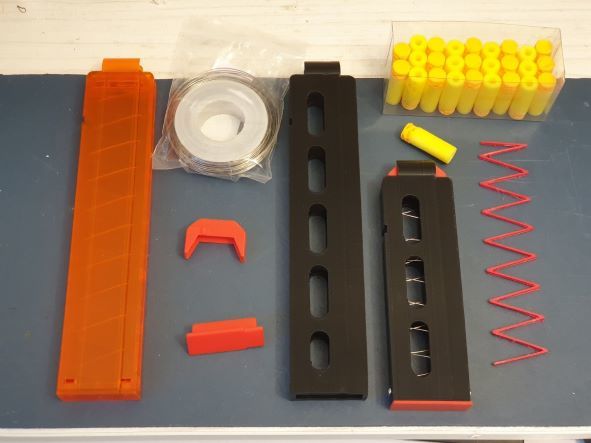
Simple printed taloon mag: used its spring part to make the magazine

Picatinny Rail: attached it to the shooter body to make the shooter more tactical

BerettaM9: Used its trigger parts as the gun's trigger


Comment & Rating (23)

Please fill in your opinion
(0/5000)

Boosted
I have 0 idea on how to put this together, I’d love a video
The designer has replied
2
Reply
Boosted
I figured it out but why do the bullets jam? am I missing something
1
Reply
Replying to @levywater :
Please check the picture in description that said "lubricate this part", you probably need to use a lubrication oil(that comes with the bambo 3d printer) or WD40 to lubricate the part indicated in that picture
0
Reply
I can’t understand how to assemble it, you should add more pictures or a video
0
Reply
my trigger broke on the second day, and the nerf bullets fired two feet, I was barely able to figure out how to put it together and the “|-|” shape part broke twice in an hour, the bullets jammed and I think it is kinda bad, but it was pretty cool while it lasted, and I was barely able to fire the bullets
The designer has replied
1
Reply
For the durability issue, It depends on the printing material and the type of rubber band -- I used the Official Bambo PLA Basic as printing material and No.3214 ruber band to make the launcher. This configuration is pretty durable and have been tested for more than a houndred rounds. For the bullet jamming issue please check the picture in description that said "lubricate this part", you probably need to use a lubrication oil(that comes with the bambo 3d printer) or WD40 to lubricate the part indicated in that picture
0
Reply
Replying to @user_1174848848 :
ok
0
Reply
Replying to @user_1174848848 :
ok
0
Reply
this is a very cool blaster, especially cause I can make it on my a1 mini
1
Reply
Does this propel the dart using air or by hitting it?
The designer has replied
0
Reply
There is a "|-|" shape part that directly hit the dart
0
Reply
would really love it if you were able to upload the model in individual files as i cant open multiple build plates in cura or prusa slicers. thankyou
The designer has replied
0
Reply
Sorry I am a little bit busy and don't have time exporting all of the models from 3mf...But you can download the bambu studio, open the 3mf file and export individual models as stl.
1
Reply
Print Profile
(MK2 version) 0.2mm layer, 2 walls, 7% infill
no
0
Reply
can you make one with a threaded barrel? I have a custom yellow and black peq box that looks good on it but need a suppressor or tracer to make it look finished
0
Reply
I have a question about the rails - if we put anything other than super weak rubber bands from veggies, like even store bough bands, they pull the, let's call it "nerf rail" stronger than trigger pushes it - and when pulling the trigger it tries to lift the main rail off the blaster body... I wonder why is there that stiff angle? I don't think it is necessarily needed. I think I will mod it and show the effects
0
Reply
I can’t understand how to assemble it, you should add more pictures or a video
0
Reply
what’s the fps
0
Reply