
Fancy Ring (customizable)


Print Profile(2)





Description
My free designs are sustained by premium experiences: |
So Fancy!
Are you a fancy person? Then you need a Fancy Custom Ring! This ring helps you stand out among stylish folks while showcasing your unique personality through full customization.
Not only is it tailored to your fit, but it’s designed for comfort! The outer face features its own radius, the inner face has its own radius, and the hole itself offers a customizable radius, ensuring a snug, comfortable fit, not a stiff toy ring. Mold it to your finger’s shape with ease!
Feeling adventurous? Add ridges with two adjustable stripes you can position or disable. Plus, personalize it with your own text, including symbols like hearts ( ) or smileys (
 ). It’s all up to you!
Boost Me (for free)
Each Boost fuels more free designs - THANK YOU!
Instructions
1) Create the ring shape
Click the “Customize” button toward the top of this page. The customization page includes a description of each parameter. Once you’re done, export the .stl file of your ring.
2) Import into Bambu Studio
Download a Fancy Ring 3mf print profile near the top of this page, open it in Bambu Studio, make sure the first plate is selected, delete the dummy ring there (I had to add something to that plate to pass MakerWorld's verification), and then in the upper toolbar click “Add.” Select the .stl file for your ring.
3) Paint (optional)
Select the ring and then click on the paint tool at the top. Select your filament color and then click the bucket (fill) tool. Now you can click on parts of the ring to color them. If coloring the stripes, don’t forget to also color the top and bottom edges of each one.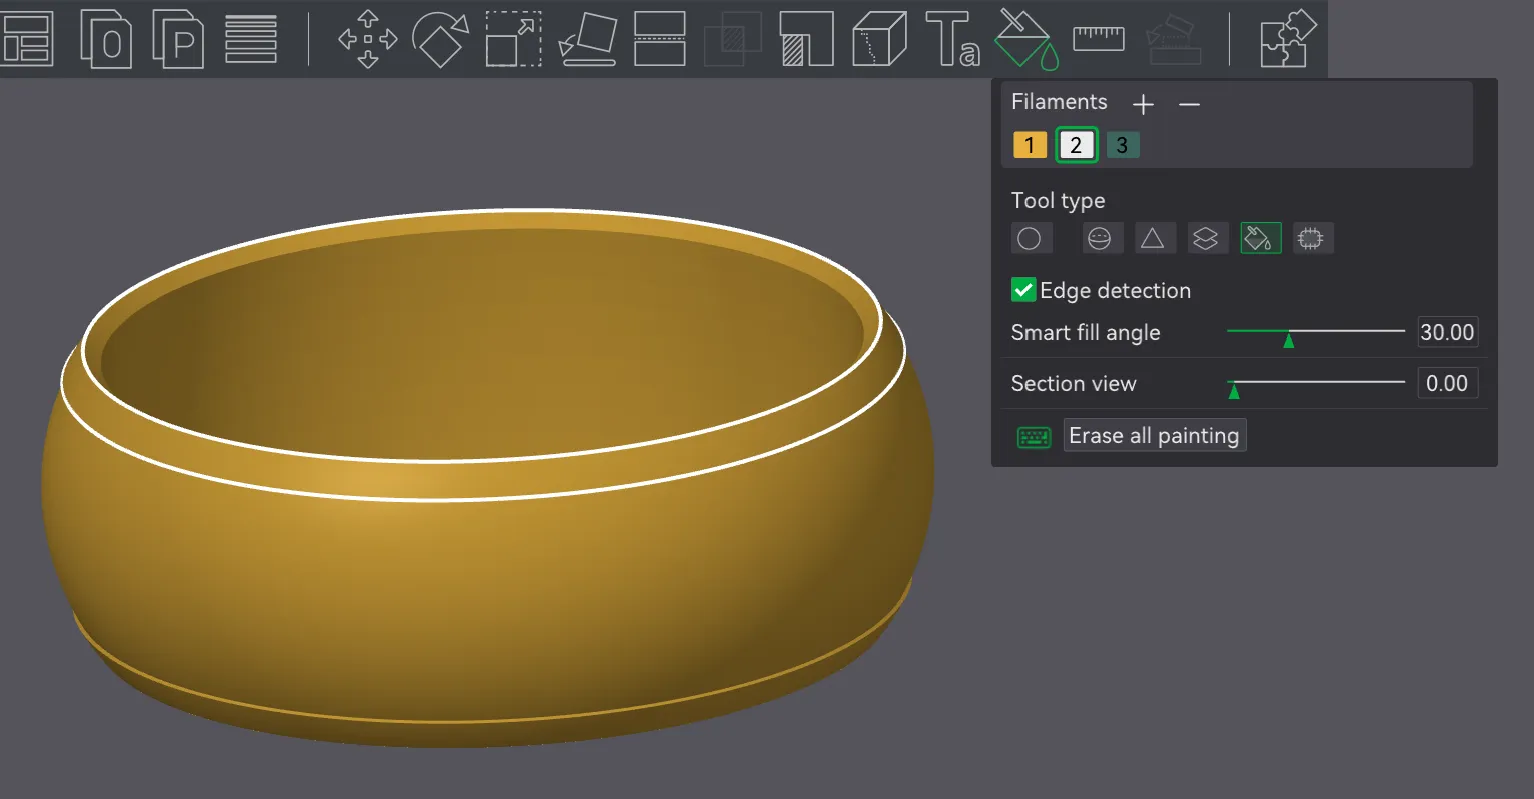
4) Add text and/or symbols like hearts (♥), smileys (☺), etc. (optional)
Select the ring and then click on the text tool at the top.
Feel free to play with the various options, but your font size will probably be somewhere between 3-9 (decimal points allowed), depending on the size of your ring. Smaller sizes require a 0.2mm nozzle, so make sure to check the Preview tab to see how well the text will show up. The rings in the main photo at the top of this page, however, were all created using a 0.4mm nozzle.
I generally set thickness to 0.2 and embedded depth to 0.2, but this is your ring, so play around. If you don’t embed the text at all, it can easily fall off. If you want the text fully embedded (and not raised), set the thickness to 0.01.
Now just enter your input text, ensure “Surface” is checked, and click on your ring where you want to place the text (ideally in the front since the seam is in the back). To add Unicode symbols like hearts (♥), smileys (☺), etc., just find the unicode symbol you want (you can do a web search) and copy/paste it into the Input text field. It will show there as a “?” but will render correctly when placed on the ring.
The Surface option will fit the text to the surface of your ring. Placing the text in the exact right spot can be a bit fiddly, so take your time. I find it’s helpful to set the view to Front (ctrl + 3) to help me line up everything.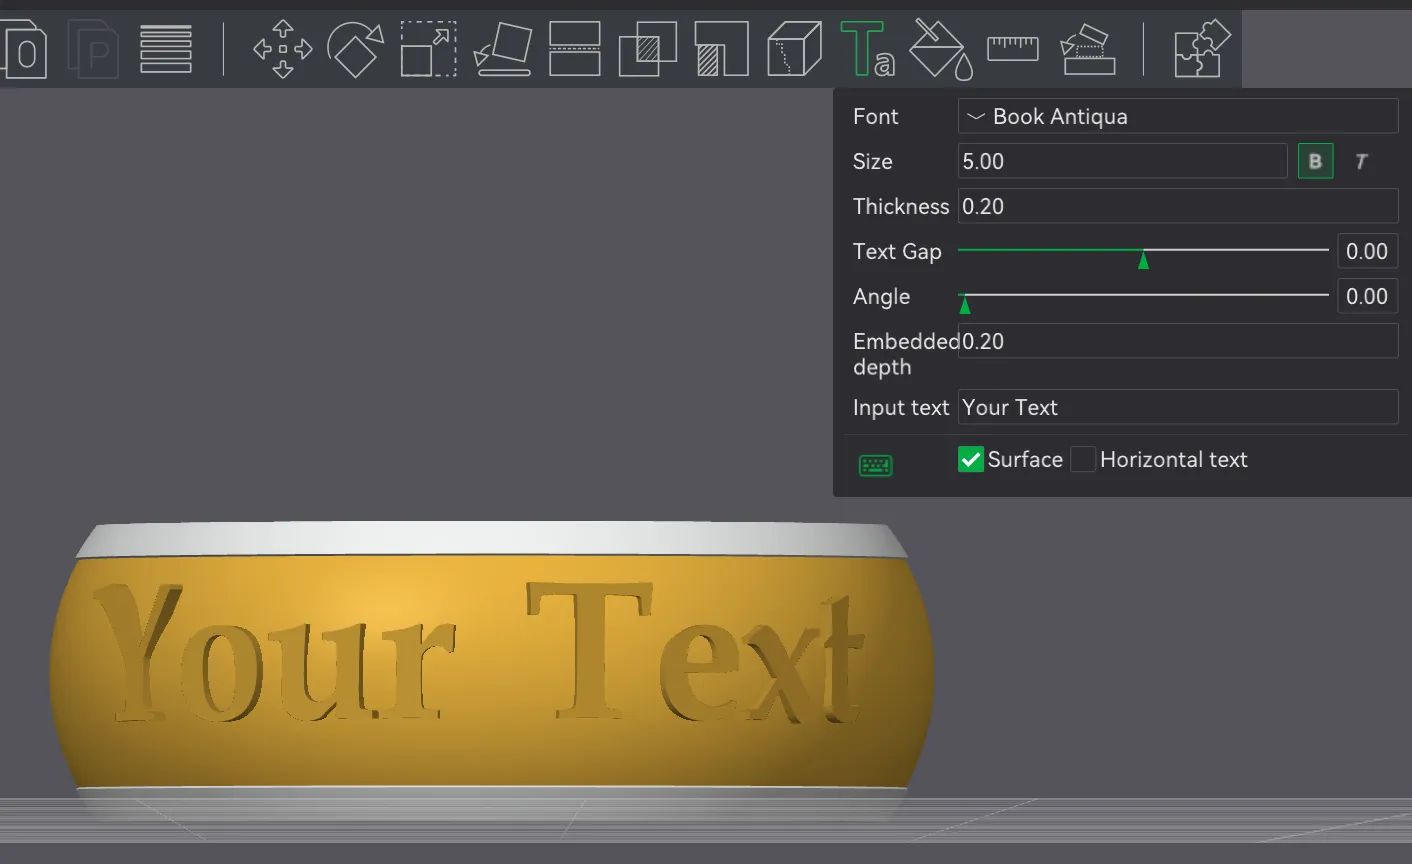
If you’ve taken the time to place the text in the perfect position, and then realize you want to change something (like the font or the text itself), just select the text object in the object viewer on the left (switch from Global to Objects) and click the text tool again. It will bring up your prior choices which you can then edit.
To change the color of the text, select the text object in the object viewer and change the filament color.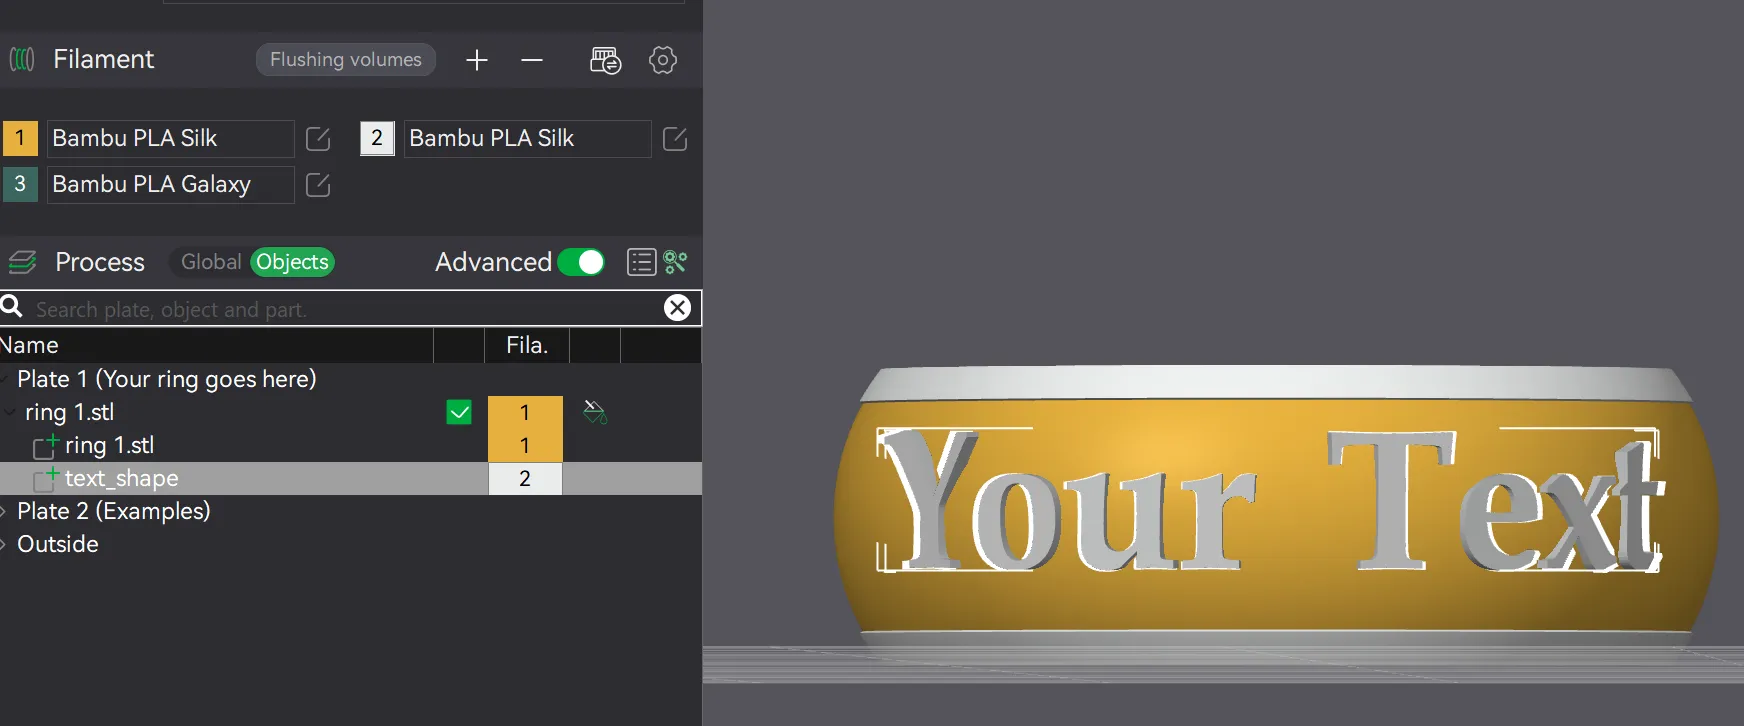
5) Print
The rings in the main photo at the top of this page were all created using a 0.4mm nozzle, but for finer detail (especially important for smaller rings and/or ornate text) a 0.2mm nozzle is encouraged. Make sure to pay attention to how the text looks in Bambu Studio’s “Preview” tab.
Additionally, my print profile has various reduced speed settings to ensure maximum shininess of silk PLA. If you aren’t using a sensitive filament, feel free to revert those settings.
Boost Me (for free)
I truly appreciate every single boost!
 My free designs are sustained by premium experiences: |
License



Comment & Rating (6)