PoopKeyCap Ver.Artisan

PoopKeyCap Ver.Artisan

Boost
232
294
22

Print Profile(2)

All
X1 Carbon
P1S
P1P
X1
X1E
A1

0.2mm layer, 6 walls, 25% infill
Designer
1.2 h
1 plate
4.8(4)

0.2mm nozzle, 0.1mm layer, 4 walls, 15% infill
Designer
18 min
1 plate
5.0(3)

Boost
232
294
22
18
79
30
Released

Description

First of all

This model is created based on the wonderful idea from the following link. I pay my respects.

Spinning top mold 陀螺模具 by 潦草小狗爱吃雪糕

https://makerworld.com/en/models/437241


Related models are available!

https://makerworld.com/en/models/481189


https://makerworld.com/en/models/473846

[New Information]

For those who are concerned about layer lines, try printing with the mold tilted at a 45-degree angle.

This can eliminate the steps on the top surface. Give it a try!
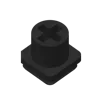
What is this ?

This PoopKeyCap is designed to repurpose purge material (Poop) and support material generated by 3D printers into keycaps.

The mold is printed with PETG, and the stem, made with a 0.2mm nozzle, is embedded into the heated and kneaded PLA through insert molding.

How to use

Print

Please print the mold with PETG, using at least 6 wall layers and at least 5 top layers.

If you are using Bambu Studio, select the 0.2mm Strength setting.

Please print the stem with PLA using a 0.2mm nozzle.

It was difficult to achieve a good fit for the key switch with a 0.4mm nozzle. However, it's not impossible with a 0.4mm nozzle, so feel free to give it a try.

Insert the printed stem into the male mold. Insert it in the direction where the chamfered edges align.

Applying a release agent

Please apply a release agent to female mold.

Wipe off any excess release agent.

Use the wiped paper to apply the release agent to the male mold and other parts.(Do not apply to stem.)

Weighing out Poops

You need 3.5g Poops. (in case of PLA)

Heating PLA

Heat the PLA to around 230°C using a soldering hot plate or an oven.

Using a cup-shaped silicone mold is convenient.

If you use a hot plate, covering it with aluminum foil will help it melt faster.

For quicker melting and to achieve a nice marbled pattern, it is also recommended to flatten the PLA with a spatula.

Compression molding

Form the melted PLA into a sphere inside the silicone mold.

Once it has cooled slightly, you can also form it into a sphere using leather gloves.

The important thing at this stage is to ensure it is thoroughly shaped into a sphere to remove any air bubbles.

Once the PLA is in the mold, compress it using the mold. Hand pressure is sufficient.

Using a vise or similar tool can cause the mold to adhere too tightly, making it difficult to remove keycap and potentially damaging the mold.

Demolding

Once the mold has cooled sufficiently, demold the keycap.

Using a utility knife can make it easier to remove, but be careful to avoid injury.

If it's difficult to demold with a utility knife, there are demolding protrusions that you can grip with pliers and pull to remove.

Finishing

Wipe off the release agent and remove any burrs using nippers or a file.

It is also a good idea to sand the entire surface to remove any layer lines.

Using thin-blade nippers for plastic models is recommended as they can cleanly cut off burrs.

Enjoy!

Comment & Rating (22)

Please fill in your opinion
(0/5000)

Print Profile
0.2mm layer, 6 walls, 25% infill
just like the description said. don’t use pla use a high temp material. I used pla but it was just a test. I will buy a high temp material and try again.
The designer has replied
2
Reply
That's right, just as the PLA stem can be insert-molded, the mold also sticks. That aside, it's a very nice color.
(Edited)
1
Reply
there is a secret to making pla work... but if I tell you, you could become too powerful...it involves a freezer and spraying a special chemical
0
Reply
Hi! Loving the idea!! Did you perhaps try with larger keycaps like spacebar? If so what are your results? I would be interested in other cap profiles like shift, ctrl, spacebar,...
(Edited)
The designer has replied
1
Reply
Creating larger keycaps like the spacebar is possible. However, even with this 1U size keycap, there are times when the PLA doesn’t flow properly, so it’s a challenging task. Please give it a try and let me know the results.
0
Reply
does it Work with PTG
The designer has replied
0
Reply
What is PTG? When using PETG poop, materials like ASA, ABS, and PC might be usable.
0
Reply
oh sorry I nowe PLA
0
Reply
Print Profile
0.2mm layer, 6 walls, 25% infill
really tight fit but printed perfect
1
Reply
Print Profile
0.2mm nozzle, 0.1mm layer, 4 walls, 15% infill
printed perfect
1
Reply
these are so cool but whose gonna really use them as keys? I think they should be necklaces or honestly I think you should make another mold of something like your own type of lego style building block so we could make as many y as we can to play with...or ... instead of a key cap why not make.... a small phone stand that everyone can use or a lighter leash? or photo frame is a goodnone. a phone frame easel that can all be one triangular shape very simple... your system here could be used to make something even more useful I think and really change 3d printing... I think u should sell this mold as a metal aluminum mold for those who wanna spend more money maybe u can get it down to 30 dollars
The designer has replied
0
Reply
I created these cool keycaps using purge material because I wanted to experiment with this process. You should try it too, especially since you have access to a 3D printer and the method has been shared. MakerWorld properly recognizes those who contribute to the community. This is a great opportunity! Let’s do it.
0
Reply
wow now I want to print a larger petg mold for all my filament trash
1
Reply
first of all, i think i is Awesome. However in all my attempts i have had some problems, first of all, the most annoying thing that i don't know how to solve, is that my PLA seems to cool off too fast, once i stoop heating it, taking it with gloves and stuffing it into the mold has to be extremely fast or it will become too hard. this makes it hard to shape it into a nice ball and compress it so it makes to fold lines and bubbles. how do you handle this? also, the excess filament has nowhere to go, if there's a little too much PLA, it will get stuffed between the 2 parts of the mold and prevent the two parts to compress completely, could it be useful to add some escape holes to the stem part of the mold so that excess filament could runaway there and get better results? -
(Edited)
The designer has replied
0
Reply
First of all, I had the same issue with PLA cooling down too quickly and not forming properly. It’s likely that the heating time is still too short, or the temperature setting is too low. With repeated attempts, you’ll get the hang of it, so don’t give up and keep trying. The problem of excess filament having nowhere to go is indeed a fundamental issue with this compression molding method. In the case of the Spinning Top, which was the inspiration for this idea, excess resin was absorbed by changing the thickness of the disc part of the top. Similarly, if the keycap has the same cross-sectional shape in the vertical direction, the excess resin can escape upwards (e.g., cylindrical or rectangular shapes). However, even if some flashing appears, it can be removed, so it’s better than creating an uninteresting shape. I believe more new ideas will emerge, and I’ll continue to update my process.
(Edited)
0
Reply
Great way to recycle
1
Reply
Boosted
What a great use of poop!
1
Reply

License

This user content is licensed under a
Creative Commons Attribution-Noncommercial