
Raspberry Pi Pico Case


Print Profile(4)


Description
A simple 2 parts snap-fit case for Raspberry Pi Pico. No screws needed. Back of case is open for wires. I use it to connect 2 ADXL345 and do the input shaper in Klipper
Print settings:
- layer: 0.16 or lower
- perimeters: 3
To connect 2 ADXLs use the following pins. For the second ADXL you will need to use GPIO8, GPIO9, GPIO10 and GPIO11 according to the colors. Red and Black are the same.
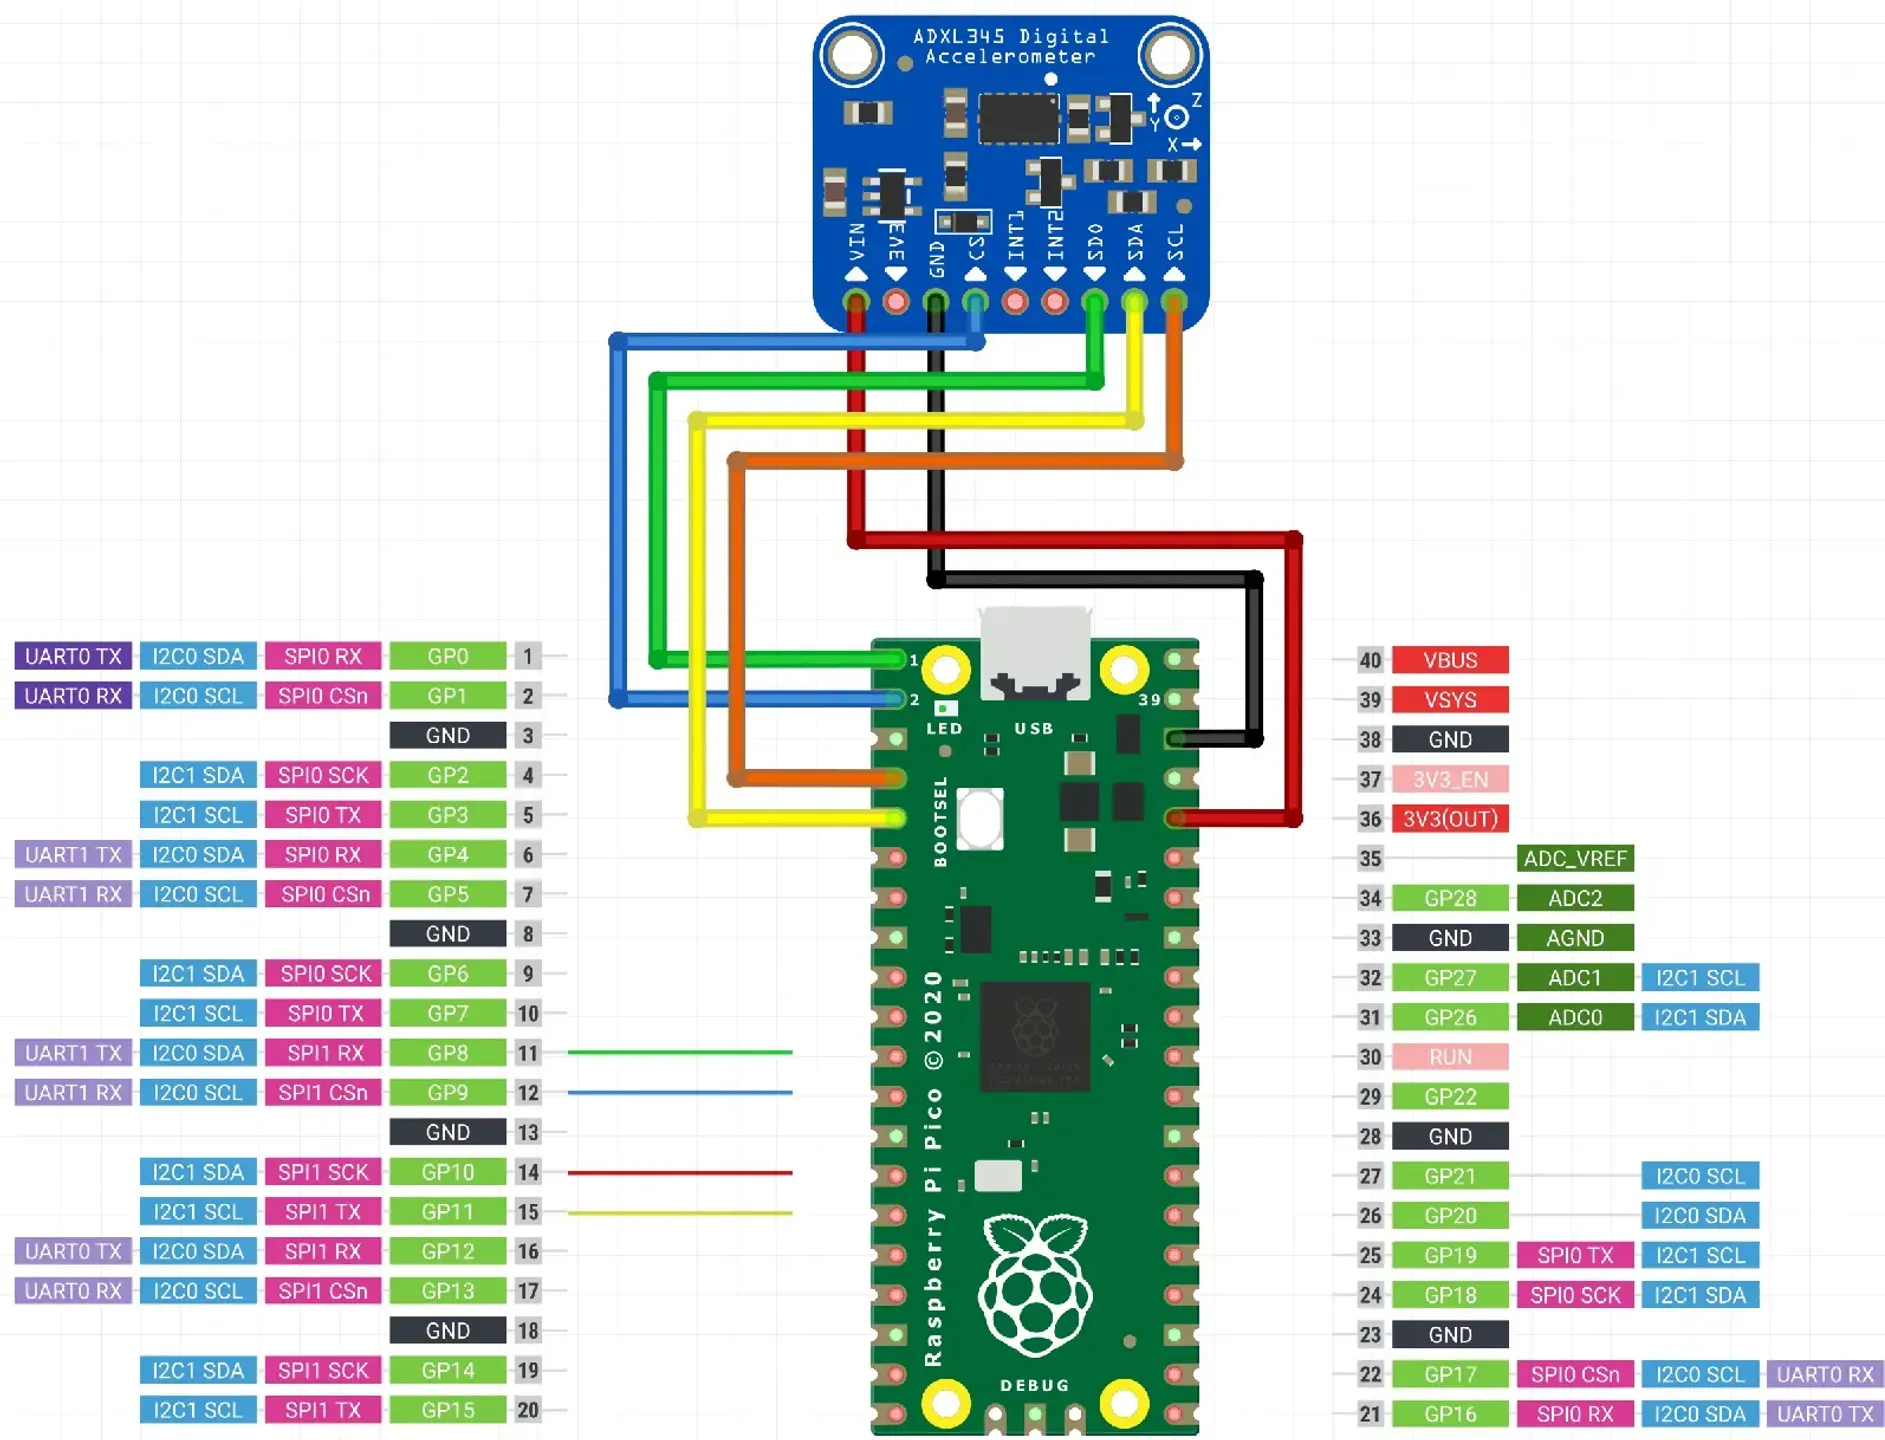
Klipper Configuration
[mcu pico_adxl345]
serial: /dev/serial/by-id/usb-Klipper_rp2040_use_your_id-xxxxx
[adxl345 head]
cs_pin: pico_adxl345:gpio1
spi_bus: spi0a
axes_map: -z, x, -y #update your axes mapping
[adxl345 bed]
cs_pin: pico_adxl345:gpio9
spi_bus: spi1a
[resonance_tester]
probe_points: 115, 115, 30 #update your position
accel_chip_x: adxl345 head
accel_chip_y: adxl345 bed
If you need a bed mount for ADXL take a look at this.
Updates
21.11.2022 - Add pins and Klipper configuration
22.07.2022 - Version 2.1 - add a cutout for the Bootsel button.
12.07.2022 - Version 2 - add an indentation in order to make the case more snap-fit and prevent to become too lose from wearing.
License



Comment & Rating (129)