Full Color Filament winder with all upgraded pieces for X1C
Remixed by
Copyright Claim
Full Color Filament winder with all upgraded pieces for X1C
Remixed by
Boost
25
56
21


Print Profile(1)

Full Color 0.2mm layer, 2 walls, 15% infill
Designer
36.5 h
6 plates
Open in Bambu Studio
Boost
25
56
21
0
177
361
Released
Description
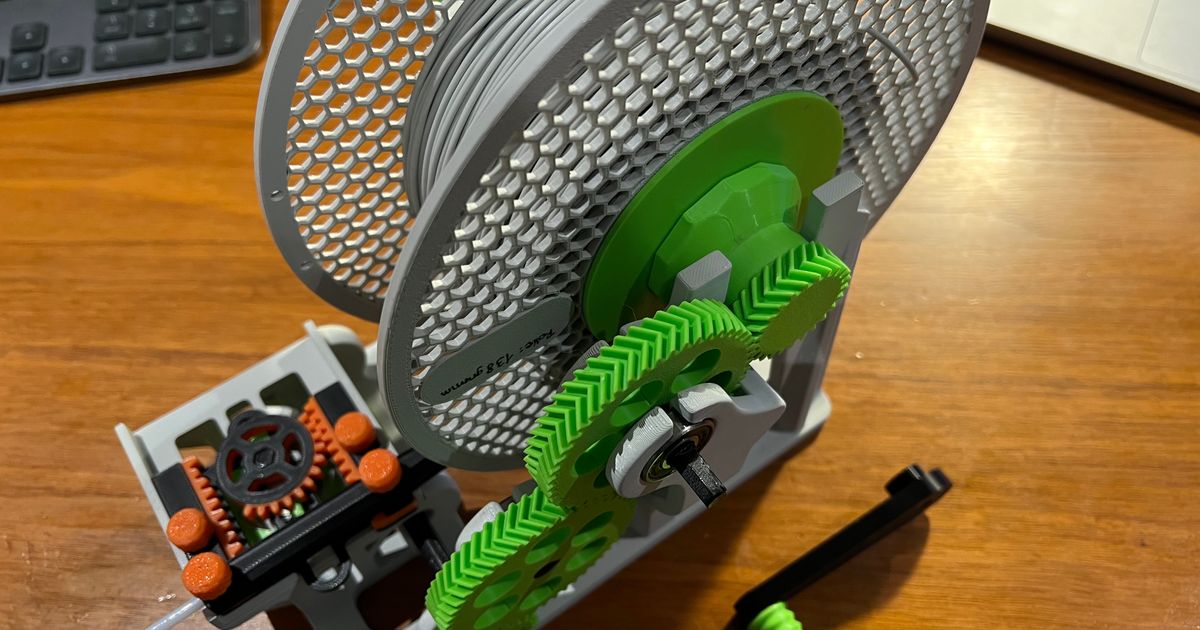
This is the popular Spool winder from Printables but this has all the plates set up with the improved parts, reinforced gears and additionally, full coloring of the gear sets.
This is set up to be run from an electric motor.
Comment & Rating (21)
All

Not gonna say I'm disappointed with the print. I do need to report that 2 walls with PLA Silk and 25% infill turned out to have a couple of problems.
There's a layer at the top you can see that easily broke after the initial print but it was because the printer detected spaghetti error in the middle of the night. It was actually a purge piece that flew out and got away. The time it took for me to tell it to continue must have let it shrink just enough from cooling that it resulted in a weak interface for one layer across the model.
The other detail is that the 608 bearings snapped off the layers rather than go in snugly. Not really a mistake of the designer necessarily unless it happens with regular PLA.
I patched everything up with a 3d print pen, so it seems to still be functional. I'll upload an alteration for the bearing hole sizes if I decide to print it again. I recommend now from what I have learned in general since that 4 layer walls and 5% infill is better and that you might want to add a negative part sphere to widen the bearing holes just slightly. I also would recommend PETG at this point since so much about this project suggests one should expect a lot of impact damage.


0
Reply
PLA Silk filaments are known to have poor layer adhesion when used for functional or load bearing parts. Stop it.
1
Reply
Is anyone else having trouble with this step? The original doesn't have the exact same design. This part with the cylinder with a tooth at the end doesn't seem to connect to anything in the 3mf.


0
Reply

Print Profile
Full Color 0.2mm layer, 2 walls, 15% infill
Doesn't completely follow original print setting recommendations from remix. Had to adjust based on materials original print setting recommendations
(Edited)
0
Reply

is there a specific motor to add to this to make it more automated?
(Edited)The designer has replied
0
Reply

This setup does come with the parts to add a motor. I would recommend mounting the whole thing on some 2020 extruded aluminum.
0
Reply

Replying to @omfgitsjimmy
So what motor is this setup to use?
0
Reply
Replying to @watsonmachine
https://www.printables.com/model/485389-motor-drive-for-stand-auto-stop-function-for-bambu
This will link to multiple sources recommended for the electronics and motor, including specs and wiring diagrams
1
Reply
I'm on my last plate of parts and I was reviewing the source printables(there's multiples between the remix and the originals) and all the instructional reference.
These are the observations/notes I have regarding this remix:
-Almost have all the parts, but some things are missing or not noted. There's 1 pair of centering disks, but you have parts for the main rewinder and the donor spool holder.
Since the disks are labeled as "assembly"- I'm assuming its for the bambu spool since the donor spool size may need different disks. I'd suggest including a pair of standard disks in the project
or at least making a mention that people will need to print whatever appropiate centering disks. Its not technically required for operation on the donor spool holder, but it'd make the whole thing
run more smoothly and since you went to the trouble to include all the parts, might as well include the other donor spool disks or making a notation.
-Looks like this includes the switch housing for generic switch instead of the creality switch housing. Just a note in description would be helpful. I bought the creality sensor since I wanted to follow the original setup Damian went for with all the upgraded parts. After reviewing and confirming- I'll have to reprint the Creality switch housing and toss the generic one since it wasn't noted originally.
-You included both the gear25 versions- both for manual and for electric motor operation, but you didn't include the manual handle parts. I'd suggest either removing the basic gear25 so no one prints an extra gear or include the handle parts to really make it "complete" for those who are interested in setting it up for manual use.
-Since this is the total sum of all of the upraded parts for Damian's respooler setup based on mikloskiszely's designs- it'd be helpful to include updated instructions linking to how assembly will be different. Or at least linking to the neccessary links. It'd make this listing for the respooler better in some ways to the collection of upgrades since it'd be easier to understand and follow, making the process that much more enjoyable. Thanks for making the remix and profile!
1
Reply
By chance, are these all the parts from the upgraded motorized spooler on a stand/aluminum extrusions by Damien? I Just came across and was about to start downloading/organizing all the files for a project file when I noticed this project with everything set up already. If it is, you're a huge help/timesaver haha
The designer has replied
0
Reply
It is! Strengthened parts, all the various upgrades are integrated in this.
1
Reply
Print Profile
Full Color 0.2mm layer, 2 walls, 15% infill
wow. thanks. this was a great print
0
Reply

Print Profile
Full Color 0.2mm layer, 2 walls, 15% infill
Had issues with layer adhesion where the colours changed, so those parts I had to redo in a solid, other than that it was just keeping the smaller parts on the plate.
0
Reply
Print Profile
Full Color 0.2mm layer, 2 walls, 15% infill
0
Reply
Print Profile
Full Color 0.2mm layer, 2 walls, 15% infill
0
Reply
This remix is based on
License
This user content is licensed under a
Creative Commons Attribution-NoncommercialRelated Models


© 2024 MakerWorld