AMS Riser Remix


Print Profile(8)


Description
Boost Me (for free)
Wish to support me without paying for a license? Consider boosting my models!
Membership
Wish to sell prints of my exclusive models? Sign up for only $5 per month for a license to sell prints of all my models.
PRINT PROFILES:
The following are the only print profiles tested and approved by me. They are listed by the name I've given them in the print profile description. I can not guarantee the quality of any print profile posted by anyone other than myself.
- BLV Remix FR (v2)
- BLV Remix FL (v2)
- BLV Remix RR (v2)
- BLV Remix RL (v2)
- BLV Remix DRAWER
- BLV Remix ACCDRAWER
- BLV Remix Shorty (No Drawers)
- Riser v3
- Gasket
SUMMARY:
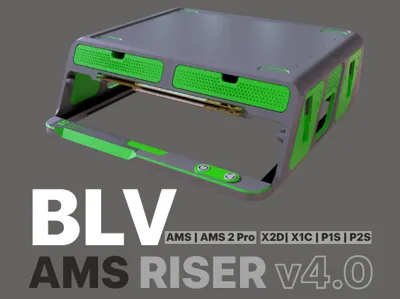
This is a remix of the BLV Riser. The intent was to simplify the assembly, print easier, and with less pieces/material. The original uses close to 2.7kg and this one uses 1.5kg for the primary body, the drawers are between 100-220g, the gasket is 60g of TPU. I will leave the original files in the raw files repository, but will be removing the print profiles that are outdated. The riser maintains the LED light strip sockets, the drawers, the build plate slot, and the high and low shelves for the top glass. I've added a gasket that will work with both the newer and older models. For the older models, you may need to glue it in place because the design intent was to drop it into a small recess, which is only present on v3.
Ideally, use PETG or any other filament with a higher temperature resistance. PLA will deform over time. With that said, I use a PLA version on one of my printers which only prints PLA and I have no issues with it so far. I would recommend TPU for the gasket.
This riser has a few versions:
- The first version is the original remix with drawers.
- The second version is the remix without the drawers. Additionally, this version has a sloped inner edge to mount an LED strip at an angle for optimal lighting. I bored out the rear hole slightly so you can terminate the led strip in the rear and run the cable out of the back.
- The third version (v3) is the original remix, but with a slot for a gasket and sloped edges inside for mounting an LED strip at a slight angle.
Printing/Assembly:
If you decide not to use the print profiles, these are the settings I used.
- Global Settings:
- 0.2mm Layer Height
- 3 Wall Loops
- Enable Supports: Normal (Auto)
- Snug
- On Build Plate Only
Assembly:
The assembly can be done in a matter of seconds. The joints are made with dovetails and a fairly tight fit for a nice press-fit application.
- Assemble the front two pieces
- Assemble the rear two pieces
- Assemble the front and rear halves together
That's all there is to it. Follow my facebook page, RC3D, for giveaways and entry details as well as my latest models.
CHANGELOG:
UPDATE 12/22/2023:
Added v3. This version includes the same sloped edges that the shorty does, as well as a slot for the gasket. I've also included the gasket since the original BLV has nubs that won't work right with this one. The gasket is designed to simply drop into a recess, so it will work on older versions, but you may have to glue it in place.
UPDATE 11/25/2023:
Added a second version without the drawers. Removed several print profiles and re-organized the files.
UPDATE 10/31/2023:
I revised the drawer insert and the drawer itself. The new version is very similar, but required just a few changes in order to work probably with the new drawer insert. The insert now fits into the side of the drawer as well, so you'd insert the piece and slide it into the side. This helps avoid issues with alignment and helps position the insert correctly. I also remove the accessories tab from the insert as it made no sense in this application. Instead, the other half of the drawer will just be empty.
UPDATE 10/27/2023:
Update the insert to fit better, revised the drawer for better printing and fit. The insert and the drawer need to be super glued and held in place for a minute or so (I used clamps) so the bottom sticks to the existing drawer and doesn't snag the edges when the drawer is inserted.
UPDATE 10/20/2023:
Uploaded an insert to convert the drawers to one similar to the original model. Simply drops in and was intended to just glue in place. I haven't yet tested it, but it's going on the printer tonight so if you'd rather wait I will update this description when mines complete.
INITIAL RELEASE 10/15/2023:
The design is based on the popular AMS riser by Benlevi. My goal was to reduce the number of pieces, complexity of assembly, and ease of printing. The result is this 4-piece body with dovetail interlocks and 2 drawers. I will be improving on this and am currently printing the latest iteration, but its here for you to try as well. If you find any issues, let me know and I'll make it right.
The riser has slots on top for the AMS feet, high and low shelves for the glass Lid, build plate holder, and two drawers.
ASSEMBLY:
Assemble the front two pieces, then the rear two pieces, then assemble the resulting front and rear halves together. The sequence is important. I glued the pieces for peace of mind, but I'm not sure it's totally necessary. The pieces should only slide together one way.
PRINT SETTINGS:
• 3 walls
• 15% gyroid infill
• Supports, snug auto, on build plate only (this is for a small lip at the bottom that will not be visible when installed.)
This remix is based on
Comment & Rating (468)