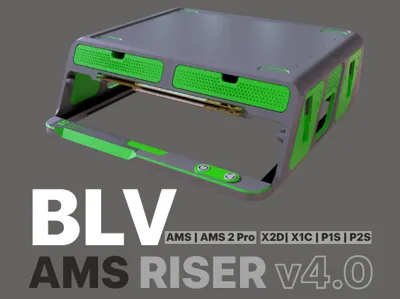
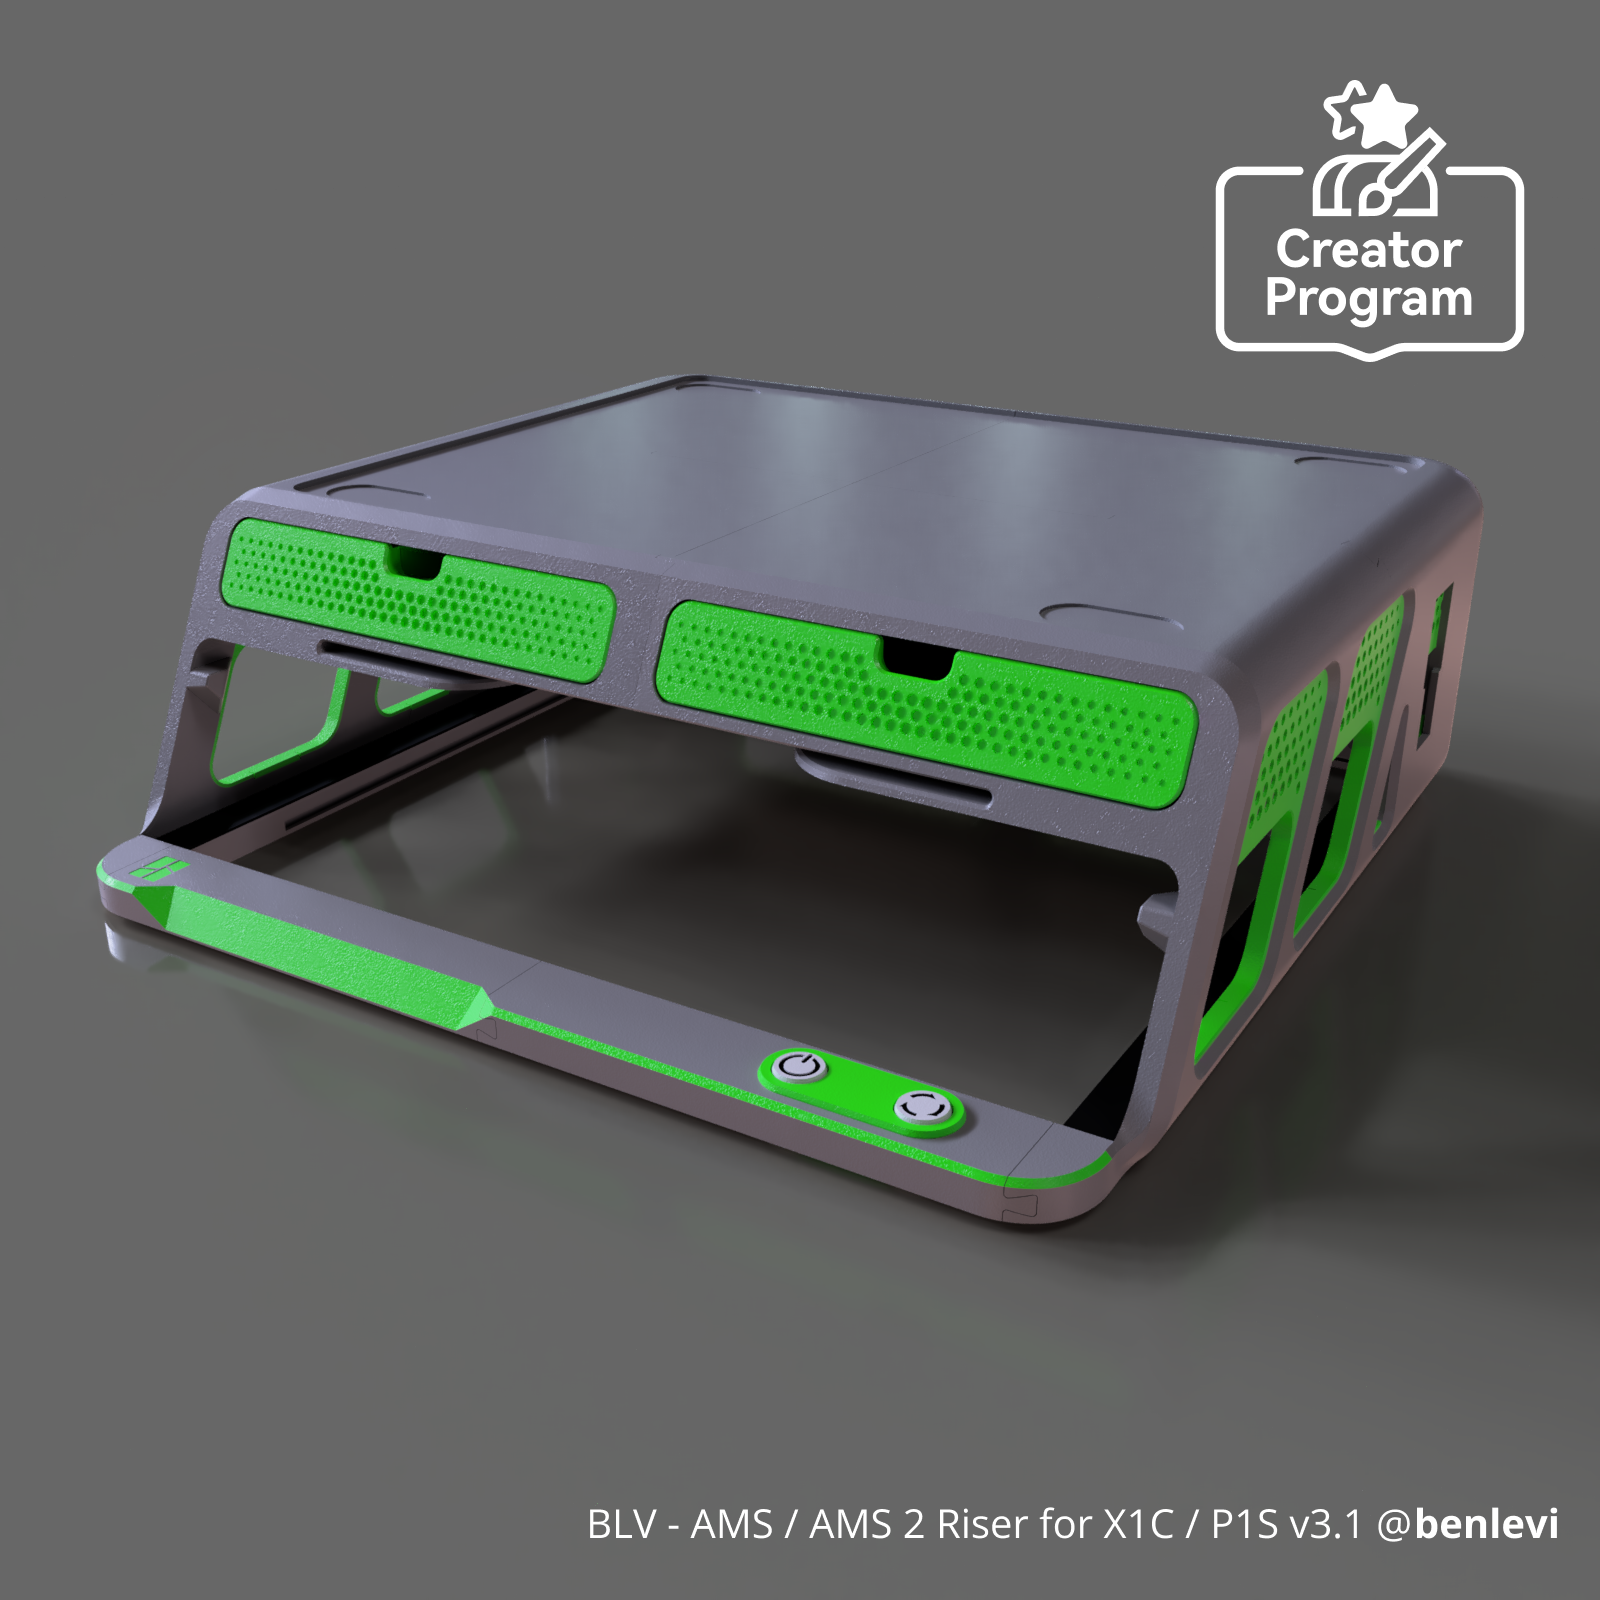
BLV - AMS / AMS 2 Riser P2S / X2D / X1C / P1S v4


Print Profile(20)


Bill of Materials


Description

Boost Me (for free)
Toss Me a Boost (I’m Running on Coffee and Dreams) ☕🚀 I’m over here, pouring my heart (and a lot of caffeine) into creating designs for this amazing community! If you’ve got a boost to spare, you’d be a total hero - it really does help! But if not, no worries at all, you’re still amazing, and I hope my designs make you smile anyway! 😊💛
| Updates |
|---|
18/04/26: NEW HUGE UPDATE v4.0 has been published (updating this page with new guides)
Full support to X2D, P2S Extra build plate support, Support for 3rd party attachments,
Mounting holes for additional accessories, Magnetic attachments, Improved print time and more..

| Introduction |
|---|
Hi, I’m Ben Levi, and I’d like to introduce you to the BLV AMS / AMS 2 Pro Riser I designed.
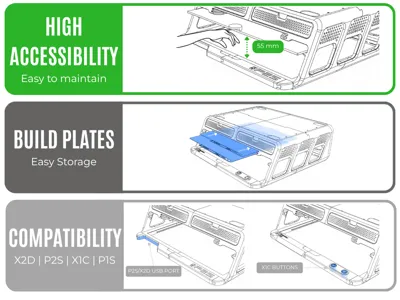
When the AMS sits directly on top of the printer, it blocks your view of the print and makes it impossible to open the top glass lid -something that's important when printing high-temperature materials and needing better airflow. I realized there needed to be a better solution - something that lifts the AMS while keeping the top cover free and accessible. I’ve seen a few AMS risers out there, but honestly, none of them really impressed me… so I decided to create my own. The result is this sleek and functional BLV AMS Riser:
- Simple to assemble
- Easy to use
- Sturdy and reliable
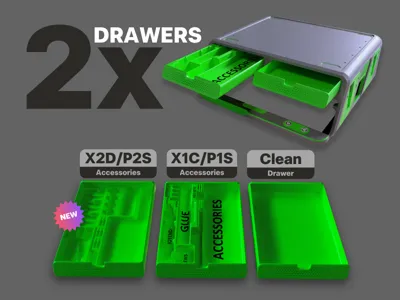
- Includes two practical drawers for your tools and accessories
- Special storage for your build plates
- Magnetic attachments
- Support 3rd Party accessories with special adapter
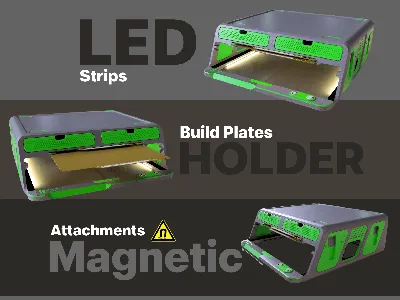
- Integrated dual LED strips for a clean, modern touch
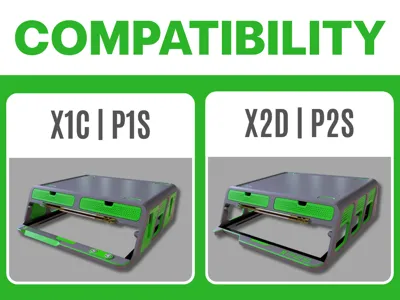
- Compatible with both the standard AMS and the AMS 2 Pro
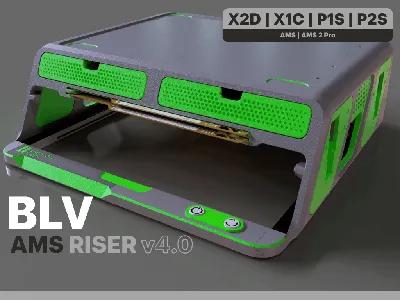
- Compatible with printers: X2D, P2S, X1C, P1S.
It took time, effort, and iteration - but I’m proud of the outcome. As many of you know, I’m passionate about giving back to this amazing community. That’s why I’m sharing this project completely free of charge, including the original CAD files (F3D, STEP) so you can modify, enhance, or adapt the design to your needs. Please refrain from using the design for commercial purposes without my explicit permission.
Enjoy, and happy printing!
Thanks,
Ben Levi
Membership
Love my designs? Follow me to stay updated on new releases! If you'd like to support my work or even sell physical prints of my models, check out my membership tiers. Your support helps me cover filament and equipment costs so I can keep creating for you!
| Main Features |
|---|
These are just a few of the design features I’ve planned so far. If you have additional ideas or suggestions, I’d love to hear them - your input could help make this project even better. The original CAD files are available for download to make self customization easy.
- Easy, Screw Free Installation - Assembles effortlessly with no tools or screws required.
- Dual LED Strip - Integrated lighting positioned at an optimal angle for LiDAR functionality.
- X2D / X1C / P2S / P1S - Fully compatible with all the latest X and P series printers.
- AMS / AMS 2 Pro Riser - Elevates the AMS to improve visibility and functionality.
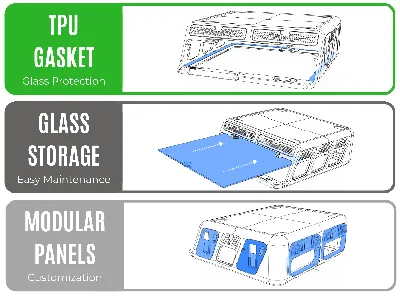
- Top Glass Holder - Frees up the top cover for airflow during high-temperature prints.
- Two Storage Drawers - Includes a version tailored specifically for tool organization.
- Magnetic attachment - integral magnets allowing to attach scraper and other tools.
- Build Plate Storage - Dedicated build plates holder.
- Rubber Gasket for Glass – Provides a snug, protective fit for the top cover.
- 3rd party accessories - Fully supports community created 3rd party accessories
- Custom Side Panels - Sleek, modular design with a clean finish.
- Full Access to Original Printer Buttons / Micro-SD (P2S) – No compromise on usability.
- CAD Files Included - Downloadable in F3D and STEP formats for easy customization and remixing.
| How to print and where to begin? |
|---|
The easiest and most reliable way to get perfect results right from the start is to use the dedicated print profiles I’ve prepared especially for you. Everything is already dialed in perfectly: supports, infill, strength settings, layer heights – you name it. All you have to do is open Bambu Studio, select your printer model, choose the colors you want for your BLV Riser, and hit print. That’s it – zero hassle, maximum quality!


Panel Options
Each profile includes two complete sets of side panels. You’ll see the name above each plate: OPTION1 or OPTION2. Feel free to print both sets and swap them whenever you want, or just print the one you prefer.
- OPTION1 – Standard Panels: the classic clean look, purely aesthetic.
- OPTION2 – Modular Panels: designed for mounting all kinds of community 3rd party accessories.
Choose your style – or keep both! 😎

Example for an attachment that suitable to the v4.0 modular panels.
The AMS-HT mounted holder can be easily installed on the left or the right side of the BLV AMS Riser.
you can download it from the Print profile, labeled: “BLV Official Attachments AMS-HT | PSU | Tool Holders”

To be completely honest, If you’re looking for a quick 2 hour print and done project, this isn’t it.
This is a serious, high end upgrade that demands real commitment in both filament and print time.
Finishing a full BLV Riser means you’re in for the long haul - but the result is absolutely worth it.
Here’s what you’re signing up for:
Printing Time | ~ 96 print hours (including color switching) |
Printer | Any Bambu Printer other then A1 Mini |
Filament |
* Feel free to choose your own colors. |
| Important note: Print the drawers using the same filament type as the main structure (color can be different). If the main body is printed in PETG but the drawers in PLA, different material properties may affect tolerances and cause increased friction or poor fit. | |
Overall dimensions for your convince:

I designed this project with simplicity in mind - minimizing the number of parts and avoiding the need for screws or glue wherever possible.
To make assembly even easier, I’ve included three reference images that display all the printed parts along with their corresponding file names. These visuals will help you quickly identify what needs to be printed and what can be skipped.. Click on the pictures to enlarge.
 |
 |
 |
 |
 |
| Assembly Instructions |
|---|
I believe the best way to demonstrate the assembly process is through a visual guide.
That’s why I’ve created a short animations that clearly illustrates how to assemble the project step by step, including the proper sequence of all components.
Main Body Assembly
Gently insert Part 1 into Part 4, making sure that the tab on Part 4 slides smoothly into the corresponding groove on Part 1.
Verify that all parts are perfectly aligned before proceeding.

Gently insert Part 2 into Part 3, making sure that the tab on Part 3 slides smoothly into the corresponding slot on Part 2.
Verify that all parts are perfectly aligned before proceeding.

Gently insert the combined Part 1 + Part 4 assembly into Parts 3 and 2, following the animation below.
slide them in carefully while keeping everything perfectly aligned, ensuring the tabs on one side lock
smoothly into the corresponding slots on the other until both pairs are fully seated and flush.

Now slide the front dashboard panels gently into the assembled units as
shown in the animations below, until fully seated and flush.X1C / P1S Dash Board assembly
P2S Dash Board assembly


Before installation, make sure you have printed the correct version for your printer.
The parts for the P1S/P1P are different from those for the X1C. The drawers are designed for storing screws, filament cutters, grease, lubricant oil, Allen keys, hotends, silicone socks, and more.
Drawers installation: Gently slide the drawers into place. Note the slot on the underside of each drawer, it aligns the
drawer and prevents it from dropping when opened. A slight friction on the first insertion is normal and expected.

Gaskets installation:
The gaskets protect the glass edges when inserting or removing the glass cover.
Before installation, make sure the pin holes are completely clean and free of any old supports or debris.
X1C / P1S Gaskets | X2D / P2S Gaskets |
 |  |
Insert the gaskets as shown in the animation below. Ensure they are straight, fully seated, and sit flush against the lower parts.
 | |
X1C / P1S Gaskets | X2D / P2S Gaskets |
 |  |
Button installation (for P1S/X1C only):
- Insert the two soft TPU cylindrical inserts into the buttons from the bottom.
- Push the buttons into the lid.
Fit the lid with buttons onto the dashboard as shown in the animation below.


Panel installation
You have two panel options:
- Standard panels - simple and clean finish for decoration only.
- Modular panels - these allow you to add third party accessories such as
tool holders, extra build-plate storage, side AMS-HT mounts, and more.
How to find the add-ons?
Search for “AMS Riser V2” on MakerWorld and you will find attachments created by community members.
In an earlier version of the BLV Riser I included a universal accessory slot that was adopted with modifications
by maCyo42 AMS remix. Other community members created wonderful attachment that can be used with BLV AMS Riser v4.0
- Standard panels
Simply slide the panels into place until you hear a click and they lock securely.
No screws or glue are required for this option.
Modular panels
The modular side and rear panels feature a slot for later sliding in accessories.
To install the modular panel you would need to have:- a Soldering Iron
- 18 x M3 threaded inserts (same type listed in the materials section).
18 × M3 flat head screws, 10 mm long (same type listed in the materials section).

Modular panel installation (rear and sides):
On each side, only the two outer panels are modular, the middle panel is a standard (non-modular) panel that simply clicks into place.
Installation of each modular panel is straightforward:Install 3× M3 threaded inserts into the designated holes using a soldering iron set to 200 degrees Celsius

A short video demonstrating how to install M3 threaded inserts into a 3D printed part using a soldering iron:
Keep them straight and level. Let them cool fully for a few minutes before proceeding (see diagram below):

- Slide the modular panels into position one by one.
Secure each panel with 3× M3 × 10 mm flat-head screws.


 | |
Installing the Magnets:
The magnets on the sides of the BLV AMS Riser allow you to hang tools like the scraper, Allen key, etc. It's convenient, quick, and doesn't require much effort.
| 1. Remove the drawers | 2. Use a few drops of super glue on one side of the magnet and Insert the magnets into the holes in the left side panel. |
 |  |
| 3. Use a few drops of super glue on one side of the magnet and Insert the magnets into the holes in the right side. | 4. Return the drawers. |
 |  |
| Official attachments and Recommended Remix |
|---|
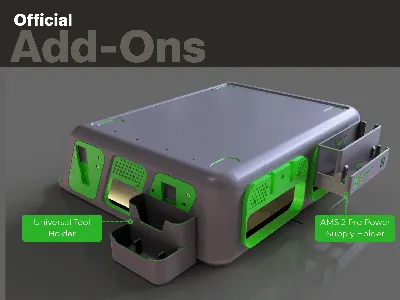
If you've chosen to print and install the modular panels, you can print add-ons and mount them onto your BLV AMS Riser.
In addition to dozens of other add ons created by the community on MakerWorld, there are several official BLV add-ons available for download right now:
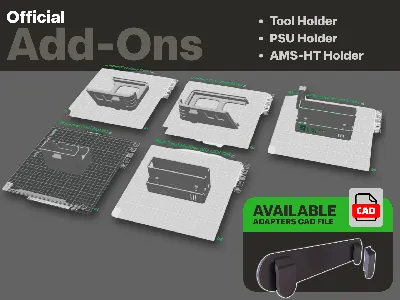
AMS-HT Holder | AMS 2 Pro PSU Holder | Tool Holder |
 |  |  |
| A shelf for mounting on the left or right side of the BLV AMS Riser, allowing you to install the AMS-HT in a convenient and reliable way. | This add-on lets you install the original AMS 2 Pro power supply in the back. Includes space for the PSU, a dedicated spot for the cable, and even channels for zip ties. | Two universal compartments for storing tools, screws, and various other items. Extremely handy. |
You can download and print the official add-ons by selecting the print profile that already includes all the parts ready for printing.
See the image below:

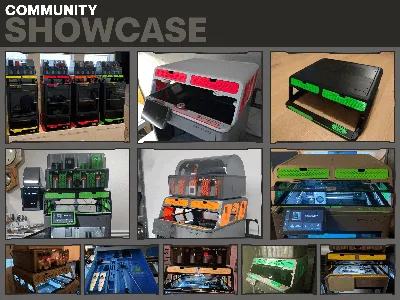
Community Add-ons
There are many more extensions created by community members.
How to find the add-ons?
Search for “AMS Riser V2” on MakerWorld and you will find attachments created by community members.
In an earlier version of the BLV Riser I included a universal accessory slot that was adopted with modifications
by maCyo42 AMS remix. Other community members created wonderful attachment that can be used with BLV AMS Riser v4.0
Examples of selected community add-ons compatible with the new v4.0 modular panels:
Wants me to add your attachment to the list?
Just PM me with the link and i will add it :)
| LED Strips Installation: |
|---|
There are two types of LEDs you can use:
- COB LED strips (6 mm wide)
- Bambu Led kit for BLV AMS Riser (check the BOM list)

The original design was intended to use 6 mm wide COB LED strips that can fit perfectly inside the dedicated slots.
You will need to cut them to the appropriate lengths (Maximum of 214mm length for each side) and solder wires to the ends.
The wires should then be routed through the dedicated cable channels as shown in the diagrams below.
Please note that the Bambu LED strips are slightly wider. Therefore, they can only be used if inserted partially into the slot so that they sit at an angle (this is actually even better, as it prevents glare for the user). When using Bambu LED strips, you must remove the protective plastic film from the adhesive on the back of the strip so that it properly sticks to the edges.
 |
 |
 |
Top Plate – Community Expansion Options
The BLV Riser V4 top plate comes with 12 built-in M3 screw holes. Use it to design and 3D model your own custom add-ons whether you want to add a drawer module or a tray for an extra AMS. To make things easier for you, I’ve uploaded a CAD/STEP file that includes the top plate with all the details and hole positions. I’ve also listed the exact measurements and hole spacing below to help you get started on your builds!

measurements and hole spacing:

| Colors Ideas |
|---|

| Selected User makes and comments |
|---|
 |  |  |
 |  |  |
 | ||
 | ||
| Changes Log |
|---|
- 21/04/26 - X2D Drawer updated and fixed.
- 18/04/26 - Added new print profile for X2D!
- 08/04/26 - added top plate CAD / STEP file for future/community add-ons.
- 20/03/26 - added improved support, more instruction and new guide.
- 08/01/26 - added measurements sheet and updated CAD files.
- 01/12/25 - added guides graphics
- 29/11/25 - added beta STL files for AMS-HT holder attachment!
- 28/11/25 - added new v4.0 assembly guides and animation.
- 24/11/25 – Added custom drawer for the P2S (fits all P2S-specific accessories).
- 23/11/25 – HUGE UPDATE!! v4.0 release: P2S support, magnetic attachments, modular panels for 3rd-party accessories..
- 27/07/25 – Confirmed fully compatible with AMS 2 Pro.
- 29/06/24 – Added BOM (Bill of Materials).
- 31/05/24 – Reinforced internal structure for greater rigidity.
- 22/05/24 – Optimized overall structure to reduce vibrations.
- 04/04/24 – Updated print profile for wider, more stable base.
- 02/03/24 – Added extra support to side panels.
- 4/10/23 – New optimized slicing profile: faster printing, less filament, better supports.
- 30/9/23 – Remix section update: added spool holder and honeycomb panels.
- 29/9/23 – Added Button insert.stl + button assembly images.
- 29/9/23 – Added 3 new remixes: clean front drawer, drawers with text labels, dash front parts for P1P.
- 25/09/23 – Released v1.3 with measurement fixes.
- 24/9/23 – Major update v1.2: faster printing, minimal supports, Added LED option, TPU gasket lock pins, stronger front/rear locking, Improved glass holder & deeper AMS leg sockets, New accessory drawer (fits hex keys, 2× hotends, cutters, wipers, screws, glue, needle), Optimized decorative panels + dedicated P1P/P1S button frames with logos
- 23/09/23 – Optimized Left/Right/Rear panel edges for smoother surface finish.
- 19/9/23 – Uploaded v1.1: angled glass holder, fixed drawer size, stronger rear section.
- 19/9/23 – Published first prototype (not ready for printing yet).
License
You shall not share, sub-license, sell, rent, host, transfer, or distribute in any way the digital or 3D printed versions of this object, nor any other derivative work of this object in its digital or physical format (including - but not limited to - remixes of this object, and hosting on other digital platforms). The objects may not be used without permission in any way whatsoever in which you charge money, or collect fees.
Comment & Rating (11887)