
Tiny Trophy Teacher Gift Card Kit Card Holder


Print Profile(3)
Bill of Materials

Description

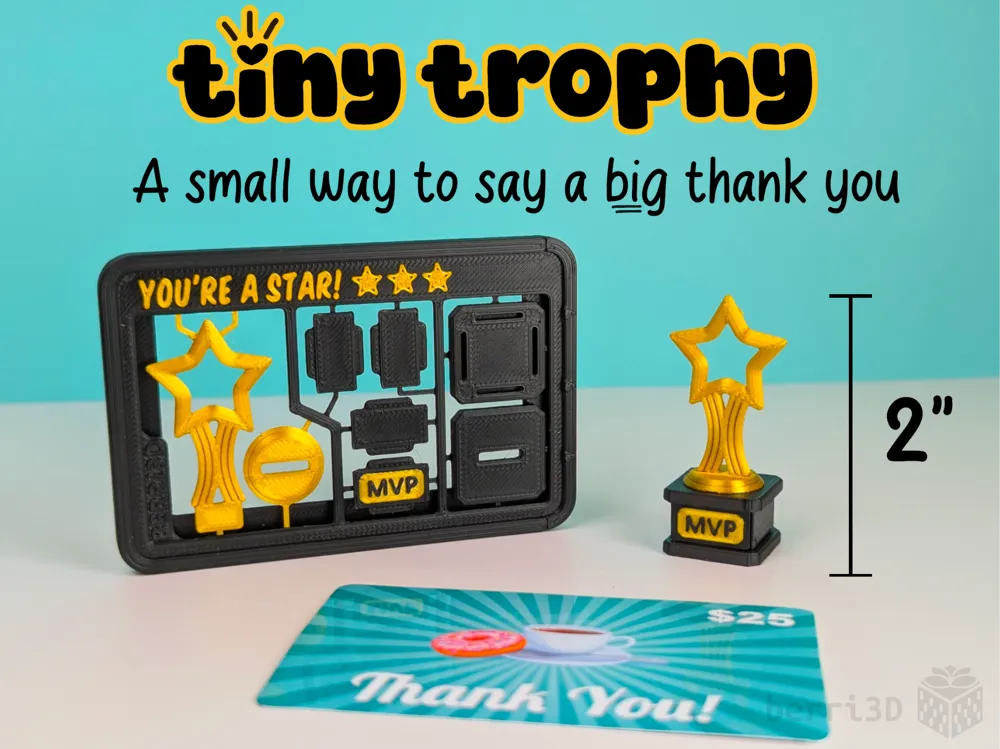
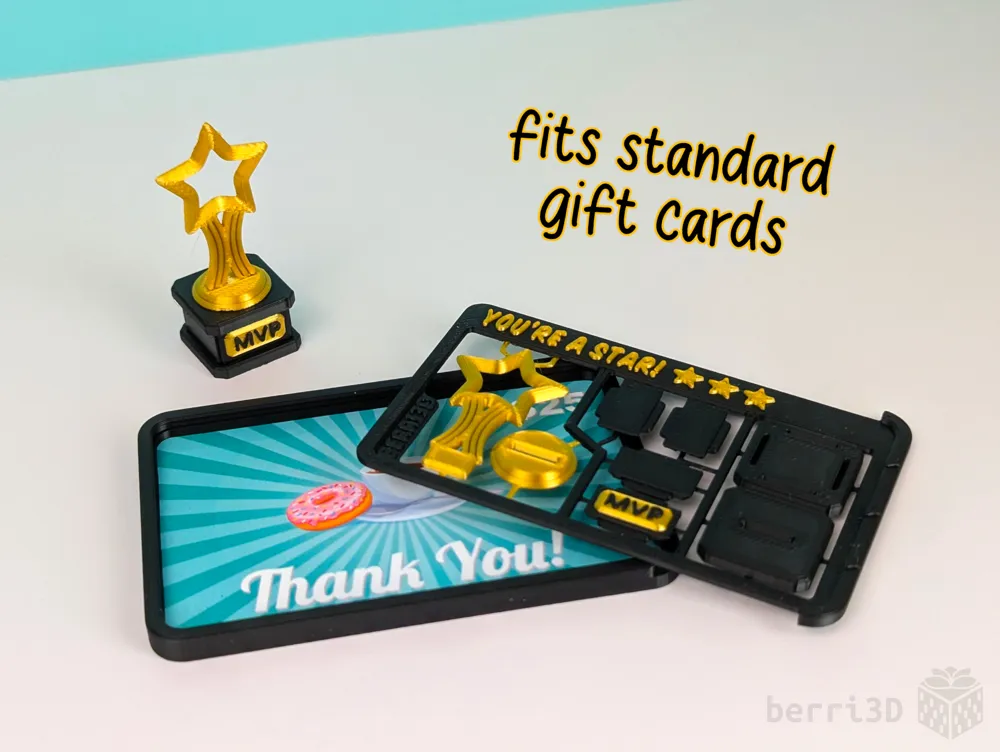
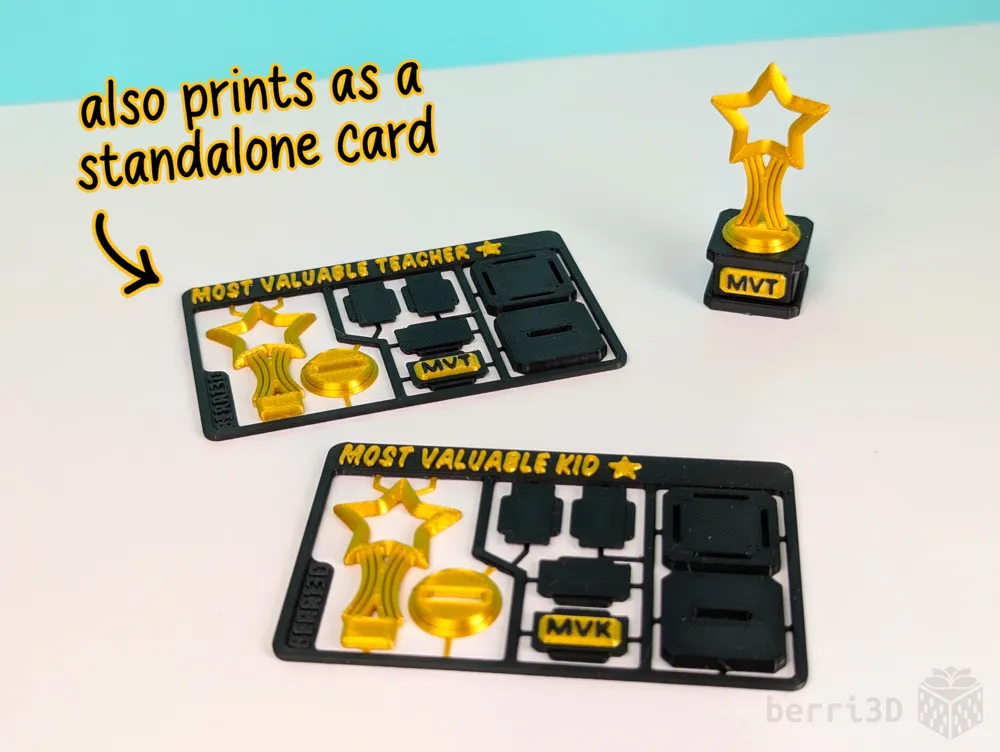
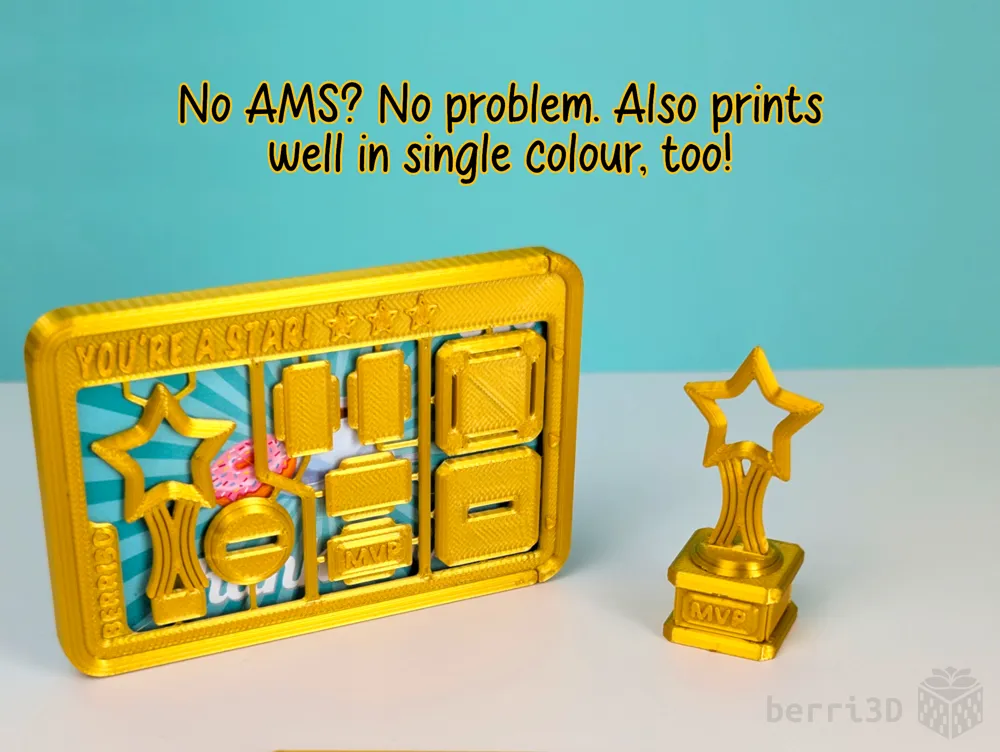
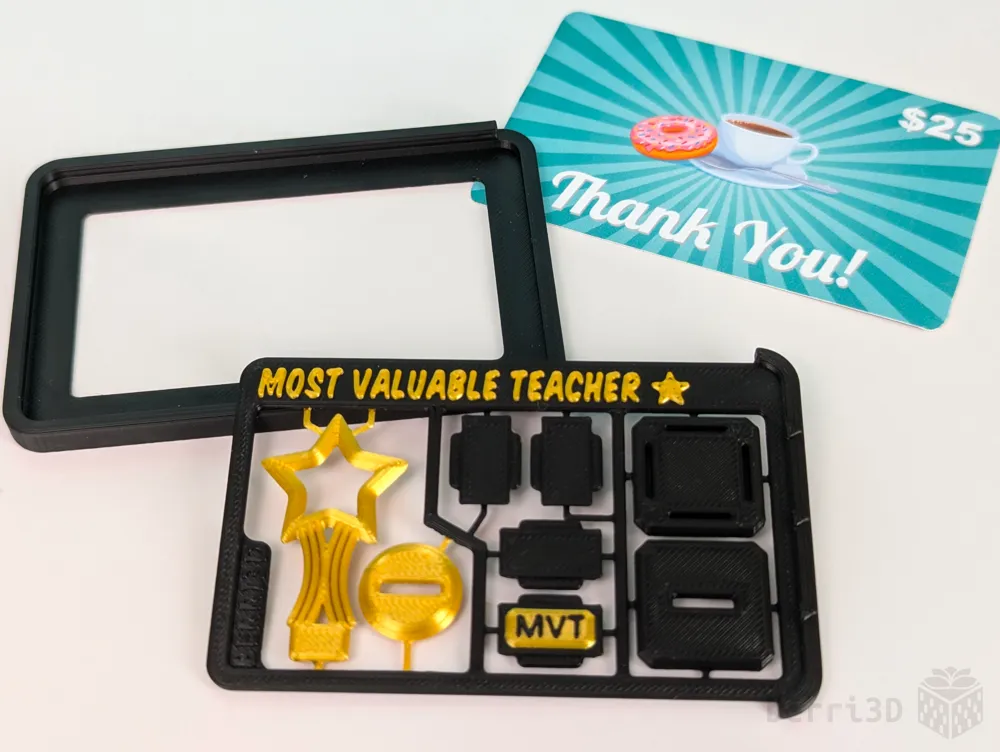
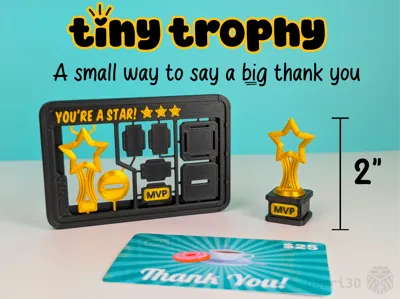
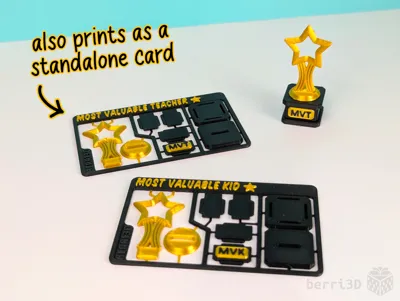
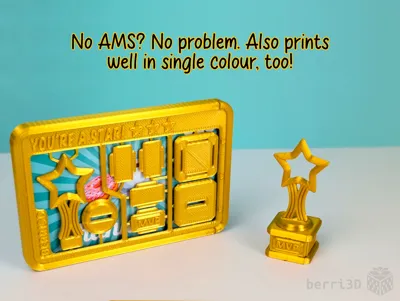
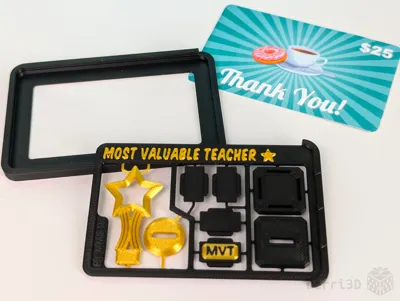
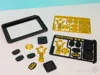
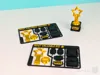
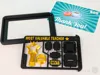
This customizable kit card can be printed two ways: as a gift card holder or a standalone card.
Either way, the recipient gets to build the tiny 2" high trophy themselves which they can keep as a reminder of their (and your) awesomeness 😎.
- Quick multi-colour print (~0.7h for standalone or 1h for card+holder)
- Prints even quicker in one colour (~0.5h)
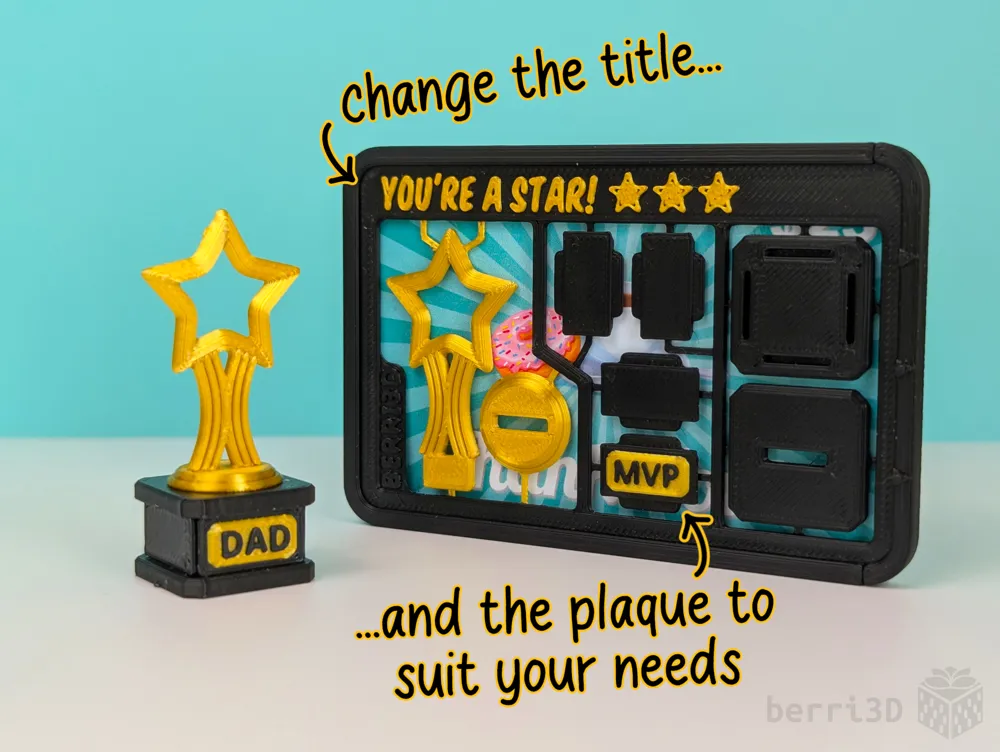
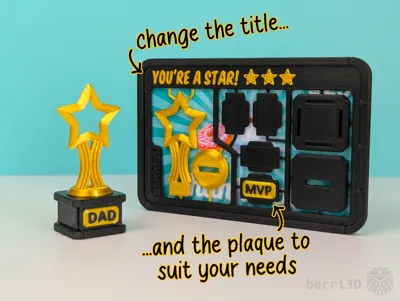
- Customize it yourself or use one of the pre-filled versions
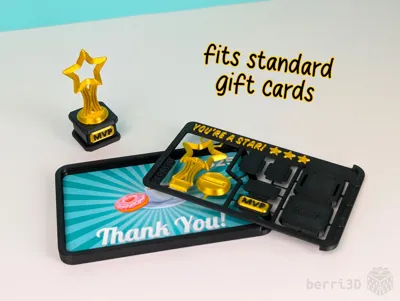
- Holder fits standard gift cards, with a bit of room to spare for notes, receipts. etc.
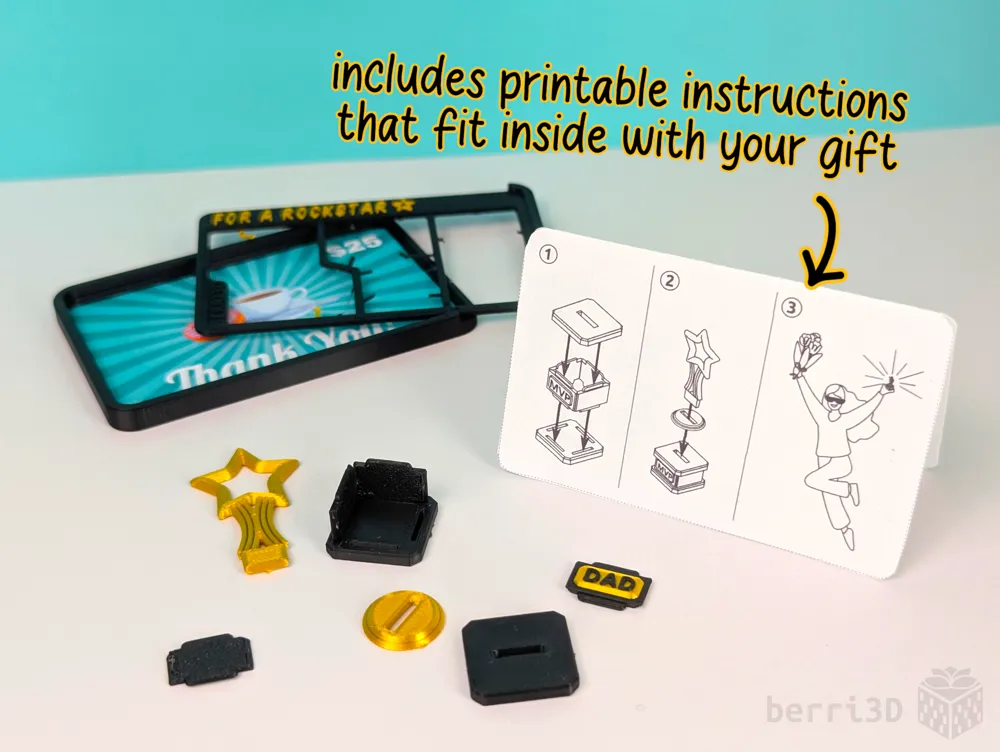
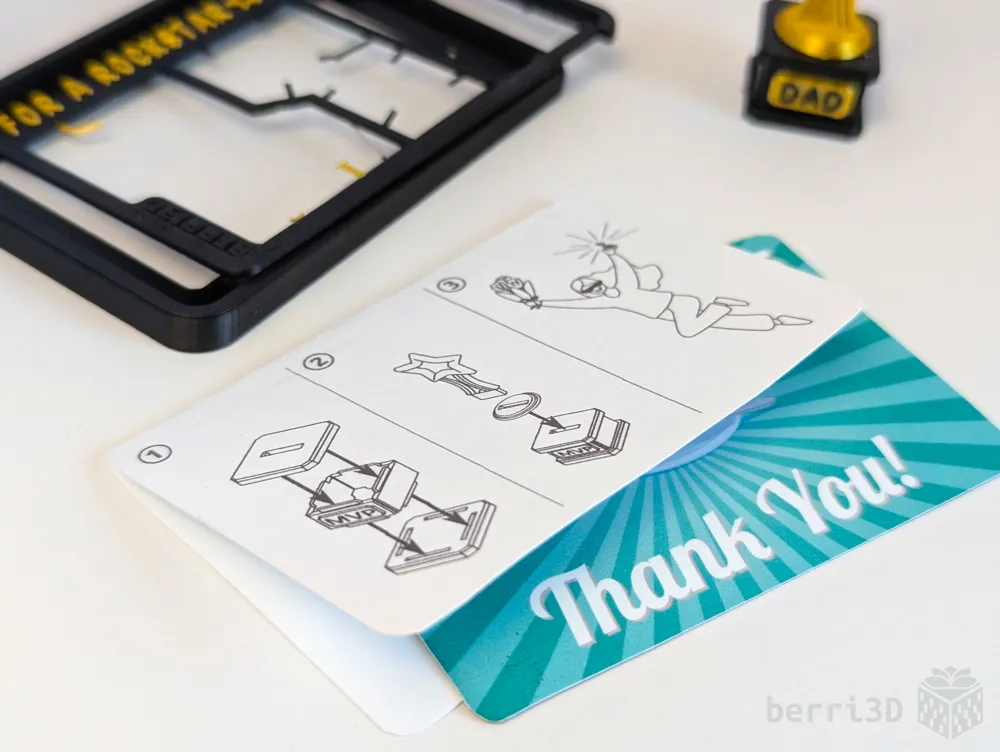
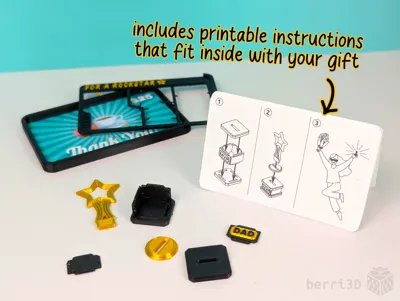
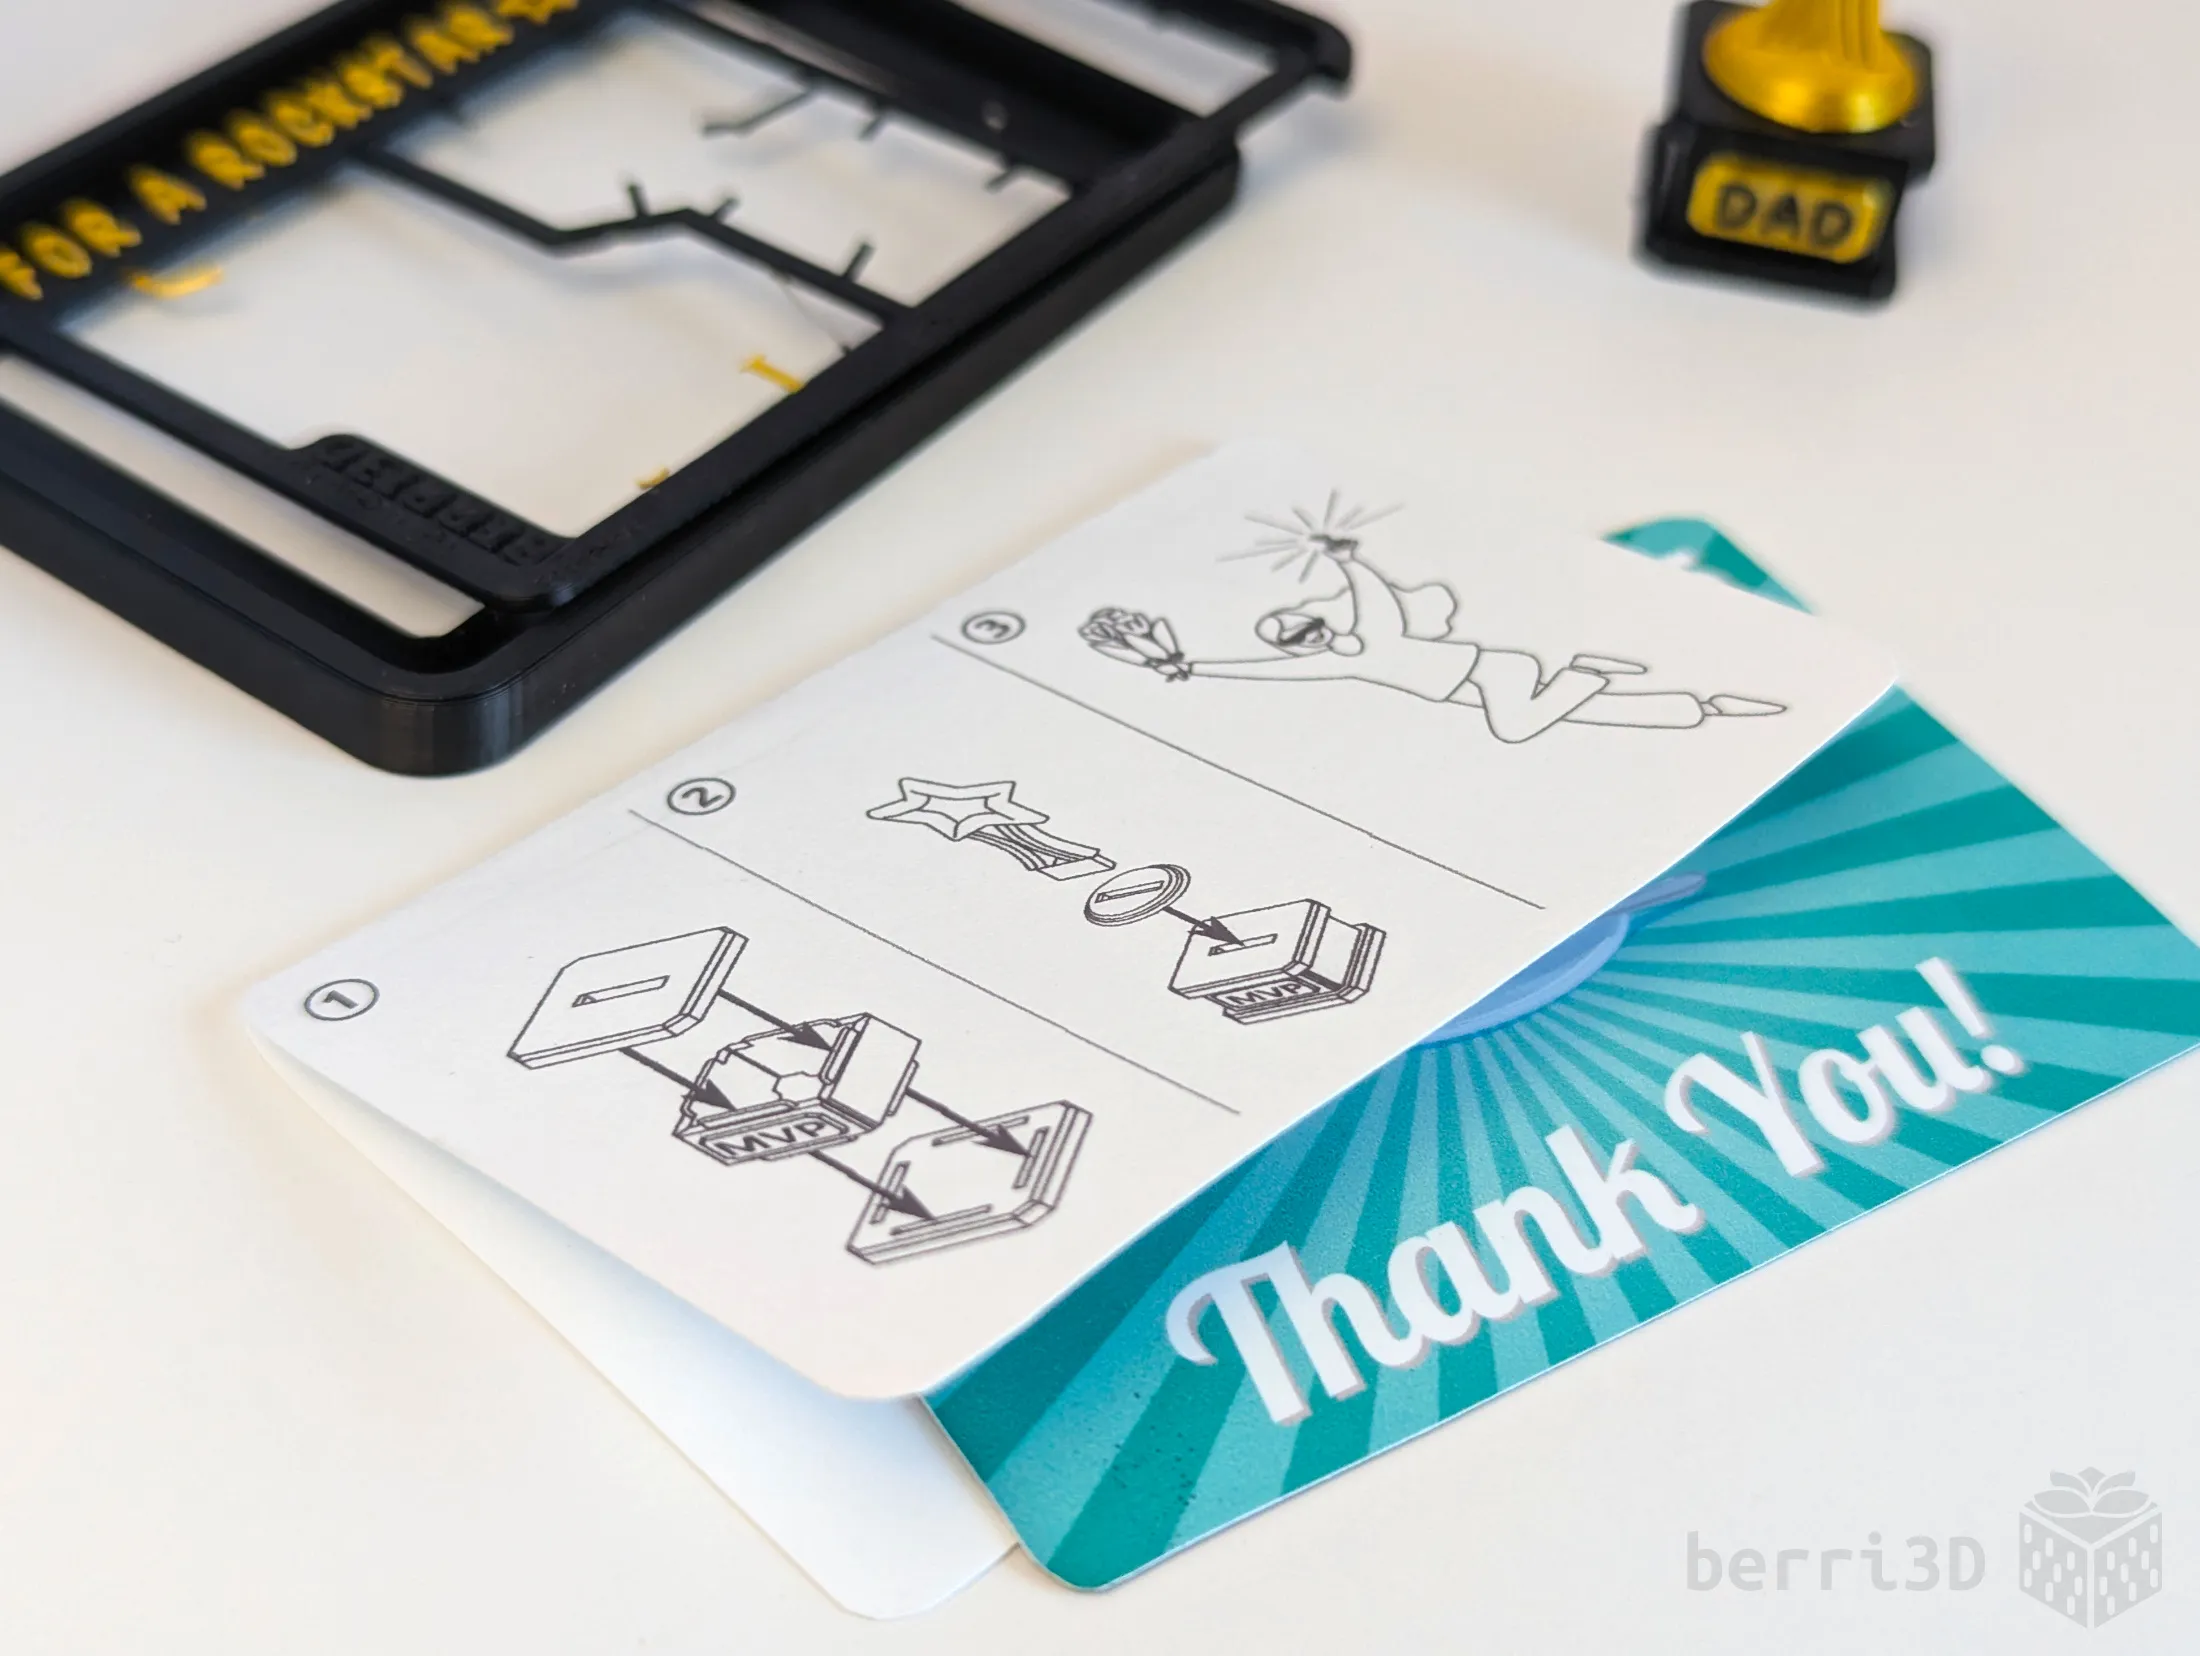
- Bonus instruction cards that fit inside with your gift! (see Documentation section below)
- Perfect for batch printing (can fit up to 10 on a mid-sized printer plate)
⚠️This is a miniature model and as such won't be suitable for all users such as the very young or those with reduced dexterity.
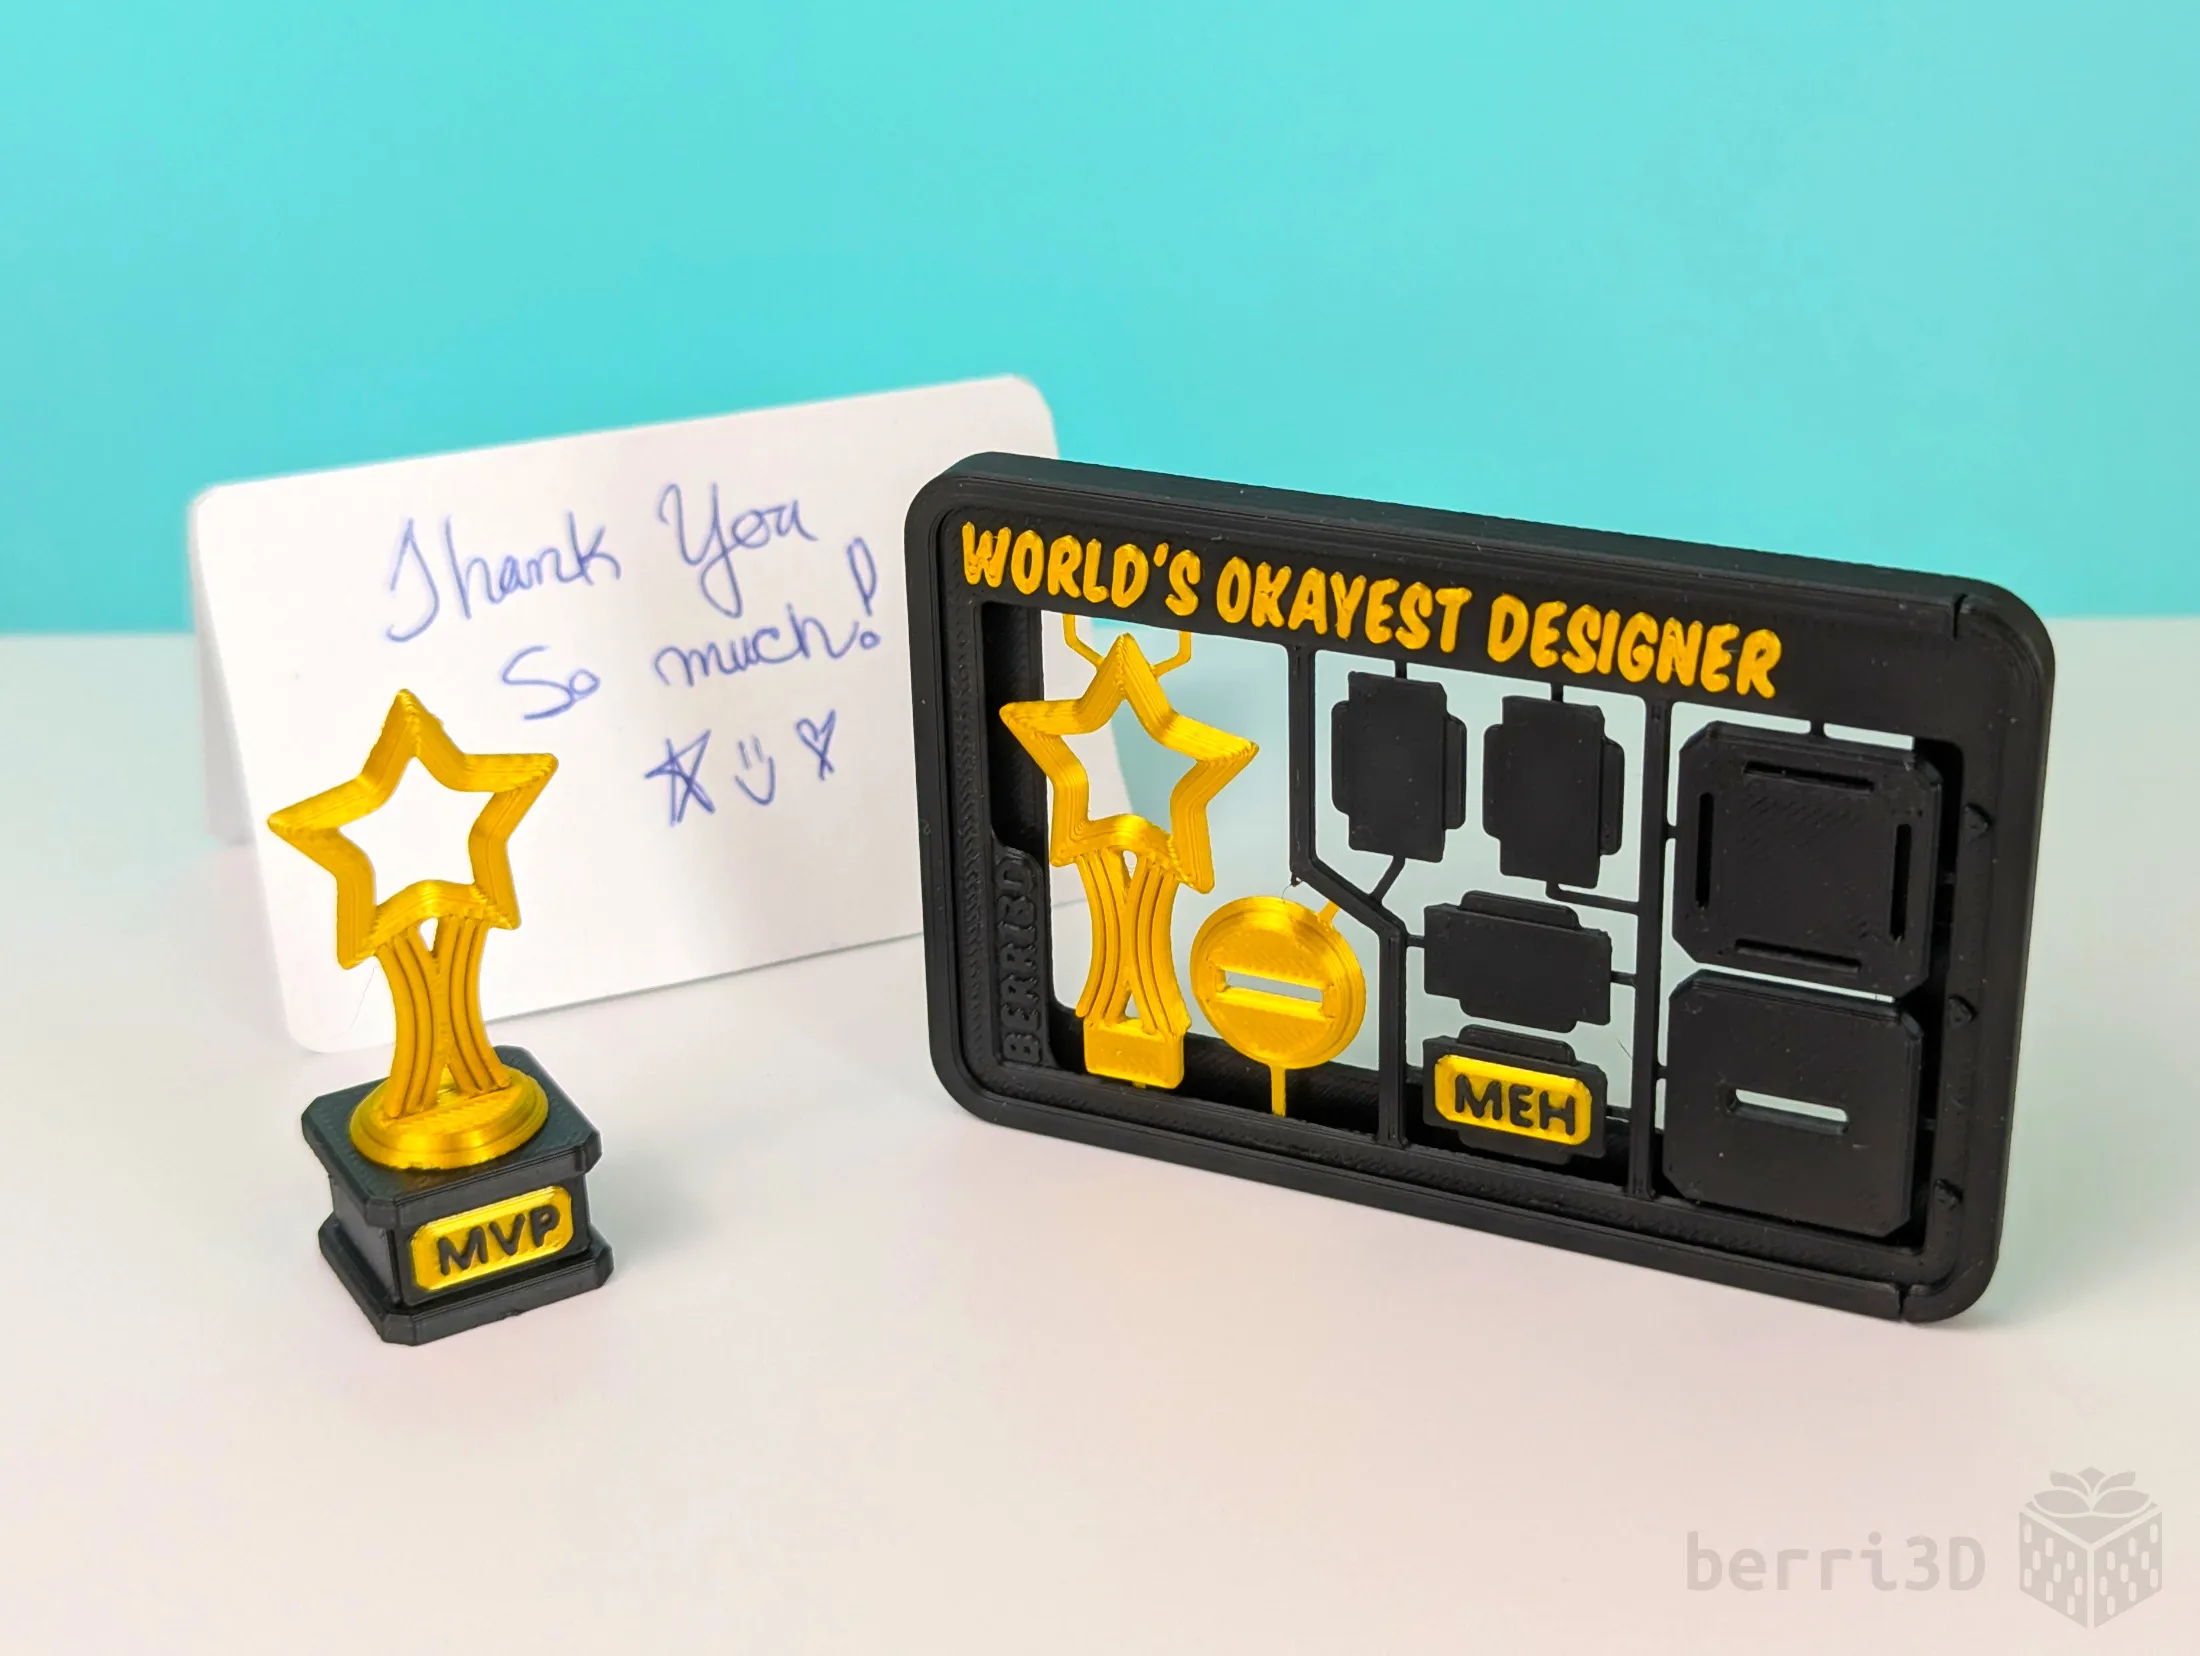

Table of Contents
Most people do not have problems with my models as I rigorously test everything I make. However, I'm a firm believer in more information is better because it means you don't need to wait for me to respond 🤪
If you're already familiar with printing my kit cards, you can skip most of the following (except Special Considerations which yes, I do change!) and go straight to Section 4 for the assembly guide.
- Special Considerations (important information please read)
- Card Holder (dimensions and info)
- Text Customization (tips and tricks)
- Assembly Guides (printable and screen)
- Detailed Print Information (in-depth details)
- Filament Recommendations
- Process Settings
- Adjusting Fit of Parts
- About (design inspiration, commercial licensing, etc.)
1. Special Considerations – please read before printing
- ⚠️ Small parts. Choking hazard. Not A Toy. Not suitable for very young children. This is a tiny trophy with tiny parts. Assembly should be done with adult supervision.
- ⚠️ Textured build plate required when printing this particular kit card. It has ultra skinny sprue connectors due to space limitations. This means they may break off from the card (along with the parts they're attached to ) if due care is not taken during removal from the build plate. Textured plates self-release parts when they cool which is why I recommend them for kit cards.
- ⚠️ Clean build plate required. Small details will get dragged if the plate isn't clean. Print profiles contain settings which will help adhesion but cannot perform miracles 😥. Please see this wiki article➚ for correct plate washing procedure.
- Due to the size of the connectors, the easiest way to remove the parts is to snap them out by hand first, then follow up with flush cutters or small pointed scissors (or nail clippers) to remove any residual flashing.
- Gift card holder “lid” is friction fit and may be a bit stiff to start. I find that it loosens up after the first insertion. If for some reason it's very loose, a bit of tape should keep it from sliding completely out. If it's not sliding all the way home, check the inside corner of the card lip.
2. Gift Card Holder Dimensions
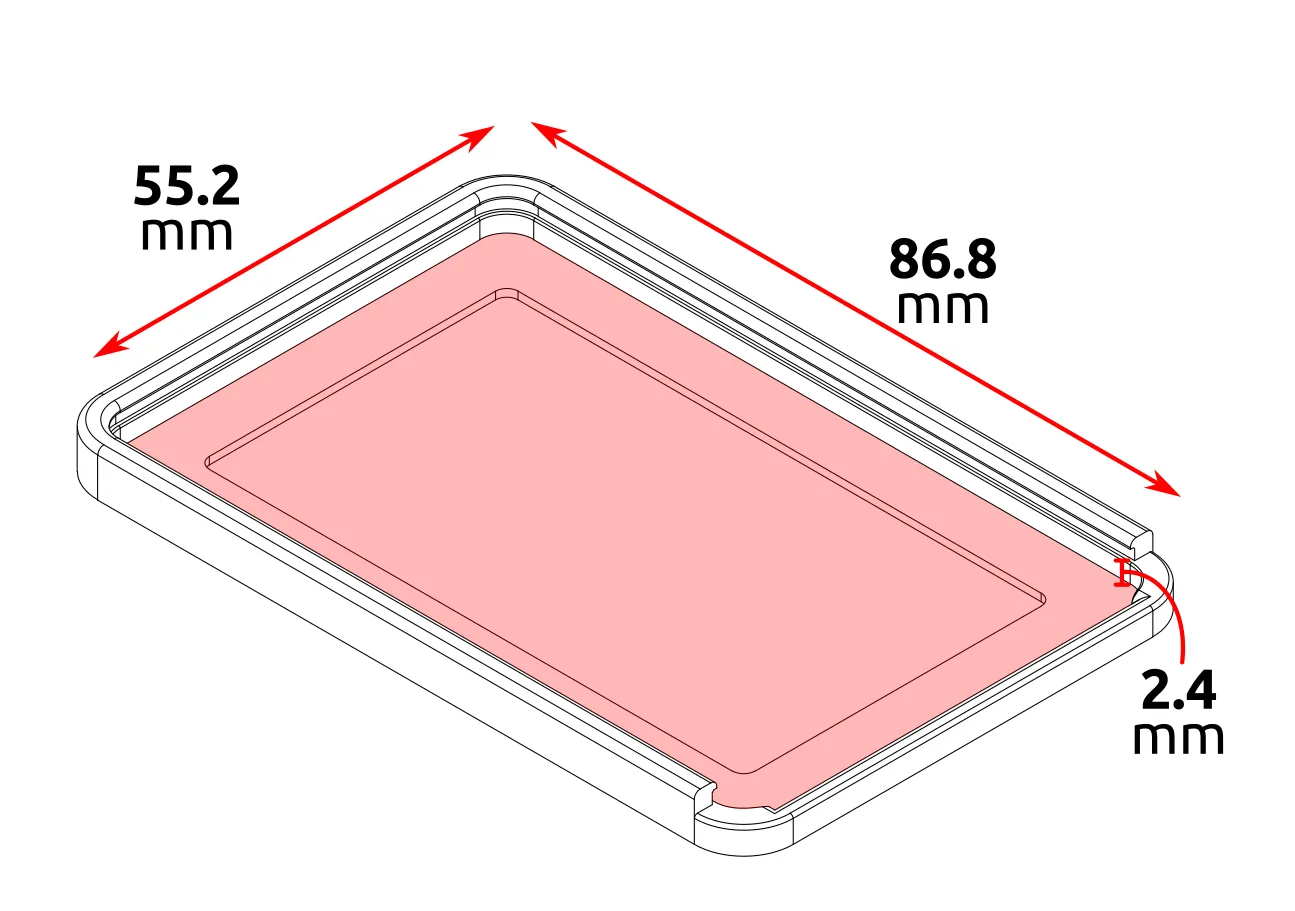
55.2 x 86.8 x 2.4 mm
The inner cavity of the holder is slightly bigger than a standard payment card (as per ISO CR-80 guidelines➚) which should result in a slightly loose fit depending on your printer and the corner radii of the card.
The height from the inside bottom to the underside of the kit card “lid” is 2.4 mm. It is deeper than the card itself so that you can also include a receipt or a small note. I was able to fit the following into one holder:
- a thermal ink receipt folded four times
- a bifold card printed on cardstock
- a gift card
The fit was quite acceptable, if perhaps a little snug.
Note: The back of the card holder has been left open for printability reasons (reduces filament and prevents a particular print defect) and as a sort of frame for any illustrations on the card itself. If for some reason you would prefer a fully enclosed back, please leave a comment below.
3. Text Customization
If you've never customized text before, this video➚ is a good all-round primer on how to do it. The rest of this section will go into recommendations as there's a few things to keep in mind for this particular card.
✏️ Title Text
The font I used for the title text is called Komika Title➚. If you want to use the same font as I did, you will need to download and install it on your own computer. It's available as a free, no-sign-in-required download from dafont.
★ Stars
The stars in the title row are made using a Unicode symbol➚. This means they can be edited and sized like real text. Delete them if you'd like. Add more, take away some, move them around, whatever you'd like!
Note: Studio may flag it as an “unsupported character” but as long as it looks like a star, it should print that way. Verify printability on the Preview tab to be safe.
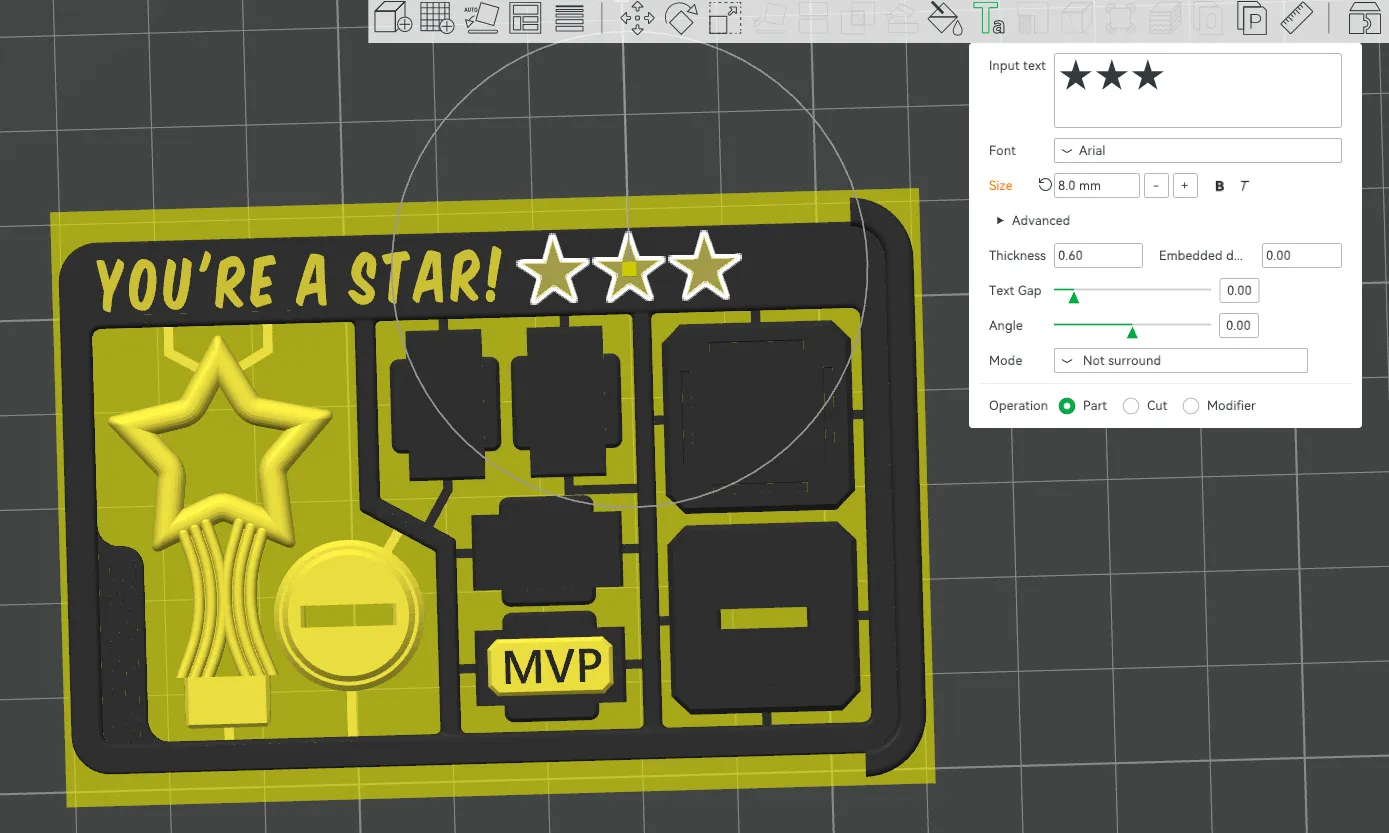
black star, U+2605
🏆 Trophy Plaque
The plaques in my print profiles have been tested and should print well. However, if you would like to change the letters yourself, then please be aware they need a little extra attention to ensure they print okay.
The font I used is called Segoe UI Semibold which comes preinstalled with Windows 10 and 11. If you don't have this font or want to change it to something else, look for a simple sans-serif font with a medium weight (not bold or black) and always double check the Preview screen for printability. In most cases you'll be able to spot problems before you even send it to print.
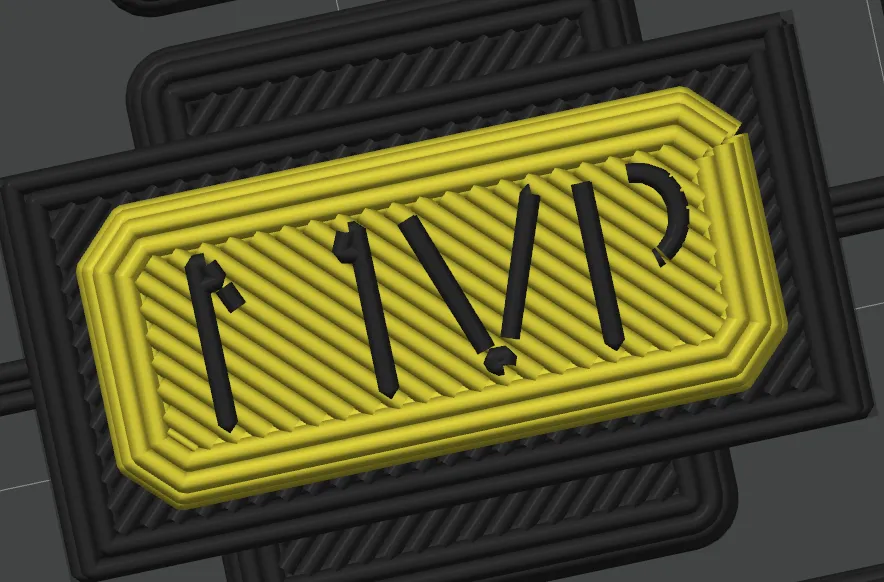 | Segoi UI Lines are smaller than the nozzle width and so it will not print. |
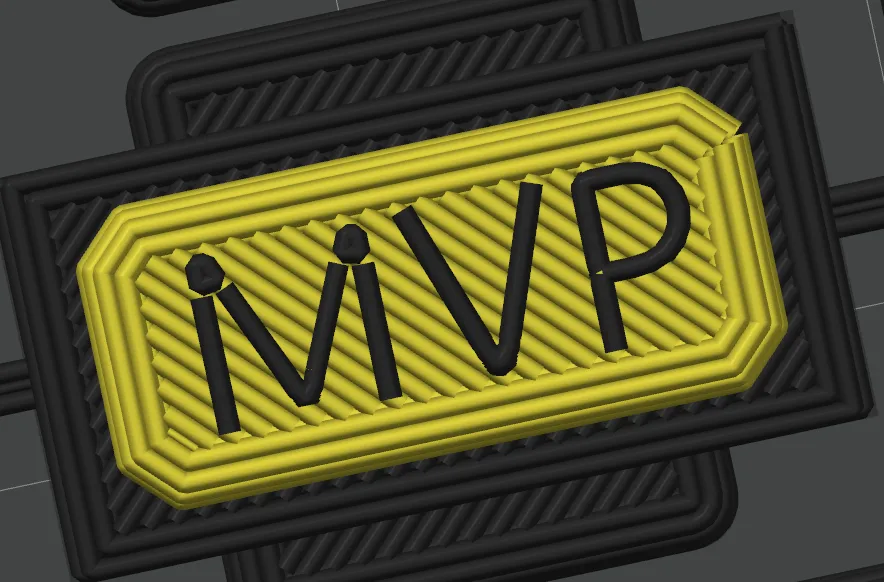 | Segoi UI with “detect thin wall” turned on Better, however the “M” isn't printing with one continuous line which can lead to blobs or strings. Additionally, a one-perimeter wide line may print poorly, looking scant and weak. |
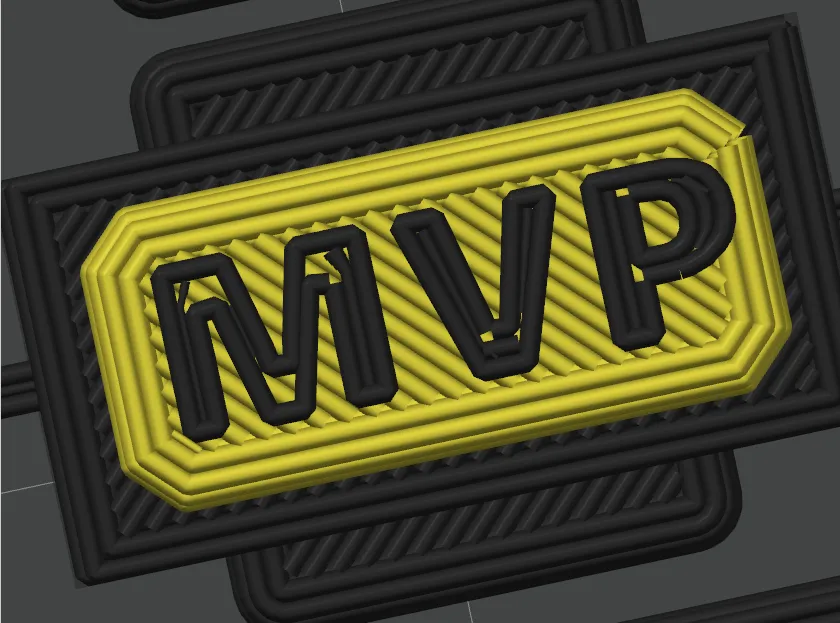 | Segoe UI Black Too many perimeters at this small scale will result in over-extrusion and illegibility. Additionally, the gaps in the “M” are large and may not fill in. |
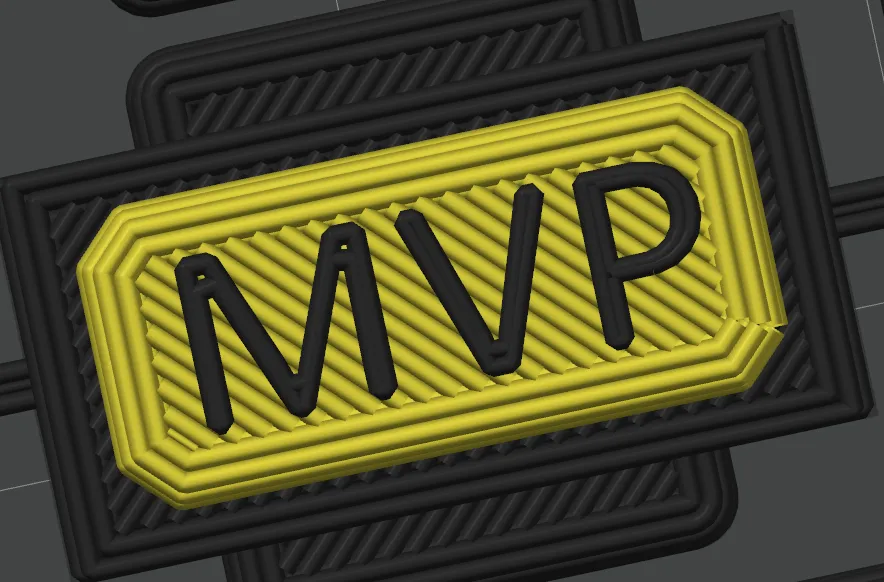 | Segoe UI Semi-bold This will print quite well. It has just the right number of perimeters for legibility without under or over-extrusion. The gaps at the top of the “M” are small enough that they will fill in as part of the printing process. |
⚠️ Note: there is a process setting applied to the text object to reduce flow rate slightly. Testing showed that it produced cleaner and crisper text. If you find that the letters are showing up poorly for your particular printer and filament, you may want to adjust this setting further.
4. Assembly Guides
Printable PDF Cards
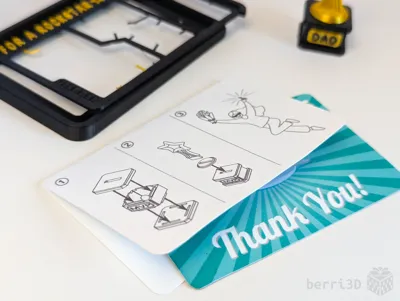
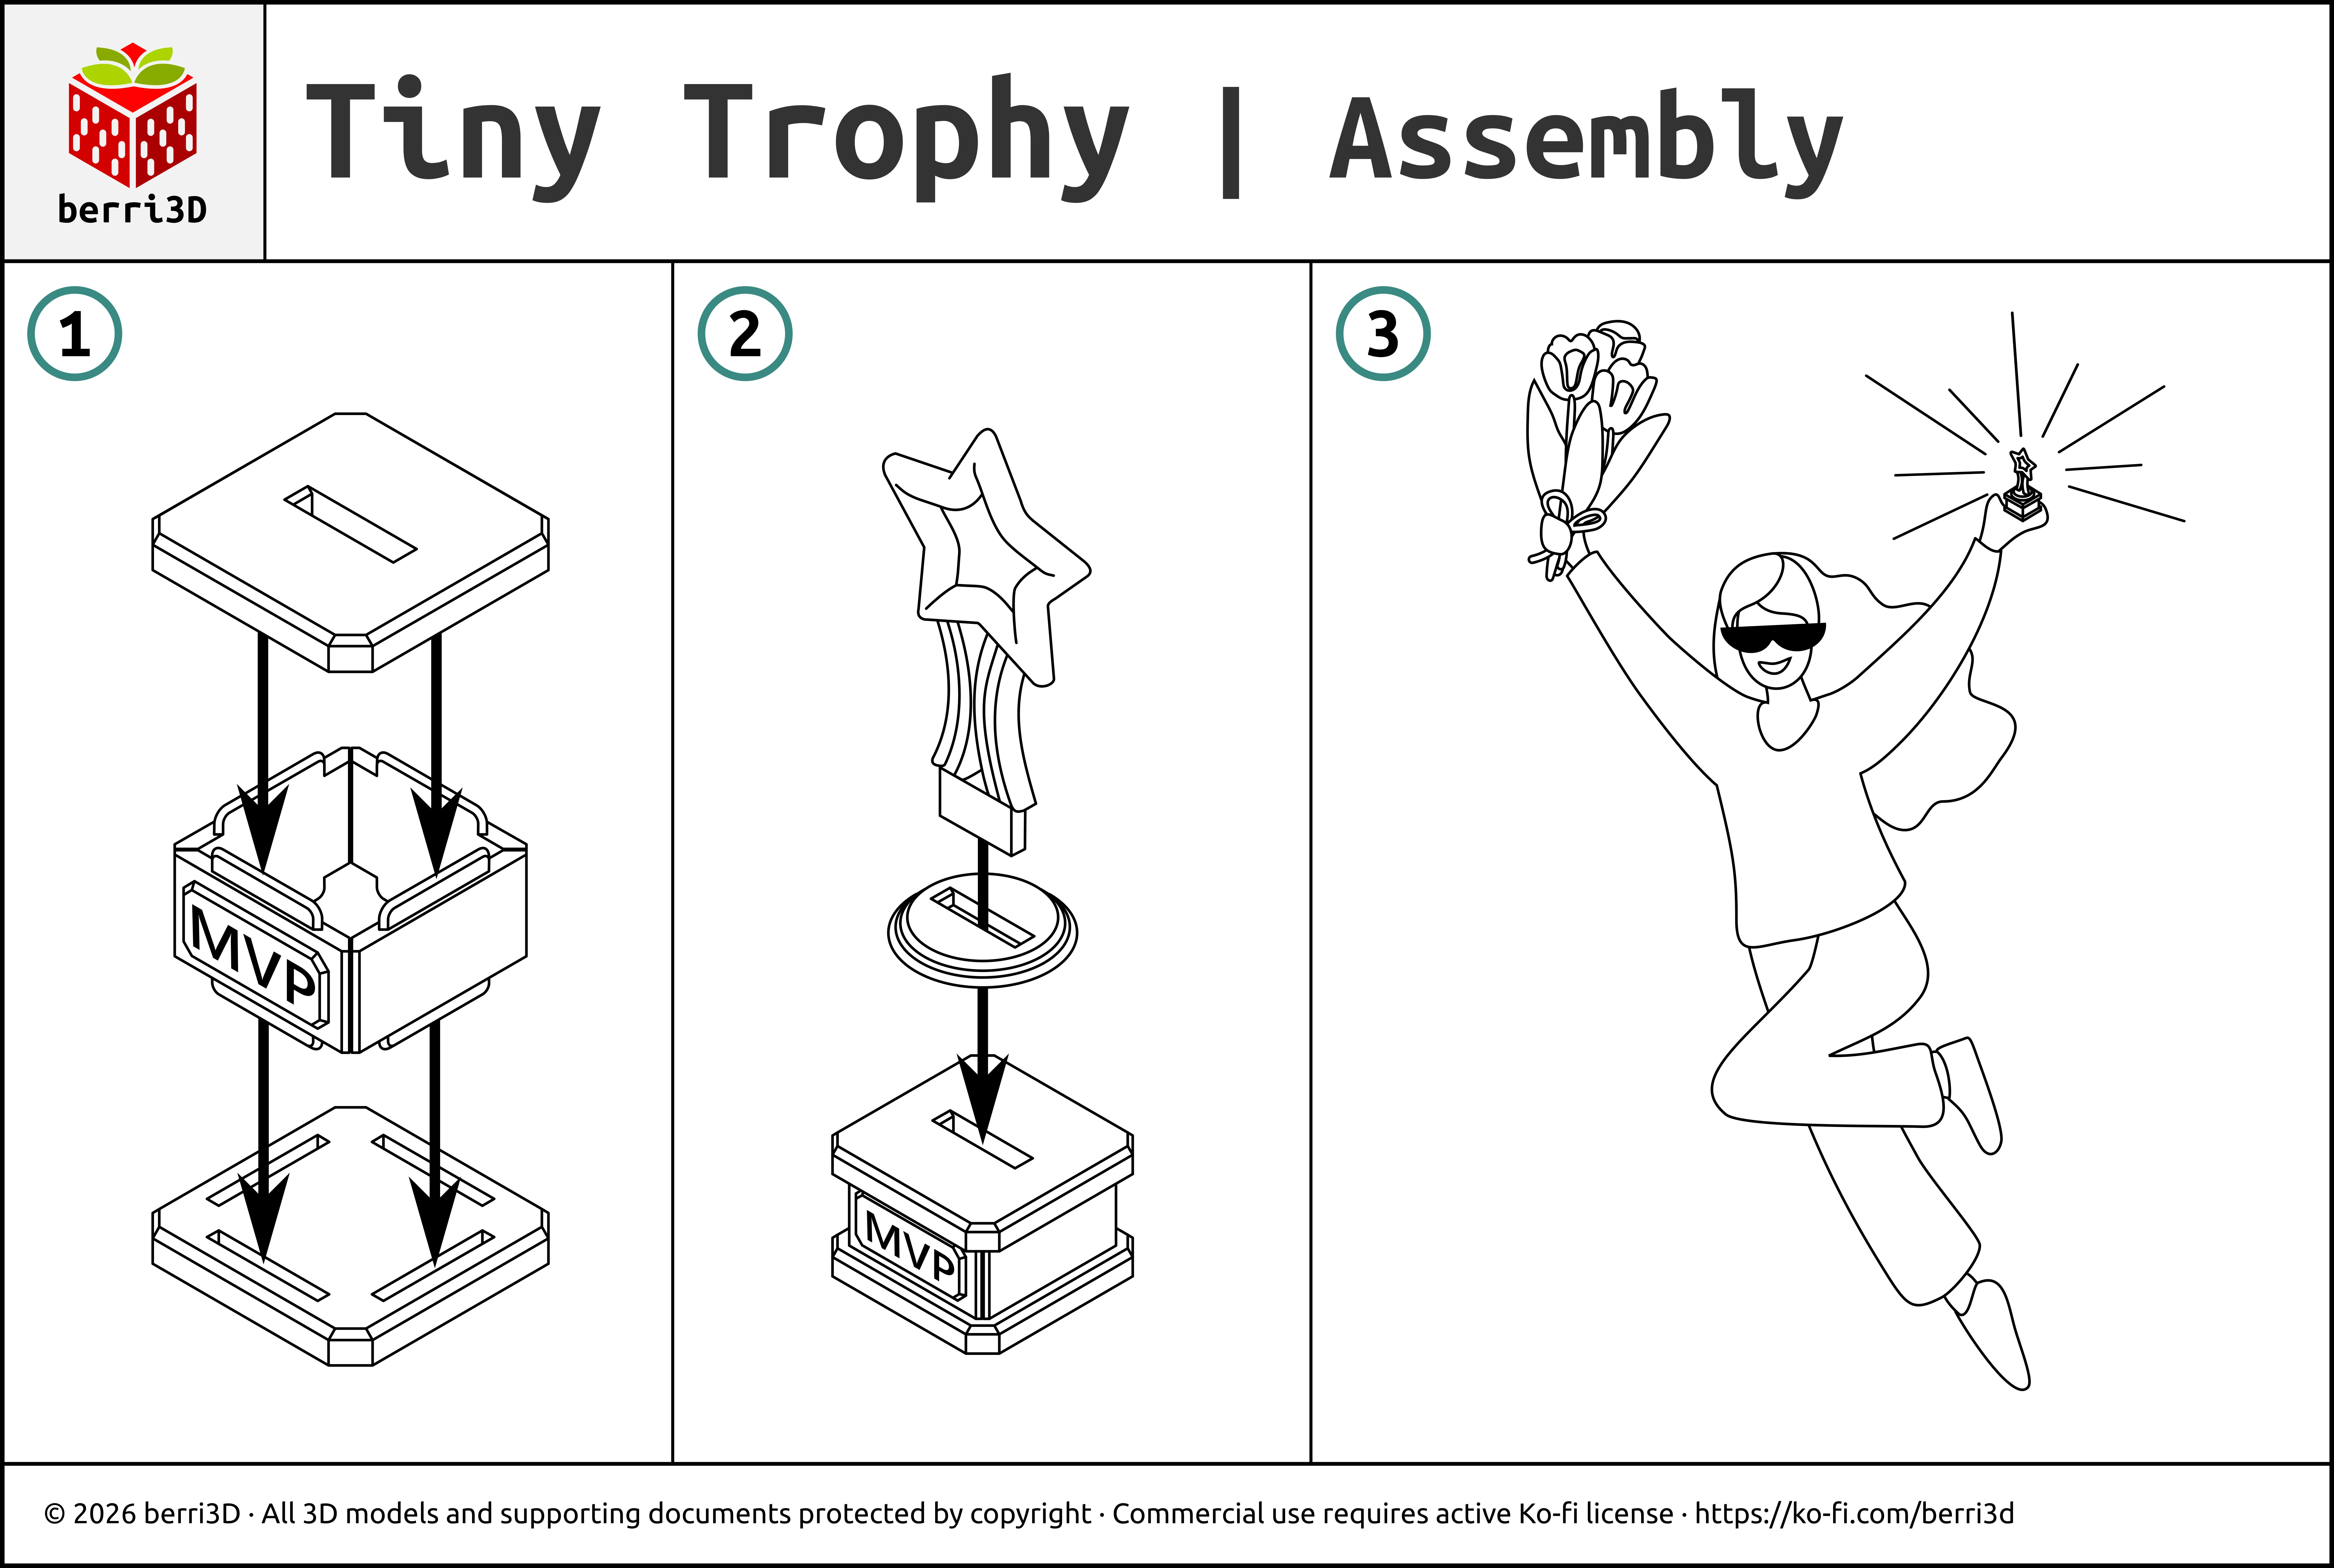
I've created a mini instruction card in two formats: flat or bi-fold. Both fit inside the card holder.
- Flat → good for giving without a gift card, can also be bulk printed (8 to a sheet); write a small note on the back or leave blank.
- Bifold → good for writing a longer personal note, also conceals the back of the gift card in the holder, may be a bit of a tighter fit inside the holder but should still go in.
Find them in the Documentation section below ↓
Image Guide
Want to save paper? Screenshot or download this image instead.
5. Detailed Print Guide
More info than you can shake a stick at. Good for the deep divers; not necessarily necessary for casual printing.
🎨 Suggested Filaments
The models in the photos were printed using Bambu PLA Basic (Black) and CC3D Silk PLA (Glorious Gold).
Test prints were made using the following filaments using default profiles on a Bambu X1C and were found to have a good fit between parts. Your results may differ due to filament colour/type/brand, and printer. Always perform a test print before batch printing.
| Brand | Type | Colour(s) |
|---|---|---|
| Bambu | PLA Basic |
|
| Bambu | PLA Silk+ |
|
| CC3D | PLA Silk |
|
🖨️ Print Process Settings
Models were prototyped on a Bambu X1C with a 0.4mm nozzle. These are the process settings I used and which are contained as part of the print profiles. You're welcome to change them to fit your own preferred settings, though please be aware that changing values may result in parts not fitting.
| Setting | Value | Reason |
|---|---|---|
| Layer height | 0.2 | Part fit and decorative features were designed with this value. Changing may result in poor fit or details not printing correctly. |
| Wall generator | Classic | Prototyped with this generator. Changing to Arachne may make parts not fit. |
| Wall order (first layer modifier only) | outer/inner | Printing the outer wall first gives tiny inner walls something to stick to. Only applied to the first layer as it's inadvisable to use for the entire model. |
| Only one wall on top surfaces | Not Applied | Results in a nicer top surface to the parts. |
| Object flow ratio (Trophy plaque text only) | 0.9 | Reduced flow for these extra tiny letters increases legibility. |
| Sparse infill density/type | 10% / gyroid | As this isn't a weight-bearing model, less infill results in faster printing. |
| Initial layer speed | 20 mm/s | Slower speed allows complicated first layers enough time to cool and adhere. |
| Outer wall speed | 100 mm/s | Slower outer wall speed is better for overhangs and overall surface quality. You can increase this speed but the quality may not be as nice. |
📐 Adjusting Fit of Kit Cards
How well a kit card fits together depends heavily on your machine, filament brand, and filament type/colour. I do my best to make models that assemble smoothly across a range of filaments, but as there are too many variables to account for, tuning by the end user (that's you) may be required.
- Multicolour kit cards → Adjust flow rate➚ up or down.
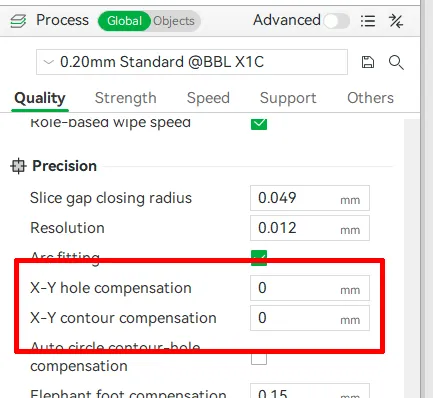
- Separate parts → two methods depending on which part isn't fitting. If everything is too tight, use contour compensation. If one type of part fits but another doesn't, use either:
- Parts that slide together → change X-Y contour compensation➚ by ± 0.03; OR
- Parts that insert into holes → change X-Y hole compensation➚ of the part with the hole by ± 0.03
Note: these values are guidelines only and may need further tweaking.
5. About
Trophies are wonderful things to give and receive. But also they're big. And hard to wrap. And it's awkward pulling one out of your pocket any time you want to thank someone for their time. Plus, you need to plan them in advance to get engraving done.
This tiny trophy kit card is my solution to all these problems. Small, quick to print, and doubles as a gift card holder. Just the thing my eternally last-minute gift giving self needs! Hopefully it will likewise help if you find yourself needing a quick gift that looks like it wasn't bought at the grocery store 10 minutes before-hand. Not that I've ever done that. Much.
🥰 How to Support me
If you appreciate the work I did to bring this model to you, please consider supporting me on Ko-fi. Even a small tip will help offset the cost of prototyping filaments. Alternatively, a like or a boost is another easy way to say “hey, you don't entirely suck.”

⭐ Licensing
If you wish to sell my models, you may purchase licensing rights through my official Ko-fi page.
This model is shared using my own Personal-Use License which supplements (but does not replace) MakerWorld’s Standard Digital License. My license is fundamentally the same (no public remixes, no file sharing, no selling) but includes specific exceptions and allowances not covered by the Standard Digital License.
Licenses offered through third-party websites (e.g. Cubee3D) are not authorized and are not valid.
Boost Me (for free)
🚀= 💪🐹 👍 = 🦵🐹 My models are created on a smoking hot Compy386 powered by Hunrod the Unusually Swole Hamster™. Every boost and like makes Hunrod stronger.
Documentation (2)
License

You shall not share, sub-license, sell, rent, host, transfer, or distribute in any way the digital or 3D printed versions of this object, nor any other derivative work of this object in its digital or physical format (including - but not limited to - remixes of this object, and hosting on other digital platforms). The objects may not be used without permission in any way whatsoever in which you charge money, or collect fees.


Comment & Rating (19)