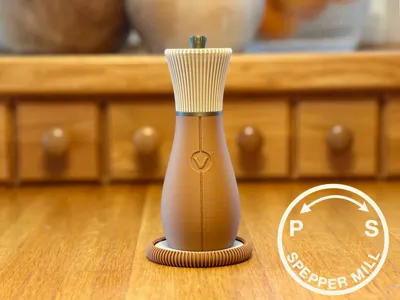
Spepper Mill - Salt and Pepper Mill


Print Profile(4)
![[For PLA Pure filament] 0.2mm layer, 2 walls, 15% infill](https://makerworld.bblmw.com/makerworld/model/US73c4fd33fadc36/822710266/instance/385c563f82f4fe70.png?x-oss-process=image%2Fresize%2Cw_100%2Fformat%2Cwebp)
![[For PLA Pure filament] Funnel for filling](https://makerworld.bblmw.com/makerworld/model/US73c4fd33fadc36/822710946/instance/9d8e0a57c0fca679.jpg?x-oss-process=image%2Fresize%2Cw_100%2Fformat%2Cwebp)
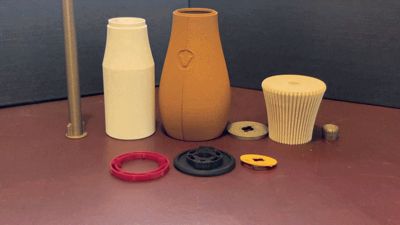
Bill of Materials


Description
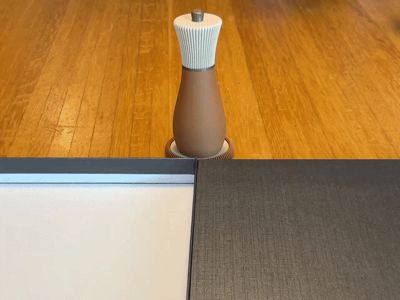
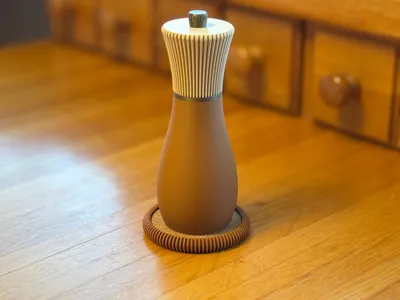
At first glance, this is a clean, minimal pepper mill designed for everyday use. Comfortable grip with smooth rotation and satisfying ratcheting grind.
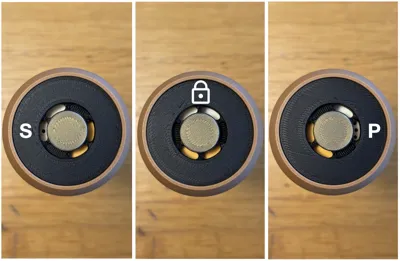
But it has a unique twist. Turn clockwise for salt and counterclockwise for pepper and amaze your guests.
Both seasonings dispense from the same end, keeping the mechanism completely hidden and the experience just a little confusing to watch. There are no visible indicators to give away the trick.
Designed as a functional kitchen tool with a slight bias toward social engineering, the Spepper Mill turns a simple interaction into a fun illusion.
How it works:
At its core, the Spepper Mill combines a salt shaker and a pepper shaker in one body (no actual grinding happens). Twisting one way reveals the opening to one chamber; continued rotation engages a ratcheting mechanism that dispenses the seasoning. A distinct middle point helps you close both openings when not in use.
Design and Safety Considerations:
PLA is widely regarded as a non-toxic material and is commonly used in food packaging and disposable food-contact products. However, most consumer 3D printing processes are not certified for food safety. For the safest operation, use food-contact certified PLA Pure and follow Bambu Lab's processing guidelines.
This design is intended for pre-ground, dry seasonings and functions as a shaker rather than a grinder. Because it does not rely on abrasive grinding surfaces, mechanical wear—and therefore potential particle release—is reduced compared to traditional plastic grinding mechanisms.
The number of parts in direct contact with the seasonings is minimized, allowing you to select safe and easily cleanable materials for those components. External visual parts do not come into contact with the seasonings, enabling the use of materials such as wood-filled filaments without concern for cleaning or contamination.
The opening mechanism is designed to minimize sliding surfaces. Critical sliding interfaces are printed against the build plate to improve surface smoothness and consistency. If seasoning particles enter these interfaces, the geometry directs them outward into a collection gutter, where they can be easily cleaned.
To maintain hygiene, clean the mill and drip tray with warm water and mild detergent. Don't use dishwashers or high temperatures, as PLA can deform under heat.
As with all 3D printed food-contact items, use at your own discretion.
Normal operation: clockwise for salt, counterclockwise for pepper. If unsure, check the number of holes on the bottom—pepper has three. (“PePPer” → three P’s, three holes.)
Tip: If you wish flip the direction for whatever reason (for your preference or as a prank to family members), simply rotate the ratcheting part 180deg at assembly step 1.

Assembly:
- Align the ratcheting spring on the bottom part as shown - one dot towards you and the longer post of the spring to your right.
- Place the sliding panel on the bottom part, protrusions go to their matching holes in the bottom part.
- Install the stacked parts on the central shaft.
- Place the container on the shaft, align it with the posts on the ratcheting spring.
- Place the base of the body over the container.
- Place the lid on the container (don't fill the container just yet)
- Place the cap on the shaft.
- Screw on the locking nut - light tightening is enough.

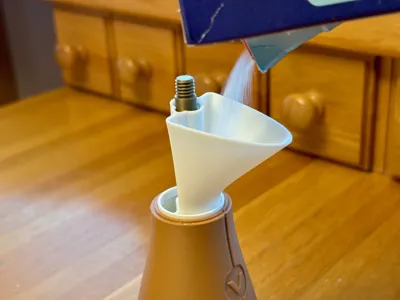
Filling:
To fill the Spepper Mill, remove the locking nut, the cap and the lid of the container.
Prepare your two seasoning, e.g. medium ground salt and pepper from a grinder. Ensure that the particles fit through the openings on the bottom of the container. If needed, you can slightly increase the size of the holes by drilling. By default, the “portioning” is moderate by design.
The two compartments are marked on the inner wall with one and three dots for identification. Use the included printed funnel to fill each chamber with the desired seasoning.

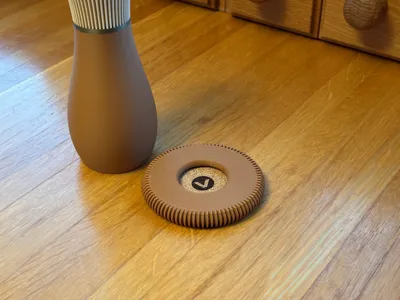
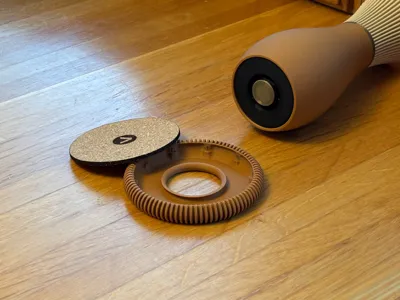
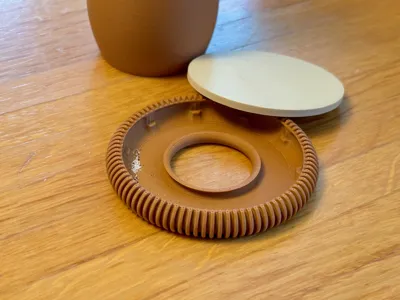
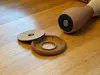
Catch Tray:
You can print the dedicated catch tray to go with Spepper Mill. It features a clever container that's hidden under the snap on cover plate for easy cleaning. Optionally, this cover plate can be cut from 2-3mm cork or wood using the linked Laser & Cut model.

Boost Me (for free)
If you like this model, please check out my other designs and consider leaving a boost. Each one is appreciated! Cheers!
Check out my other models too such as this:


License
You shall not share, sub-license, sell, rent, host, transfer, or distribute in any way the digital or 3D printed versions of this object, nor any other derivative work of this object in its digital or physical format (including - but not limited to - remixes of this object, and hosting on other digital platforms). The objects may not be used without permission in any way whatsoever in which you charge money, or collect fees.
Comment & Rating (80)