
Easy Print Super Strong Hook - Single Piece - No Screws - No Supports - HSW Honeycomb Storage Wall


Print Profile(3)


![[ABS] HSW Ez-V2 Hook 60mm 0.2mm layer, 2 walls, 30% infill](https://makerworld.bblmw.com/makerworld/model/US1b51818f2cca81/47858352/instance/2023-09-26_d828201191c41.jpg?x-oss-process=image%2Fresize%2Cw_100%2Fformat%2Cwebp)

Description
Update 17/09/2023
- Added “HSW Ez-V1 Round Object Holder - 65mm Left”
Update 29/04/2023
- Added “Ez-V1” and “Ez-V2" hooks (14 files) which supersedes all other versions. These have been completely remodeled for improved strength, easier bed adhesion for ABS/ASA, more secure fit with easier clipping, less side-to-side movement when installed and a cleaner look.
- Added 2 base clips for remixing.
Update 24/04/2023
- HSW Simple Hook 50mm Type 1 v1.1 added - stronger vertical section
- 3 “Ez” hooks added for easier install - these work better for PLA wall pieces, and the firm ones work better for PETG wall pieces.
---
I wasn't happy with the current hook designs as the layer direction was always sub-optimal, seemed wasteful and they do not hook on securely. Here are some easy print strong designs. No screws or supports needed and no need to print separate pieces to be able to mount them.
You will need good first layer adhesion - clean your build plate and get your first layer squish right or use a brim if you are using a warp-y material.
Print setting recommendations:
Material: PLA, PETG, ABS, ASA (PETG hooks will be a little less secure due to the reduced stiffness)Temperature: print on the hotter end of your material's temp range, the overhangs are 45 deg at most so it should print fine0.4mm nozzle, 0.25mm all layer heights2 walls, 30% grid infillIf you have issues with fitment, you can try scaling it in only the "vertical" direction by adding or removing 1% or 2% (vertical direction when installed, not when lying flat) to give the detents more or less bite. Alternatively, try printing outer walls first for better dimensional accuracy.
Installation and removal:
Install like a pegboard hook - get the top in first, then the bottom.Remove by pushing up on the hook.
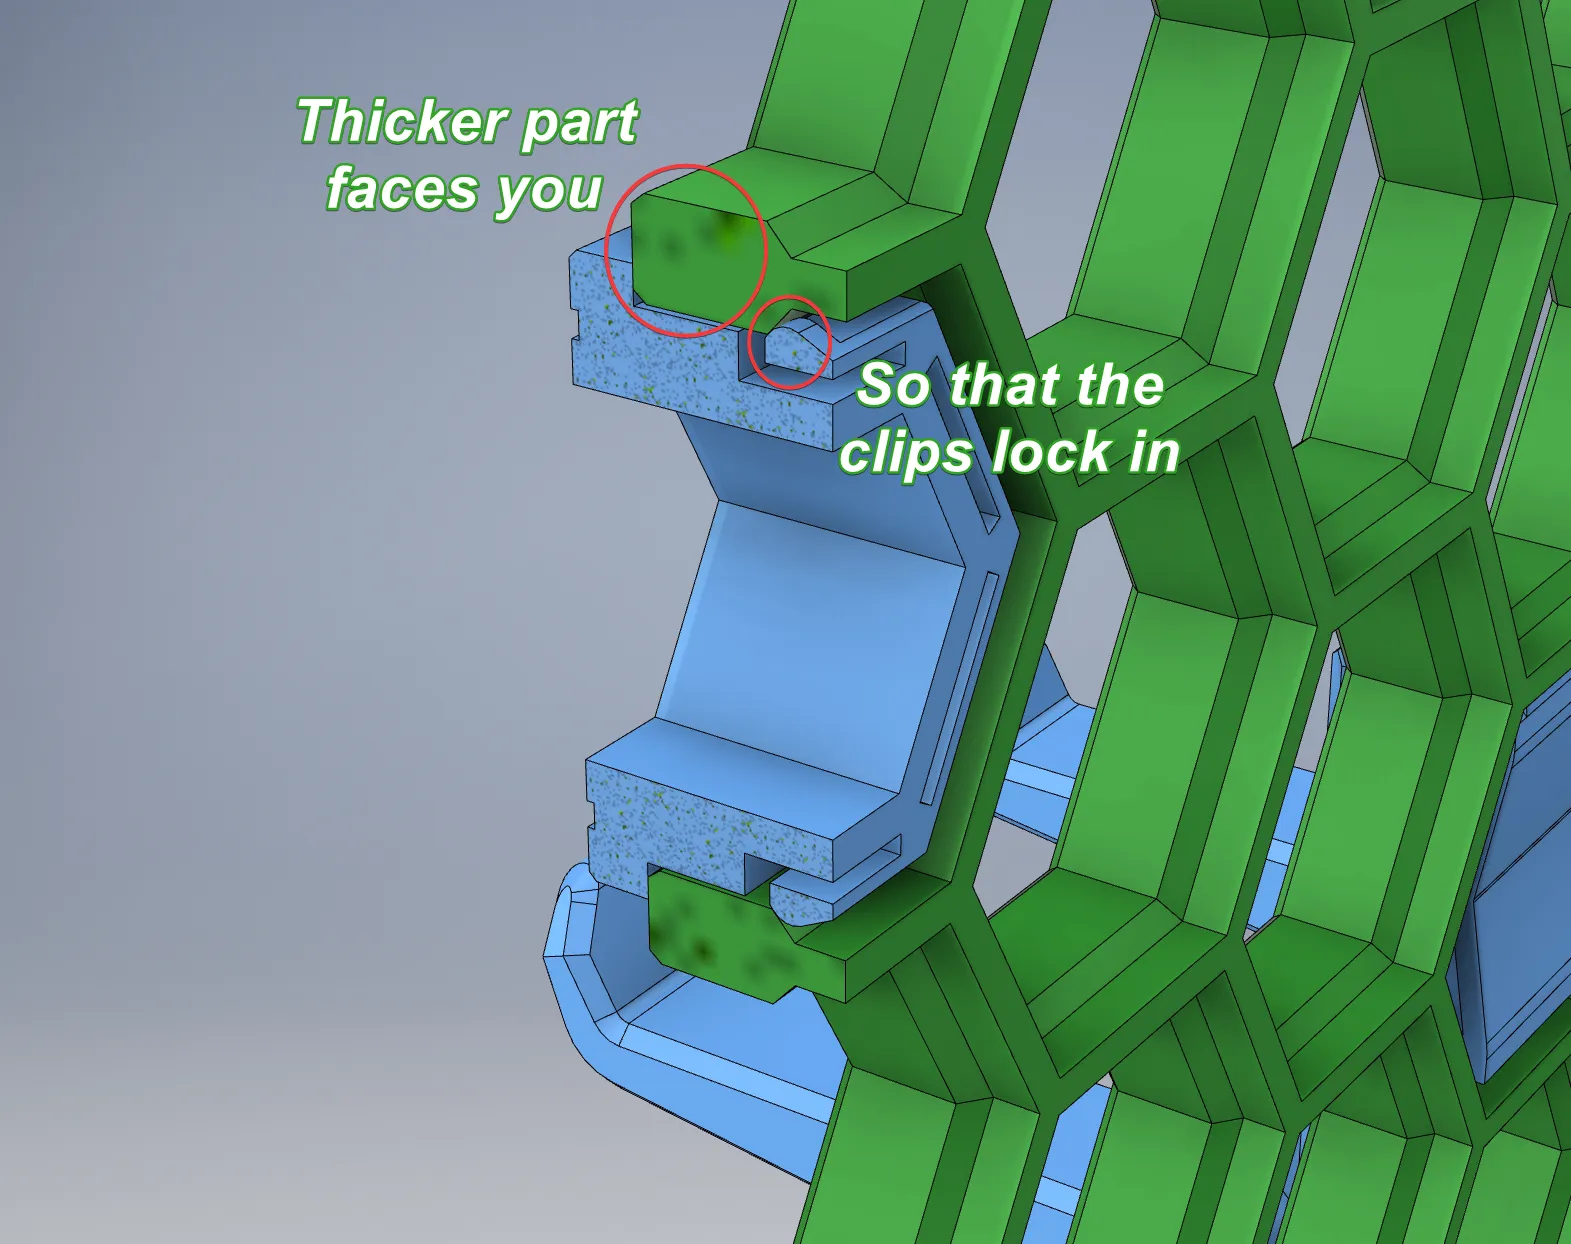
Make sure you install your Honeycomb the right way around! It seems to be a very common mistake. The thicker part of the honeycomb faces YOU. These hooks will not fit properly if you have your honeycomb the wrong way around. I made a diagram to clarify:
Check out this collection for my other Honeycomb Storage Wall models and
check out this collection for my Gridfinity models.
To support me, simply share my models :)
This remix is based on
License



Comment & Rating (327)