


Print Profile(2)
Bill of Materials


Description
Membership
Do you want to sell 3D prints of my models? Commercial License Membership is now available!
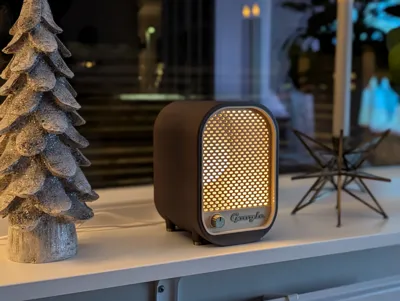
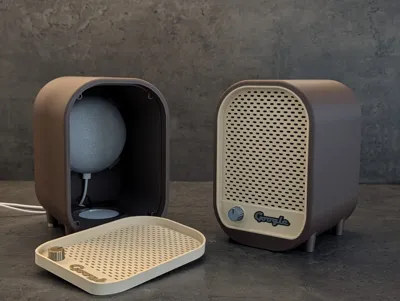
Mid-Century Modern Smart Radio: The Glowing Booknook

Bring a touch of 1950s nostalgia to your bookshelf.
This model transforms the Google Nest Mini or Alexa Echo Dot* into a classic mid-century tabletop radio, designed specifically to sit snugly between your favorite books or game boxes.
By integrating the Bambu LED Lamp Kit (MH001), it serves as a warm, glowing accent light that breathes life into your shelf. Whether you’re listening to an audiobook or just want that retro "radio glow" while you read, this functional booknook is the perfect bridge between vintage style and modern smart home convenience.
*Hughe thank you to Billsboy75 for helping out with the Alexa adaption!

Key Features:
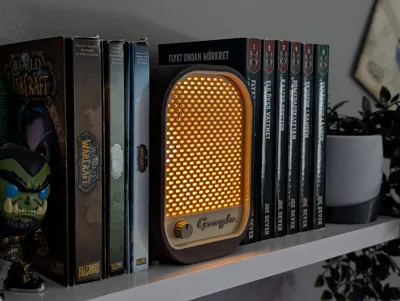
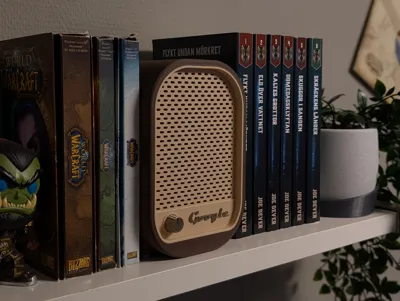
- Book Nook Friendly: Sized to fit snugly on a bookshelf.
- Perfect Fit:
- Custom snap-mount for the Google Nest Mini (2nd Gen) and the older Google Home Mini.
- Custom snap-mount for the Alexa Echo Dot 3rd generation, and a cradle for the Alexa Echo Dot 4th and 5th generation.
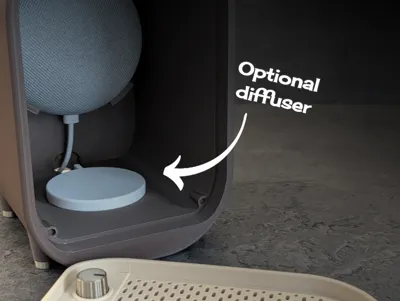
- Ambient Glow: Dedicated slot for the MH001 LED Lamp Kit to light up the grille. A LED Diffuser is included to dim the light a bit if prefered.
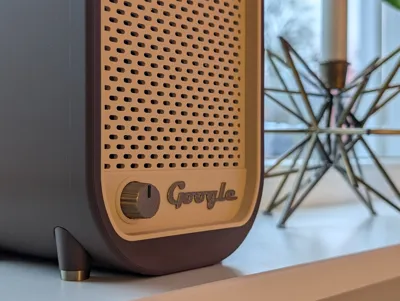
- MCM Styling: Features a classic two-tone aesthetic with a tactile-look tuning knob and authentic retro typography.
Acoustic Friendly: The perforated grille ensures sound quality remains crisp and clear.
🖨️ Print Settings & Customization
- Supports: No support is needed.
- Ironing (Optional): For an extra smooth, high-quality finish, consider enabling ironing on the top-most surface of the main radio body.
AMS(Optional): Enchance the details with either AMS (enabled in the profile) or filament swap at certain layers, se table below:
Part Pause and change between layer Knob Layer 62-63 Dual Google text Layer 3-4 Legs Layer 25-26 (This is only a preference) Custom Text: If you prefer custom text instead of the "Google" logo, use the text tool to add your own text.
For the authentic retro look, use the "Magneto" font, which is often included by default in Windows and is available in the slicer's font list.

🛠️ Assembly Guide & BOM
This model is designed for a mostly tool-less, "snap-fit" assembly. Follow these steps to get your retro radio glowing and playing music!
Bill of Materials (BOM):
- 8x (4x2 mm) Neodymium magnets.
- Google Nest Mini or Google Home Mini.
- Bambu LED Lamp Kit MH001.
- Glue
Step 1: The Magnetic Faceplate Install the 4x2 mm magnets into the circular recesses.
- Insert 4 magnets into the main radio body.
- Insert 4 magnets into the back of the front faceplate.
- 💡 Pro Tip: Ensure your polarity is correct before pressing them in, as they can be difficult to remove without damaging the part.
Step 2: Legs
- Mount the legs. There is a guide pin on the legs to prevent misalignment and wrong orientation. Use glue if needed.

Step 3: Lighting the Grille
- Take the LED Lamp Kit (MH001) and pull the USB cable through the front opening of the radio body so it exits out the back.
- Once the cable is through, press the LED board into its dedicated cavity behind the grille area.
Step 4: Install the Google Nest Mini and Echo Dot
- Route the power cable through the back of the radio.
- Plug the cable into your Google Nest Mini.
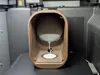
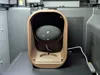
- Press the speaker into the internal snap-mount. It is designed to hold the speaker securely without muffling the sound.
- For the 4th and 5th generation Echo Dot pull the wire through the hole in the cradle, connect it and then place the Dot in the cradle with the connector facing down.
Step 5: The Tuning Knob
- Take the Knob Clip and insert it through the hole from the back of the faceplate.
- Align the Knob on the front and push them together until they click. The knob should now be held firmly in place but still look like a realistic dial.

Step 6: Add cover
- Align cables from the speaker and light and push on the cover.

Boost Me (for free)
If you like my work, please consider giving me a boost!
License
You shall not share, sub-license, sell, rent, host, transfer, or distribute in any way the digital or 3D printed versions of this object, nor any other derivative work of this object in its digital or physical format (including - but not limited to - remixes of this object, and hosting on other digital platforms). The objects may not be used without permission in any way whatsoever in which you charge money, or collect fees.
Comment & Rating (346)