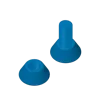
The Respool Tool (Respooler Drill Attachment)


Print Profile(11)


Description
I recently upgraded and bought my second printer (Bambu Lab X1C) and not only am I finding that I want to do prints on each printer with the same filament but some of my spools don't fit the AMS system.
A lot of the existing respooler tools I found online were convoluted and required many parts and their own setup space. I wanted something that was quick, simple, and didn't take up space.
This tool requires a 3/8" (9.5mm) Socket adaptor drill bit to simply plug into the end of the respooler, pull the trigger, and bam! Respooled.
Just make sure that you set the drill to speed 1, and torque 6. Anything higher will risk the kickback destroying the print. Here is an example bit that should work :)
DO NOT RECCOMEND using on anything greater than a 1kg spool with provided settings, really beef up the perimeters and infill of the whole thing if you do want to try!
Edit:
Thanks Uncle Jessy for the feature in your Sunlu Filament Connector Video! Very Much Appreciated :)
If you like what I'm doing and want to help me keep doing it feel free to Buy me a Nozzle :)
Hardware Requirements:
Print Instructions:
- Any Layer Height
- 15-20% Infill
- Some strength is needed
- Add modifier around drill bit hole to make 5 perimeters
- 2 Perimeters will lead to the kickback breaking the print
The 3mf file provided includes the required modifier!
Happy Respooling!
License
You shall not share, sub-license, sell, rent, host, transfer, or distribute in any way the digital or 3D printed versions of this object, nor any other derivative work of this object in its digital or physical format (including - but not limited to - remixes of this object, and hosting on other digital platforms). The objects may not be used without permission in any way whatsoever in which you charge money, or collect fees.
Comment & Rating (2302)