Functional Vertical Milling Machine

Copyright Claim

Functional Vertical Milling Machine

Boost
1170
1686
59

Print Profile(3)

All
P1S
P1P
X1
X1 Carbon
X1E
A1

0.2mm layer, 2 walls, 15% infill
Designer
76.7 h
3 plates
5.0(2)

PLA-CF, Heavy, 100% infill, 0.2mm layer, 3 walls
235.7 h
3 plates

PLA-CF, 0.2mm layer, 3 walls, 15% infill
90.6 h
3 plates

Boost
1170
1686
59
29
2.7 k
113
Released

Description

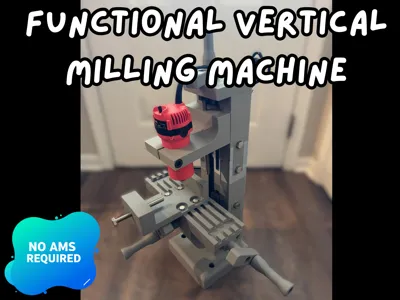
Functional 3D Printed Mill


Purchased components are listed below, these are McMaster-Carr part numbers with the exception of the router which I purchased on Amazon. You could definitely source cheaper hardware, but the bolts that are labeled (Fully Threaded) need to be. The router is just a cheap one so you may want a better router, or already have one. I included a step file of that part so that you can modify to fit another router.


When assembling I would recommend tapping the ½-13 holes if you have a tap, I was able to assemble without it, but it took some working back and forth to make it smooth, and WD-40 can help as well. The second one I built I tapped the holes after printing and it made it a lot easier.


½-13 Hex Head Bolts


(2) 92800A407 - 10” Long (Fully Threaded)

(10) 92240A715 - 1-1/2” Long (Comes in 10 pack)

(1) 92800A408 - 12” Long (Fully Threaded)

(1) 92240A740 - 8” Long (Fully Threaded)

(1) 92240A728 - 4” Long (Fully Threaded)

(4) 92240A710 – ¾” Long (Comes in 10 pack)


3/8-16 Hex Head Bolts


(4) 92240A622 – ¾” Long (Comes in 25 pack)


1/2-13 Socket Head Cap Screw


(1) 91251A722 - 2-1/2” Long (Comes in 10 pack)


Set Screw Shaft Collar


(3) 9414T11


Router

https://www.amazon.com/dp/B094VSC1GT?ref=ppx_yo2ov_dt_b_product_details&th=1

Comment & Rating (59)

Please fill in your opinion
(0/5000)

Used ASA that was quite possible moisture damaged. I printed at 50% and at first glance it seems to be a possible game changer. I will not use it for a router instead I am looking at creating a insert press and Dremel drill. It takes a LOAD of filament even at 50% but I see this really taking off. Thanks for sharing. I will make a couple of changes and test them before I comment further but great start AWESOME! Can't currently give 5 stars but this is worth a 5 star review for sure. edit: Printed at 0.12 High Quality for tolerances and many hours later works a treat
(Edited)
The designer has replied
23
Reply
Following you now. I’m curious to see what you do with it!
2
Reply
Thank you very much for the feedback, I’m glad to hear that it turned out great for you. My dad is loving the prototype we gave him and I’m working on building mine now.
0
Reply
dont forget, walls add more strength than infill. so u can lower the infil to around 20% gyroid and up walls to 6 and itle be very strong.
7
Reply
首先感谢作者发布如此高质量的作品,接下来我谈一下打印和组装的一些问题. 1.我使用了0.8mm的喷嘴层高设置的是0.4mm我感觉这样打印会结实一点,我用了将近4kg耗材(还不包括期间由于打印失败浪费的2kg耗材). 2.关于螺丝怎样去确定尺寸,作者提到了一个品牌“McMaster-Carr“大家可以去这家公司的官网输入对应的型号来确认每一个螺丝的尺寸,然后可以在国内购买,有4只长螺丝不好购买我选择了购买英制的丝杆和螺母,裁切后自己制作.注意需要在螺母上开小孔后攻丝拧入定位小螺栓(参考图二). 3.关于修边机,我家里刚好有worx的无刷锂电款没有电线的限制你可以在更大范围来使用. 4.我觉得作者可能忘记上传了一个夹具的配件,摇把和链接转块也少了一套应该是4套
(Edited)
13
Reply
For those who do not read Chinese nor wish to be bothered to translate it: "First of all, I would like to thank the author for publishing such a high-quality work. Next, I will talk about some issues about printing and assembly. 1. I used a nozzle layer height of 0.8mm and set the layer height to 0.4mm. I feel that the printing will be stronger this way. I used nearly 4kg of filament (not including the 2kg of filament wasted due to printing failure during the period). 2. Regarding how to determine the size of screws, the author mentioned a brand "McMaster-Carr". You can go to the company's official website and enter the corresponding model number to confirm the size of each screw. Then you can buy it in China. There are 4 long screws. It was not easy to buy, so I chose to buy inch screws and nuts, cut them and make them myself. Note that you need to drill a small hole in the nut and then tap and screw in the small positioning bolt (refer to Figure 2). 3. Regarding the edge trimmer, I happen to have a worx brushless lithium battery model at home. It has no wire restrictions and can be used in a wider range. 4. I think the author may have forgotten to upload the accessories of a clamp. There is also one missing set of tremolo and link turning blocks. There should be 4 sets." - @user_2527737234
11
Reply
Print Profile
0.2mm layer, 2 walls, 15% infill
slow and steady with PETG and it worked fantastic
3
Reply
it would be nice if you could upload a youtube video for assembly instructions
The designer has replied
4
Reply
I can definitely do that, I’m waiting on the components to come in for the one I’m building now and I will make a video. Thanks for the suggestion.
15
Reply
Replying to @Carman3D :
Looking forward to that!!!!!
0
Reply
I added a tool/bit holder attachment that can be found in my uploads. It doesn't require any change to the mill, you can just remove one of the connector blocks that hold the mill together and replace it with with the new part and use the same bolts to attach it. Thanks for all the great feedback and support this has received.
5
Reply
Does anyone have a YouTube or other video of this working with the router working on parts? Would love to see this in action!
5
Reply
Any update on the assembly guide @Carman3D I just got all my parts and have it half assembled but am a bit confused when going to assemble the carriages
The designer has replied
1
Reply
Hey, I'm sorry I just saw this. I have one mostly assembled at home, I can send you a few pictures tonight showing how it goes together.
2
Reply
Replying to @Carman3D :
I would love that! please do!
1
Reply
Replying to @Dutyg2069 :
Here I hope this helps, if you need any others let me know.
0
Reply
I've been waiting for this! Very excited to build it! Do you have a discord or some kind of community related to this project? I'd love to be part and wath this grow!
The designer has replied
3
Reply
Thank you, it’s been really nice to hear the excitement behind this, We do not currently have a discord for this but that is a great idea, I’d love to see what people are able to do with this and hear any ideas for improvements. It’s been a really fun project for us. Thanks again!
0
Reply
How much filament is needed?
The designer has replied
1
Reply
Depends, but about $100-$140 Quick breakdown. Loose estimates from being bored super late at night. It says it needs 3098g. So about 3.1 rolls of filament assuming no print errors or mistakes, which comes out to 54-80$ of filament depending on where you get it from and what type you use. The cost of electricity for 80hrs@100w where I am is relatively cheap so that comes out to 2-4$. Then the hardware (bolts), just an off the cuff guess at 10-15c per bolt and there are 25 of them. So about 3-5$ with tax. Though if you're building one of these you'd probably have many of these on hand. Conversely you could buy variety packs on Amazon for 5-10$ The router listed is ~40$ + tax and maybe shipping. All in all it's about $100-140 in cost to make. Which isn't bad considering that the cheaper vert mills ice seen normally run you $800+, though the used market and Dremel vertical stands exist. If you have a lot of the parts on hand and you want to convert a tool, it's not a bad idea. Just can't speak to the quality as I've not built it
14
Reply
Replying to @vetrex :
Wow, thank you for figuring all of that out and answering! Very good information.
3
Reply
all the parts on McMaster Carr were about $75. The tap (optional) itself is another $60.
0
Reply
Whats the difference between the two printables one says designer and then theres another one also maybe what were the optimal settings used hope this reaches the community well also maybe the type of fillament used i would love to make one real soon
The designer has replied
2
Reply
Hello, those are different print profiles, I uploaded the one that says designer and someone else uploaded one that has more walls. Should be a lot stronger, but also takes longer to print and more material. If you have the material and time, then I would go with that one. As for material, I have only used PLA making these so far. Thanks
1
Reply