Bastion from ARC Raiders


Print Profile(3)


Description
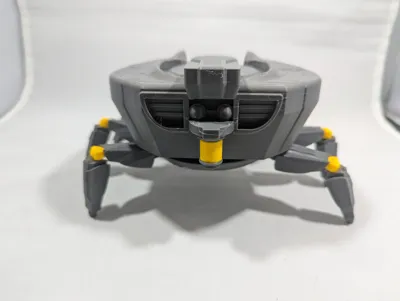
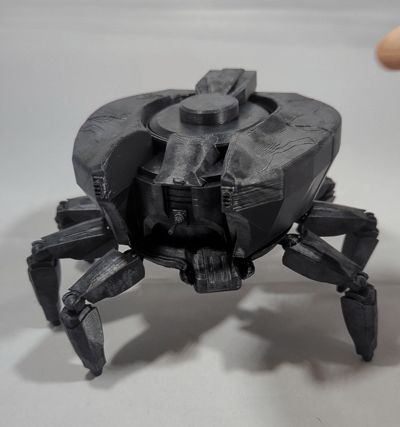
This model is a recreation of one of the ARC enemies: the Bastion. An enemy in the game “ARC Raiders” that our family is playing.
The Bastion is my husbands and sons favorite enemy.
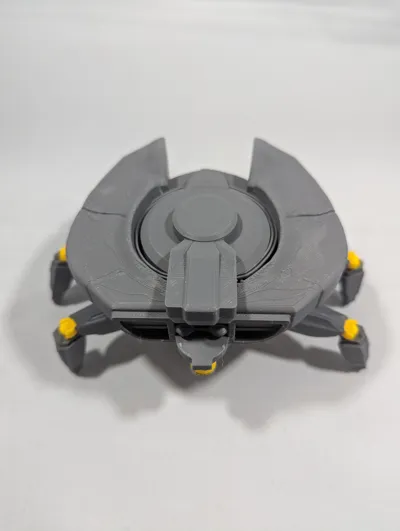
It is a big armored robotic emeny with a mean minigun, BUT he also has a little yellow canister at the back of his body that is his weak spot.
When in a team off two, one raider distracts, while the other shoots his weak spot on the back.
One problem though… The Bastion can rotate his top body to quickly change directions. So you're never really safe.
Therefor, so can this design. Not only are the legs posable, to put in a position you chose. But you can also rotate the head.
When assembled it is about 9 cm high and 13 cm wide.
Fan of ARC Raiders? Check out this collection.
Print profile options
There are 3 different print profiles:
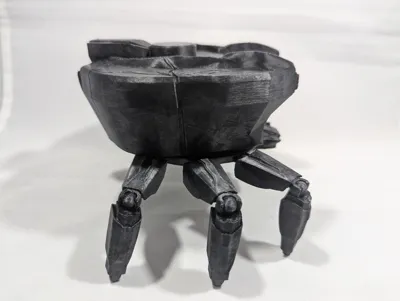
- Single color (I advise black or dark gray, with a quick silver drybrush it gives a great effect).
- Full color: the joints and canister on the back are colored yellow, just like in the game.
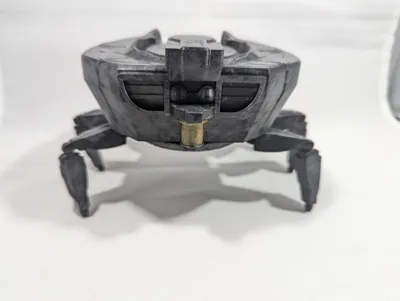
- AMS friendly: the canister on the back is printed seperatly, so when glued together, the entire Bastion is single color, except his little weak spot on the back for a nice touch of color.
Prep
Dry your filament. I have prototyped this design with filament that was bit older (and had a humidity of 50%) and the joints just snapped. When drying the filament it printed and assembled perfectly every single time.
If you want sturdyer joints: scale up the bottom and top legs to 105% - I've tested it and the body can hold it.
Not using the print profiles? Add additional supports on the bottom legs. When print testing I found them falling over sometimes when printing in 2 colors. The additional support on the bottom helps the part stand up straight trough the full printing process.

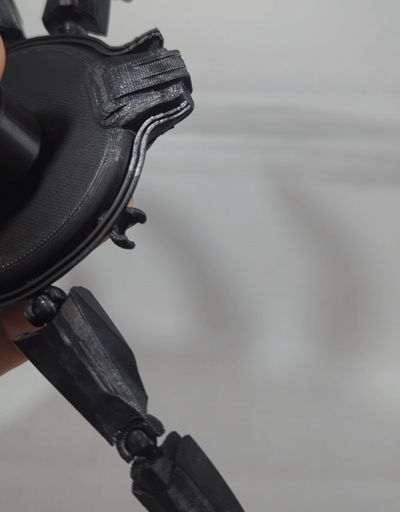
Remove the supports on all parts. Make sure to cut the support around the turret befor you pull. It is a sturdy turret, but still, it's a little piece of plastic sticking out.

Assembly
After printing all the parts, assemble all the legs by clicking them together, making sure the flat face of the ball faces the pin-part of the other joint:

To clarify, a picture of the same system used in the Leaper design:

Click all the legs in the bottom body part, using the same system:

Click the top en bottom body parts together (clicking is a big word, it jus slides over it), make sure the legs are facing down so you don't bash the head against the legs:

After that: all done!

Edit 27th of february: when upscaling the model the cylinder on the bottom part was slightly elevated. Fixed this by putting the cylinder further down in the bottom base. You can safely make mega-bastions now 🤣
Boost Me (for free)
Spread some Makerworld magic — boost what you love! ❤️
Membership
Interested in selling our original designs? Join our commercial membership!
License
You shall not share, sub-license, sell, rent, host, transfer, or distribute in any way the digital or 3D printed versions of this object, nor any other derivative work of this object in its digital or physical format (including - but not limited to - remixes of this object, and hosting on other digital platforms). The objects may not be used without permission in any way whatsoever in which you charge money, or collect fees.
Comment & Rating (415)