Adjustable power strip clamp mount
Remixed by
Boost
7
25
1


Print Profile(2)

0.16 mm layer, 2 walls, 15% infill
Designer
2 h
1 plate

0.16mm layer, 6 walls, 25% infill
6.8 h
1 plate
Open in Bambu Studio
Boost
7
25
1
2
40
21
Released
Description
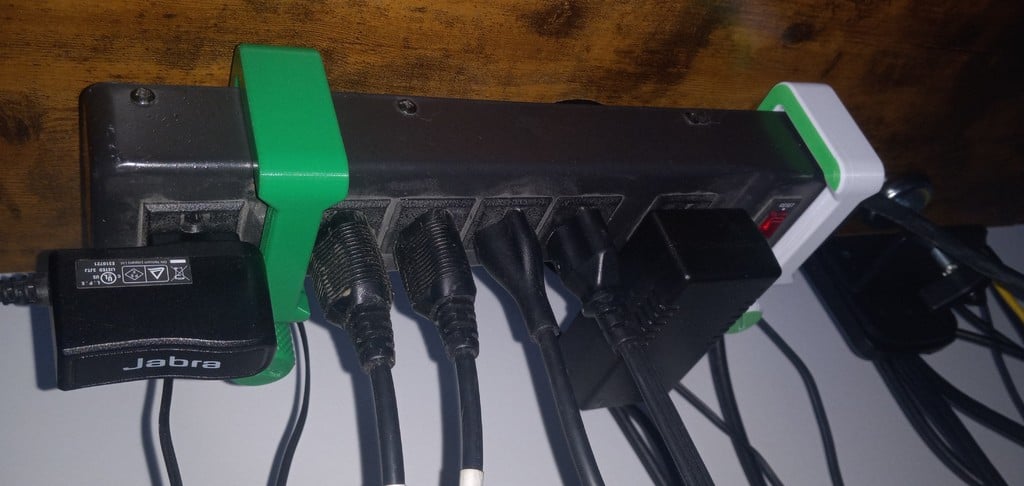
Clamp to mount power strips/boards under desks non-destructively (instead of using a mount that screws into the desk). Helps to organise computer cables, particularly for standing desks. Adjustable width to fit a variety of power strip sizes.
Features:
- Fits desks up to
- Regular size: 25 mm/1 inch thick
- Large size: 50 mm/2 inches thick
- Fits power strips 60 - 90 mm wide and 35 mm thick
- Mounts power strips in vertical orientation to reduce interference with desk frames (e.g. standing desks)
Parts:
- Clamp, screw (large) and pad - main body that clamps to the desk
- Arm - adjustable lower portion of the power strip mounting area. Raise/lower to fit different power strip widths
- Screw (small) and nut - fixes the arm in place. Nut fits into the hex nut groove of the arm
Instructions:
- Pick the clamp size that fits your desk thickness
- Print two sets (1 of each part) to mount at both ends of your power strip. All parts are shared between the different clamp sizes
- Insert the hex nut into the groove in the arm
- Place the arm against the bottom of the clamp and pass the smaller screw through to the nut
- Pass the larger screw through the clamp
- Place the pad onto the ball joint of the larger screw. It should snap into place with some pressure
- Place the clamp onto the desk and tighten the larger screw until the clamp is snugly against the desk. Be careful of overtightening as you may damage your desk surface
- Loosen the smaller screw and slide your power strip onto the arm. Push the arm up until the power strip fits snugly and tighten the smaller screw again
Print settings:
- Print as orientated
- Layer height: 0.16 mm for smoother threads
- Walls: 2 is sufficient
- Infill: 15% adaptive cubic is sufficient
- Supports: not necessary, but may be needed for the hole in the clamp's powerboard mount area depending on your printer's bridging abilities (see below). Easiest to use support blockers under the C clamp threads and let your slicer auto-generate supports for this hole

Notes:
- I designed the mount to fit the variety of power strip sizes I had. If you have larger power strips (e.g. double row of sockets), feel free to let me know the width and depth so I can adjust the design to fit your use case
Updates:
- Hex nut changed to square nut for easier tightening (reduced rotation) of the arm
- Hook added to top part of clamp to stop smaller power strips falling forwards and out
- Large version of clamp added for thicker desks - fits up to 50 mm/2 inch thickness
Comment & Rating (1)

This remix is based on
License
This user content is licensed under a
Creative Commons Attribution-Noncommercial-Share AlikeRelated Models


© 2024 MakerWorld