
Print in place concealed hinge + fidget toy


Print Profile(4)


Description
Hi,
I have created this concealed hinge that print in place.
There is one functional version, robust enough for real applications, and one version just to play with. (It is oddly satisfying).
EDIT 2025/02/15 : @WARxFARE made a great use of the hinge in his design Secret Vault Clock. Go check it out !
EDIT 2025/02/11 : I created a gravity locked print in place hinge ! Perfect for table extensions !
EDIT 2024/02/25 : Fixed the toy version (bad versionning sorry). Built in supports will now work as intended
Please note that the files are LEFT side hinges. You will have to mirror the mechanism for a right side hinge.



In order to have a robust mechanism, the tolerance are quite thin.
After printing, you will have to force a little to free the model the first time.
(There are 8 little pillars around the arms which will break, it is normal. They are built-in supports)
The functional version contains 3 items : the mechanism and 2 trapezoids.
Mounting the hinge is very easy : One trapezoid is screwed in the door and the other one is screwed in the furniture.
The mechanism will then be pressfit on these.
Be carefull, the trapezoids have an orientation !
The figure below illustrate where you should screw the trapezoids.
EDIT : You can find in the link below, a model helping to drill holes at the right place. It includes a custom print in place caliper
https://makerworld.com/en/models/198787#profileId-219386
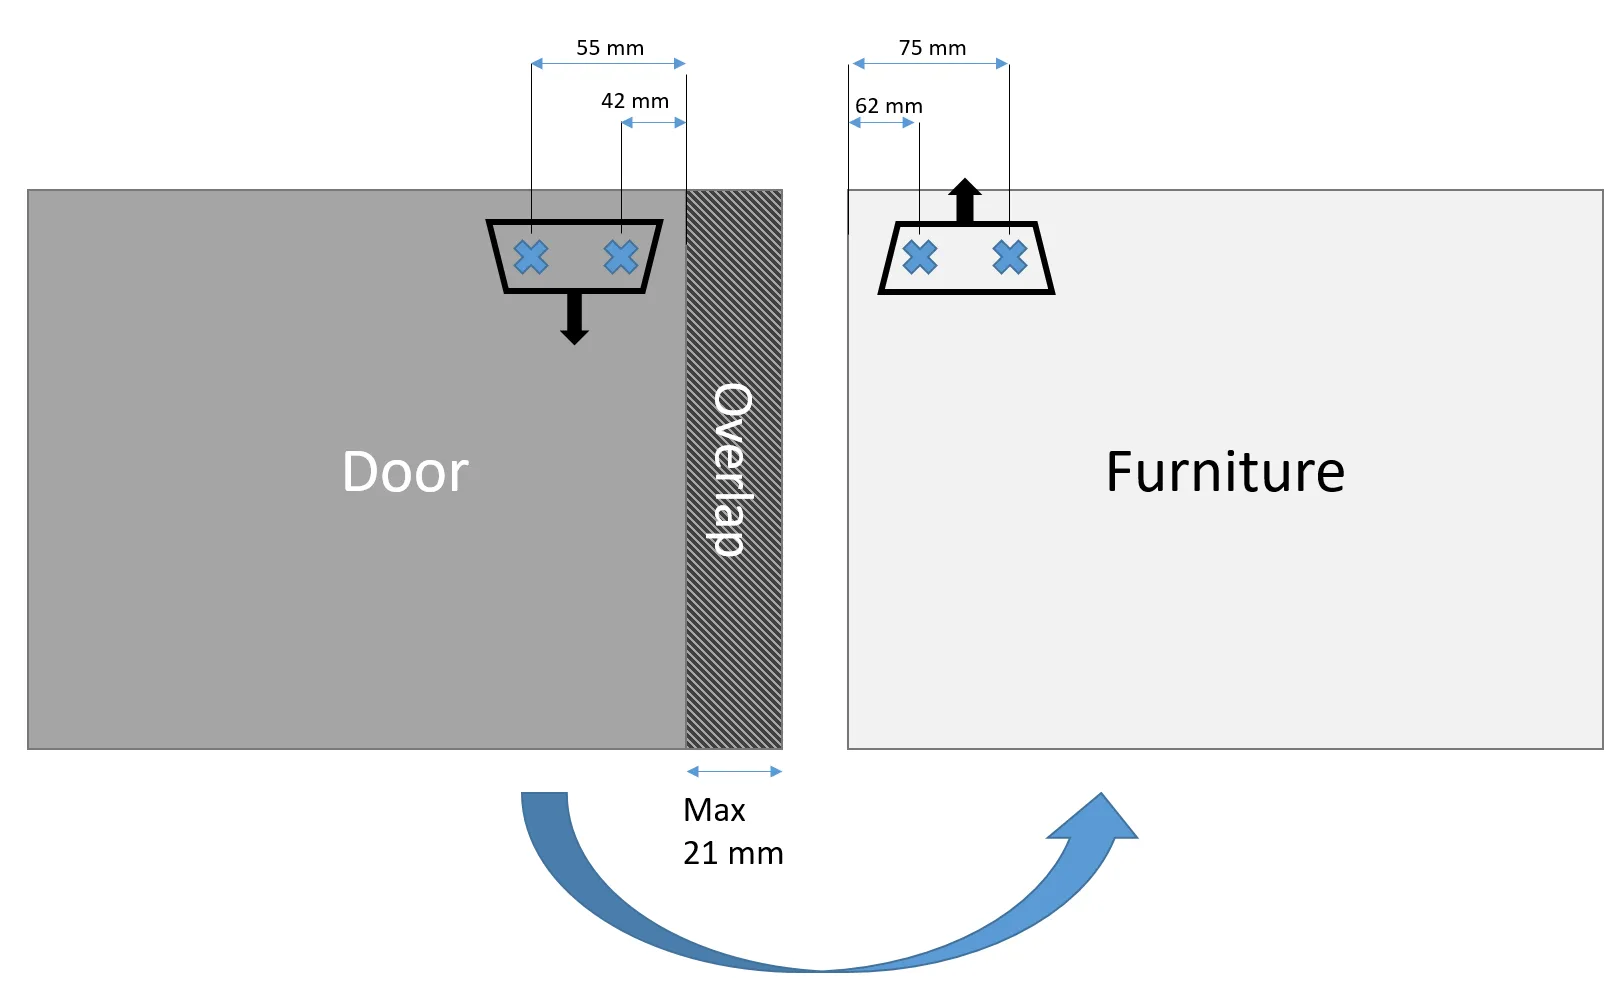
The cinematic of the hinge allows up to 21mm of overlap.
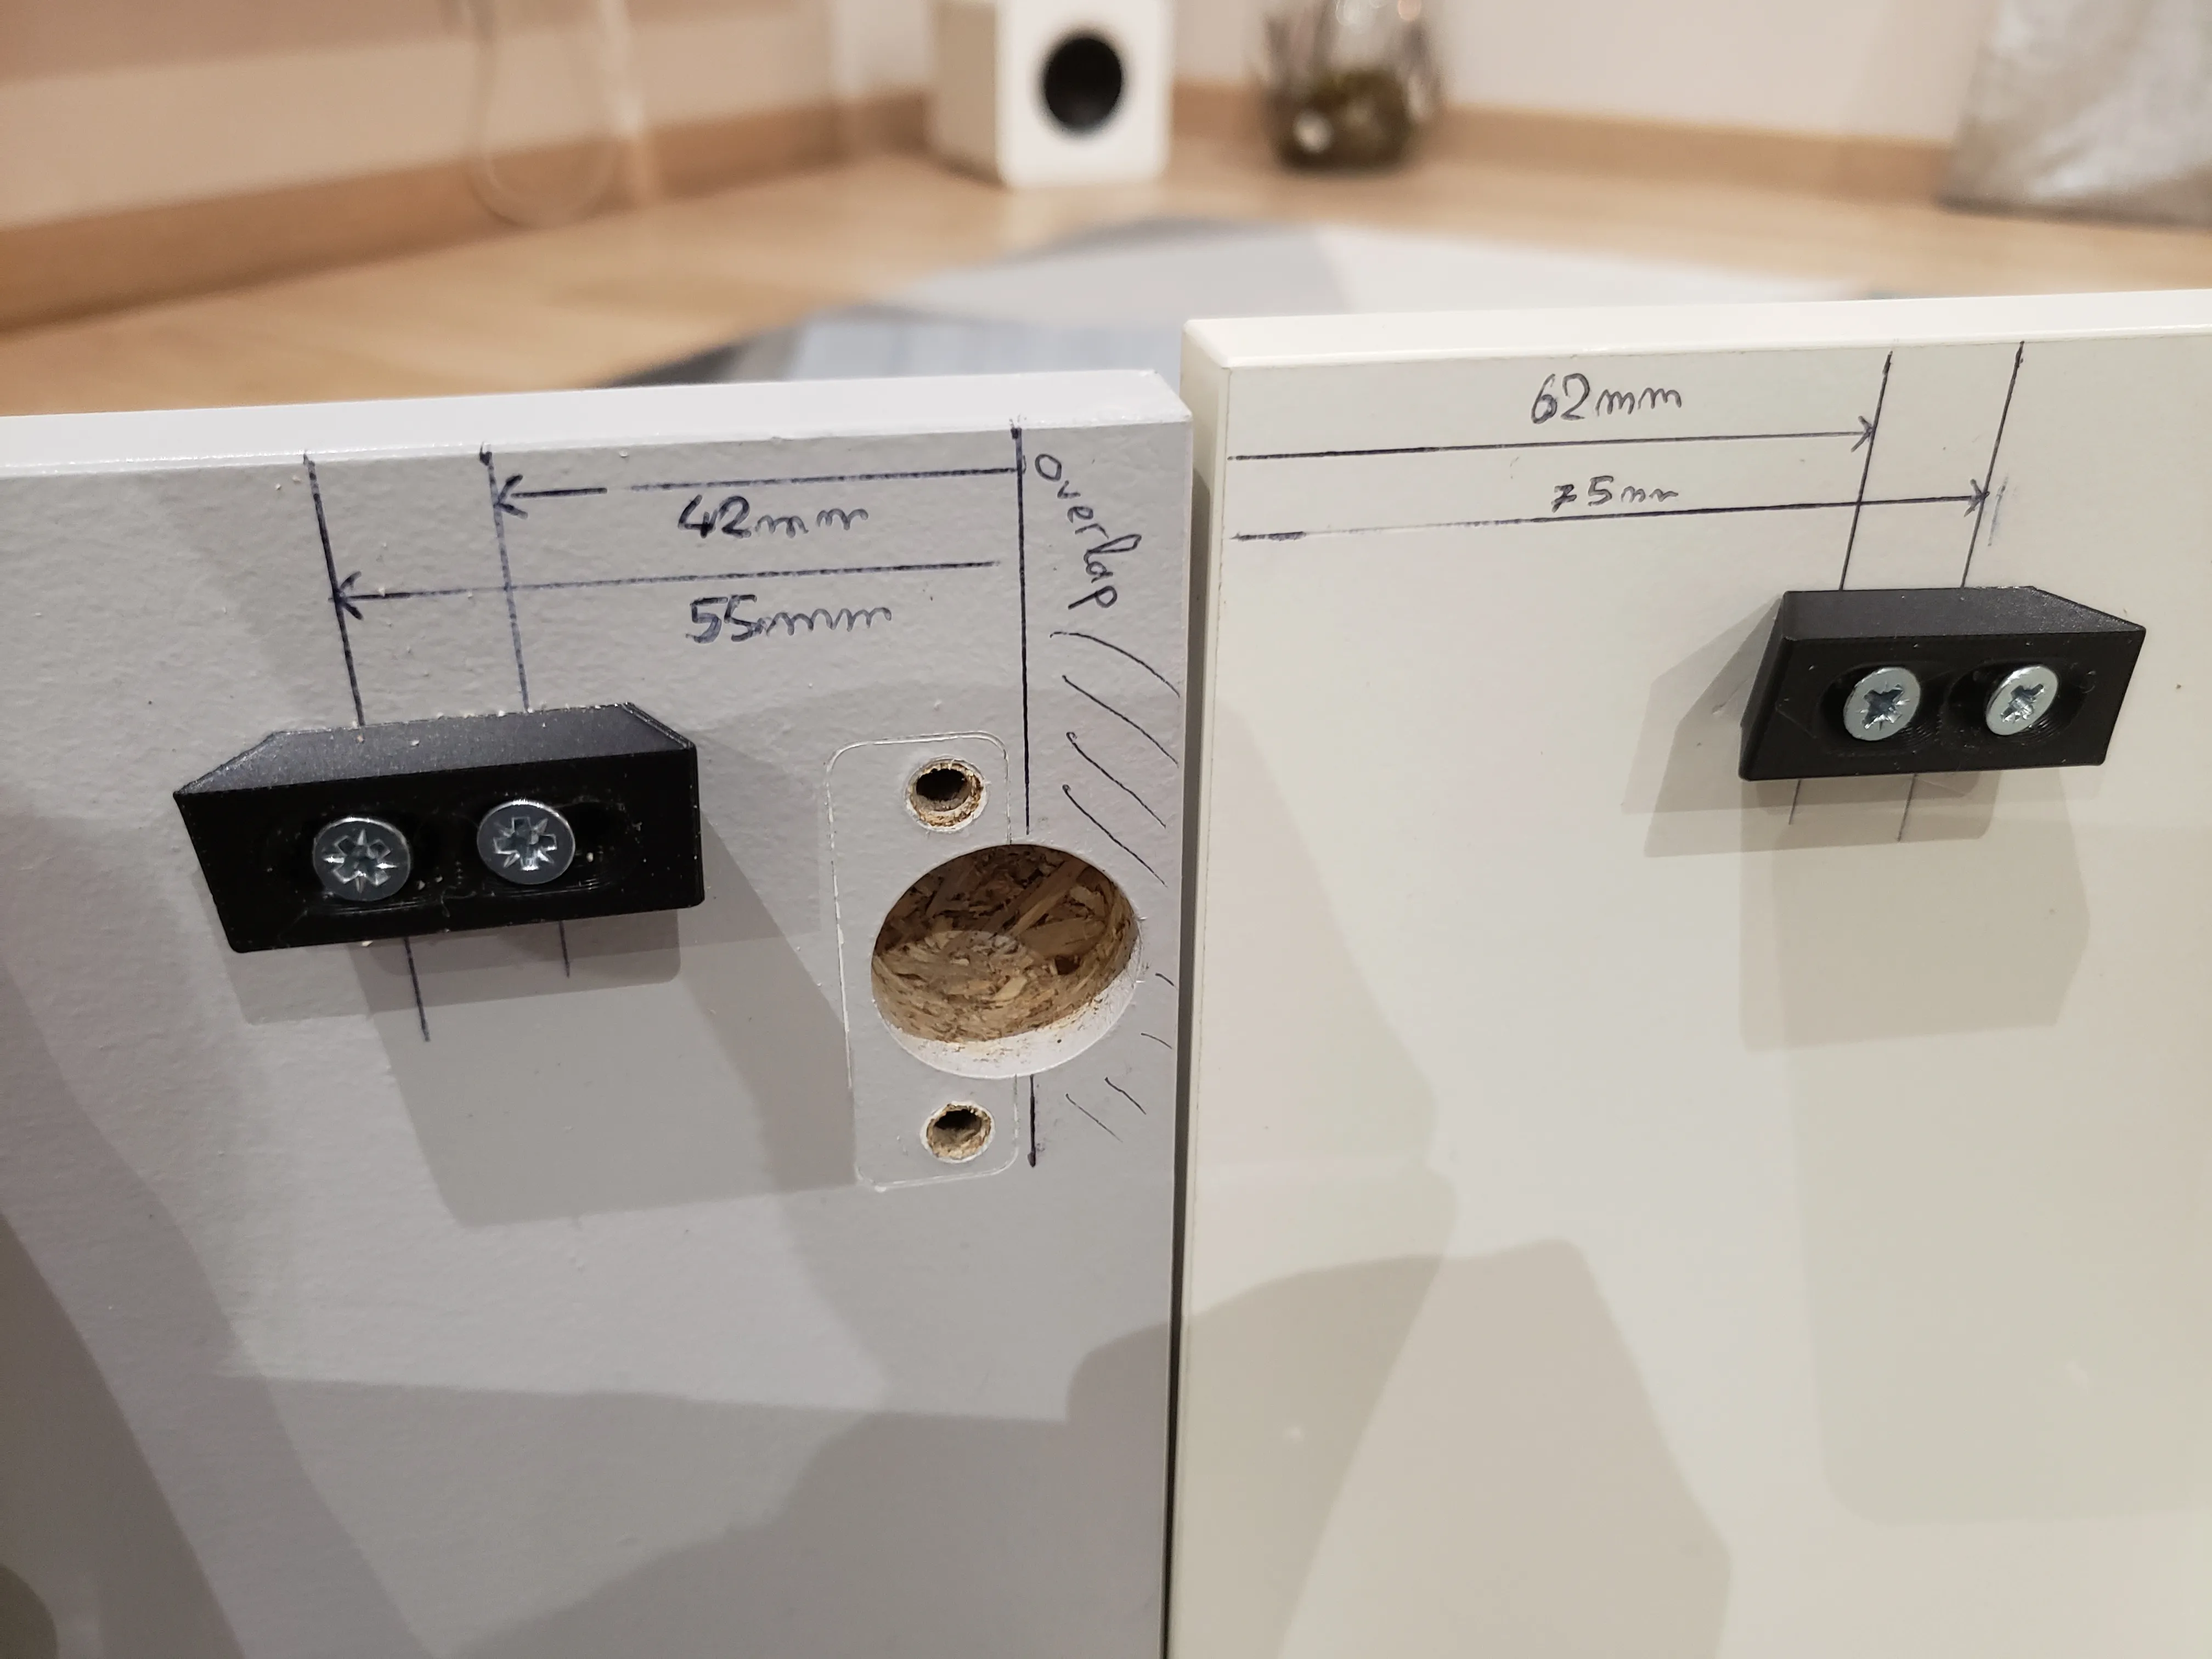
You are free to inprove the design, you will find the sources here:
https://cad.onshape.com/documents/007e254c011e844549e4a4bd/w/c7896a26d83ada10650c00e2/e/cb414f8844a48c4622f0780c?configuration=List_DVwExgKQQXkqD7%3DDefault&renderMode=0&rightPanel=variableTablePanel&uiState=65d6778603d7d900d85e7f80
If you like my work, please download or print, it helps :)
Alexandre
License



Comment & Rating (199)