Mechanical Weekly Pill Organizer(NEW MULTILINGUAL)

Copyright Claim

Mechanical Weekly Pill Organizer(NEW MULTILINGUAL)

Boost
1167
1741
639

Print Profile(13)

All
P1S
P1P
X1
X1 Carbon
X1E
A1
A1 mini

2 wk Labeled Center Drum
Designer
1.8 h
1 plate
4.8(71)

Box-V2  & Small Components
Box-V2 & Small Components
Designer
3.4 h
2 plates
4.6(129)

Pill-Fit-Test-Spiral-vase
Designer
17 min
1 plate
5.0(34)

AM/PM Center Drum Wheel
Designer
1.8 h
1 plate
4.7(63)
Click to see more

Boost
1167
1741
639
117
2.9 k
4.7 k
Released

Description

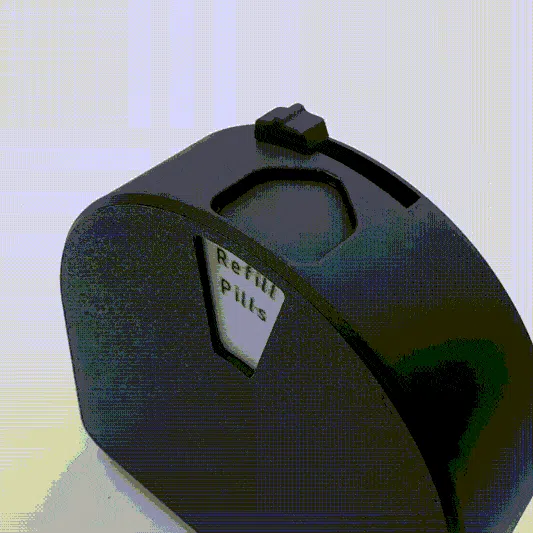
This mechanical Pill organizer box can help store even some of your larger pills for a convenient and labeled AM-PM cycle. This design uses absolutely no supports whatsoever in order to provide you the most user friendly experience in printing with ease. Simply print the components and throw them together for a super cool lever action dispenser with a satisfying click to its internal ratcheting mechanism! No need to remove components or disassemble this box for refills, simply open the lid and replenish your next weeks dosages. Stands upright for easy storage in your cupboard or bathroom medicine cabinet. Continue reading below for any updates and Enjoy!

EDIT 1: Added a pill fit tester so you can see if your amount of pills fit in the very quick spiral vase print then that is how much volume each section has available. Many people cant quite guage how much room each section has so this seems like it will help everyone out if they arent sure and dont want to waste time printing the whole thing. Happy Printing!


EDIT 2:

•Added V2 box which fixes empty spaces inside the box which could potentially jam smaller pills inside when using.

•Added multiple language labeled drums! English, Spanish, Polish, German, French  and now Romanian! If there's a language you'd love to see included then drop me a DM!


EDIT 3:

•Some people seem to have some fitment issues with the inner rotating drum. For this I'm sorry and looking at my model that specific part has ~0.15mm Radial tolerance (Tol.= 114.3mm - 114mm / 2 = 0.15mm Radial Tol.) which for some printers can become too tight. For this I recommend printing everything else the same but for the center drum, print it at 99.5% scale should put the drum around 113.5mm, adding another 0.25mm radial tolerance if your printer seems to print too tight which should solve that issue of fitment.

•Second is more of a simple sizing request for some. For everyone who loves the design but thinks its a little on the small side for the amount or size of pills they need to take, I have found a solution in the very easy form of scaling the model! For every component except the center drum, you will want to scale up from 100% to 120%. The main case will need to be rotated 45° then upscaled and all others small components can just be upscaled to 120% as they currently sit. The center drum in order to keep it from being too tight, scale it up only to 119.75%. That should be able to then hold up to six (27mm L x 10mmØ pills) in every section and still be under 6" tall. If you upscale it to 120% and the mechanism doesnt seem to be clicking the drum into place that is because the tolerance of the ratchet wheel under the drum will now have a little slack in it. To solve this, place a small piece of electrical tape or scotch tape on one or two faces of the sqaure peg on the base until the ratchet sprocket has no wiggle room shown below.


EDIT 4: Some people gave feedback that their prints were too tight of tolerance and the center drum would not be able to spin or the main hinge was binded and would snap at the base when trying to break it free. Another issue of individuals that need to take smaller pills or chalk like pills would have them break and or become caught in the lever arm above the opening section. To solve these issues I have opened up the tolerance for both the drum section and beefed up the hinge of the main box as well as added a fin section that covers the lever arm allowing the pill section to be fully covered allowing no space for pills to get caught between. The only difference is with the assembly which will require a small drop of superglue at the three pin locations for the two alignment slots and the central lever pin cavities. Because few of these instances have occured, the V2 will remain available for people to download and print but if you are interested in a bulkier hinge, looser toleranced and no risk at all of pills getting caught at the open ended section then V3 is for you. Im always open to feedback and Italian labeled drum is soon to come for this edit #4!


ASSEMBLY INSTRUCTIONS: Be sure your parts are free and clear of wispy strings and your machine/filament is properly calibrated for accurate printing. These models are meant to assembly together with relative ease and tolerances but improper printing/old filament can cause tolerances to seem tight. Make sure the notch mark on the Drum-Lock ring is facing the front pill opening of the box or else the ratcheting mechanism will not line up properly.

(V2 Assembly):May or may not have some tight fit issues on case by case basis and potential for pill to get grabbed by the lever arm.

(V3 Assembly)


!CAUTION!…Be sure to keep away from children as we all must remember that these are still for pill/medication storage and must be treated as such regardless of how cool 3D printing their storage is. Be safe and happy printing!


Comment & Rating (639)

Please fill in your opinion
(0/5000)

The main box is not good. After printing, it is difficult to open the hinges. Mine broke. It would be better if the top and bottom were separate and could be screwed or hinged.
The designer has replied
5
Reply
Oh my im sorry it didn work out well for your print. Do you mind sharing what your specific filament brand and settings were for this print? I hope its a simple fix and that you can try it again for a success next time🙌
1
Reply
Replying to @Cjwelcome :
I had the same problem. My hinges are basically welded shut, and the lid snapped off with very little force. I can't get the hinges to move, even when trying to force them with pliers. Printed with PolySmart PLA Black Beauty. I printed it on a textured plate, with a 0.4mm nozzle from the Bambu App, using the settings it picked.
(Edited)
1
Reply
Replying to @Cook66 :
Hmm if you say the hinges are basically welded, it definilly sounds like a tolerancing issue in that case. As i've recommended to some before trying out a tolerance test print to see what gaps spacing your printer and filament you wish to use can handle. I'm sorry it was too tight for you and all I can recommend now is possibly some PLA+ filament. Sometimes with specialty PLA or speckled filaments their layer adhesion is considerably less than generic PLA or PLA+ and with that have a higher nozzle backpressure which would explain the oversized extrusion width and tight tolerance. If you wanted to try a tolerance test with your Black Beauty filament and then the same tolerance print with a different color spool to see how they stack up, your bambu printer especially should have no problem handling down to at least 0.15mm gaps. Best of luck to you and feel free to ask me anything.
0
Reply
Just printed it. I’m having a lot of trouble. It’s very tight and the wheel doesn’t spin easily . Any suggestion?
The designer has replied
5
Reply
hey @kevman, I can see from your picture you may have a little overextrusion which could throw your machines printing tolerances out of wack. Try firstly printing a tolerance test part that has all the wheels at different tolerance spacing and see if there’s some that are in the higher number range(0.2-0.3mm) that are still tight for you. If so performing some calibration to your machine may be required/suggested but until then I would suggest trying to reprint just the center drum piece at ~99.8% scale which should help it fit loosely and spin freely again😌all of these parts are modeled with a tolerance ranging between 0.15-0.25mm room between parts which is usually enough for a well tuned printer/filament but give it a shot and let me know if you need more assistance👏
1
Reply
Replying to @Cjwelcome :
Thank you for the detailed response. I think you have captured it well. my carbon will be replaced on the X1C due to some abnormality. unfortunately, this broke on me while trying to work with it, and I may not print it again for a while, nothing against the model at all, it just took up a lot of time and unfortunately, I don’t know if I’ve got the patience anymore. I’ll revisit this maybe when I fix up my printer.
1
Reply
Replying to @kevman :
Oh dang im sorry to hear that. Was that a material swap over to different color at that layer cause it loks like two different materials in that picture? If so I could understand two different types of material having a weak layer adhesion right where it swaps over. Best of luck in fixing it up and hope to hear your success story soon!
0
Reply
Print Profile
AM/PM Center Drum Wheel
great design, been using almost a week and did a full refill today which was easy. Crested at 50% scale which fits my pills perfectly - used the template to find the best size - great idea 👍
The designer has replied
1
Reply
I'm so glad you like it and also happy it seems to work well at a much smaller than expected scale! Thank you for the great feedback and have a great day!
0
Reply
How did you manage to scale it to 50% and be able to open the case with the hinge ? Mine get stuck
0
Reply
Replying to @leSourCil :
sorry, it just worked for me when using Bambu Basic PLA. I did try one with Bambu Silk and that got stuck! So mabye try some other filament?
0
Reply
Print Profile
Box-V2 & Small Components
i also went with black and green. one of those glow in the dark filaments for the wheel/font would be awesome i think.
(Edited)
The designer has replied
5
Reply
Green is my favorite color so I must agree! Very nice job😄
(Edited)
1
Reply
I made one with Black PLA with a textured plate on my A1, with Red PLA internals with Silk Black PLA Day plate w/ the Red PLA letters showing through. The only thing I would change would take more time to get better lettering. Other than that, an absolutely beautiful model to print. Functionality is perfect.
The designer has replied
3
Reply
I'm glad you like it and I'd have to scavenge around for a better default font on solidworks for the text. That bold Isocpeur font is what I used since it seemed very uniform and smooth. Certainly a darker color on lighter front always looks better contrast wise but regardless thank you for the feedback😄
0
Reply
This is awesome! Is there a version that has just two weeks worth of pills instead of AM and PM?
The designer has replied
3
Reply
I certainly can just label the drum to be Mon-Sun twice over! thank you for the good idea I’ll let you know when it’s done. Just be aware how much fit into each section with the fit pill test vase so you know if you can fit a while 2 weeks in there✌️
6
Reply
Replying to @Cjwelcome :
I was just about to print this but I'll wait for the 2 week version! thank you!
1
Reply
just got a 2 week labeled drum posted so feel free to try it out and let me know any feedback😌
4
Reply
Print Profile
Box-V2 & Small Components
print came out great! the mechanical mechanism works well. Do not over fill or it can get jammed.
(Edited)
The designer has replied
2
Reply
thank you for the review and if you ever wanted to try the V3 box it should solve that issue of jamming if you have more pills in each slot and you can reuse all the small components too!
0
Reply
Print Profile
Box-V2 & Small Components
issue resolved. great design and awesome designer
(Edited)
The designer has replied
0
Reply
Hey there I'm not sure I understand the issue, could you repeat what happened? All part files are available in the print profiles list. the "Box-V2 & Small components" profile will print the main box along with the smaller assembly pieces but you'll have to select what language drum you want from the profile list as well which should be the last part needed to build the full organizer.
0
Reply
Replying to @Cjwelcome :
I printed from Bambu handy and it printed two plates. One with the main box and the second plate printed the items in grey. I checked and tried to print again and it still had two plates the same as I printed
0
Reply
Replying to @Cjwelcome :
I tried again and the plates with the language options was there. thank you. excellent print!
0
Reply
Print Profile
Box-V2 & Small Components
nice
(Edited)
The designer has replied
1
Reply
Those are some super cool colors together! Very nice and glad you enjoy it!
0
Reply
all printed in ABS ☺️
(Edited)
1
Reply
I'm trying to slice the files for a non bambulab printer. But, if i try to slice the drum, on all versions the text is missing. The down side is just a flat surface. Any suggestion?
The designer has replied
1
Reply
This is a multi-material print that requires a multicolor capable printer. The text that needs to be a different color is .01mm thick so you just can't see the text and it looks flat. You will need to go into your paint settings and select all the letter faces you want and in selected color in order to see it.
0
Reply

License

This user content is licensed under a Standard Digital File License.

You shall not share, sub-license, sell, rent, host, transfer, or distribute in any way the digital or 3D printed versions of this object, nor any other derivative work of this object in its digital or physical format (including - but not limited to - remixes of this object, and hosting on other digital platforms). The objects may not be used without permission in any way whatsoever in which you charge money, or collect fees.