
Ergo Plates


Print Profile(2)


Bill of Materials










Description
Boost Me (for free)
I usually don’t ask for this, but I’ve noticed that many creators actively encourage it on other platforms—and it makes sense, as it helps increase visibility. So, if you can follow me, it would make difference. It’s a great way to support my work and show appreciation. For more insight subscribe my blog at: https://designrepcom.com/ This design is freely available for the community, but if you enjoy my work and would like to show your support, you can boost this project. Thanks!
Introduction
Introducing the Ergo Stand – a collection of Stands/plates that blend aesthetic appeal with functionality for all A1 Ergo line Accessories:
- Ergo Spatula
- Ergo Scraper
- Ergo Bowl
- Ergo Capsule - (Storage system)
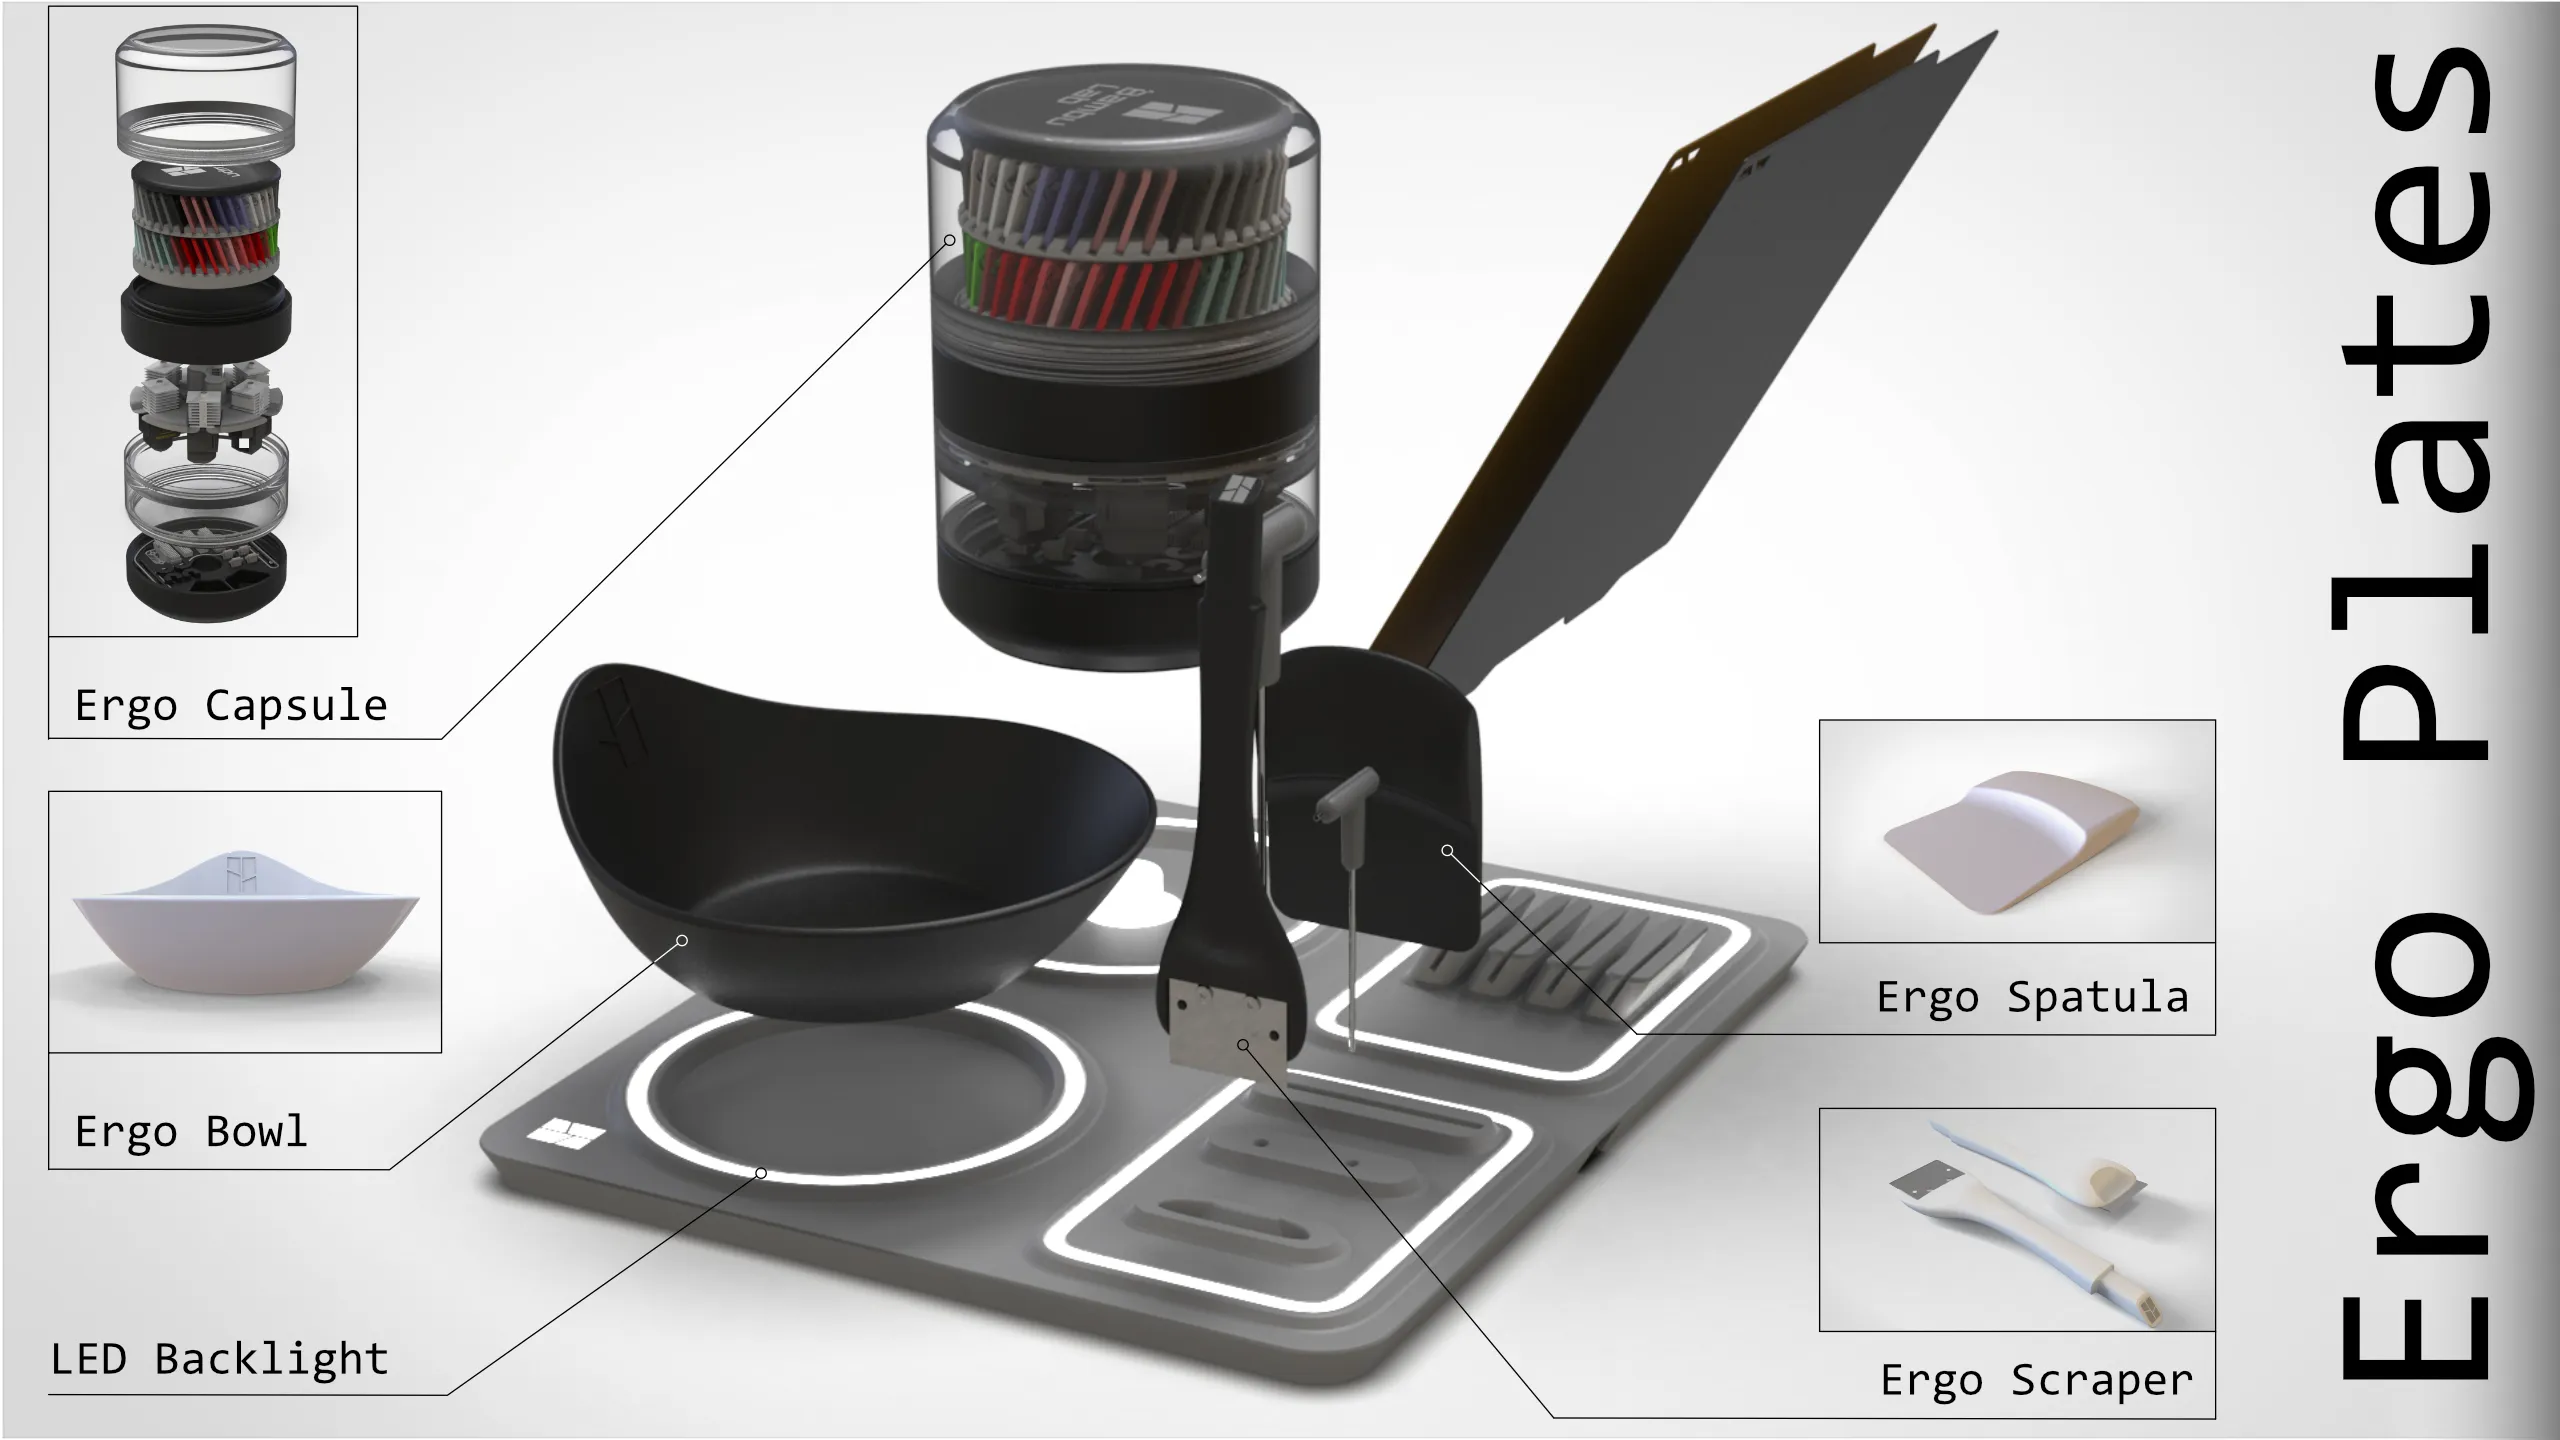
The sleek and modern design adds a touch of sophistication to your workspace, creating an environment that inspires creativity and innovation.
What sets our supports apart is their adaptability. Designed to accommodate a wide range of accessories, these supports provide a secure and stable foundation for your 3D printing tools. The thoughtful arrangement of slots, hooks, and compartments ensures that your accessories are easily accessible, organized, and ready for use.
Production
This design is free for the benefit of the community, but If you like my designs and want to contribute, you can make a donation on paypal, that will be greatly appreciated.
This are affiliated links that will give me a small support, if you want this items use the following link, it will cost you the same.
The RGB light effect:
- In this project I've used this matte PLA, but if you have a hardened nozzle you can use PLA with Carbon Fiber for the opaque parts that gives you very nice finish and a little stronger parts;
- For the areas with light don't use normal or opaque PLA. In case of any doubt, teste a small sample, the light needs to be visible with a thickness of approx. 1mm
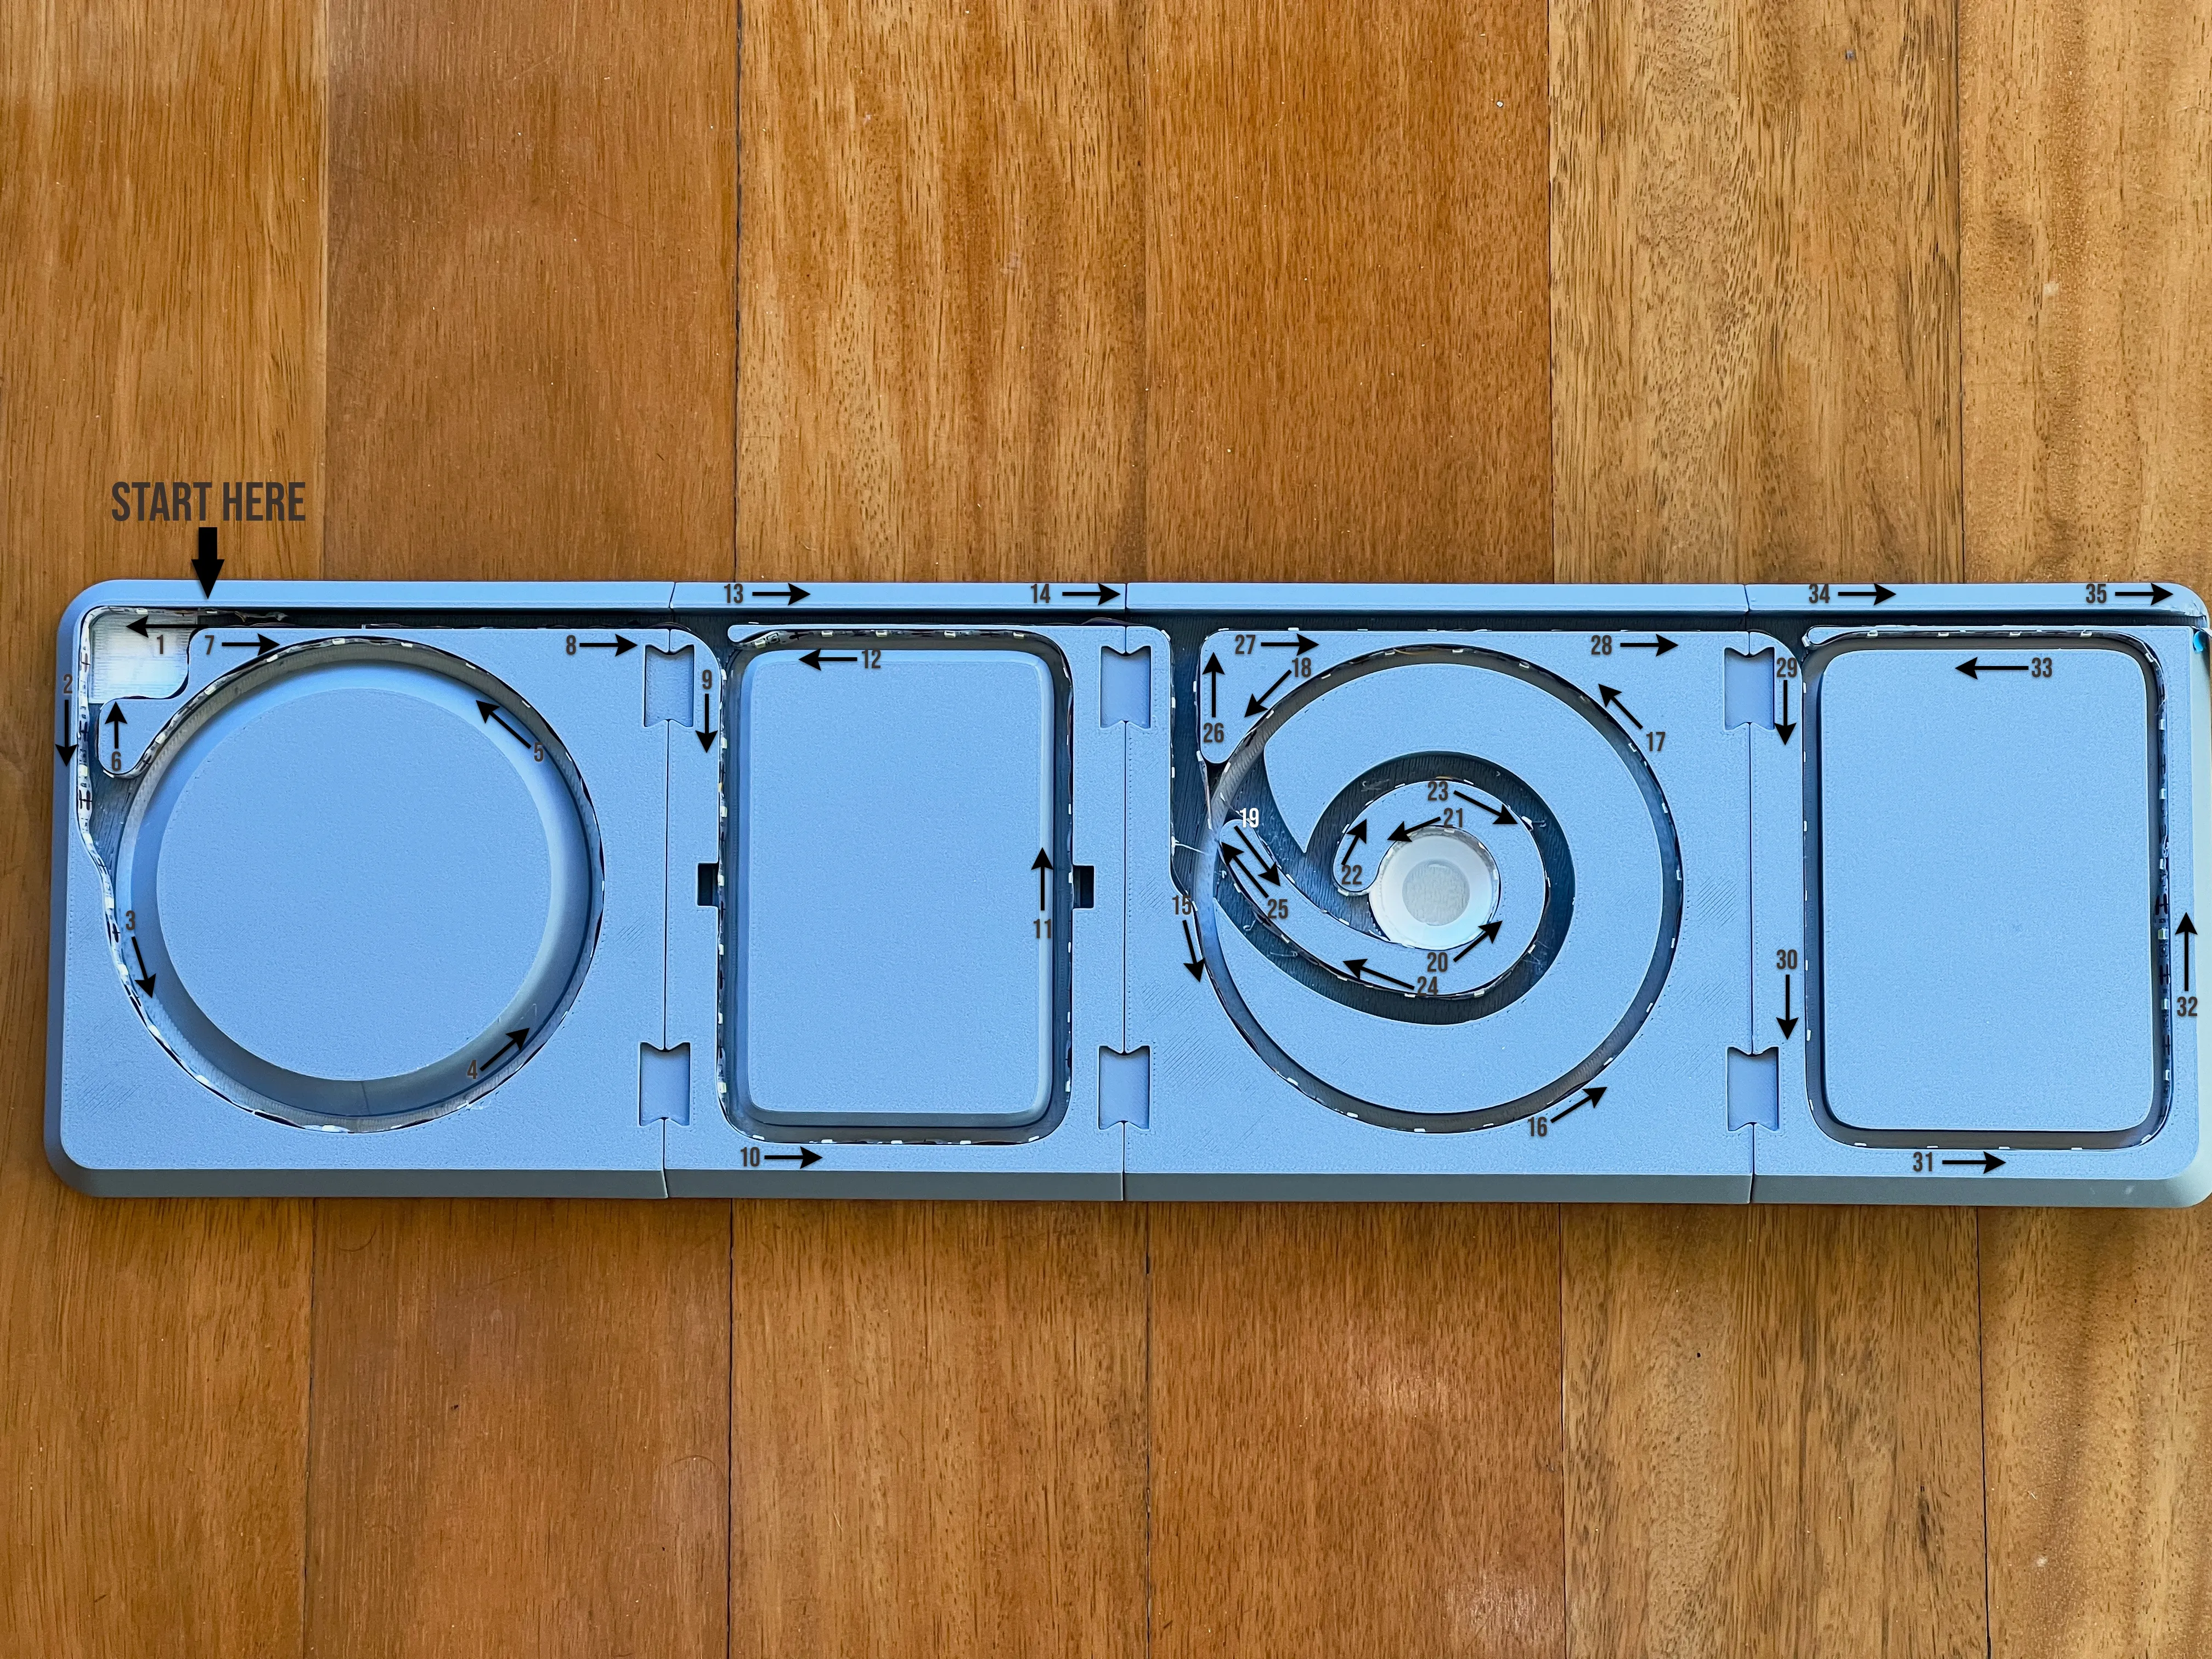
Paths to assemble the LED strip
You need to follow this path, be patient and try to glue the Strip to the bottom of the profile near the white part as close as possible.
Linear Configuration
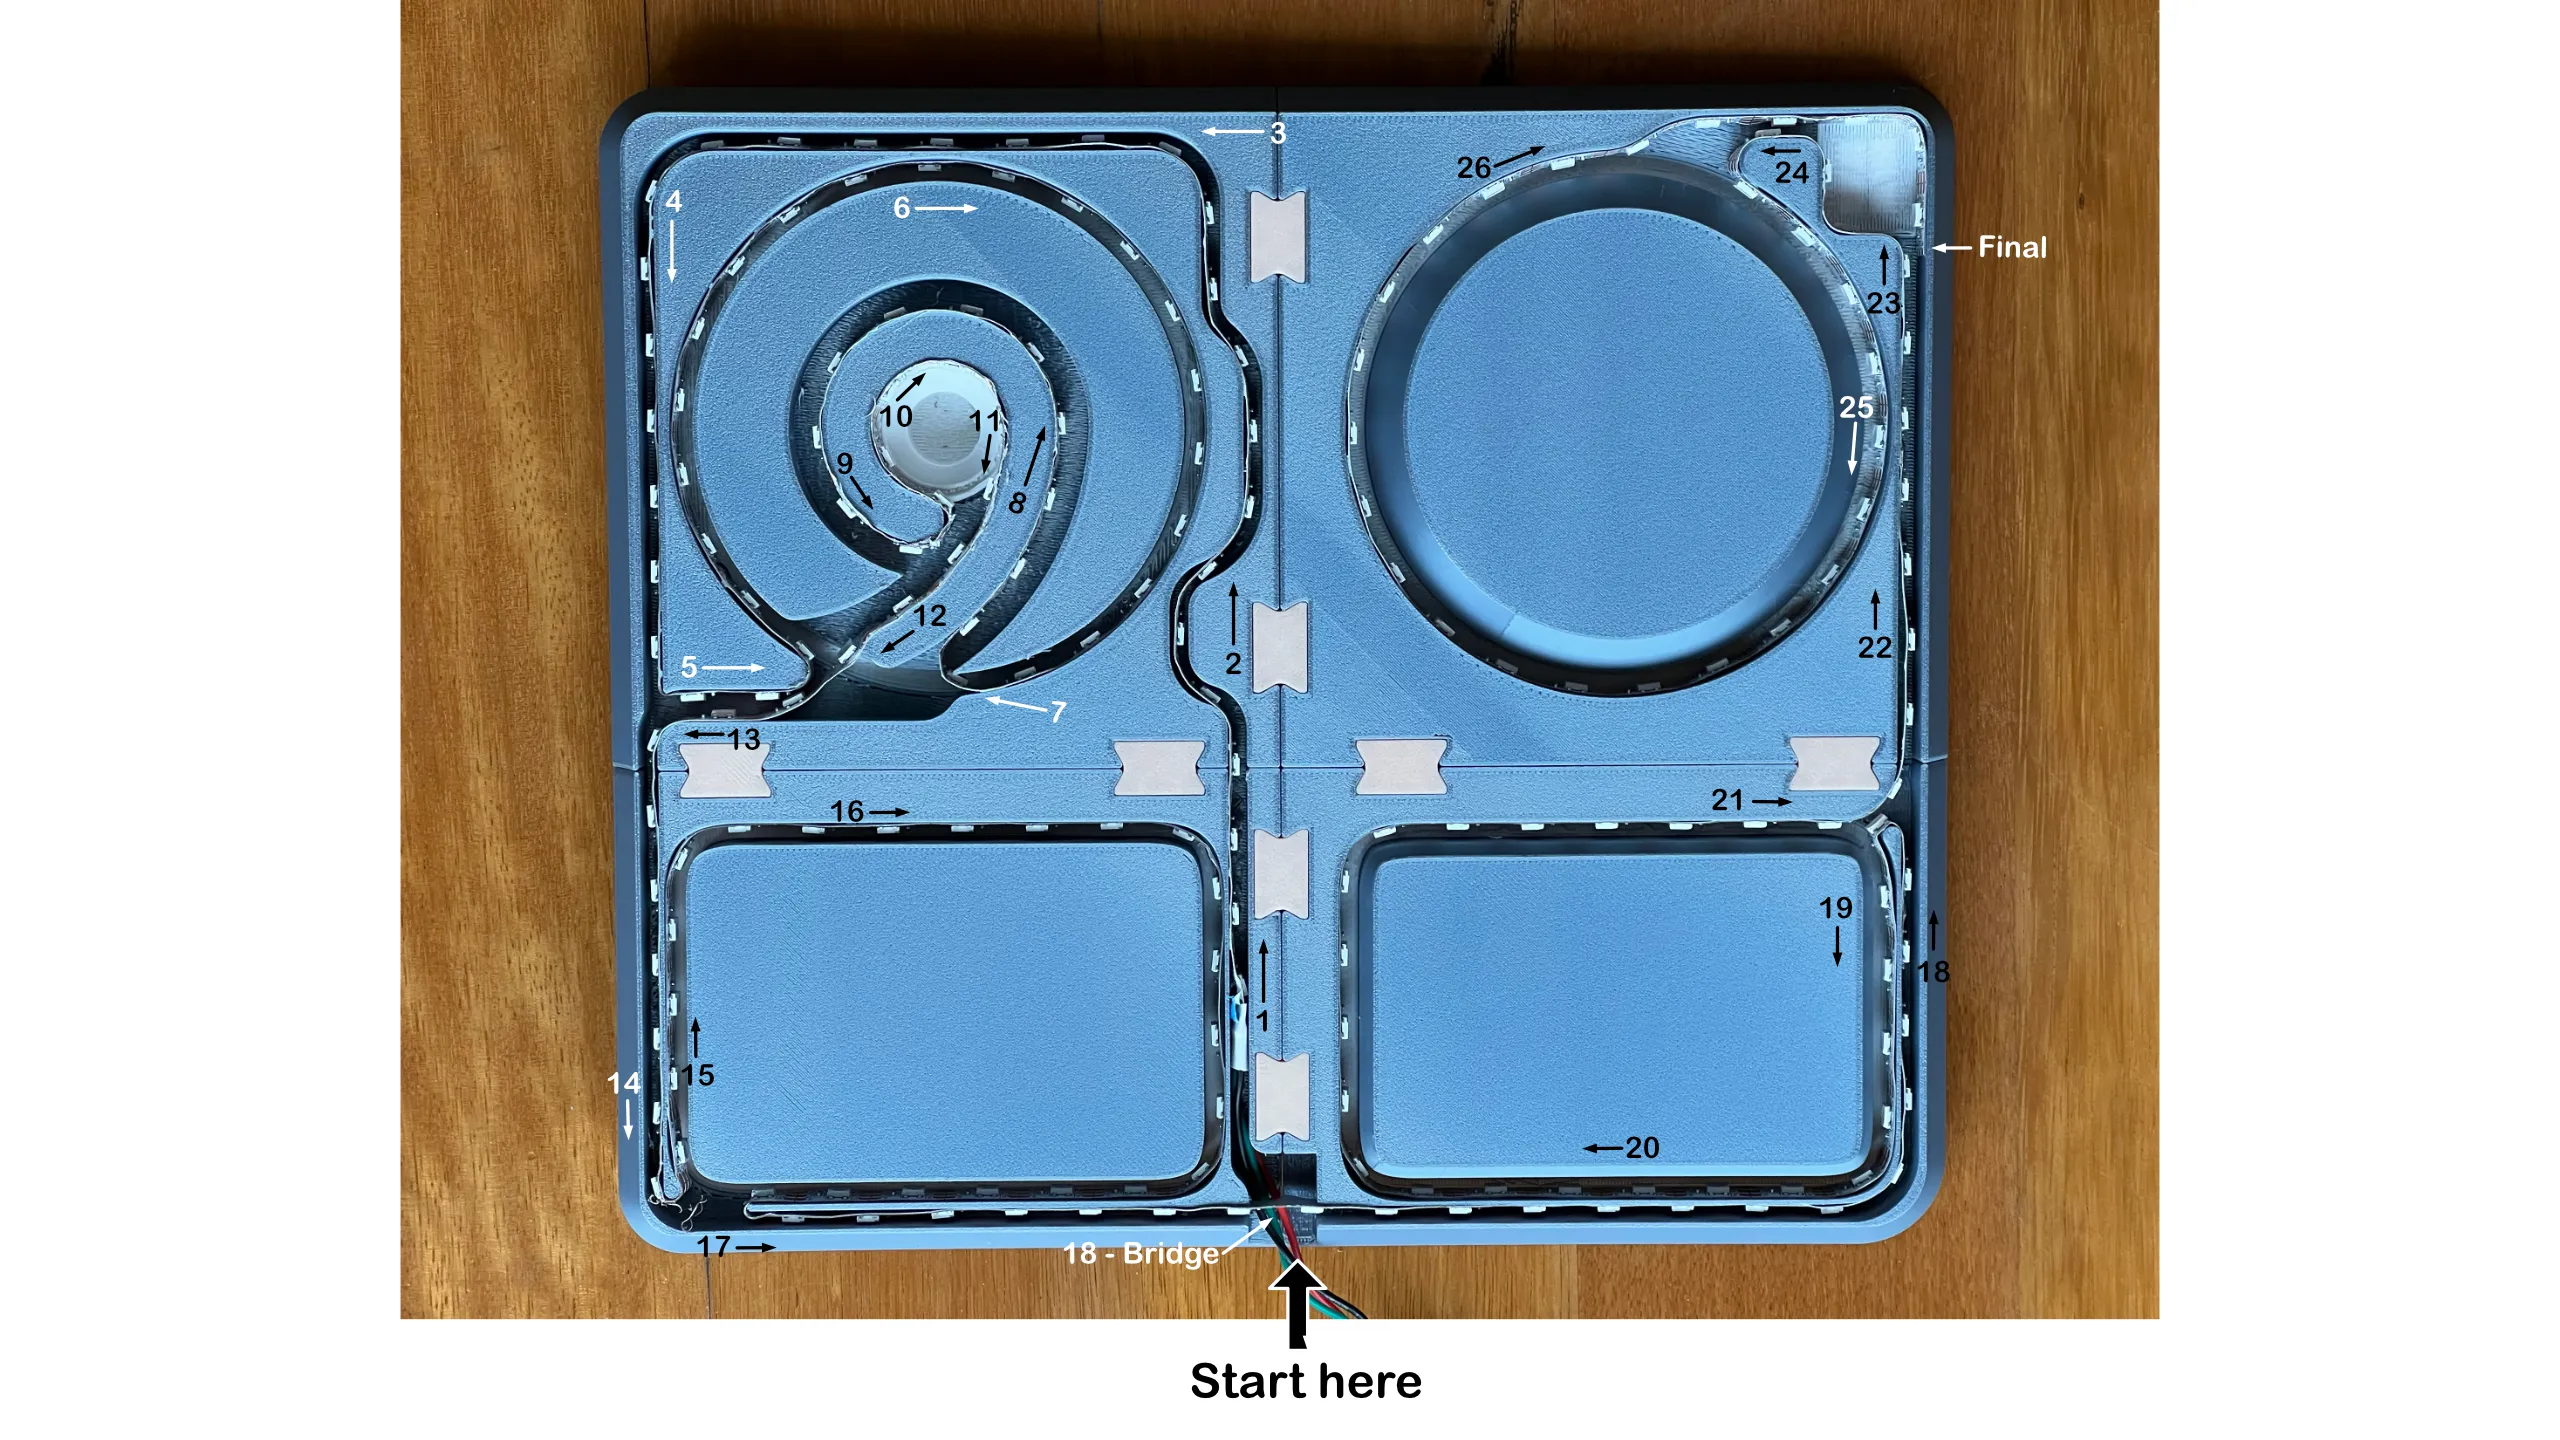
Rectangular Configuration
In this configuration you need to start in the inverse order that was used on the last previous configuration (linear). See the diagram and follow the numbers.
Printing
Nothing special here. Just use the 3mf file and you are good to go. Change the material settings as needed.
I've tried to make the least possible amount of filament changes, so that i can be done without and AMS unit, nevertheless it is best to use the AMS unit since it is faster and more reliable.
Change Log
29/12/2023 - Changed the name of the plates on the 3mf file. Thank you JackTheBlack24
Curious About My Tools? Check This Out!
For those of you who often ask about the tools I use to bring ideas to life, this article, The Journey From Idea To Object (Part I), offers some insights into the initial stages. It highlights the use of various tools, including software like Autodesk Fusion for CAD design, Blender for render and Bambu Studio for 3D printing preparation, and other... So, if you're curious about the software and hardware too, that I've incorporate in my workflow, take a look at the link for more details!" – Visit https://designrepcom.com/ for much more.
License



Comment & Rating (15)