Search models, users, collections, and posts
TINY TIE INTERCEPTOR (Maglev Display)
IP Report


GIF

Print Profile(2)

0.2mm&0.4mm nozzle
Designer
19.1 h
10 plates
0.2mm nozzle, 0.1mm layer, 4 walls, 15% infill
30.1 h
3 plates
Open in Bambu Studio
Boost
1063
2359
83
72
1.4 k
194
Released
Bill of Materials
Maker's Supply Kits and Parts
Select all


Description
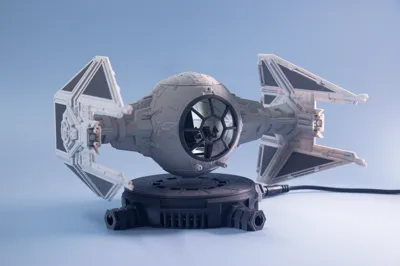
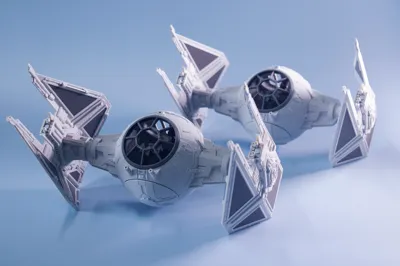
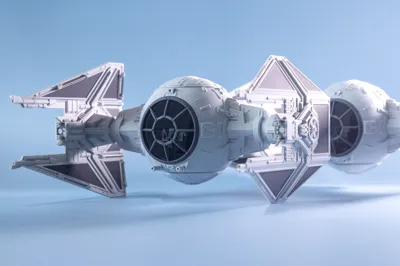
TINY TIE INTERCEPTOR (Maglev Display)
Description
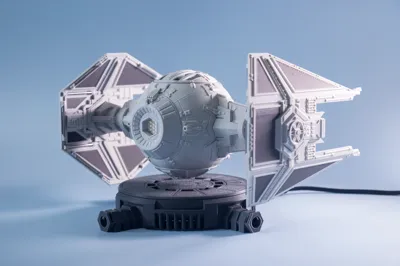
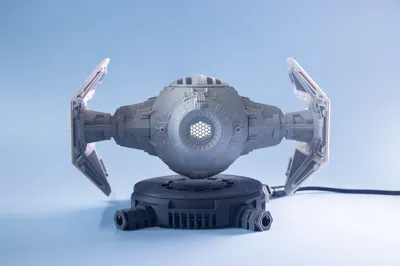
- The Tiny TIE Interceptor is a miniature replica of the Empire’s iconic starfighter, featuring its signature angular wings and sleek, agile frame. Despite its small size, it retains the fierce silhouette and high-speed feel of the original TIE Interceptor, with detailed elements faithfully recreated.
- In the Star Wars universe, the TIE Interceptor is a high-performance starfighter deployed by the Galactic Empire. As an upgraded version of the standard TIE Fighter, it boasts greater speed, superior maneuverability, and unmistakable blade-like wings. Designed for pursuit and dogfights, it stands as a symbol of the Empire’s elite force, delivering overwhelming presence on the battlefield.
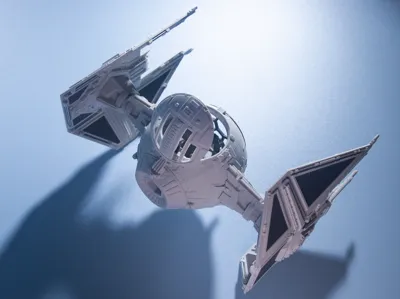
- This miniature version is crafted for Star Wars fans and 3D printing enthusiasts alike. Whether placed on a desk or suspended in midair, it captures the cold, striking charm of Imperial engineering. If you're passionate about sci-fi and love bringing models to life through printing, this is a perfect choice for you.
Technical Description
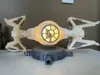
- The Tiny TIE Interceptor uses a magnetic levitation kit for display. Due to the relatively large width and length of the starfighter, metal shafts and metal balls are used as counterweights to maintain balance and reduce wing oscillation. The metal balls mainly suppress lateral oscillation that increases over time, while the metal shafts are primarily used to adjust the pitch angle.
- The model faithfully replicates the original design as much as possible, while being optimized for 3D printing and easy assembly.
Printing
- It is recommended to use both 0.2mm and 0.4mm nozzles during printing to balance detail and speed.
- Each .3mf file has the required nozzle size indicated in the top left corner. Keep the original settings of each plate and switch to the appropriate nozzle size as marked to ensure smooth printing.
- It is recommended to maintain the current wall loop and infill settings during printing, and to use the specified nozzle size (marked in the upper-left corner of each plate), in order to ensure the model’s total weight and weight distribution.
Assembly
- Please refer to the included assembly diagrams for detailed instructions.


Placement TIPS
- Gently and slowly lower the 3D-printed model with the float to the center of the base. You will feel changes in magnetic force. If the force pulls in any direction, lift and reposition the model until successful levitation is achieved. If frequent attempts cause the base to overheat, triggering a safety mode, unplug the kit and let it cool for 10-20 minutes before trying again.
- After the aircraft is floating, gently touch the front of one wing and the rear of the opposite wing with your fingers to suppress wobbling and stabilize its posture. Once the body is stable, lightly push the rear of one wing to initiate a slow rotation. The spinning motion helps the four sets of electromagnets achieve more uniform control, further reducing oscillation.
- The magnetic levitation base must be kept away from metal objects, including any metal beams or structures beneath the tabletop.
Update 2026‑01‑20
- Added bonding time recommendations and handling notes for the cockpit hatch hinge, based on assembly testing. This update addresses stability issues caused by the limited bonding surface and improves overall assembly reliability.
- The four side-mounted cylindrical wire guides on the magnetic levitation base have been shortened so the wings are less likely to hit them.
star wars
Tie Fighter
tie interceptor 7181
tiny tie interceptor
tie
maglev
magnetic levitation
magnetic
magnetic accessories
Documentation (1)
Assembly Guide (1)
Tiny TIE Interceptor.pdf
License
This user content is licensed under a Standard Digital File License.
You shall not share, sub-license, sell, rent, host, transfer, or distribute in any way the digital or 3D printed versions of this object, nor any other derivative work of this object in its digital or physical format (including - but not limited to - remixes of this object, and hosting on other digital platforms). The objects may not be used without permission in any way whatsoever in which you charge money, or collect fees.
Comment & Rating (83)