
P1 Series Relay Mount (LED Lighting)


Print Profile(2)


Description
Suggested Parts:
- Pair this with a COB LED strip mounted in a Left-side LED Housing
- Relay module
- JST GH1.25mm 2-pin connectors – male & female (or pigtails)
- USB Type A plug, cable, or pigtail
- Hook-up wire (~24 AWG)

This is a tool/screw-less mount to attach a popular, cost-effective, relay module near the USB Type-A port of the P1-series. The purpose of adding a relay module is to control USB power using the built-in LED controls. Pair this with COB LED strips in an LED housing and you can get much more light in the chamber beyond the 300mA limit while retaining control of the lights with the screen, Bambu Studio, or the Bambu Handy app. More light = better image quality from the chamber camera too!
Pair this with the left-side LED Housing (preferred), right-side LED Housing (can cause glare for built-in chamber camera), or your own LED solution such as a riser.
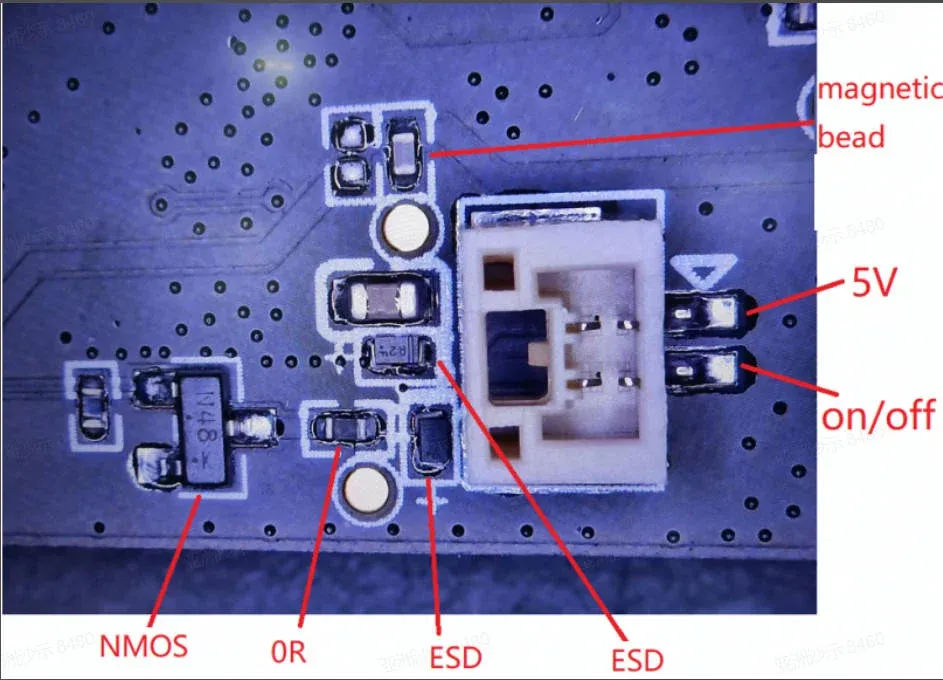
According to Bambu Lab, the AP board's LED connector is limited to 300mA of current, but we can use it to activate a relay to control the power from the USB A port, which can supply up to 1.5A of current (5 times the power). (https://wiki.bambulab.com/en/p1/troubleshooting/p1p-led-failture)
Print Settings: The footprint is small, so I used a brim to keep the print in place during printing.
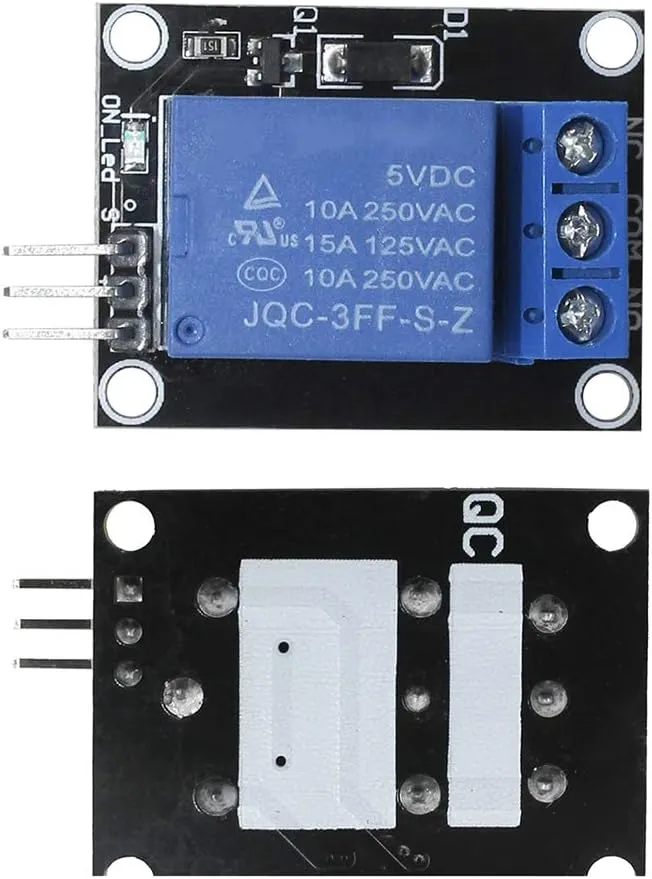
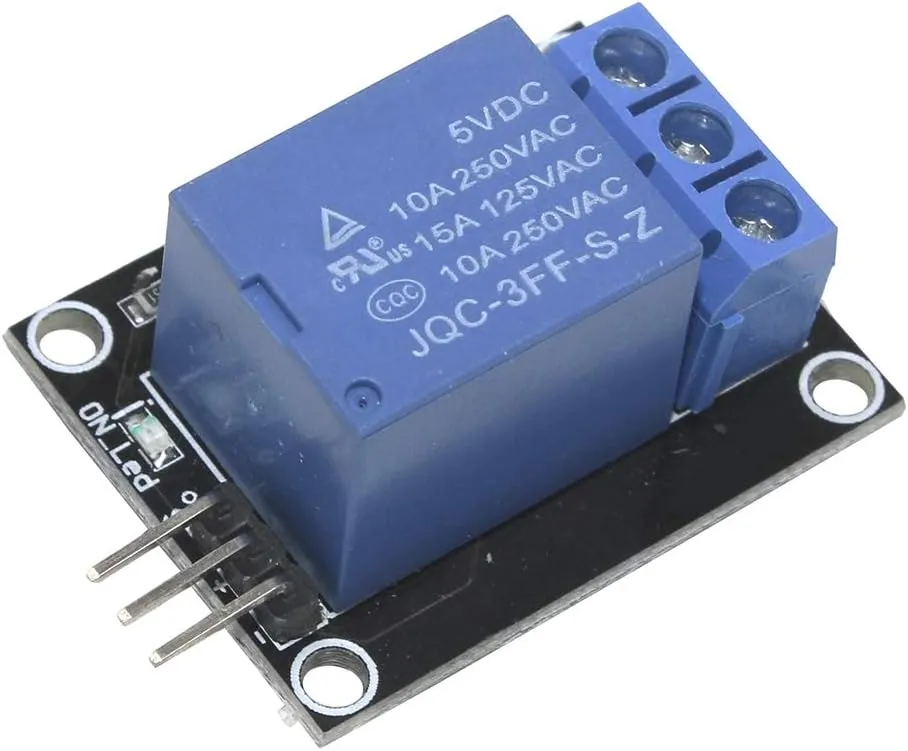
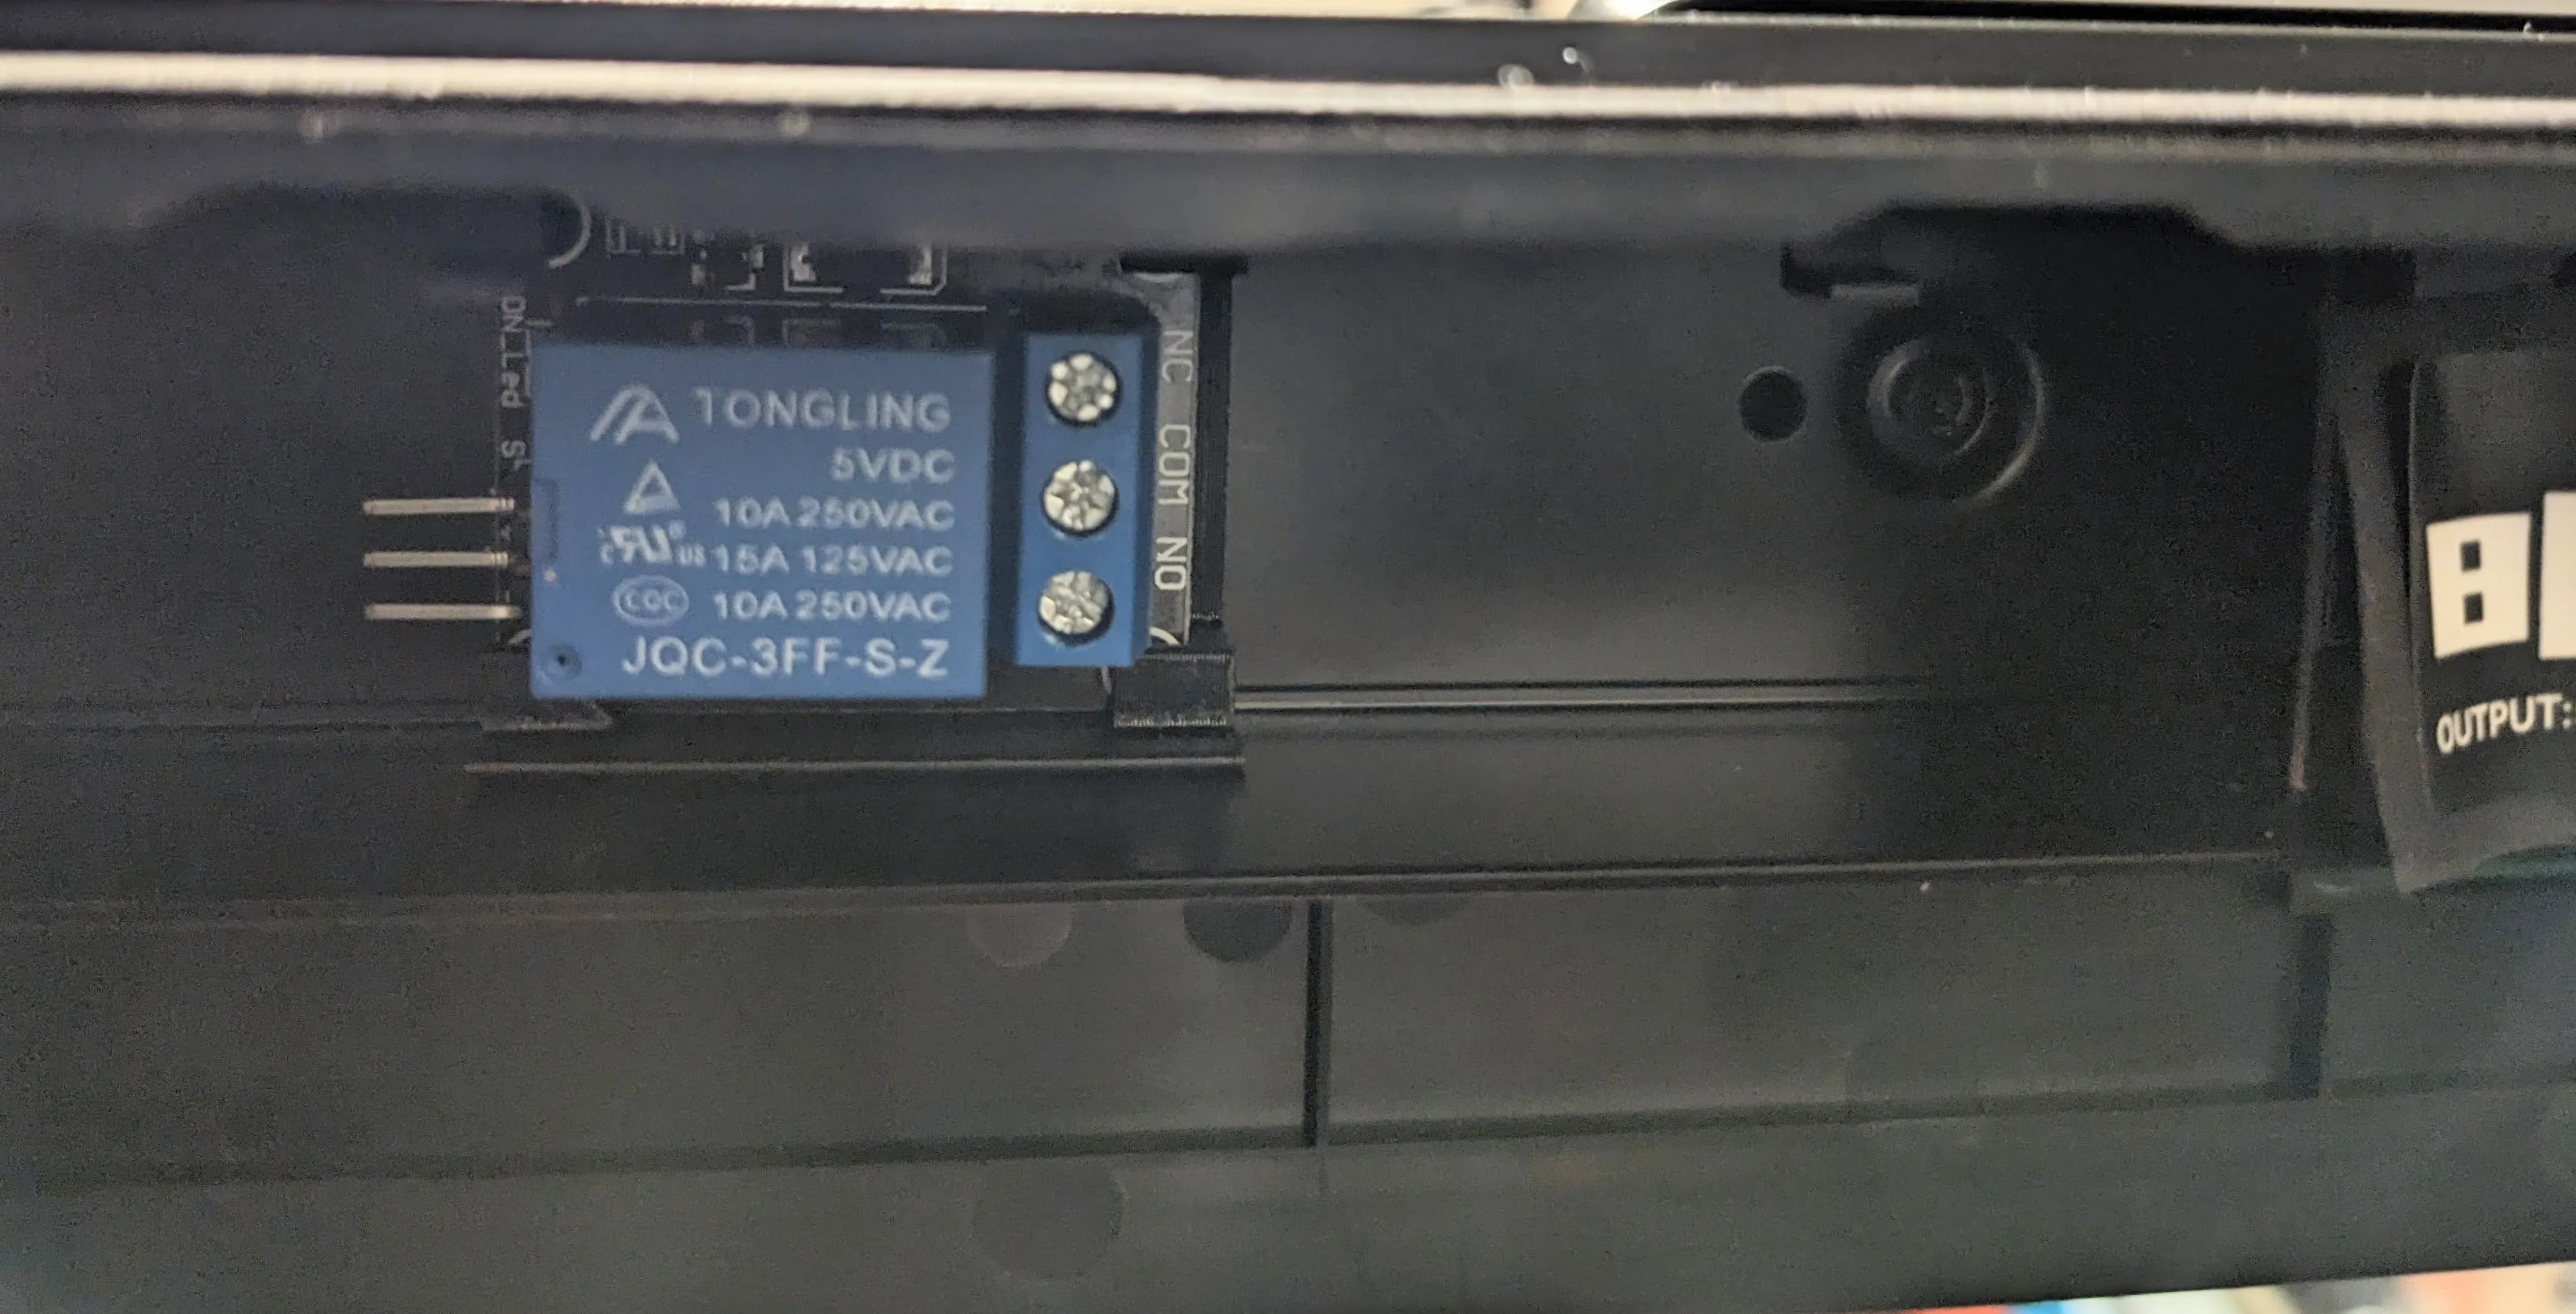
Relay Module: The mount is designed around a popular, generic relay module that is sold at AliExpress, Amazon, eBay, etc.. If your relay module looks like this and measures approximately 26.5mm × 33.75mm, then it's almost certainly the correct one.
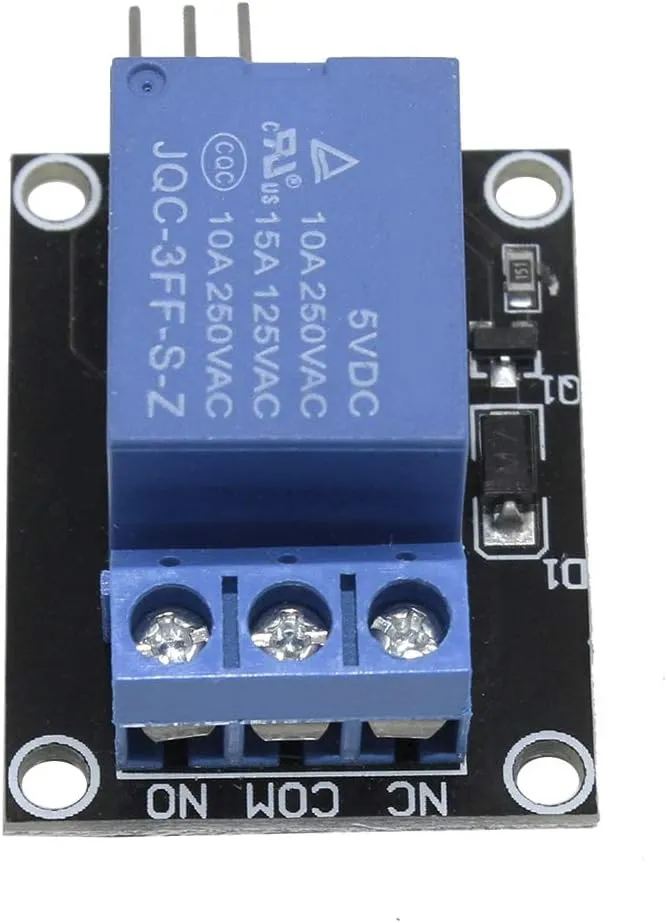
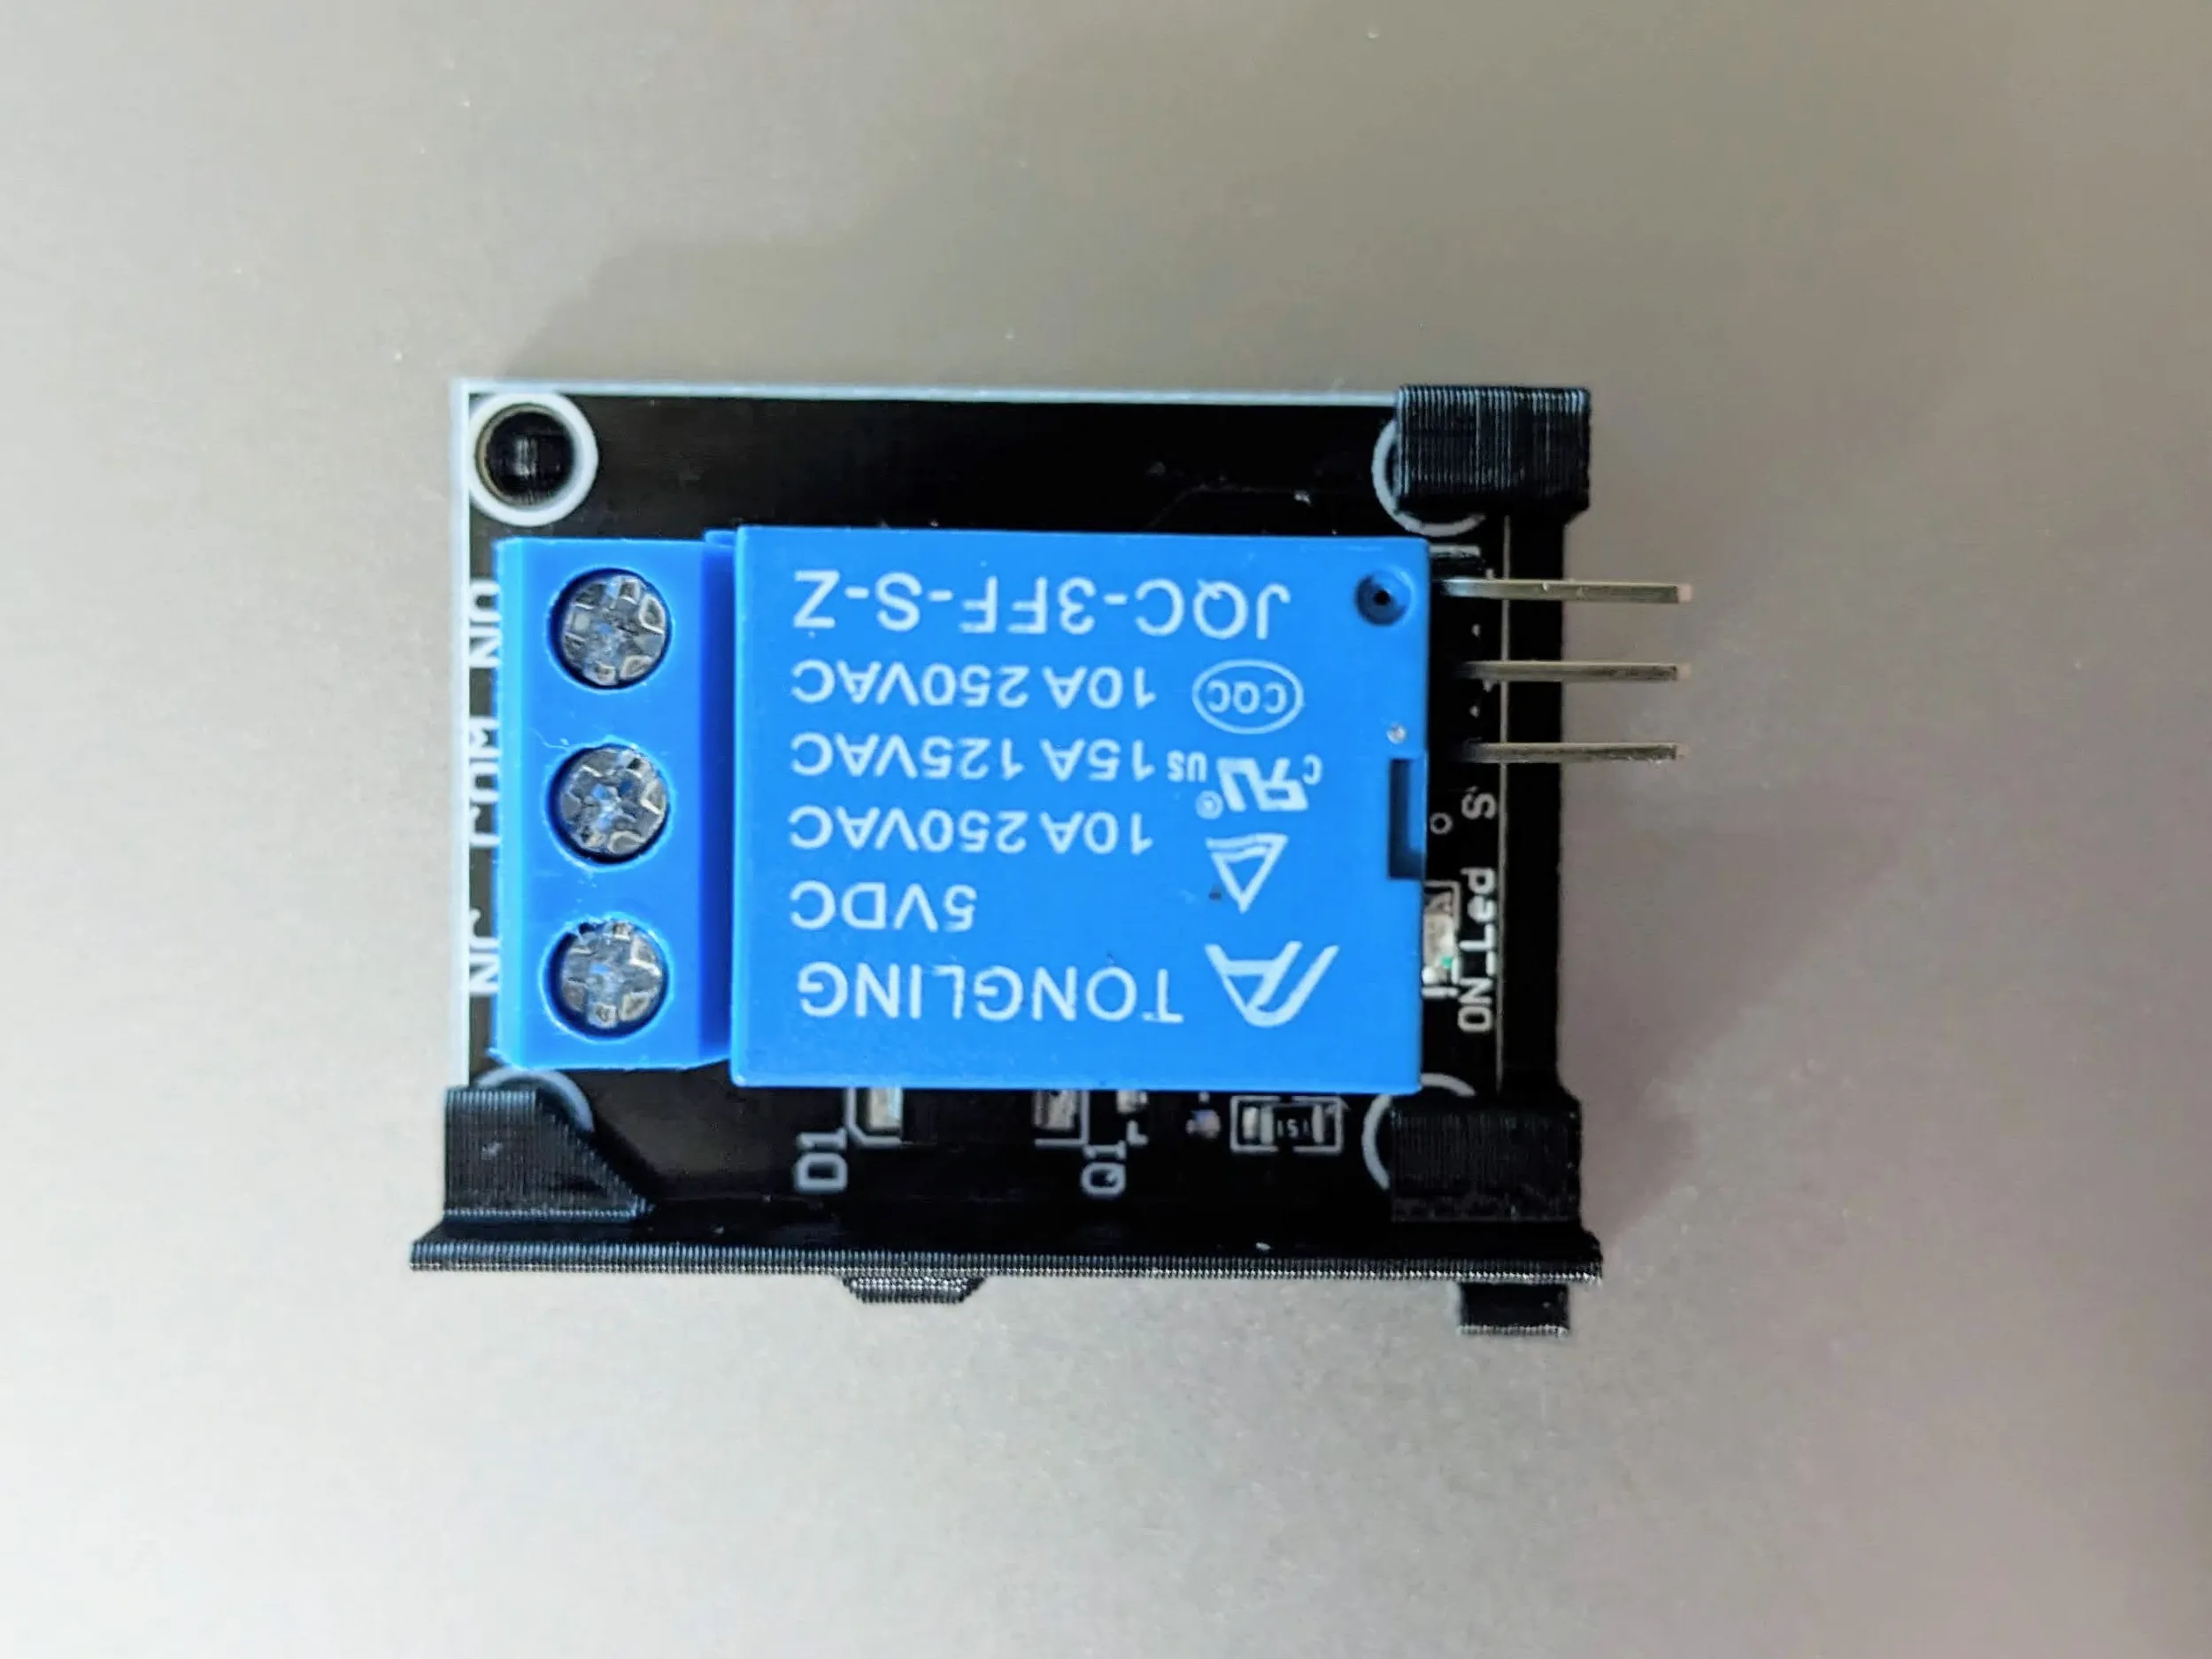
Slide the relay module onto the mount. It may take a fair bit of force to fully seat it, but in the end, it should look like this. The relay module can be inserted in either orientation (screw terminals facing left or facing right).
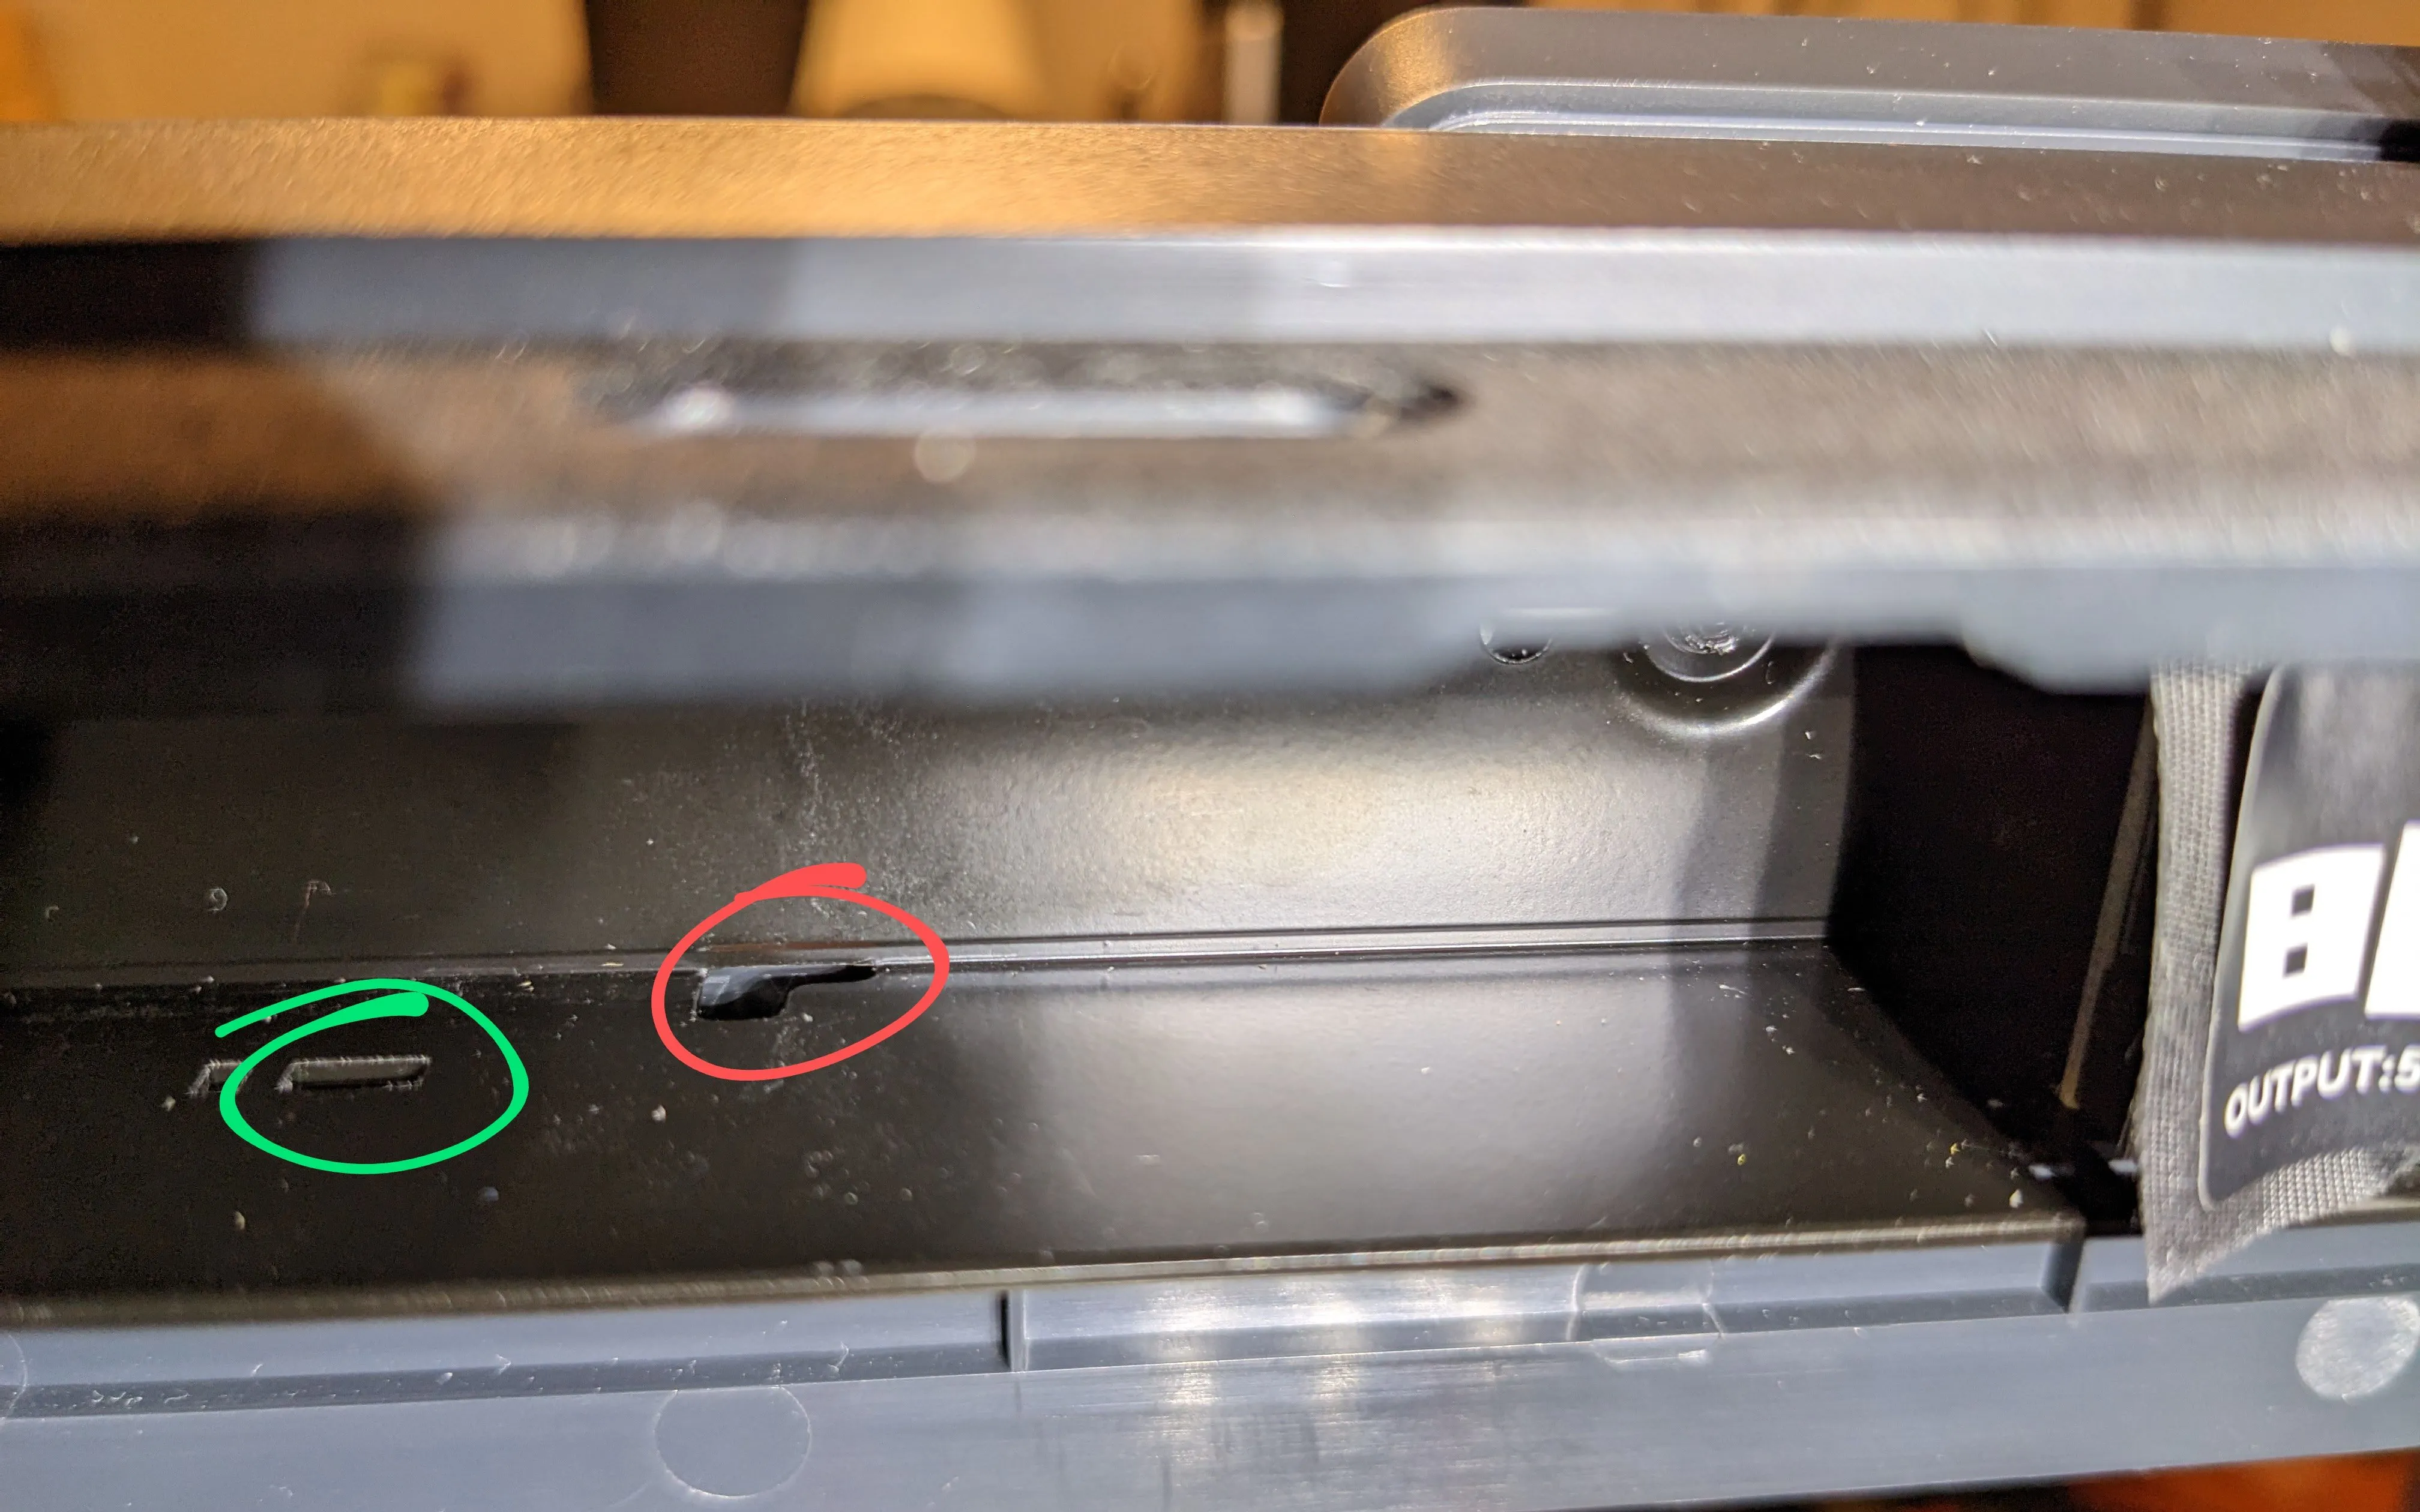
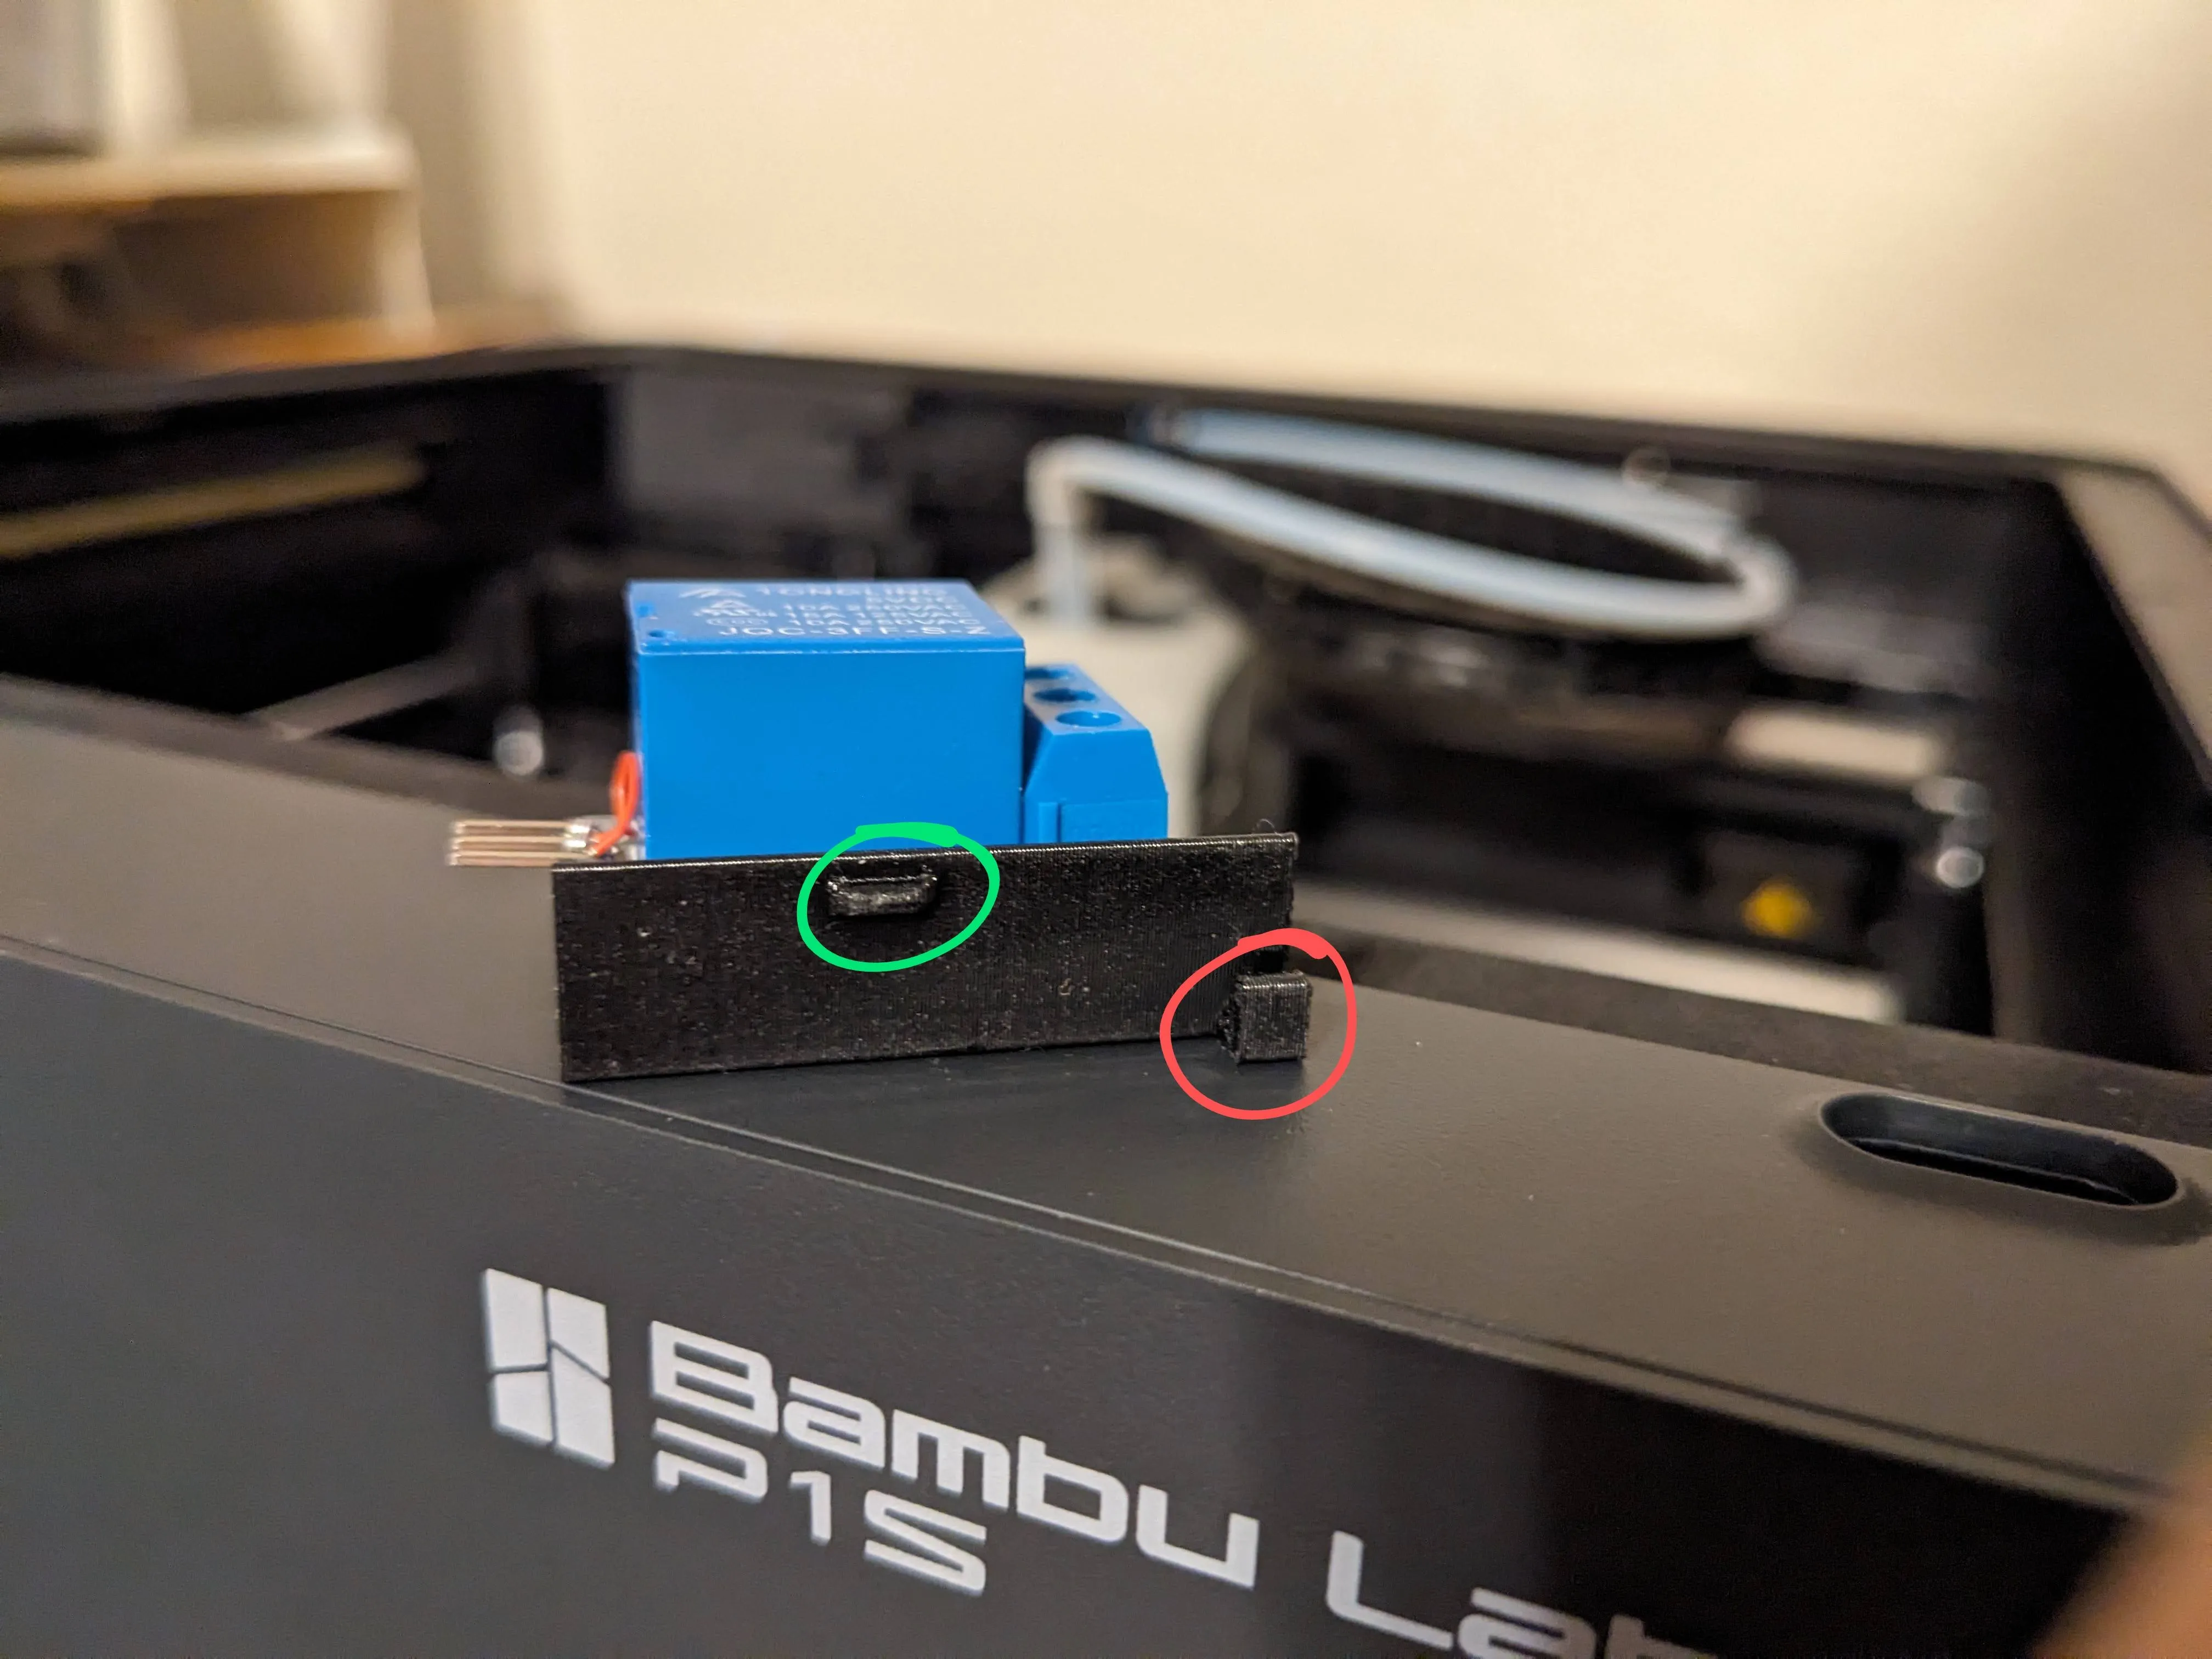
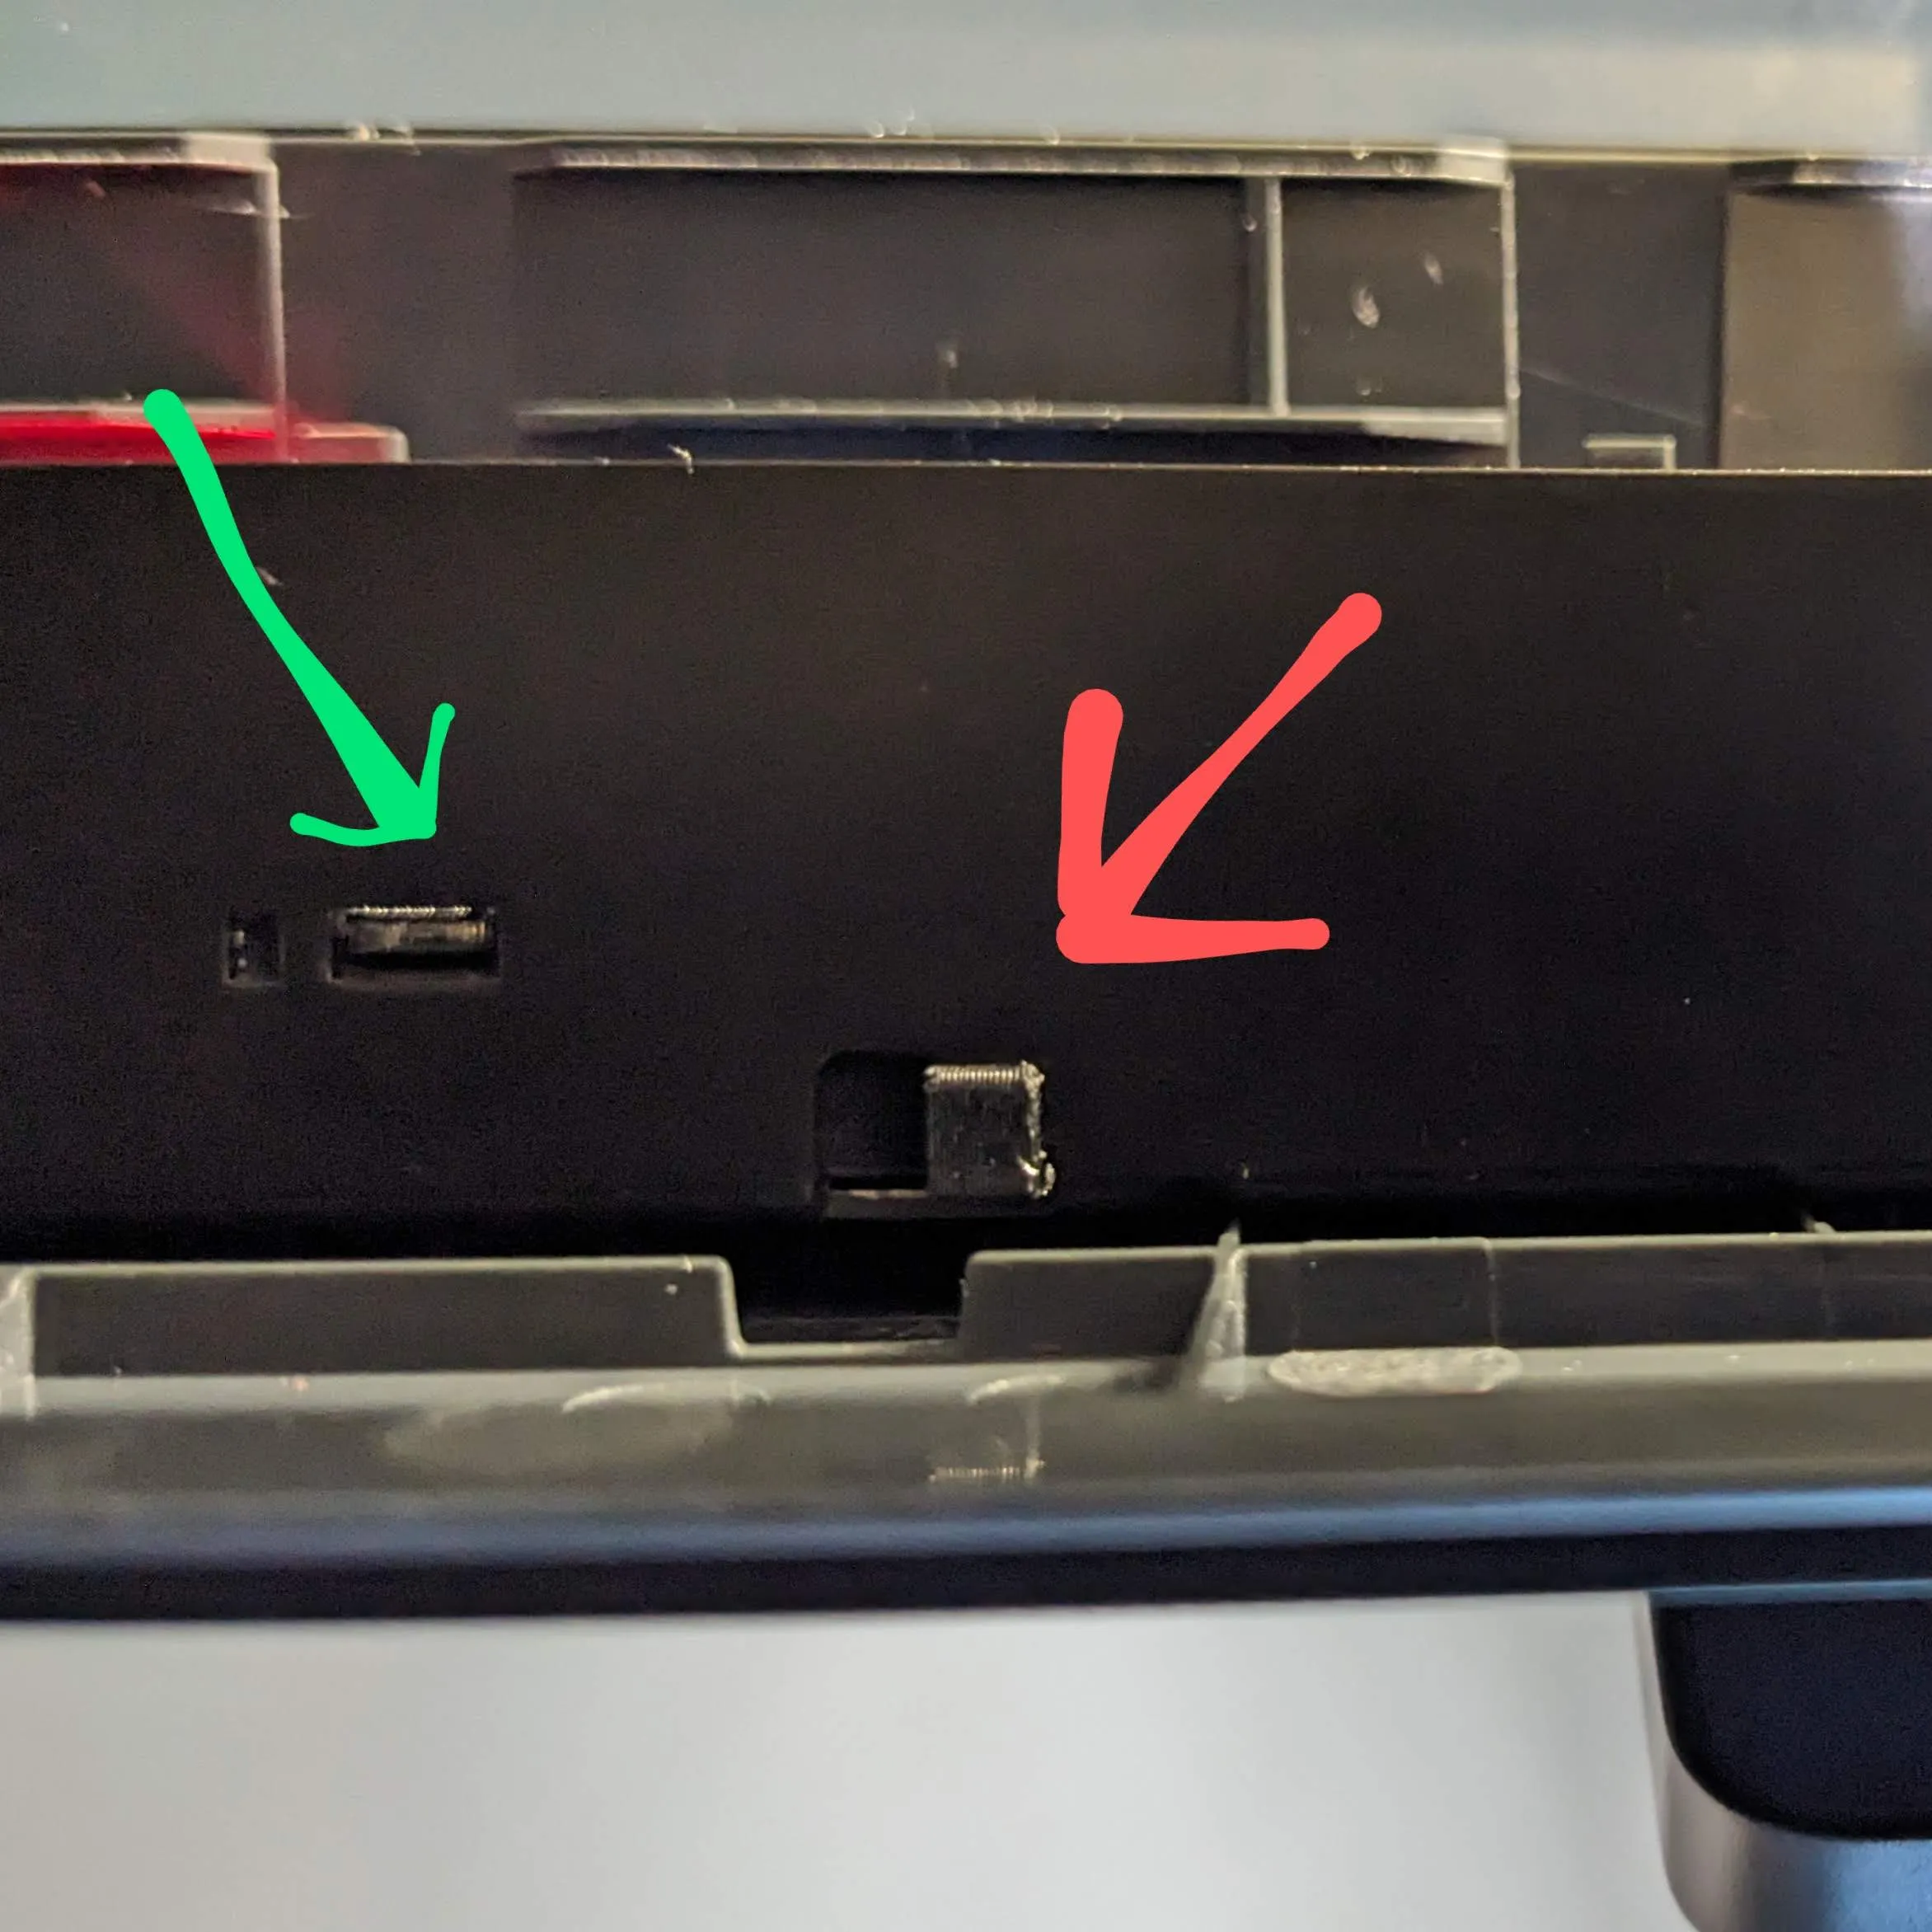
Mounting: For the first attempt, this will require some flexibility and patience. Carefully angle the mount and insert into the area of the frame left-of the USB port. Try tipping the mount towards or away from you at various angles. The mount has a “hook” that should fall into the larger portion of the “L-shaped” hole and then slide over towards the USB port to lock it in place -- circled in red below. The other tab should fall into the other slot when the mount locks into place – circled in green below. If you're having trouble, be sure the “hook” isn't crushed or bent out of shape from your insertion attempts.
When properly seated, it should look like this:
View looking straight up at the under-side of the frame:
Suggested Connections
AP Board LED Connector: Control the relay by using the LED connector (5V and a switched GND) on the AP board to energize the relay. The connector is a JST GH1.25mm 2-pin header. The best way to tap into that is to crimp your own cable or buy pigtails with the connector already crimped. You can get them at Amazon, AliExpress, or eBay. If you make a Y-cable, you can continue to power the stock LED strip and activate the relay at the same time.
USB Type A Connector: To get power from the USB port, create your own Type A plug/cable or get a pigtail with the cables already attached. These are available at Amazon, AliExpress, or eBay.
Wiring Diagram:
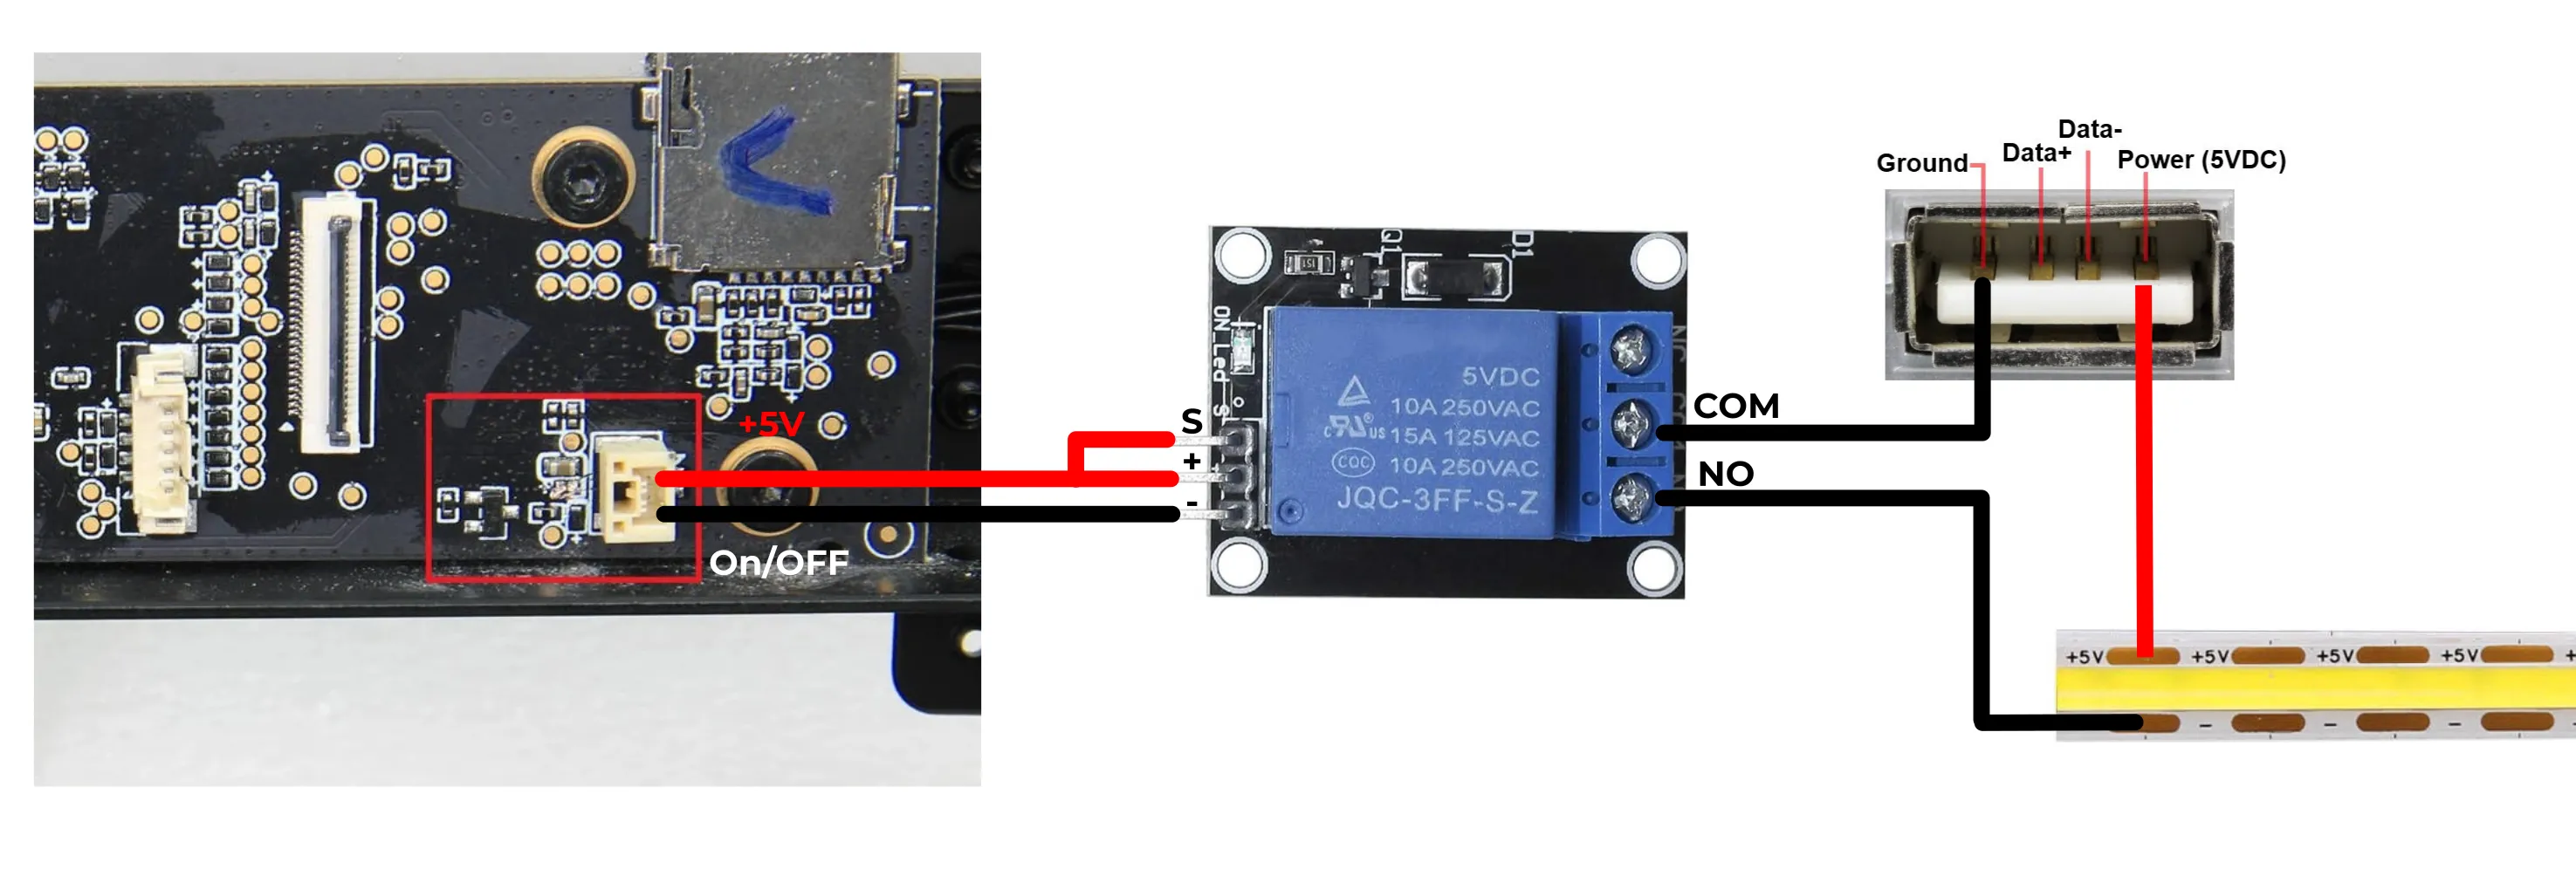
Wiring Options:
- Make a Y-cable to retain the stock LED strip functionality
- Add an inline switch between the NC (Normally Closed) and the NO (Normally Open) terminals of the relay. This will give you instant local, manual control over the LED without having to go through the screen's menu. It will also override the software control of the LED and keep it on.
License

You shall not share, sub-license, sell, rent, host, transfer, or distribute in any way the digital or 3D printed versions of this object, nor any other derivative work of this object in its digital or physical format (including - but not limited to - remixes of this object, and hosting on other digital platforms). The objects may not be used without permission in any way whatsoever in which you charge money, or collect fees.


Comment & Rating (252)