Filament Spool Switcher for Bambulab AMS and AMS Lite


Print Profile(2)


Description
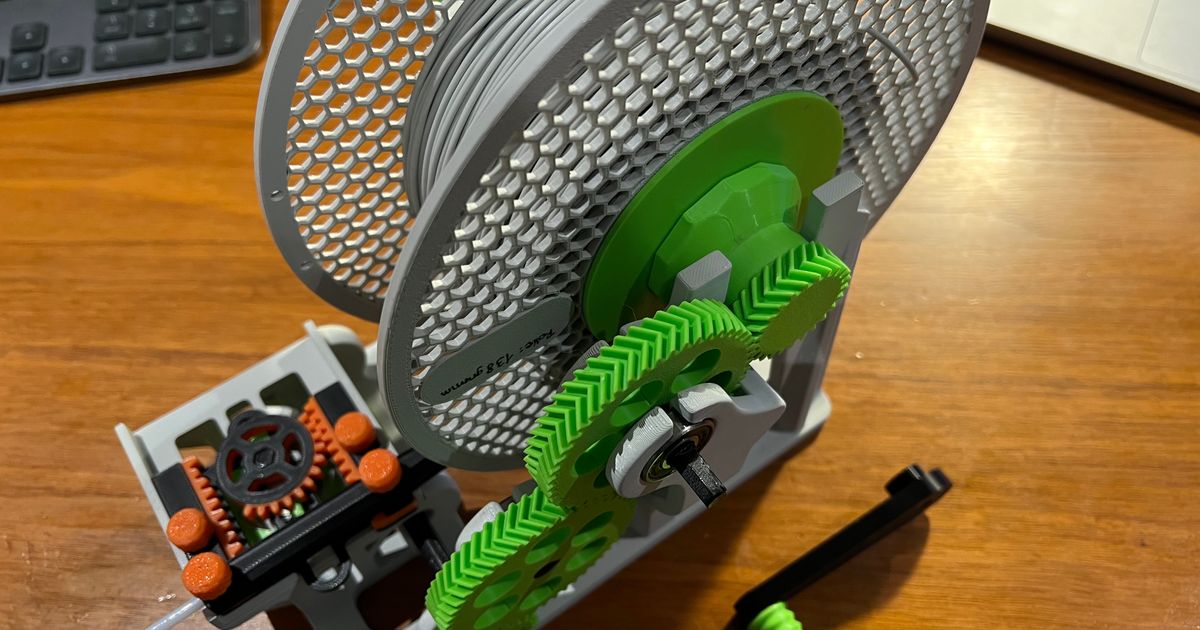
Completely automated filament winding system designed for Bambu Lab's P1, X1, X1C, or X1CC 3D Printer.
Explore the videos located below to witness its functionality firsthand. Stay informed about any updates related to this model by checking out the latest news.
Always ensure bed leveling and flow calibration, especially for gears and axles when using this model! Calibration for Bambu Lab P1 is essential, particularly regarding linear advance.
I've uploaded some print suggestions in *.3mf format. Included are 5 print plates for Bambu Lab / Bambu Studio, with a PEI plate at the end of the list. Note: this is not a cold plate, so exercise caution.
Upon repeated testing, I encountered the same issue: the 45 mm axle (the driven one) broke! Using 3 walls and 25% infill isn't sufficient.
If you haven't printed it yet or experienced a breakage, please print it with:
- 0.16mm Optimal @BBL profile
- 5 or more wall loops
- 100% infill (sparse infill density)
- Rectilinear (sparse infill pattern - set automatically)
- speed outer wall (slow as possible for more accuracy) e.g. max 60 mm/s
- support (yes) normal (auto)
If the stronger printer settings for Axis 45mm are not enough, the you can also print the “Heavy Load” version (see folder “Heavy Load Parts”)
Centering discs:
If you need a special size, you can decrease or increase the next size in the slicer program.
E.g. if you need 51.5 mm, then you can take the 50 mm disc and scale up accordingly before printing.
(51.5 / 50 = 1.03, i.e. print 3% larger)
Reference print settings for:
- Winder Spool Holder Main Body
- Donor Spool Holder Frame
- Winder and Donor Right Hand Spool Axle Nut
- Donor Spool Holder Axle without Gear
- all Spooler Centering Discs (50/55/60/65 mm)
Settings:
- 0.20mm Standard @BBL X1C Profile
+custom settings: - Wall loops: 3
- Outer wall: 60 mm/s
- Infill 25 %
- if you need support, don't do it at the vertical ball bearing openings
support can be used under the filament carriage holder and under the lower ball bearing for the filament sled. (paint it manually)
Print settings for:
- all Gears
- all shafts / axis (except the driven one 45 mm, see above)
- handle or drill adapter parts
- all washers
- and all Filament Guide parts
Settings:
- 0.16mm Optimal @BBL X1C
- Wall loops: 3
- Outer wall: 60 mm/s
- Infill 25 %
- no support needed, except:
all axis with hexagon
please print all parts (gears, axis) horizontally, except:
- Winder Right Hand Spool Axle with Gear 25 teeth or the Heavy Load version
- Winder and Donor Right Hand Spool Axle Nut
- Gear Worm
- Rotary handle - twist grip - axis
- Rotary handle - twist grip - knob
- Donor Spool Holder Axle without Gear
Multiple Prints:
- all centering disc's 2x per spool
- 4 x Washer 3.0 x 8.5 mm
- 2 x Gear with 50 teeths
Additions parts:
- 7 x 608 bearing
- 12-15 cm PTFE tube
- 4 x M3 hexagon socket screw (optional, you can also glue the filament guide & sled)
Have Fun!
The model is available for free download and use.
If you still want to invite me for a coffee for my effort, troubles and time (I ran out of filaments a couple of times), you can do it via:
https://paypal.me/mikloskiszely
Comment & Rating (401)