Keychain Calipers

Copyright Claim

Keychain Calipers

Boost
981
1770
121

Print Profile(5)

All
X1 Carbon
P1S
P1P
X1
X1E
A1
A1 mini

X1, P1, A1 Right Handed
Designer
24 min
1 plate
4.9(61)

A1 Mini RIGHT handed
Designer
26 min
1 plate
4.7(18)

X1, P1, A1, LEFT HANDED
Designer
24 min
1 plate
5.0(3)

A1 Mini LEFT handed
A1 Mini LEFT handed
Designer
27 min
1 plate
5.0(1)
Click to see more

Open in Bambu Studio
Boost
981
1770
121
89
1.4 k
841
Released

Description

Boost Me (for free)

Boosting this model supports this channel and allows this model to become more visible to other users! Thank you for the support!

If you are printing with a textured buildplate, the parts might be a little too tight initially. To loosen it up, force the lower jaw to the bottom most position and then to the top most position several times in quick succession and it should start to loosen up.

Description 

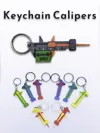
 These calipers are accurate up to 0.5mm. They are perfect for those who always want to have a measurement tool on the go. Clip it to your backpack, keys, or belt loop. It weighs less than 6 grams, takes 25 mins to print, and cost $0.15 to make. Mix and match colors to find the perfect combination to suit your style!

ACCURACY

Each smaller notch, going from top of the notch to the top of the following, will measure out to be 1mm. The long notch is representative of 10mm and the notch half its size is representative of 5mm. Using the measurement datum on the lower jaw, you can determine the measurement based on which notch the datum aligns up with.

 MEASUREMENT TECHNIQUES

Calipers are a must-have tool for anyone looking to start designing. Although many individuals own a caliper, not many know all of the different measuring techniques a caliper set offers. Keychain calipers has 3 different ways that you can use it to measure. 


The first is the one that is the most intuitive and that is the outside measurement. By placing the caliper jaws around the outer surface of an object and closing them, you can measure the overall external dimension.


The second is the inside measurement. Using the jaws on the back of the caliper, you can measure the distance between two inner surfaces, like the diameter of a hole.


The third is the depth measurement which is depth measurement. By using the probe that protrudes out from the bottom, you can measure the depth of a cavity or blind hole by placing the caliper body against the top surface and extending the probe to the bottom. 

ASSEMBLY

  1. Slide the lower jaws onto the upper jaws as shown below.


   2. Slide the frame onto the back of the jaw assembly as shown below. 


    3. For a more secure hold, a small amount of glue can be applied in the top cut out in order to lock the frame to the top jaw. If you are printing with a textured buildplate, the parts might be a little too tight initially. To loosen it up, force the lower jaw to the bottom most position and then to the top most position several times in quick succession and it should start to loosen up.


Commercial license - https://www.patreon.com/MeasureOnce  


Bill of Materials

Maker’s Supply Kits and Parts
Buy Now
Download BOM

Comment & Rating (121)

(0/5000)

Absolutely love it. Just wish they had an SAE version.
The designer has replied
2
Reply
Lol I'll try to get around to releasing an imperial version. I actually originally designed it that way but changed it last minute because I figured noone would download it if it wasn't metric.
3
Reply
Replying to @MeasureOnce :
i was about to print it until i read this comment and yours (probably still will). at least in the US things just **are** SAE, so a keychain probably would be the one place i'd find use in non-metric calipers :P
0
Reply
Replying to @ddcardin :
Fair enough. I solely use SAE at work as an ME in the US. However, metric seems to be the go-to system for the majority of the 3d printing community regardless the country of origin. Im still getting used to metric but my brain has been wired for SAE. For some reason, its easier for me to gauge the thickness of a 0.039" wall than a 1mm wall even though they are the same thing. Brains are weird.
(Edited)
0
Reply
Great design, thank you. I printed mine in gray petg with a layer of black for added contrast. I also used a 0.2 nozzle and .1 layer height on a smooth plate and it is beautifully smooth and very accurate. Doing the black the way I did, meant only 3 colour changes.
(Edited)
The designer has replied
2
Reply
Dope! You should post a profile for it!
1
Reply
Boosted
Print Profile
A1 Mini RIGHT handed
Look great and the messurment are fine
1
Reply
Beautiful print, dude!
0
Reply
Print Profile
X1, P1, A1 Right Handed
Very cute, but not exactly functional or accurate
0
Reply
The lines that indicate the measurements are the protruding notches. Not the indents. It should be accurate up to around half a mm. However, it looks like your initial layer got messed up. So that might be why. The first layer on the upper jaw looks shifted upward (looking at the back internal dimension jaws). If your print had a layer shift then the it probably doesnt slide properly as well. Id recommend checking your belts to make sure they are tight. That can cause a layer shift
(Edited)
0
Reply
Print Profile
PETG for strength and durability, colored markings, .16mm
Humorous :) Carbon Plate! (PLA printed)
Show original
1
Reply
Print Profile
X1, P1, A1 Right Handed
Really love the design. I would suggest for the P1S and X1C. That you move the prints away from the aux fan to the other side of the plate. I had a couple failed because it's so close to the fan you get shrinkage and lifting even on the super attack cold plate. :)
0
Reply
Unfortunately I am away from from computer for the remainder of the week. Youre more than welcome to post a profile with them being moved away from the fan.
0
Reply
Boosted
Print Profile
X1, P1, A1 Right Handed
I’ve got some print defects and readability could be better but nonetheless nice print
0
Reply
Hey thanks for the rating. Those defects make me think that your filament might be a bit wet and over extruding. Try a different spool. Or run the whole thing in orange because the orange part looks like it printed well
(Edited)
0
Reply
Print Profile
X1, P1, A1 Right Handed
printed perfectly with no issues, love the fact that no glue needed. Only thing I change is the preset which is bambulabs own 0.08mm print profile.
1
Reply
Really nice, but I'm getting a print time of 2hrs 14min without modifying any settings. Any idea what may be causing this?
The designer has replied
0
Reply
Can you send a screenshot? Thats really strange.. I just downloaded all the profiles and they are all saying around 25 minutes after slicing. Also which printer are you using?
(Edited)
0
Reply
Replying to @MeasureOnce :
It looks like all of the extra time is spent on the tower. Seems like it would be more efficient to print the second part in the other color with a different plate. I'm very new to this, with less than 20 prints. Received my X1E a few days ago.
0
Reply
Replying to @user_3589941952 :
Gotcha. Id just run two separate prints. Run two parts in the one color you want them in and then print the last part in a different color after they are finished
1
Reply
Print Profile
X1, P1, A1 Right Handed
Charming keychain 🤩
Show original
0
Reply

License

This user content is licensed under a Standard Digital File License.

You shall not share, sub-license, sell, rent, host, transfer, or distribute in any way the digital or 3D printed versions of this object, nor any other derivative work of this object in its digital or physical format (including - but not limited to - remixes of this object, and hosting on other digital platforms). The objects may not be used without permission in any way whatsoever in which you charge money, or collect fees.