Search models, users, collections, and posts


Bio
Hi! I'm Pakulia, but my friends call me Paku.
My life is an endless discovery of new hobbies, so I had to land here eventually.
I'm completely new to the 3D space, but I'm pretty experienced in 2D design. I like to draw, paint, but mostly design stuff on my trusty computer. Which I love putting together myself also :P
I also play a lot games, am a bit of a movie/drama show addict and oh, I also recently got into sewing as a hobby so there is that, too!
Why are there only 24 hours in a day?
Achievements
MakerWorld Guardian
Active more than 20 days out of last 30 days UTC time
Pioneer Maker
Print successful 136 different models and 1,073 hours
So I had this pixel project in mind for a while, and tried to make it using MakerLab, Diamond Painting and Pixel Hobby. None of them really hit the spot for me - Pixel Hobby is too expensive, diamond painting too shiny, MakerLab too large.
So I went and developed my own version. I present to you: Petite Pixel Painting!
As the name suggests, the pixels are very tiny.
Putting paintings together is a bit of a challenge, but oh so addictive!
You can make it as hard as you like - print a 2D example to place the base board on for a relaxing and easy grind.
Use the provided example on a screen next to you for a slightly harder challenge.
Or... Test your photographic memory and try to make it without using the example?!?!
Either way. Please enjoy this project and leave a like!
I intend to upload many more fun designs and peripherals, such as frames and hangers.
#Newmodel #Halloween 2025 #pixels(Edited)
Share
0
0
0
So I had this idea when the Glow Within competition started, but I just couldn't get it on paper.
Fast forward to the very last hours of the competition being live, and I finally managed to finish the design and put it in the competition in the very last hour it was live!
So now, all I need is a little support from my followers <3
Please take a look at my first-ever attempt at some more intricate 3D design. A cute little glowy lampy thingy! #Fiery Heart #Light #Glow Within
Share
0
0
0
My second entry in the Paint tools contest!
After making a much requested holder system for Citadel ports, I redesigned the Vallejo collection from the ground up, and made it even easier to print! Go check it out 😊
Paint Rack for Dropper Bottles - Skadis Full Rows
884
2.4 k
Share
0
0
0
My very first contest entry!
Paint Rack for Citadel 12/18ml - Skadis Full Rows
536
1.9 k
Share
0
0
0
Share
0
0
0
Perfect.
I grabbed this dual color print profile for A1 Mini without AMS, used only plate 1 and added one more colour. I chose black, red and yellow.
The new tri-color filament fits on my tiny spool perfectly. I can’t wait to see what a print will look like!


Share
0
0
0
Check out my new upload!
I got some light strips over the weekend and decided to try out some Makerlab stuff.
How awesome is this lightbox 😄
FOR THE HORDE!
Horde Logo Lightbox
5
4
Share
0
0
0
Share
0
0
0
The start of my 3D journey...
There are many, many paint holders for Skadis on Makerworld for the 17ml paint bottles from various brands. All of them great in their own right, but I just couldn't find one that was precisely to my liking.
So I designed my own system...
Shout out to @SiJiL82 for coming up with ideas and helping to think out the logic :D
First model is online now, other modules for this set coming soon!(Edited)
Skadis Modular Paint Rack - 6
142
417
Share
0
1
0
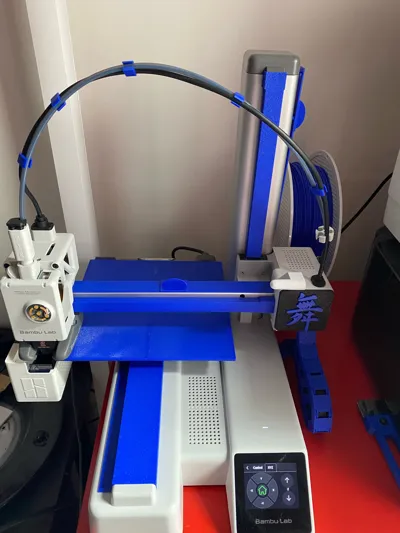
Looks very nice, thank you for this! I made a couple of refinements:
1. The Z-axis drive bar doesn’t hold itself up. See picture: if you squeeze the little protrusions (GENTLY!!) with a plier, they become a little wider and the (PLA) cover may stay in place better.
2. The Y-axis drive rod + guide rail parts can be glued together to make 1 less part to handle.
3. Adjusted the build plate cover a little bit to make it sturdier and look nicer. Will upload the profile and some pictures later! :)


Share
0
0
0
Veeery nice result with 0.2 nozzle and matte PLA.
I decorated it with a (glued on) logo, it looked fantastic... But turned out to be upside down. D'oh! 😂
Don't want to waste such a nice print so I clipped off the back clips, put in some magnets and now it's a very over-engineered fridge magnet lol.
*1 day later* Reprinted the lid and the logo, checked how to install it before glueing this time 😄
Result is great, it fits okay. Thank youuu!


Share
0
0
0
No more data