Search models, users, collections, and posts


Bio
8 year hobbyist in the 3D printing community. I mostly make practical models but dabble with other kind of models as well. Learning Fusion360 (slowly!). Welcome feedback and suggestions for how to improve the models I publish.
Achievements

MakerWorld Guardian
Active more than 20 days out of last 30 days UTC time

Popular Model
1 model more than 5,000 successful prints.

Stellar Reviewer
Rate or Comment 257 different models

Pioneer Maker
Print successful 213 different models and 3,247 hours

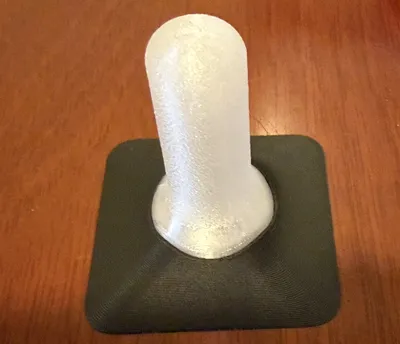
Updated review after a month plus of use: This is fantastic! There are so many scrapers out there and they may seem to blur as many of them even look similar. But this one has risen to the top for me and is practically the only one I use. What sets it apart is that I can get small bits off that would have otherwise required a metal scraper. And the blades last a LONG time. I printed four spares (and hold them with my Skadis mount) because I thought I'd be going through them rapidly. But they are way more durable than I expected. Bravo.
Printing: I did modify things slightly by reducing the fuzzy skin texture a bit. I'm sure the aggressive texture may improve grip - but aesthetically I just prefer a bit less texture so I toned it down. I also did ironing on the very top (again for aesthetics).
I also created a Skadis holder for it if anyone is interested: https://makerworld.com/en/models/2457490-skadis-holder-for-last-scraper-you-will-ever-need
Share
0
0
0
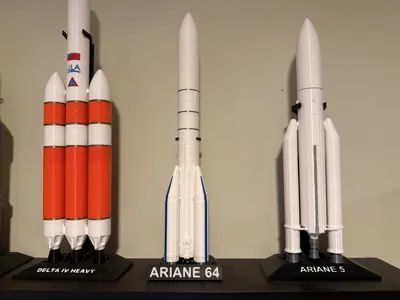
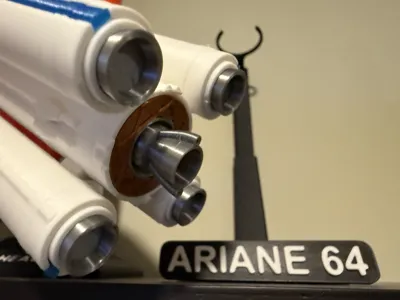
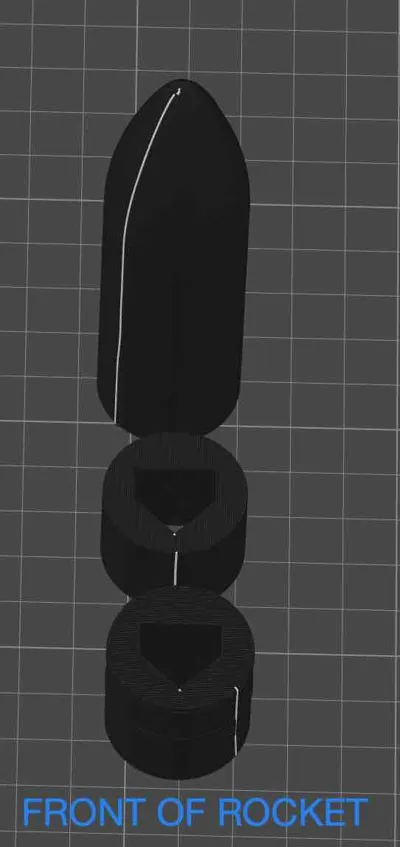
Another great rocket by Kmobrain! Very fast to print and assemble. Only minor gripe is that the seams aren't well placed on the fuselage. Fairing seam is just left of center. One fuselage section is right in the middle (most visible) and the other fuselage section is right of center. Would be better to orient all the parts facing front of plate and use the 'back' seam option (or do a custom seam). This would ensure the seam is in the back of the rocket (out of sight) for all the major parts. So if you are reading this and haven't printed it out yet, I would suggest changing the seam settings.But that minor OCD issue aside, another awesome model!
Share
0
0
0
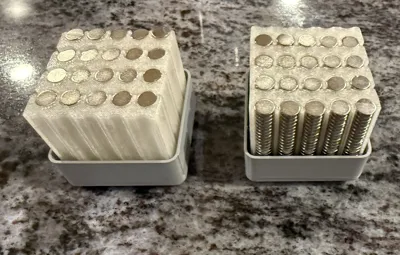
Works well to hold my excess magnets. Most of my magnets I keep in dispenser pens and hung on a Skadis board via https://makerworld.com/en/models/2058802-magnet-dispenser-pen-holder-for-skadis-pegboard. But for some magnets, particularly 3x2 shown here, I have hundreds of extras and needed a place to store them well that wasn't a cardboard box! These are working out well so far. I do want to work on my own bin though as I'd like them to stack and have magnet holes themselves. But this is a solid design.
I did scale the height a little so I could get 20 of the 3x2 magnets per column (100 per row). Thus these two small cubes are able to hold 800 magnets. Nice!
Share
0
0
0
I have the SIS - Seismic Isolation System dampers plus the H2D adapter. This raises the printer about 30mm. Which, turns out, was perfect for stacking three build plate holders and using that open space. Looks absolutely custom. I haven't gotten around to printing holders for the laser plate and the cutting plate but those will be next (in a separate stack). I did find that I had to slightly enlarge the hole on the end of the arm that attaches to the button. I broke two buttons before I figured that out. But after ever-so-slight enlargement, it works great. Thanks.


Share
0
0
0
I didn't know what size(s) I would need so I printed all of them so I would have options. Seems like the 9 and 10mm are the most useful, but I think I found an application for a few of the smaller ones too. I'm all set now.
I printed these from TPU for AMS which is kind of like a cross between PETG and TPU. Provides a little more flexibility but is still pretty rigid. Works well for this application.


Share
0
0
0
I wanted clean, simple Skadis holders for Brian Dean's excellent and super-useful magnet dispenser pens. But I either couldn't find any or the ones I found didn't match what I was hoping for. So, I designed my own and after dozens of hours of design, iteration and many test prints, I can now share them with the community.
Magnet Dispenser / Pen Holder for SKADIS pegboard
68
339
Share
0
0
0
I am increasingly getting into SKADIS (I think I have 9 boards now and 2 more on their way). Lately I have been designing my first few SKADIS accessories as well as I work to try to improve my CAD skills. I welcome feedback on how I can improve my designs further.
DSPIAE ES-P Sander Pen Skadis Mount/Holder
7
19
Share
0
0
0
I like this model for the most part. The 'V' grove is the innovation over other wiper solutions in my opinion. The reason I am not giving it 5 stars is because I don't like how the 4x4 piece of the A1 mini wiper "hangs off" the right side instead of the model feature being 1-2mm wider so that it could form a nice 'wall' to help secure that side of the pad. See my photo to understand what I am talking about. I have had problems with the pad eventually getting knocked off (even with a drop of CA glue) after many repeated wipes and think that if the model was changed slightly to have that "bed" be long enough to fit the entire fourth row of the wiper, it would solve that one issue. But overall it IS my preferred wiper these days and it works well.


Share
0
0
0
One item I am a sucker for at Harbor Freight is those $3 USD small boxes with the clear acrylic tilt-to-open fronts. They are extremely well made (even more so considering the low cost) and versatile. I use them in my office and in the garage. To extend their versatility, I have made a series of dividers (for when you don't need to store large quantities of small parts) as well as a SKADIS adapter to hang them on the Ikea pegboards. If you are in the US and have a Harbor Freight, check them out!
Skadis Adapter for Harbor Freight tilt bins
12
38
Share
0
0
0
My first 'cube' tissue box cover. Unique with a realistic wood-grain texture that you can actually feel. Stainable for about even more realistic look if you use use Wood PLA.
Woodgrain Tissue Box Cover
354
1.3 k
Share
0
0
0
Reprinted V2 and can confirm it both works just as well as v1 but drains much better. Thanks!
I did *accidentally* print the 75% scale one (oops!)...but that's OK, for my daily handful of berries for a smoothie it actually is perfectly sized!

GIF
Share
0
0
0
I like this but it wasn't great for all my socks. Worked OK for thick athletic socks. But for thinner dress socks, I found it too big and also the more "slippery" and thin sock materials didn't grip as strongly.
I printed it in PC for a combination of heat resistance and fatigue resistance for long life in washer and dryer environment.
I also made my own remix to make it work better with a wider range of socks. I would upload that remix, but it doesn't seem the author allows remixes.

Share
0
0
0
Although the 'Customize' button didn't seem to do anything for me (not sure why), I was able to download the SCAD file and open it in OpenSCAD directly. I used it to make a nice custom drip tray for a planter that my wife wanted to use for this plant in the photo. I used Bambu Lab PLA Metal Iron Gray Metallic and a (subtle) fuzzy skin to further harmonize it for this particular pot/planter. I think it turned out well.
If I could suggest one further parameter that could be added, it would be to allow a variable height 'riser' (like a raised 'X' across the inside). For pots that are completely flat bottomed, the drip-trays really need to have a small air gap to allow the water to escape. Otherwise, the pot and tray may 'seal'.


Share
0
0
0
Update: after printing now 4 of these, I am finding something wrong - but I can’t figure out what.
The issue is that when off the roll, the two pieces twist together fully (as shoud be expected). BUT, when on the roll, they do not. There is about a 3mm gap. Because the spool halves don’t screw together 100%, this 3mm gap remains inside the spool where filament can get stuck between the main roll and the inside edges of the spool holder, which can potentially cause jams. Again, I can’t see anything wrong with the spool holder but on all 4 of my prints, there is this ~3mm gap after I put on the Anycubic rolls. I would fix it myself if I can figure out what is going on.
Original Review:
These worked pretty well. I printed them in high temp QiDI ASA (handles up to 96ºC) since I plan to put these into a dryer (and some of the rolls were used for ASA itself. The remaining ‘core’ is pretty narrow so I did need to use some thinner-than-standard desiccant holders to fit.


Share
0
0
0
Turned out great! I wish I had this like a year ago when I did a bunch of threaded inserts. Oh well - I've got it for my next project. I am wondering if the handle is perhaps a bit longer than needed (?). Haven't used it for real yet but looking forward to trying it.

Share
0
0
0
While I do think there are "better" angle finders out there, this one was pretty quick to print (under 1 hr using 0.24 layer height, even with the AMS swaps). It did the job to find the angle I needed for a custom project I was working on.
FYI I printed it in regular PLA just because I was a bit lazy and that was what I had in the AMS. That said, it snapped together fine and works fine. Though I think the designer's instructions to at least use PLA+ is probably a good one.
The orientation on the build plate is such that if you use a textured PEI sheet (like a lot of us do), you'll end up with 'texture' on opposite sides of the object. For functional parts, I know - who cares? But it looks a bit odd.
I think this model could benefit from being printed in one piece as a print-in-place model like I mocked up in my screenshot. It might require like one layer of PLA Support (or PETG), but could print in one piece and made stronger. Just a thought.


Share
0
0
0
Works well. I am not using it for rock or sand, but I needed a way to easily separate out different sizes of my materials and this worked well. Some one mentioned that having squares instead of holes (hexagons, actually) would work better to keep objects from getting stuck - I kind of agree, but for my purposes the hexes work OK.


Share
0
0
0
I absolutely love my little (and cheap!) NIIBOT D11 thermal printer. But of course, I want it organized and in particular to put it on a Skadis pegboard. Found other D11 Skadis holders and printed at least two, Neither fit :-(. That's when I discovered there are like 3 different version of the D11 and I have the newest one. Nobody (Makerworld or Printables) had a Skadis holder for the newest D11. So, I remixed one and now there is. If you have a D11 with a USB-C port...check out my model.
NIIMBOT D11 Holder for Skadis
3
22
Share
0
0
0
Neat little box. I am sure this will be wildly popular. But reason I can right now only give it 4 stars (if I discover it was user error later, I'll update) is because installation is a bit fiddly. Pictures and instructions makes everything look super easy but it took me a solid 5 minutes to get one box set up. Fit of the twist pegs were tight (PETG if it matters). Aligning horizontally (i.e. centered top to bottom) required needle nose pliers and trial and error. Otherwise cool!


Share
0
0
0
Wife got a laugh out of it and displays it on her desk - so that's a win!

Share
0
1
0