Mini Worm Composter


Print Profile(1)

Description
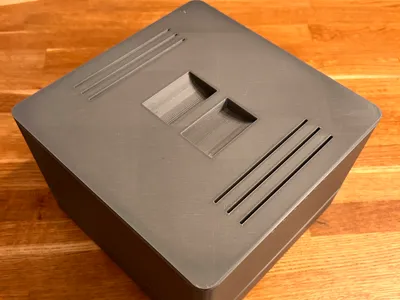
OX3D_Parts Mini Worm Composter – Compact Vermicomposting for Home
The OX3D_Parts Mini Worm Composter is a functional, stackable system for efficient composting of small amounts of kitchen waste – ideal for apartments, balconies, offices, or small households.
Developed, designed, and tested by OX3D Parts, specially optimized for FDM 3D printing.
⭐ Features
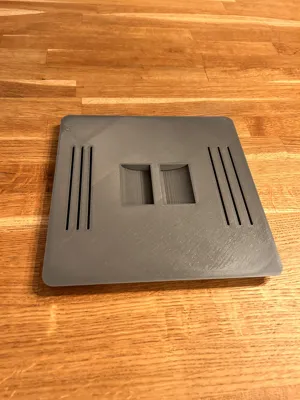
• Compact & space-saving – Base dimensions 200×200 mm, suitable for common 3D printers like the Bambu Lab P1S.
• Well-designed ventilation concept – Side air slots for oxygen exchange without drafts.
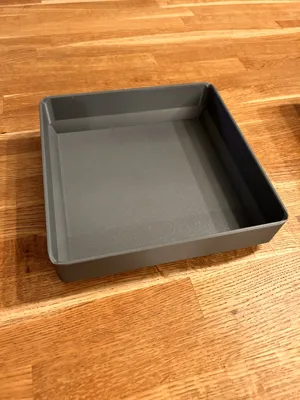
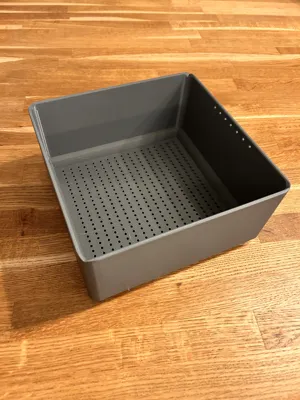
• Drainage bottom – 3 mm drainage openings for excess moisture.
• Stable construction – Optimized for PETG, 3 perimeters, 0.16 mm layer height.
• Easy to print – No support structures needed.
🪱 Instructions: Setting up & operating a worm composter
1️⃣ Preparation
Materials
• Worm composter (e.g., multi-tier, like the one you built)
• 500–1000 compost worms (Eisenia fetida / Eisenia andrei)
• Moist cardboard, egg cartons, or newspaper (unprinted)
• Some finished compost or garden soil (optional)
• Spray bottle with water
• Kitchen waste (plant-based)
⸻
2️⃣ Setting up the worm composter
Step 1 – Create the base layer (Moist, but not wet)
Place a 3–5 cm layer at the bottom of the first tier:
• moist cardboard
• shredded egg cartons
• some unprinted newspaper
👉 This is the initial moisture layer and provides habitat for microorganisms.
Moisture test
• Squeeze a piece:
→ Water drips = too wet
→ Stays dry = too little
→ It should feel like a wrung-out sponge.
⸻
Step 2 – Introduce the worms
Place the worms on the prepared layer.
Cover them lightly with moist cardboard.
⚠️ No light → worms will then burrow in on their own.
⸻
Step 3 – First feeding
Feed very little on the first day:
• 1–2 handfuls of vegetable scraps
• cut as small as possible
• mix with some cardboard (brown material)
Important in the initial phase:
➡️ Less is more!
⸻
3️⃣ Regular operation
🥕 What can go in (green / nitrogen-rich)?
• Vegetable peels
• Fruit (sparingly with citrus!)
• Coffee grounds + filter
• Tea bags (without plastic)
• Ground eggshells
• Plant trimmings
• Potato peels cooked/uncooked
• Rice and pasta in very small amounts, preferably dry
🍂 What can go in (brown / carbon-rich)?
• Cardboard
• Egg cartons
• Kitchen paper
• Unprinted newspaper
• Straw
• Leaves
⚖️ Rule:
1 part green → 2 parts brown
This keeps it odorless, loose, and airy.
⸻
🚫 What must NOT go in?
• Meat, fish
• Dairy products
• Oil, grease
• Large quantities of bread (mold!)
• Large quantities of citrus fruits
• Large quantities of onions/garlic
• Animal feces (except rabbit or horse, well-rotted)
⸻
4️⃣ Moisture & Temperature
💧 Moisture
• Optimal: 65–75 %
• Test: Material like a wrung-out sponge
• Too wet → add cardboard
• Too dry → spray
🌡️ Temperature
• Optimal: 15–25 °C
• Below 10°C → slower
• Above 30°C → dangerous, place box in a cool spot
⸻
5️⃣ Using worm tea (leachate)
If your composter has a drain:
1. Drain every 3–7 days
2. Dilute 1:10 with water
3. Perfect as a natural fertilizer for plants
IMPORTANT:
If a lot of worm tea is produced → composter is too wet → mix in more cardboard.
⸻
6️⃣ Using harvested worm humus
After 8–12 weeks, the bottom tier is ready.
Features:
• Dark, crumbly
• Earthy smell
• Almost no visible waste
Usage:
• Mix with soil for beds
• Improve potting soil
• As a compost boost for tomatoes, pumpkins, chilies, etc.
⸻
7️⃣ Typical Problems & Solutions
Odor
➡️ Too wet or too much kitchen waste
→ Add more cardboard, mix, leave open briefly
Fruit flies
➡️ Waste not covered
→ Always cover with cardboard/soil
→ Place yellow sticky traps nearby
Worms escaping
➡️ Too acidic (too much fruit), too hot, too wet
→ Cardboard, lime (eggshells), aerate
Mold
➡️ This is normal!
→ Simply mix it in
→ More worms & aerate
⸻
8️⃣ Feeding rhythm
• About 1–2 times per week
• Amount: as much as the worms can process in a week:
approx. 25–50 % of their own weight per day
For 500 worms (approx. 250 g):
→ 125–250 g of waste per day
→ Max. 1 liter of waste per week
⸻
🪱 Summary
👉 Initial setup: moist cardboard + worms + little food
👉 Continuous operation: feed 1–2 times per week, check moisture
👉 2:1 ratio: cardboard > kitchen waste
👉 Drain & use worm tea
👉 Fill tiers gradually
👉 Harvest humus after 8–12 weeks
Comment & Rating (2)