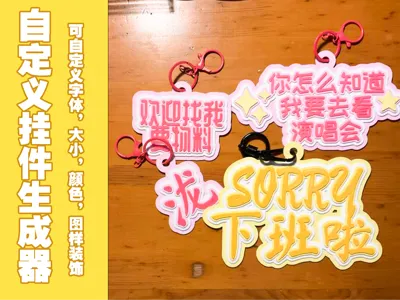
Customizable Charm Generator


Print Profile(1)

Description
[After uploading an SVG image, you need to press the Generate button again]
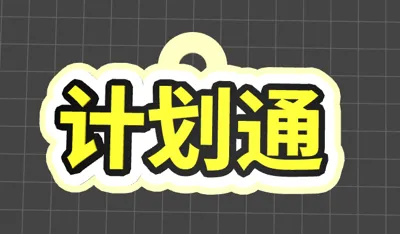
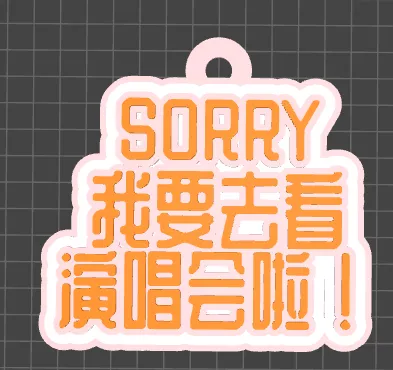
This is a **customizable pendant generator**. You can freely set the color and thickness of each layer, the font and size of the text, and icon decorations. Click the "Customize" button on your computer to start personalizing your design. During customization, you need to click "Generate" to see the final effect.
Additionally, it supports attempts at **printing without AMS**. You can input up to four lines of text and add up to six icons.
Next, I will introduce some related content. Please choose the sections you want to read.
1.Basic Introduction
2.How to Upload SVG Images and Convert Them to Decorative LOGOs
3.How to Obtain SVG Format
4.How to Achieve Printing Without AMS
1.Basic Introduction
- The pendants generated by the support pendant generator uniformly have four layers (as shown in Figure 1-1). In the thickness settings, you can adjust the thickness of each of these four layers individually. The layers are counted from bottom to top: the first layer is the bottommost layer, and the fourth layer is the topmost layer.

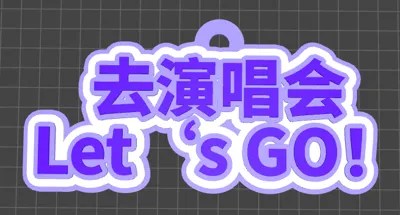
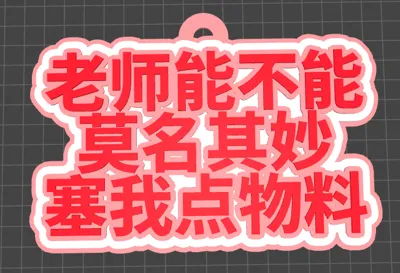
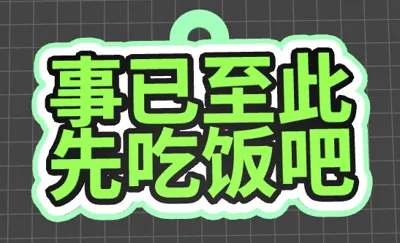
A pendant supports up to four lines of text. Unused lines can be left blank (as shown in Figure 1-2). If a middle line is left blank, it will cause a break in the middle of the pendant.
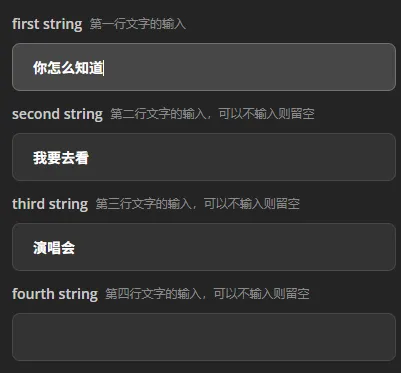
Figure 1-2 Input Options In the text settings, you can adjust line spacing, font type, font size, and outline size (as shown in Figure 1-3). Among these, you can freely choose a suitable font style; font size not only affects the text itself but also changes the overall dimensions of the entire pendant.

Figure 1-3 Text Options The hanger refers to the ring above the text, with basic settings as shown in Figure 1-4.

Figure 1-4 Hanger Options If the hanger is obscured due to adjusting the font size, you can correct this by adjusting the **Deflection (Hanger Y-axis Offset)**. Increasing the value moves the hanger upwards along the Y-axis, thereby exposing it.

Figure 1-5 Hanger Obscured 
Figure 1-6 Adjusting Y-axis Offset to Expose Hanger
2.How to Upload Images and Convert Them to Decorative LOGOs
The generator supports adding up to 6 decorative LOGOs. You can adjust the number needed in the settings under **Logo Num (Number of LOGOs)**. For example, if set to 3 (as shown in Figure 2-1), after clicking "Generate," if no local file is uploaded, the Bambu Lab default icon will be automatically generated.

After uploading, you **need to click the Generate button again**. The icons will be replaced with your uploaded content (as shown in Figure 2-2). Please note that the uploaded icons must be in **SVG format**. I will explain how to obtain SVG format later.

Next, you can adjust the color, size, and rotation angle of the LOGO, as shown in Figure 2-3. It is important to note that the color settings apply to the topmost layer of the LOGO (the fourth layer), and the thickness settings follow the same principle; the colors and thicknesses of the first three layers remain consistent with the overall design.
For position adjustment, LogoX and LogoY represent the LOGO's offset on the X and Y axes, respectively:
- LogoX: Decreasing the value moves it left; increasing moves it right;
- LogoY: Decreasing the value moves it down; increasing moves it up.

By adjusting the position, the LOGO and text can be better integrated into a cohesive whole (as shown in Figure 2-4). Please try to avoid icons obstructing the text.

3.How to Obtain SVG Format
Obtaining ready-made icons: iconfont - Alibaba Vector Icon Library
Taking "rabbit" as an example: search for "rabbit" on the website, click on the target image, then select the "SVG Download" button to download, and then import it.
When selecting icons, it is recommended to use **monochromatic graphics** as much as possible. If the image has too many colors, usually only the outlines can be recognized after importing.
⚠️Note: Icons in the icon library are for personal use only and **cannot be used commercially**.
In addition to using ready-made icons, you can also:
Draw your own SVG files using professional design software (such as Illustrator, Figma, Inkscape) to create exclusive icons.
4.How to Achieve Printing Without AMS
Since this generator produces layered models, multi-color printing can be achieved by stopping at different layers and changing filament. Take the default model as an example. After slicing, drag the green progress bar on the right, as shown in Figure 4-1.

Drag to the section where the color will change or layers will separate. Right-click the green cross to pause printing, as shown in Figure 4-2.


After adding it, the printer will stop at the corresponding position, allowing you to change filament and achieve a multi-color printing effect.
If the printer has a limited number of supported colors, or if you want richer effects, you can **hand-paint** the finished print.
Boost Me (for free)
Comment & Rating (4)