Search models, users, collections, and posts

Kit Crafters
@KitCrafters
27.2 k
235.6 k
491.3 k
340 k
Social Media Links
Bio
🎉 Build your own fun with mini mech model kits! 💰 Get a full Commercial License on my Patreon! 💡 See upcoming projects, get early access, and print exclusive models on my Patreon! 💖 I enjoy designing model kits and appreciate all of your support, thank you!
Achievements

MakerWorld Guardian
Active more than 20 days out of last 30 days UTC time

Contest Winner
Won 6 model contest awards.

Featured Creator
16 models are featured by MakerWorld.

Maker's Supply Contributor
2 models with Maker's Supply Model Kit achieves 500 successful prints.

Popular Model
9 models more than 5,000 successful prints.

Popular Creator
More than 1,000 followers.

Stellar Reviewer
Rate or Comment 554 different models

Pioneer Maker
Print successful 221 different models and 5,876 hours

Post Stars
39 posts featured by MakerWorld
Pinned Models
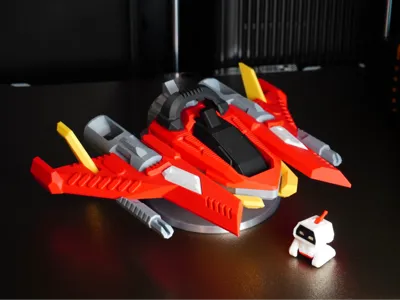
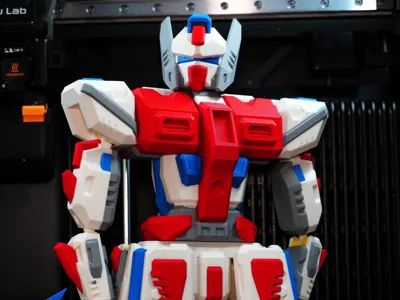
Nova Falcon
156
10
30
32
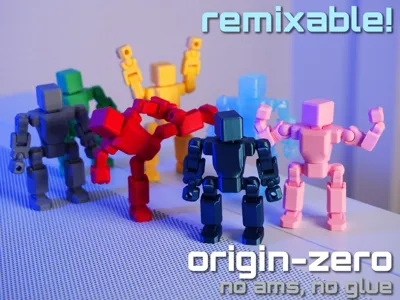
Origin-Zero Mecha
6 k
429
18.3 k
12.6 k
Zerathion - Mecha Model Kit
2.2 k
106
2.4 k
1.4 k
Recent Article
Educator Sponsorship
Educator SponsorshipHello all! I'm starting an educator sponsorship program where I'll be sending a free Bambu Lab A1 mini + filament to a different educator/teacher every month, for at least a year! Education, especially for children, is incredibly important for our society and I am grateful for all the wonderful teachers I've had growing up and so I'd like to share my success on MakerWorld by using my MakerWorld Points to fund this sponsorship. My goal is to support teachers, especially those in need or those that work with communities that are underserved, by bringing the benefits of 3D printing into their classroom. This could include 3D printing dioramas, visual aids, classroom organizers, or even prizes to give the kids incentives to learn. If you're an educator or know an educator that could benefit from a 3D printer in their classroom, check out this form to apply for the sponsorship!Apply Here!If you aren't confident about 3D printing, don't worry, I'll lend as much help and expertise as I can to help 3D printing assist your curriculum. I'll be starting with picking an educator for this month of July, 2026, and will pick a new educator every month. The application is rolling, so even after I pick this month's recipient you can still apply for future months! Thanks to all those who support me on MakerWorld to help make this happen and especially thanks to all those hard-working educators! -------------------------------------------------------------------------------------- Update #1: 07/04/2026 So far over 150 educators have applied, thank you for taking the time to apply for your students! It's quite tough to pick the first recipient as there are many educators in need and so far I've reached out to a couple educators to learn more about them and their classrooms before the first selection. For those that haven't been selected, they'll still be in the pool of applicants for the next months, so they're still under consideration. Once I start sending printers and supplies, I'll update this and share more about the selection and how they plan to use the 3D printer, thanks all!
Bambu Studio: Print By Object
Bambu Studio: Print By ObjectSlicers for 3D printing are much more powerful than you might realize. There are quite a lot of features that can come in handy for many situations and the one I want to do in-depth for is Print by Object.  Print by Object is one feature that I constantly use for my print profiles on MakerWorld. Normally, our 3D printers print all parts on a plate at the same time, layer by layer. Print by Object allows your printer to print parts one at a time, while still having all the parts on the same plate. All my examples are with Bambu Studio, but should work similarly for other slicers. Here’s an example of the standard “layer by layer”: All three cubes would be printed at the same time, which would require many many filament swaps. The normal, smart route would be to put each part on a different plate, requiring one filament swap between each plate. While this does work well, you’ll need to clear the plate and start the next one manually. This is where Print by Object can come in handy. To get started with this, customizing the plate gets you to the Plate Settings, where you can change the Print Sequence from “Same as Global Print Sequence” to “By Object" After changing this setting, you’ll notice an immediate difference on the build plate. Every part will now a border around it and you’ll likely see a red warning that parts are too close together: The reason for this is that Print by Object requires room around each part so that the printhead doesn’t collide with any already printed parts. Each printer has a differently sized printhead, so the border around parts will change in size when changing printers. To properly space the parts to make sure their boundaries don’t collide, you can use Auto-Arrange. When all of the boundaries are clear of each other, they’ll disappear along with any warnings. You can drag around the parts to see the boundaries, here’s what they look like when not colliding: Now, these three parts can be printed, one at a time, with minimal filament swaps, while still staying on one plate. You can extend this further by merging several parts that are the same color so that the slicer treats them as one part. This is very handy for my model kits where I tend to use two or three colors:With all the gray parts merged and all the red parts merged, the printer will print all the gray parts at once, layer by layer, before switching to printing all the red parts at once, layer by layer. So as you can tell, Print by Object can be very convenient in the right circumstances. There are some caveats and specifics to watch out for when using though; I’ll lay them out here. As mentioned earlier, different printers have different printheads, so the boundary around parts is not always the same. Because of this, uploading Print by Object profiles to MakerWorld generally requires that you upload a different profile for each printer (printers with identical printheads can be grouped together). I tend to upload the following Print by Object profiles: A1 + A1 mini, X1 + P1, H2S, H2D + H2C, P2S, and X2D. There is also a height limitation for this feature. When using more than 2 parts with Print by Object, they must be under a certain height, which you can see in the purple bounding box around the plate:Moving one of the parts to another plate is generally the way to fix this. The last consideration is plate size, because each part has a boundary, a lot of the plate is ‘unused’ and you can’t fit as much as you normally would. Smaller printers like the A1 mini also may have a tougher time fitting all the parts on compared to a printer like the H2S. One ‘trick’ to make more room though, is to place parts in the corners. The boundary around parts can extend past the plate and by placing parts in the corner you’ll have more room for parts. Overall, you can see how helpful Print by Object can be to save you time and filament swaps for certain situations. I use this feature quite a lot on my models and many users have let me know that they prefer profiles that use it, so maybe it’s something that can help with your models as well. Hopefully this is a helpful feature for you! Please let me know if you have any questions or comments and if there’s a feature you’d like me to write about next!
Kit Crafters' March Releases
Kit Crafters' March ReleasesHey all! I hope your March was great! This is a recap of all of my releases this past March! I've uploaded 7 designs to MakerWorld this month and 4 others to my Patreon! All of the images link to their respective model pages.MakerWorld Designs:CG-7 Elite Commander:This was a collaborative work with @Vostok_Labs and is a supportless FDM miniature. I've utizilized the H2C to make it fully colored right out off the build plate. It was a fun challenge to design it to not need any supports and I'll be sharing more of these kinds of models soon!Cloud Wyrm:This was another practice for me in organic modelling using Gravity Sketch on a VR headset. One of the challenges I've been encountering with this kind of modelling is determining if a part of the model can print without supports. In a CAD software, the angles are specific and thus easy to consider, but in VR with perspectives changing often and no grids and guidelines it can be hard to tell if a part of the model needs supports.Horizon Breaker:A classicly styled space ship, the Horizon Breaker was fun to print using the H2C. These little color accents painted on in Bambu Studio add more than I thought they would and I'm hoping to see more of you all getting a wasteless multi-color printer in the near future! This ship also features a lot of my newer micro joints.Mini Castle - Multi-Color Test:I was just testing out a tiny little model where I was practicing multi-body design for multi-color along and made this little castle. Not much more to say here, I ended up uploading it and am thinking it might be fun to make tiled versions of this with other buildings to make a little diorama.Battle Tops: Nano - MW Series 1:One series is available on Patreon, with this as the first free MakerWorld series. I've got another series coming this April too! I loved @patopato_design's of these mini tops and thought it would be fun to make little model kits of different versions, like Beyblades. Maybe later I'll make a set where the parts are mix-and-matchable.Baby Meadowspark Dragon:Another organic VR modelling practice, I really love the feathers on this little guy and quite like the shape of his eyes as well.Mecha Rabbit:This was my mom's idea, she suggested a robot rabbit for Easter and I thought it was great idea. I really like how the Bambu Lab PLA Silk+ Mint filament came out here. Patreon Designs:Echobreaker Mech and Stomper Mech:The Echobreaker Mech is a souped version of the soon to be uploaded Suppressor Mech. I think I overdid it with the colored cyan lighting here, I'll get 'em next time.Terra Starforce:The Terra Starforce has the Ground Breaker Tank and the Arc Breaker Spaceship. The theme here is “what if I made Star Fox vehicles?”.Sentinel Corps - Supportless FDM Mecha MiniaturesThis is the second set of FDM supportless miniatures I've released on Patreon. Something about designing these little guys is just so fun. And taking them off the printer, fully colored, with no supports, just feels so cool. And that's all of my releases this month! Here's a list of models that I can 100% confirm are coming this April!Suppressor MechBattle Tops: Nano - MW Series 2Grimwing DragonFidget Clicker Tank