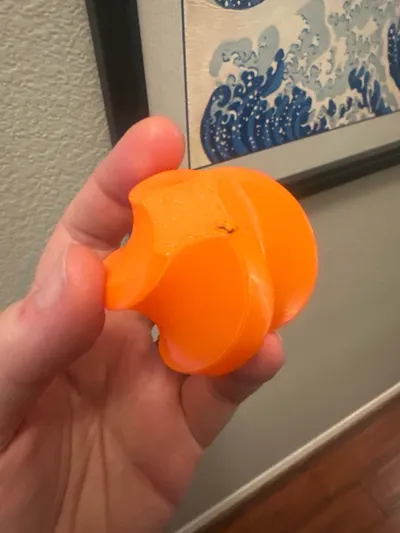
Slicers for 3D printing are much more powerful than you might realize. There are quite a lot of features that can come in handy for many situations and the one I want to do in-depth for is Print by Object.
Print by Object is one feature that I constantly use for my print profiles on MakerWorld. Normally, our 3D printers print all parts on a plate at the same time, layer by layer. Print by Object allows your printer to print parts one at a time, while still having all the parts on the same plate. All my examples are with Bambu Studio, but should work similarly for other slicers.
Here’s an example of the standard “layer by layer”:
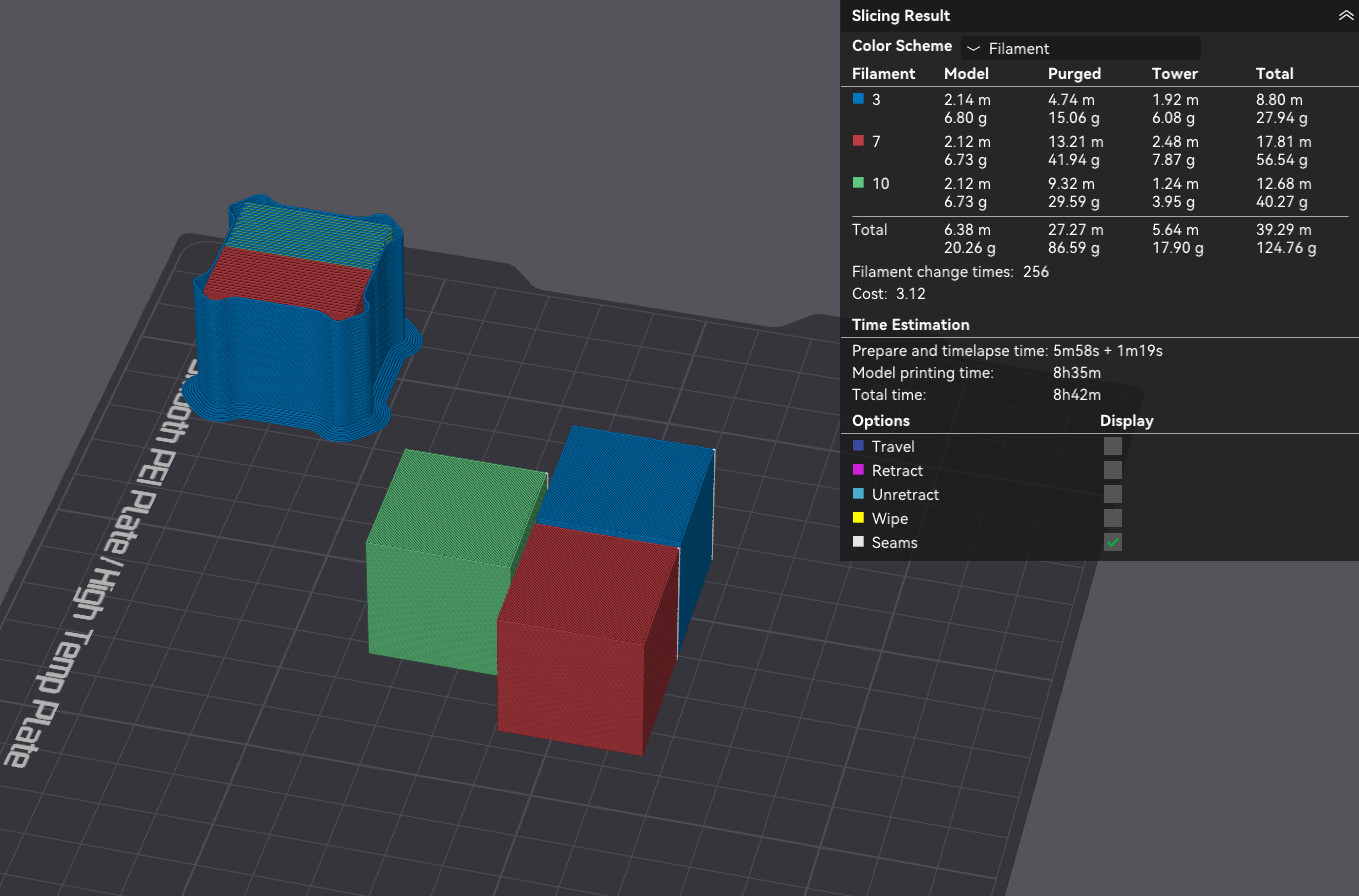
All three cubes would be printed at the same time, which would require many many filament swaps. The normal, smart route would be to put each part on a different plate, requiring one filament swap between each plate.
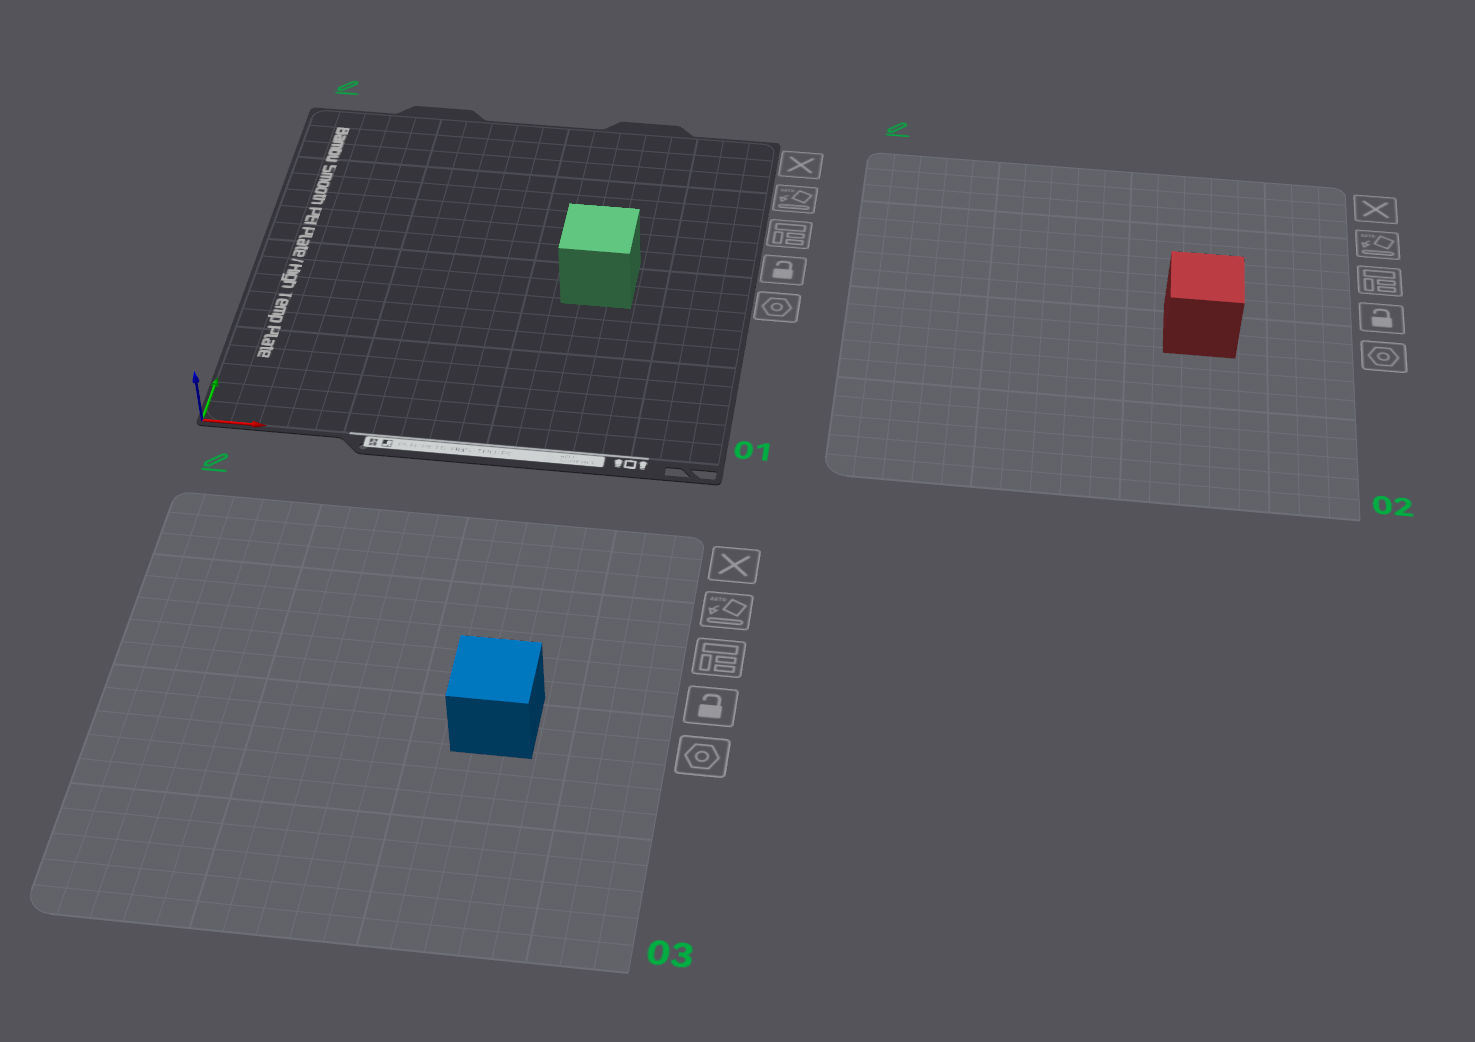
While this does work well, you’ll need to clear the plate and start the next one manually. This is where Print by Object can come in handy.
To get started with this, customizing the plate gets you to the Plate Settings, where you can change the Print Sequence from “Same as Global Print Sequence” to “By Object"
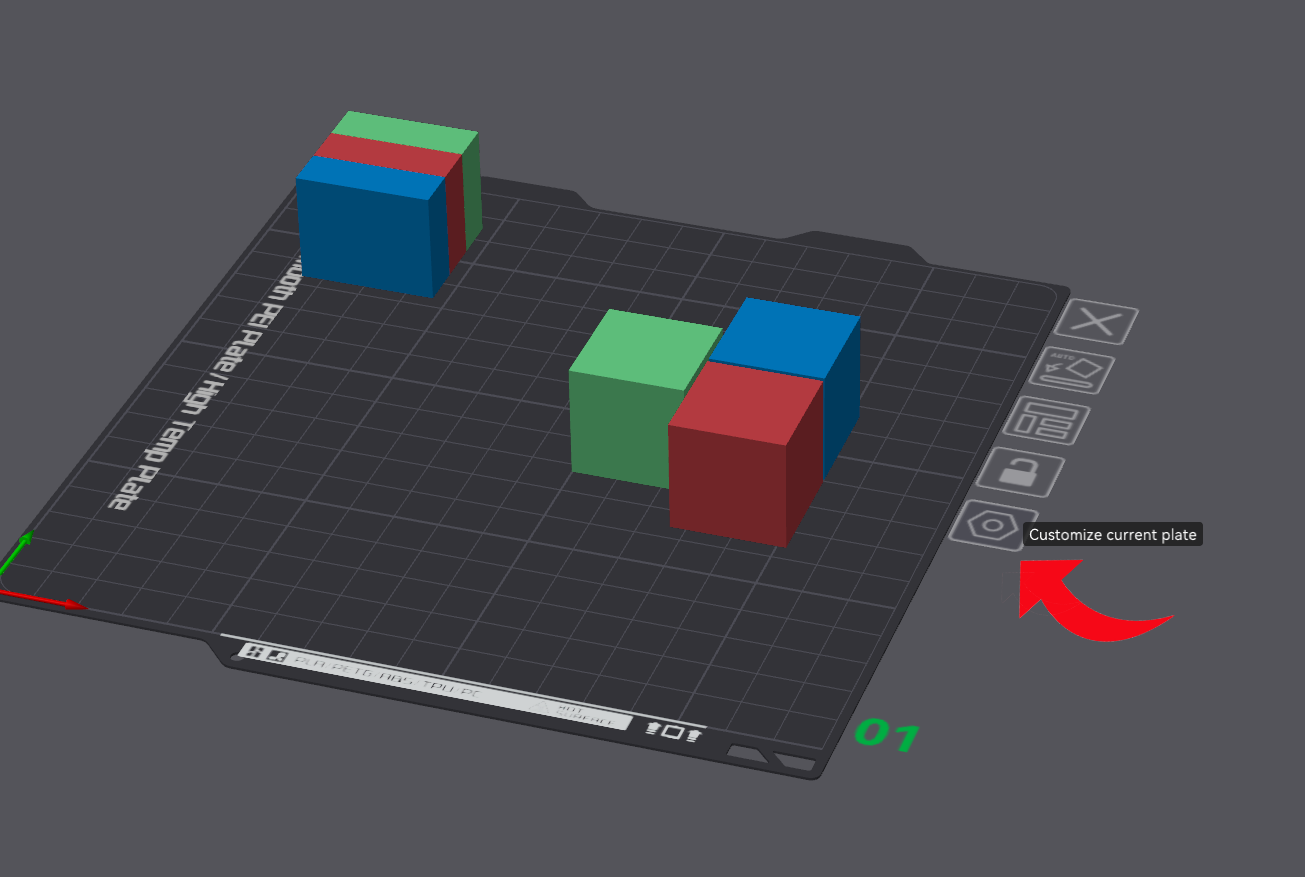
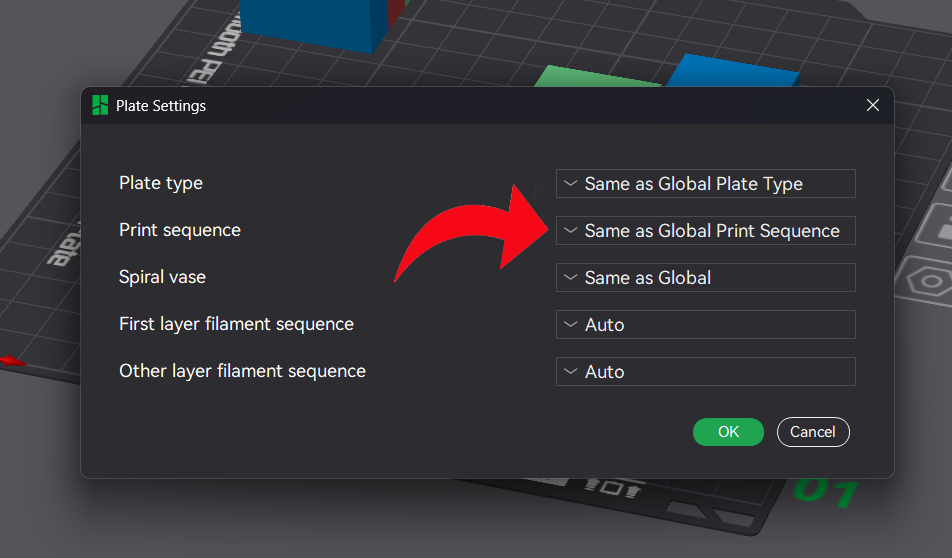
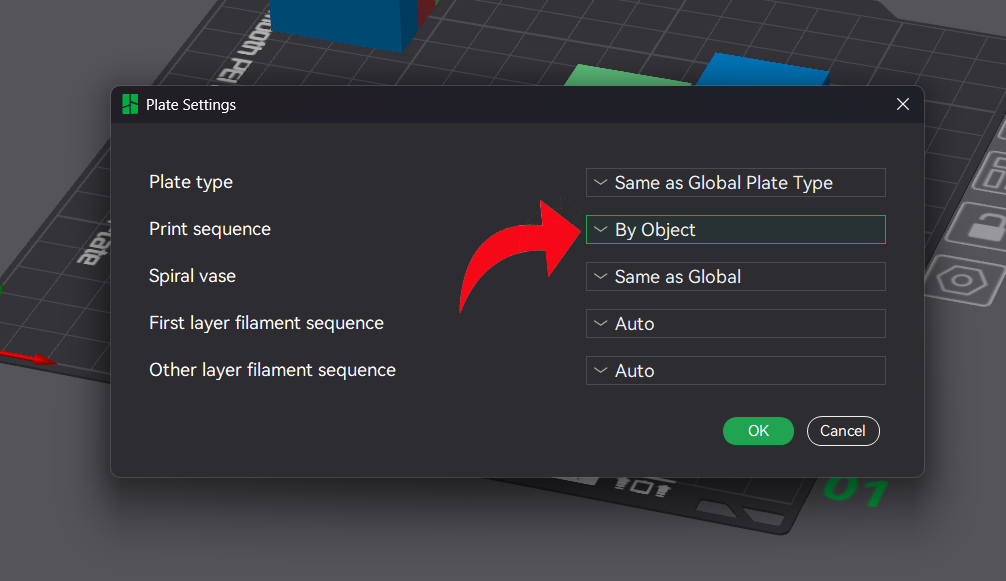
After changing this setting, you’ll notice an immediate difference on the build plate. Every part will now a border around it and you’ll likely see a red warning that parts are too close together:
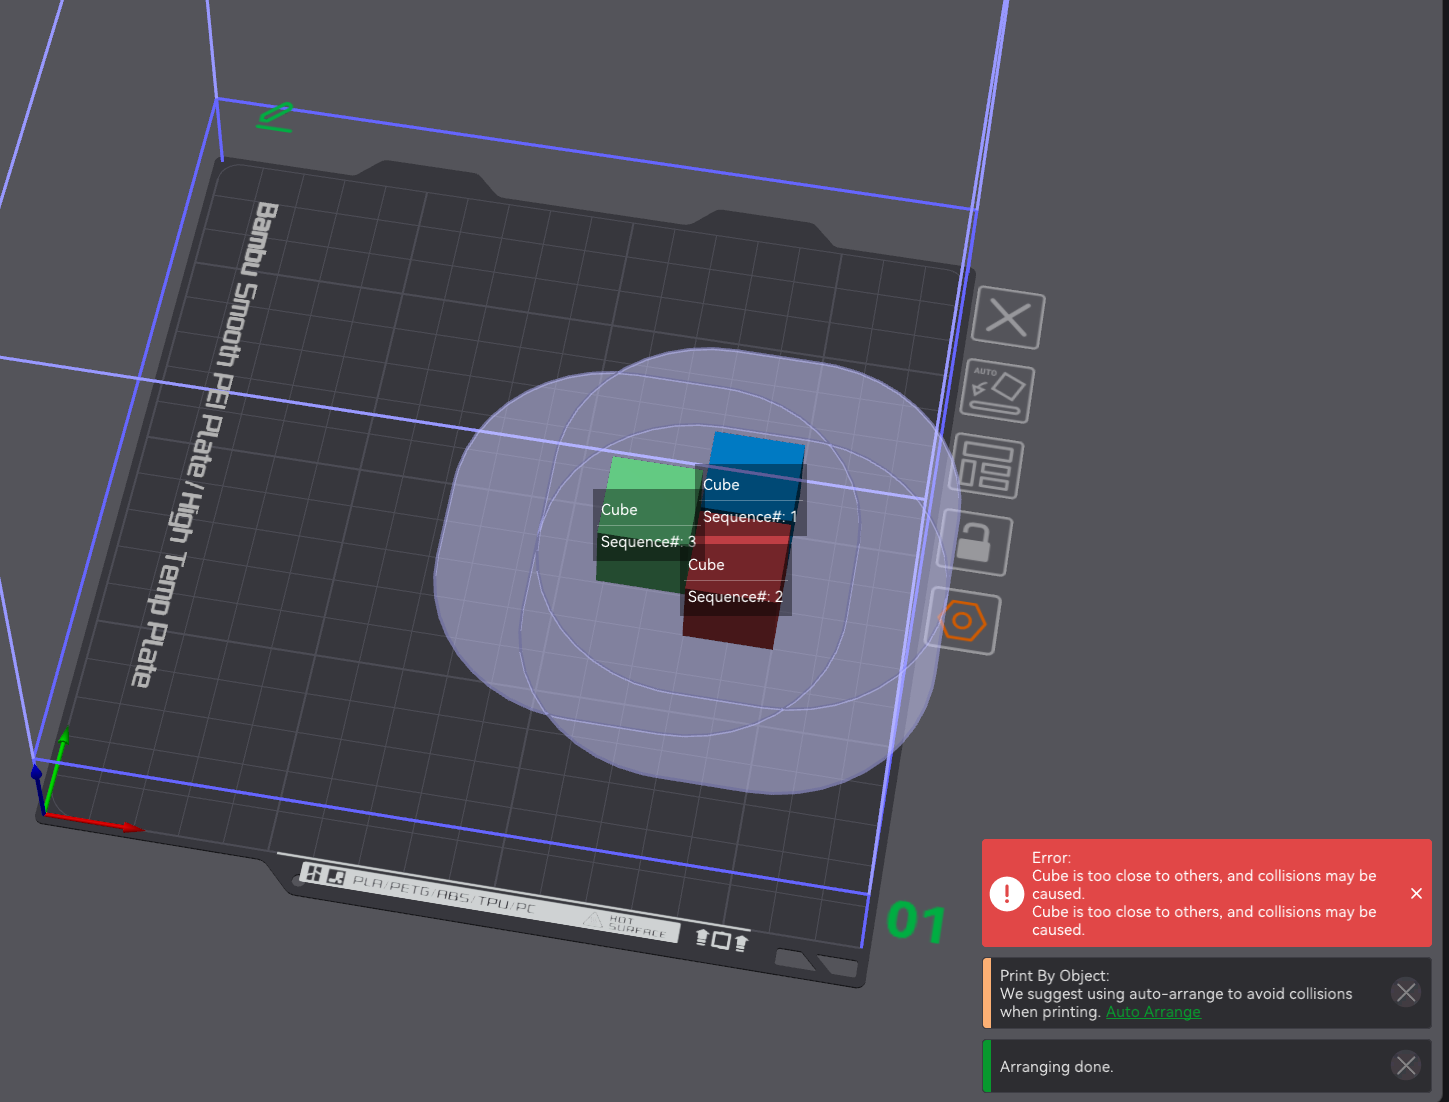
The reason for this is that Print by Object requires room around each part so that the printhead doesn’t collide with any already printed parts. Each printer has a differently sized printhead, so the border around parts will change in size when changing printers.
To properly space the parts to make sure their boundaries don’t collide, you can use Auto-Arrange. When all of the boundaries are clear of each other, they’ll disappear along with any warnings.
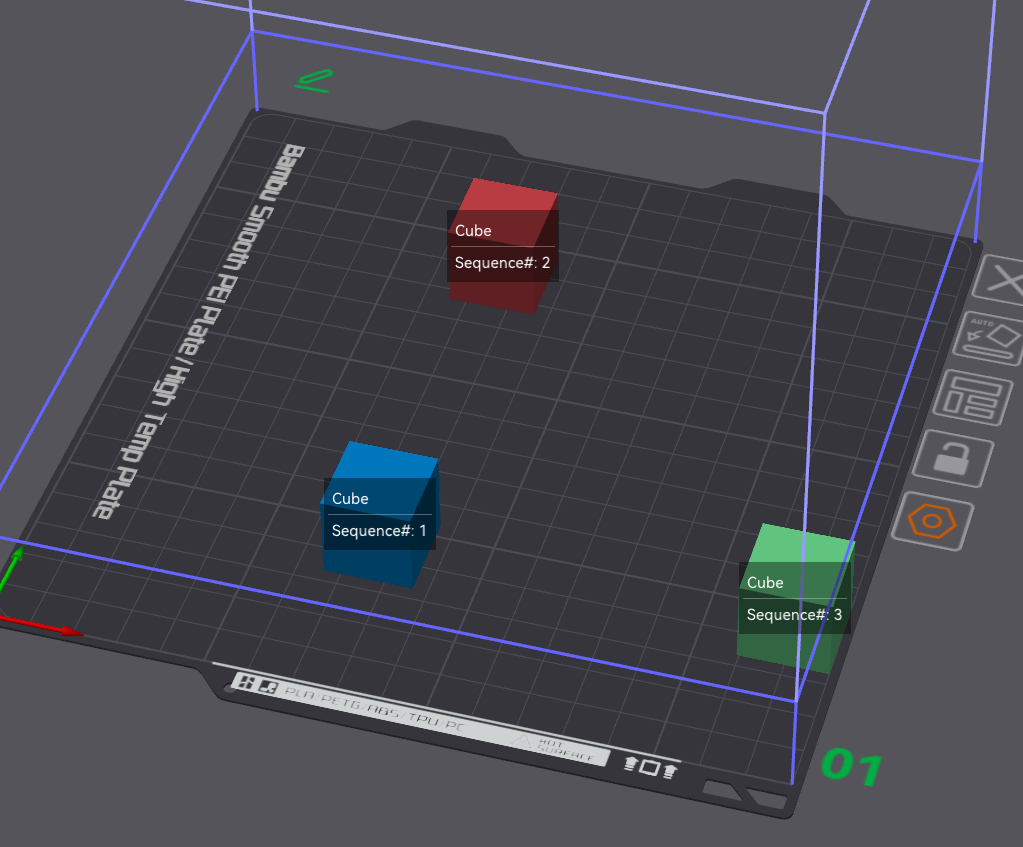
You can drag around the parts to see the boundaries, here’s what they look like when not colliding:
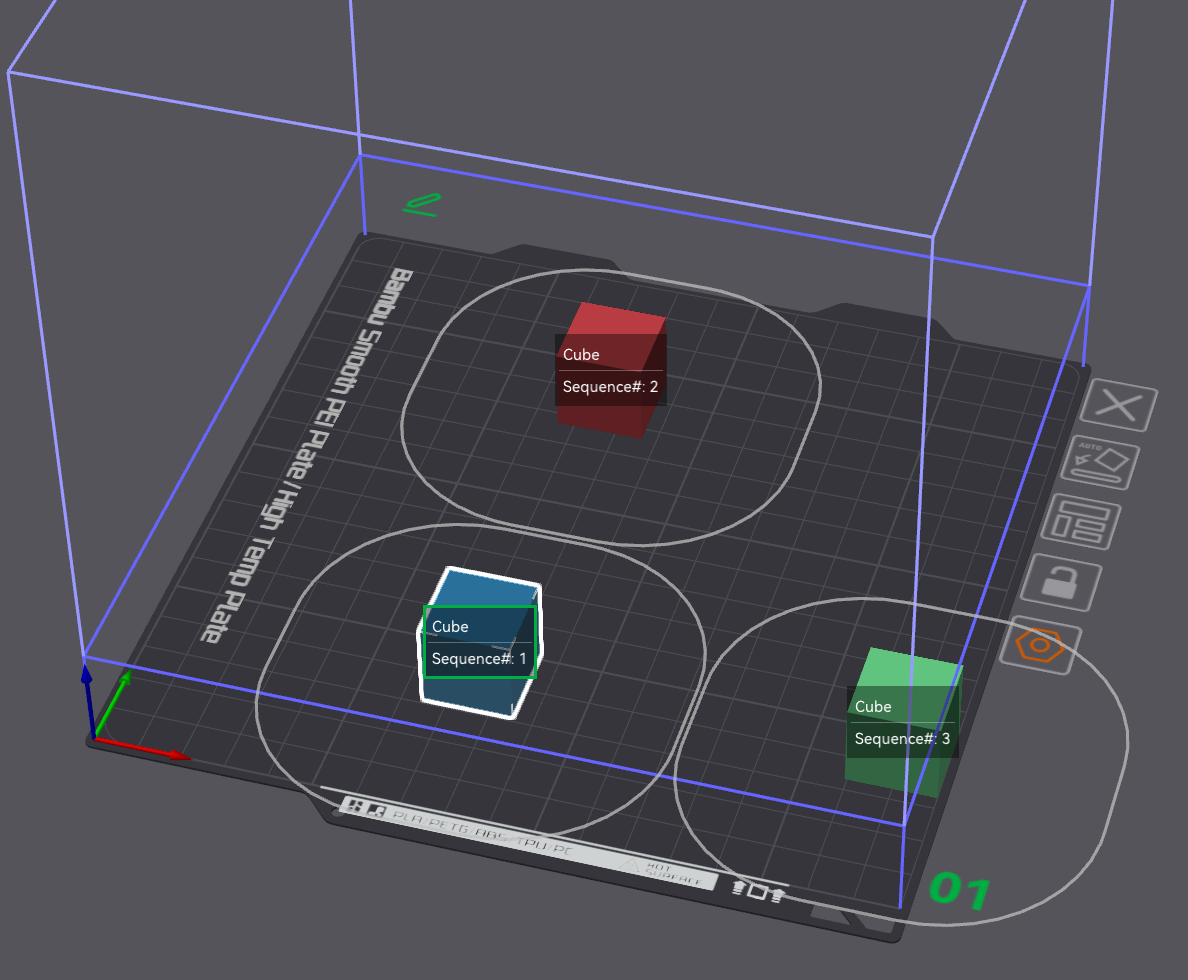
Now, these three parts can be printed, one at a time, with minimal filament swaps, while still staying on one plate.
You can extend this further by merging several parts that are the same color so that the slicer treats them as one part. This is very handy for my model kits where I tend to use two or three colors:
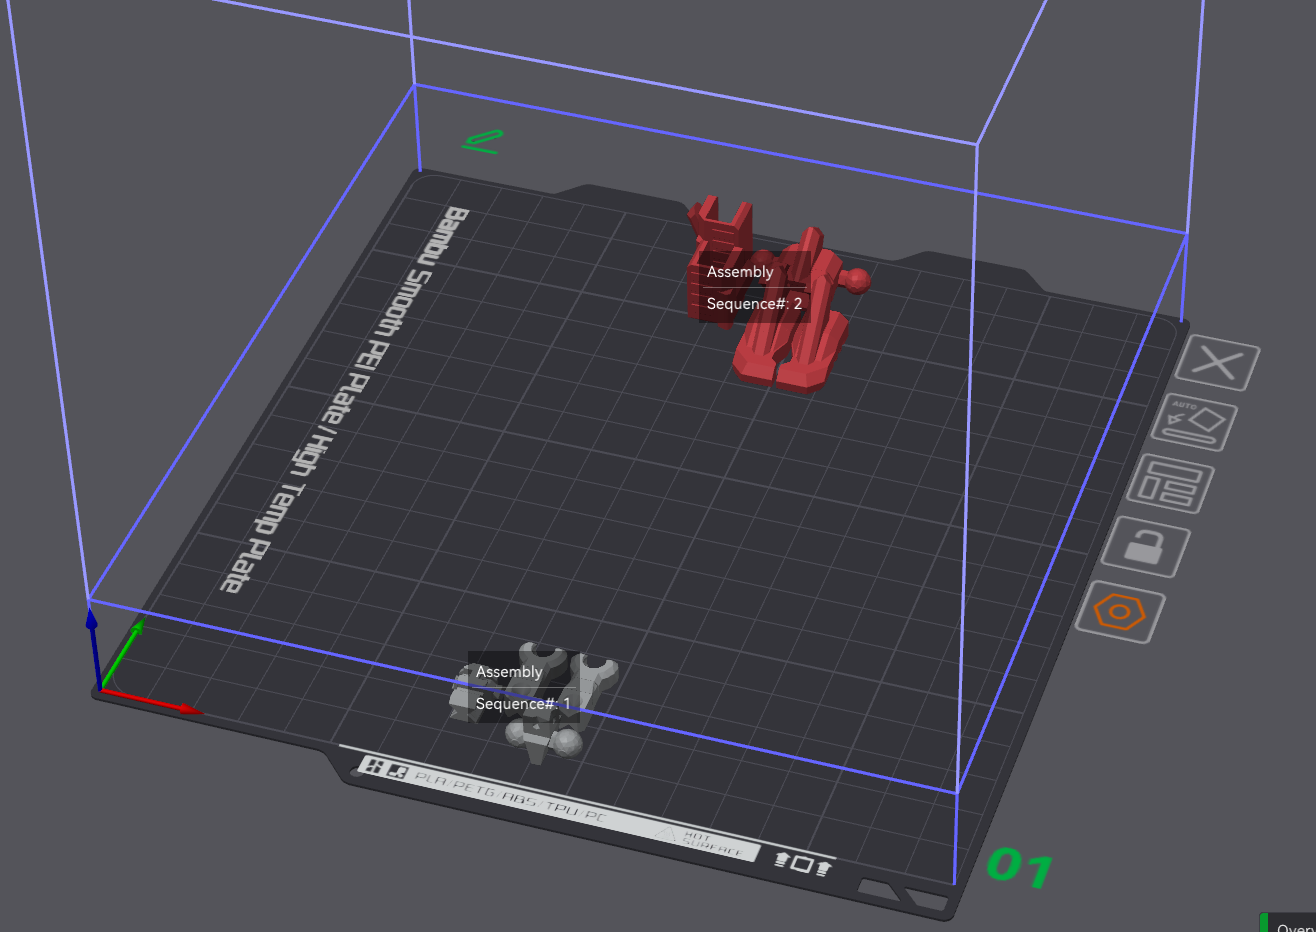
With all the gray parts merged and all the red parts merged, the printer will print all the gray parts at once, layer by layer, before switching to printing all the red parts at once, layer by layer.
So as you can tell, Print by Object can be very convenient in the right circumstances. There are some caveats and specifics to watch out for when using though; I’ll lay them out here.
As mentioned earlier, different printers have different printheads, so the boundary around parts is not always the same. Because of this, uploading Print by Object profiles to MakerWorld generally requires that you upload a different profile for each printer (printers with identical printheads can be grouped together).
I tend to upload the following Print by Object profiles: A1 + A1 mini, X1 + P1, H2S, H2D + H2C, P2S, and X2D.
There is also a height limitation for this feature. When using more than 2 parts with Print by Object, they must be under a certain height, which you can see in the purple bounding box around the plate:
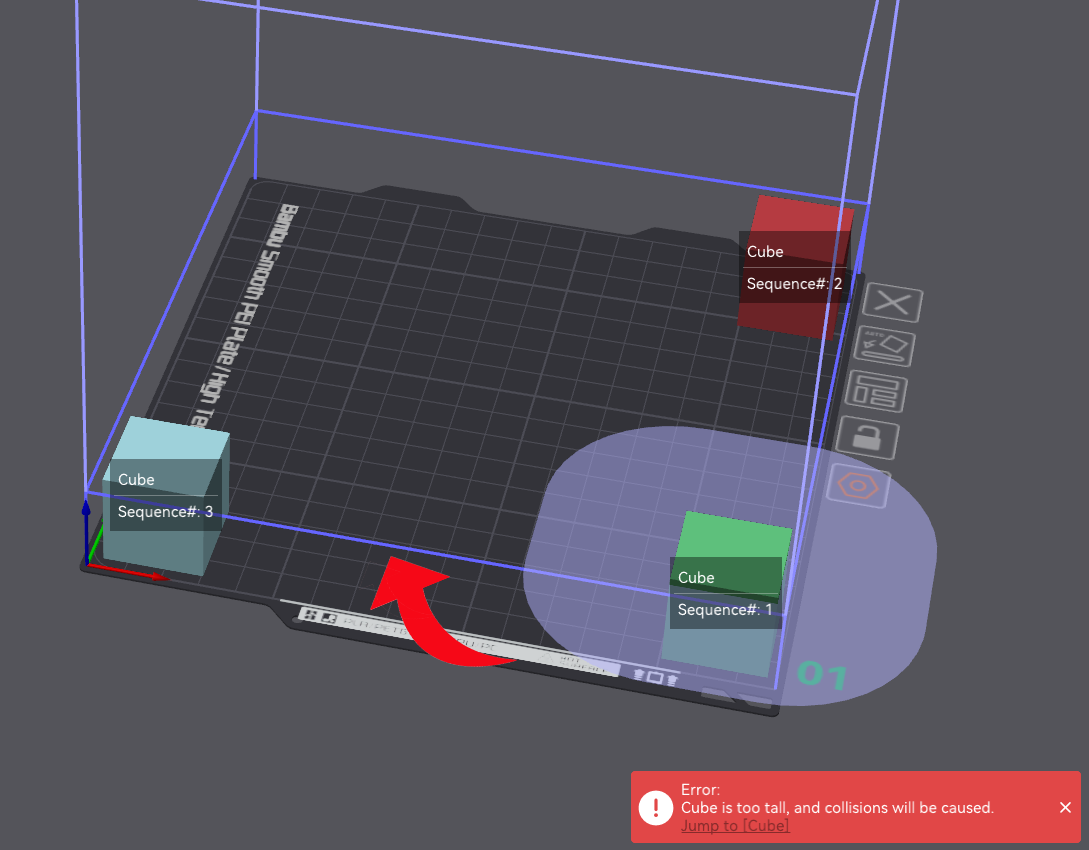
Moving one of the parts to another plate is generally the way to fix this.
The last consideration is plate size, because each part has a boundary, a lot of the plate is ‘unused’ and you can’t fit as much as you normally would. Smaller printers like the A1 mini also may have a tougher time fitting all the parts on compared to a printer like the H2S.
One ‘trick’ to make more room though, is to place parts in the corners. The boundary around parts can extend past the plate and by placing parts in the corner you’ll have more room for parts.
Overall, you can see how helpful Print by Object can be to save you time and filament swaps for certain situations. I use this feature quite a lot on my models and many users have let me know that they prefer profiles that use it, so maybe it’s something that can help with your models as well.
Hopefully this is a helpful feature for you! Please let me know if you have any questions or comments and if there’s a feature you’d like me to write about next!