Apex Legends Wingman with Reload Mechanics

Remixed by

Apex Legends Wingman with Reload Mechanics

Remixed by
Boost
417
862
57

Print Profile(4)

All
P1S
P1P
X1
X1 Carbon
X1E
A1
A1 mini

0.16mm layer, 3 walls, 15% infill 256mm full - fix
Designer
20.1 h
5 plates
4.3(12)

0.16mm layer, 3 walls, 15% infill 235 mm bed
Designer
20 h
5 plates
4.0(2)

0.16mm layer, 2 walls, 15% infill With fixed apwm_main_body_full_l.stl
18.2 h
4 plates
4.5(2)

0.16mm layer, 86% size for A1 mini
20 h
7 plates
5.0(1)

Boost
417
862
57
5
2.6 k
471
Released

Description

Original Source Material

- Original Creator Blastoise Model: graham01 on Thingiverse.


Certainly, here's a sentence expressing gratitude for the original designer's work:

"Let us extend our sincere gratitude to the original designer for their exceptional work that has inspired and facilitated our endeavors."

License

- Apex Legends Wingman with Reload Mechanics by graham01 is licensed under the Creative Commons - Attribution - Non-Commercial license.


Description

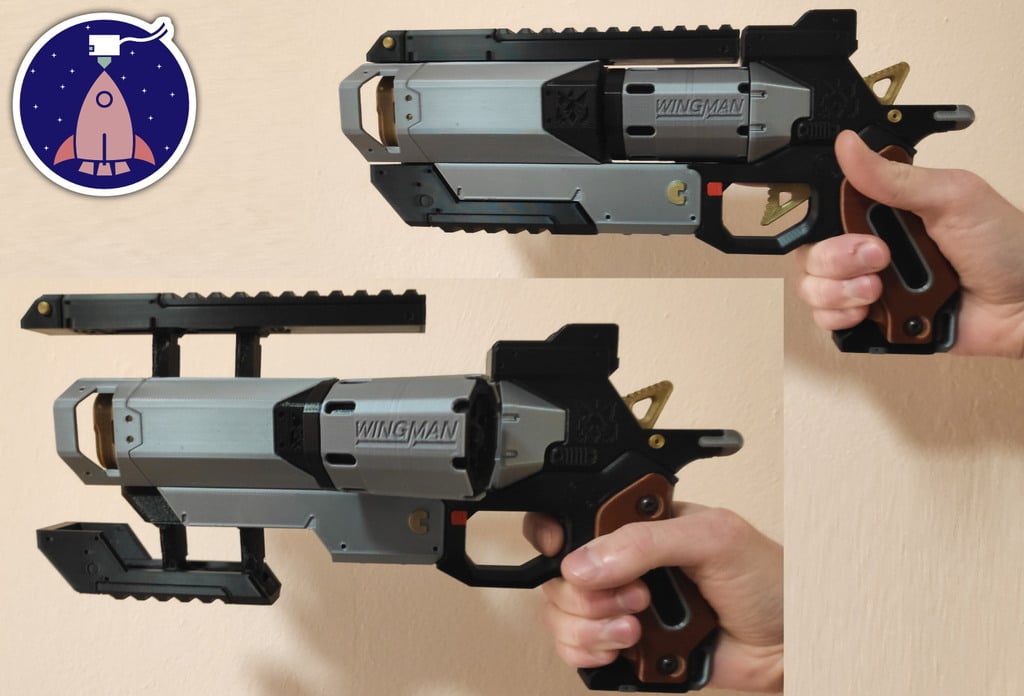
A mechanical Apex Legends Wingman build project, with a spring loaded mechanism to mimic the reload animation in game.

See the build tutorial video here: https://youtu.be/8yLk7pH2WKw


Important note regarding the files

There is 2 versions of the main body components, depending on your available bed size

  • If you have a ~235mm bed, you will need to print0.16mm layer, 3 walls, 15% infill 235 mm bed If you have a 180mm bed(A1 mini), you may need to rearrange the parts to fit the smaller build platform.
  • For printers like p1p, p1s, x1, which have a 256mm bed, you can print 《0.16mm layer, 3 walls, 15% infill 256mm full

Additional parts required

1x Spring (65mm free length, 6.8mm diameter): https://uk.rs-online.com/web/p/compression-springs/0751477/ (this should be a fairly common spring internationally however I am unable to list sources for other countries)
15x No.6 x 3/8in self tapping flange screw (ebay/amazon/etc)
11x No.6 x 5/8in self tapping flange screw (ebay/amazon/etc, plus 1 more if you print the split body version)

If you enjoy this design and fancy supporting me: https://www.patreon.com/the3dprintspace

I also did the following:

  • I used a 0.16 settings basefile I like and edited it.
  • I sorted all the different parts on different plates for easier printing, based on color.
  • I also trimmed off areas from the original model that were similar to a brim(apwm_main_body_top.stl、apwm_main_body_bottom.stl).
  • I also added the correct number of parts.(for example, apwm_black_slot_2x.stl, you will need to print 2 of them)
  • I also positioned the model at an angle to reduce overhangs as much as possible.

I don't have a sufficient variety of material colors. If there are more suggestions for better settings, please upload them!


Comment & Rating (57)

Please fill in your opinion
(0/5000)

Prints great except the left body part, seems like the original model had a minor alignment issue, and the parts around the trigger doesn't sit flush to the plate. I uploaded a fixed profile including the fixed left main body part. 整体打印效果很好,但是左侧主机身的模型好像有点问题(原作者的问题),扳机附近不贴板,支撑打印效果不好。我上传了一个修好的STL,把扳机附近拉近到了板面上。
The designer has replied
4
Reply
Thank you for your feedback. After reviewing the issue, I indeed found the problem you mentioned in the 256mm full configuration. May I use your modified apwm_main_body_full_l.stl file to update my previously published 256mm full configuration? 感谢您的评论,经过查看确实发现了在 256mm full 配置文件(235mm 是正常的)中存在您提出的问题,我可以使用您修改后的apwm_main_body_full_l.stl 文件更新我之前发布的256mm full 配置吗?
2
Reply
Please do! Thank you so much! 没问题!请用吧!
0
Reply
您用的螺丝和弹簧的规格是怎样的,能提供一份清单嘛?
2
Reply
Thanks for Sharing! I reduced the model to 86% size for A1 mini, Use M2.6 screws and 0.5*6*50 spring 感谢分享,我将模型缩小到了86%大小以适用于A1 mini,使用M2.6螺钉和 0.5*6*50弹簧
(Edited)
2
Reply
大佬能提供一下螺丝长度吗 只需要M2.6的吗
0
Reply
请问发光是怎么搞得
0
Reply
Replying to @user_3262844174 :
你好,使用的螺丝具体规格为M2.6*8和M2.6*14
0
Reply
非常Nice的模型,玩耍起来十分顺滑。 PS:需要注意模型经过优化,需要在主体左右合并之前,优先安装击锤组件!
The designer has replied
2
Reply
感谢你的评论!
0
Reply
您用的螺丝和弹簧的规格是怎样的,能提供一份清单嘛?
0
Reply
Replying to @user_1592218460 :
M3x10 黑色圆头自攻螺丝 M3x16 黑色圆头自攻螺丝 线径0.5mm 外径6mm 长60mm 弹簧
3
Reply
Great job! Using PETG to support PLA, works great. 在枪主体最大两个零件(支撑面是大的平面)上试了下用PETG作为PLA的支撑,效果不错,支撑面平整易剥离。 所需公制零件如下: M3x10 黑色圆头自攻螺丝 M3x16 黑色圆头自攻螺丝 线径0.5mm 外径6mm 长60mm 弹簧 Parts required (Metric): M3x10 self tapping flange screw (black) M3x16 self tapping flange screw (black) Spring (0.5mm wire diameter, 6mm diameter, 60mm free length)
1
Reply
大佬有没有拼装视频教程
0
Reply
Replying to @user_3656866738 :
【【搬运/教程】如何组装你的3D打印小帮手-哔哩哔哩】 https://b23.tv/CvuzMuB
1
Reply
Replying to @zagt :
感谢
0
Reply
感谢分享,但是左边的主要机身需要大量支撑,导致非常不平整,竖着打印会不会更好?
The designer has replied
1
Reply
使用 ytlty516 发布的配置,重新打印一个 apwm_main_body_full_l 可能会更好,可能需要您拆除
0
Reply
Very cool model:D I've made a little change so that it can work with M3 screws and 7mm spring. 非常酷的模型~我做了一点点的修改,以便使用M3螺丝与7mm弹簧。
0
Reply
Print Profile
0.16mm layer, 3 walls, 15% infill 256mm full - fix
great model and instructions on assembly
0
Reply
Is this using PETG or PLA?
The designer has replied
0
Reply
For the Bambu series, both PETG and PLA are equally easy to print.
0
Reply
Replying to @Go0pZz :
失败了2次,我是A1,原因是底部翘边
0
Reply
Replying to @user_2944458638 :
你使用的是哪一个配置呢,我基本使用 petg,如果你使用 petg 翘边的话,可以试试看 pla
0
Reply
Print Profile
0.16mm layer, 3 walls, 15% infill 256mm full - fix
0
Reply
a1mini86%的版本有些问题 1不知道是不是因为我开太快精度下降导致的,弹巢可能会和后面的护罩干涉。不过我是装好壳子后强行安装的击锤组件。 2在缩放后握手太小了,小拇指会不舒服,不知道能不能把下面的部件优化成符合人体工学的版本? 3在另外一个评论里提到了,在86%的缩放下M3的螺丝孔应该换成M2.6,但我买的M3也装上去了,但是安装非常吃力。 很优秀的作品,只是在小比例下存在一些问题。
0
Reply
重新装了一遍,击锤干涉问题基本不会有了。关于第二点可以把下面的部件直接拆掉的手感也不错不过我不懂曲面建模,不知道可不可以做一个加长一点的
0
Reply