Search models, users, collections, and posts

Fabric purse

IP Report

Print Profile(11)

All
H2C
H2D
H2S
H2D Pro
A2L
P1S
A1
X1E
X1
P2S
X1 Carbon
P1P
X2D
A1 mini

v2.1 with Silk filament supporting
Designer
21 h
4 plates
3.0(2)

ipadmini size
ipadmini size
Designer
18.7 h
3 plates
4.7(87)

Fits A1 mini
Fits A1 mini
Designer
11.1 h
3 plates
4.6(22)

Printable with A1 mini, AMS needed
Designer
11.6 h
3 plates
4.0(5)
Click to see more

Open in Bambu Studio
Boost
2595
6490
355
206
3.4 k
1.2 k
Released 

Description

Membership

If you like my design, leave comments, post picture of your make, boost me, follow me 'akey(delock)' on rednote, or subscribe to one of my commercial membership tiers.  Thanks for your support!

Join

2026-1-18

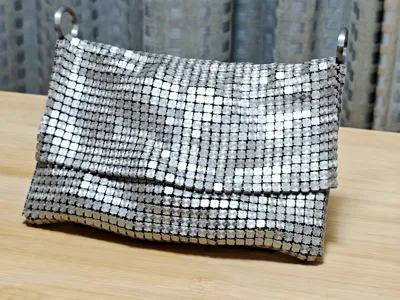
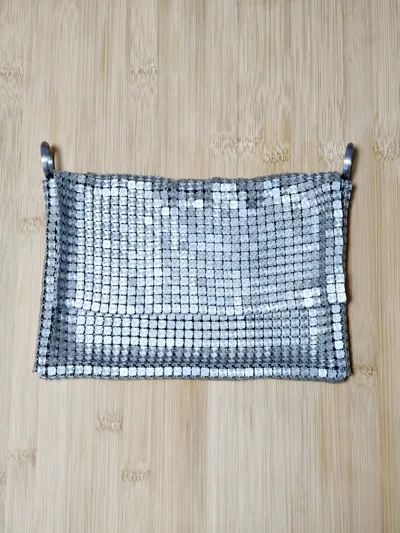
I saw many attempts to print this purse with silk filament.  This isn't easy, silk filament have poor adhesion between layers which is important for links between tiles.  Now the latest profile supports print the purse with a shiny silk tile face.


I changed the face and bottom of each tile to silk PLA, and keep the filament in the middle as PLA Basic.  This makes the purse looks shiny and still have the strength of PLA basic.   The top and bottom pattern is also changed to concentric to make it reflex beautifully.


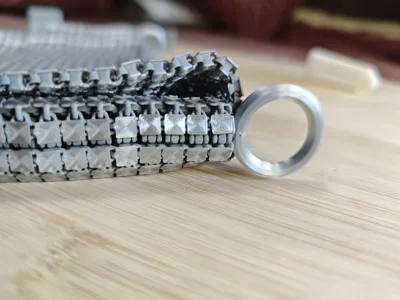
The loop piece for strape has been changed so you will see a nice finish line on the edge, I highly suggest print the loop instead of the 3D printed strap, and pick a strap of your like.


Print guide: build plate adhesion is very important.  I recently use Bambulab engineering plate and apply a thin layer of liquid glue, then wipe it evenly with a piece of wet cloth.  This is super effective for flex fabric and I didn't met a single failure.  The smooth face of engineering plate also make the silk filament really shine.  After printing, wait till the build plate fully cool down, then bend the plate from each direction to loose the piece.  If some piece won't go off, gentlely nudge the piece from the side to loosen it.  If it still won't go, soak plate in water to dessolve the glue and the fabric will come off after a while.


Installation guide: Install connector could be repetitive, take a rest once after a while.  Also print the ‘connector installer’ in profiles, they make connector installation much easier with less finger strain.


The corner connectors are harder, the tip is bend the connectors on both sides of the corner, this makes connector much easier to be insert into slots.

2025-3-15

I made a strap for this purse.  Note if you want to install printed strap then you should not install loop.   Loops is for seperately purchased strap.

Original

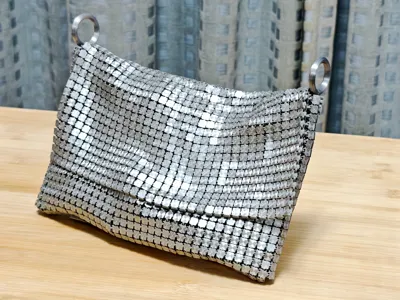
This 3D printed purse has the size of an ipad mini 6, and has two loops on the top to attach a strap to.   It has a lid so items inside won't be plainly visible.


This purse use the slot/insert system I designed so it could extend 3D printed fabric to various applications.  In this make, both the loop and connectors has inserts on it so they can be installed on the fabric with a unified interface.   See my other makes https://makerworld.com/zh/models/550291#profileId-477241 https://makerworld.com/zh/models/580850 if you are interested in the slot/insert system for 3D printed fabric applications.


In this making, I used a technique called regional regidity which makes the main compartment of the purse more rigid and feels like leather.  And the lid feels more floopy.  This makes the purse could hold heavy things such as a small tablet.


In case you need to test with other types of filament, use these 8x8 test blocks https://makerworld.com/zh/models/582881#profileId-504011 which takes much less time to print.


This purse is implemented with openscad.


If you like my ‘slot/insert’ system, boost, show your make, or leave a comment or suggestion or ideas.  Your like will be my drive.

Membership

Commercial license available for sellers.

Join

Build steps:

Caution: this making need some intermediate knowledge about slicer.
this making can be fragile and might break under certain force with some small piece fall out, don't give it to little kids.


  1. Print purse_front.pix.stl and purse_back.pix.stl models.  This would print two fabric pieces.  Use layer height 0.28mm with 0.4mm nozel
  2. Print connector2.3mf models.  This would print all the connectors and loops.  Layer height 0.2mm
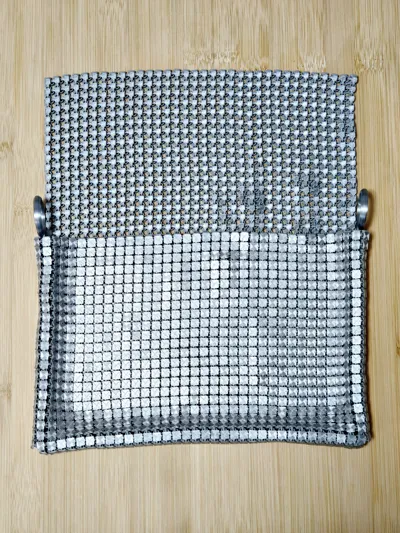
  3. Use connector2 to connect two pieces together according to the picture below. Need to use some force to press. You can use something with flat bottom to help i.e. benchy. Note: connect2 is not symmetric but its okay if different connectors are installed in different direction, its hard to notice.

  4. Use connector2 to connect the side of the bag together. This needs some force, and need right angle. Note don't misalign the pieces. Once connector2 is clipped inplace, its extremely hard to pull it out and you might damage the fabric by doing so. My experience is install all the connectors on one of the fabric piece, then clip the other piece with connector using thumb and index finger.


    The first connector near the bottom is especially hard, because the angle limit.  Becareful not to break it with too much force.  My experience is use something to push the side of slot a little.  Then press it from the inside against table.  Once the angle is right it could get in.


    Note: the connector2 is visible from outside as a seam, if you print connector2 with the same color as fabric itself, it will blend in.  If you print them with different color with contrast, it will stand out.  Both can work.

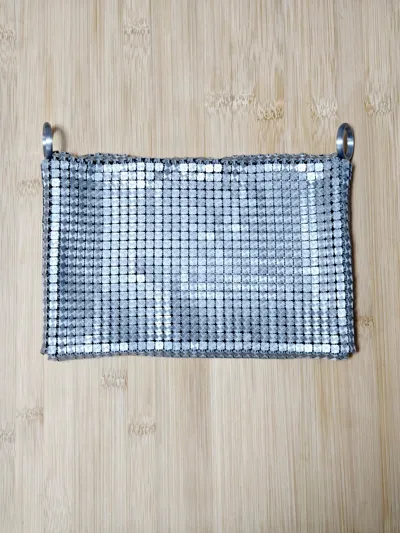
  5. Install loops.  You may need to use force at the correct angle.  It is tricky but is easy when its correct.  If you decide to install printed loop, then DO NOT install loops.  Instead, install one end of the strap on place where the loop is installed.  Then carefully check for knots and TWISTS on the strap.  Then install the other end of the strap.  Misinstalled strap is hard to fix.

  6. Your purse is done and you can add shoulder strap at your like.

Notes:

  • First layer is important and you need good bed adhesion. But I didn't use glue. If you plan to use glue, beware if the fabric adhere too good it might break when you tear it from the bed.
  • Even if the first layer does not look good, I don't suggest stop printing immediately, it is very annoying trying to remove hundreds of single layer small tile. I'd prefer to wait for several layers before stop.
  • From my experiement on Bambulab P1S with PLA basic, the best layer hight for fabric is 0.28 (for best strength) and connector is 0.2mm.


Comment & Rating (355)

(0/1000)

Print Profile
ipadmini size
it took a bit of time to bend and smoothen out the connections between the plates, and also the connectors don't jump in by themselves, but the result is more than satisfying. feels amazing and my wife loves it... only problem.. my kids now also need one ;)
The profile uploader has replied
42
Reply
I always wonder what the effect would be on a build plate with hologram pattern. It looks great! Thanks for sharing!
(Edited)
8
Reply
which filament did you use? this looks amazing!!!
(Edited)
1
Reply
Replying to @user_2499385864 :
I’m going to guess it’s a normal filament and the effect is from the holographic build plate
(Edited)
3
Reply
After using the reinforced version connector, I've managed to print it out using PLA marble as main body and wood color PLA for connectors. The connectors still break though, but is far stronger than the previous version. I was able to make the purse only breaking 5 of the connectors... So always print some auxiliary parts in case the connector breaks. And it takes practice to master the way of connecting parts. I think the next one I print will be a flawless one. Anyway, awesome model!
The designer has replied
23
Reply
Beautiful! I also use that peak design strap.
0
Reply
the latest profile contains reinforced connector, and it is even stronger than the connector I uploaded and easier to install. you can see the difference from slicer.
(Edited)
1
Reply
Replying to @delock :
Which is the largest size
Show original
0
Reply
Boosted
Print Profile
ipadmini size
turned out sooo cool! my fingers are super sore after clipping all the clips in but totally worth it in the end! lol honestly surprised this isn’t a paid model, I downloaded a couple of times to show ya support haha hopefully your gettin good points cuz you deserve it! i used rainbow creality PLA In hopes that it’ll be stronger than silk PLA.. seems to have worked quite well and looks super neat
The profile uploader has replied
24
Reply
I like the color switch in the middle. Make it even more fancyl. One thing that payoff is watching makers print this with all kinds of different ideas, I know it is worth sharing because personally I can't enumerate all these ideas. And these ideas inspires me a lot. Kudos!
(Edited)
6
Reply
Hello what filament did you use thank you
Show original
0
Reply
Did you make it on a Creality printer Can you share the settings you used I am having many problems that even the 8x8 squares that Creality Print does not load as 8x8 I have not been able to make them bend without breaking them
Show original
0
Reply
Boosted
The challenge is real... I had at least 6 failed attempts due to adhesion, as clearly stated, its a not easy. It was exasperated by my determination to print it on smooth holographic plate for the dynamic results. First "successful" print I had the layer height at the suggested 0.28mm, but for me that resulted in a very NOT flexible chainmail. I had much better results with more fluid like movement at 0.12mm and 0.08mm both a were set to "High Quality" and 100% infill. I think the overall concept and design is really cool! I truly appreciate designs lkike this and the fact that you share it openly. Super cool! I will say that I had a lot of the hinge joints break on me, during and after install. Have you ever considered a more rigid or solid union instead of it being hinged? Also, and this is just me asking questions or providing some design review feedback, the small features inside each section of the material, if there was a way to make those features thicker even if it resulted in a large square thus fewer squares I believe the end results would or could be a longer lasting functional design. Again, I love this, and could see a dress being made out of this material. My daughter bounced up and down when I gave it to her she LOVES it. I just know for a fact that with how delicate it is, its not going to hold up. Thank you for sharing this!
The designer has replied
11
Reply
A big wow for your blink shiny bag! Print on a holographic plate definitely worth the effort. And thanks for sharing how the print came out with different layer hights. Yes, make a rigid version of the hindge especially at corner might be a good idea. I'm graduately adding different parts for maker who wants to do the bag differently, I might think about a rigid connector design when I come to this part. Thanks for your advice, and glad your daughter like it!
3
Reply
By the way, I'm not sure about the size of your bag but from the picture, I feel you intended to print a small size bag, by looking at the propotion of hand to the bag. If that is the caes, I would suggest you to print from the profile "Fits A1 Mini". Its a small size bag with same tile size as the full size bag, which means it would be as strong as the full size bag. Bags simply scaled down i.e. the 71% profile might produce weaker parts.
2
Reply
Boosted
Replying to @delock :
the bag I printed filled my P1S build plate, edge to edge. I'm not at my computer right now to tell you exactly which profile I used, but perhaps that's enough for you to Go by? Ive showed it to a couple of people, and someone I know that is planning on attending the Country Music Awards that are coming up soon asked me if I could make her a shirt or top out of it..... haha. like I said earlier, I could see a dress made out of this. although she didn't ask for a dress, the request was still inline with that.
2
Reply
Boosted
70% worked~
designer
20
Reply
what filement do you use?!
0
Reply
Boosted
Bambu Lab's Matte Ice Blue
Show original
1
Reply
the thumbnail made me think something was peeking from the purse. lol. it is amazing.
5
Reply
Boosted
Print Profile
ipadmini size
This is really cool bag and experience, but you definitely should make video guide how to assemble it together. I broke few parts, but super glue can fix everything 😂 Thanks!
profile
13
Reply
Hey what filament color did you use ?
0
Reply
Boosted
Replying to @fvava :
Sunlu Tri-Color | Red+Yellow+Green and Black+Green
(Edited)
2
Reply
Hello. Which adhesive are you referring to?
Show original
0
Reply
Boosted
Print Profile
Printable with A1 mini, AMS needed
Print in PETG for added awesomeness. I took a different approach on the colour mixing as I wasnt a fan of the checkered effect. Clean print bed and slow speeds are key to success!
13
Reply
what percent size did you use
(Edited)
1
Reply
Boosted
Replying to @user_1258857158 :
100%. i didn't change the scale
0
Reply
Print Profile
ipadmini size
Took a few tries but got it printed in the end. Nothing wrong with the profile, just a lot of little squares that have to be perfect. I think it turned out great. Thanks for the model.
profile
12
Reply
Boosted
I printed this purse for a big party and I LOVE IT! It was relatively easy to assemble. What took the longest was bending every piece of the fabric to make it "come alive". I now need to buy a smooth plate to get a more sparkling result and try with more colors;)
The designer has replied
5
Reply
Very vibrant! Glad you like this design.
0
Reply
how did you bend it without breaking? 😭
0
Reply
Boosted
Replying to @studio431naples :
I wiggled every row carefully from one side to the other and then from top to bottom. If that makes sense. But yeah, it is a bit brittle when bending it the first time. I used the bag for a wedding and it’s very sturdy!
0
Reply
Boosted
Print Profile
ipadmini size
took me a few tries! advice is to wash Ur plate before trying this! print out great after that.
11
Reply

License

If you want to use this model commercially, please join my membership.
Join Now
This user content is licensed under a Standard Digital File License.

You shall not share, sub-license, sell, rent, host, transfer, or distribute in any way the digital or 3D printed versions of this object, nor any other derivative work of this object in its digital or physical format (including - but not limited to - remixes of this object, and hosting on other digital platforms). The objects may not be used without permission in any way whatsoever in which you charge money, or collect fees.