


Print Profile(0)
Description
EN
V1.1 The E in Enchor replaced by an A in Anchor, porthole text error corrected (thanks to
@jcjames_13009_134821 for his eagle eye)
Diving helmet based on the visual of the real helmet from "anchor engineering" with a few modifications to adapt it for 3D printing and its “decorative” aspect. See photos of the original; the biggest modification is the size of the front porthole, which would have been suicidal when the first helmets were released
Features and other information:
All assemblies are tight fits requiring no glue, except for the text on the porthole and the plate-side pins.
-Helmet diameter 20 cm.
-XXL front porthole.
-Hollow base for storing electronics for optional lighting or other uses.
-Invisible double cable routing towards the upper porthole.
-All parts are printed separately to facilitate painting and minimize supports.
- The front porthole is available in three versions:
1-Without text (blank).
2-Bicolor version (use a pause to change color if you don't have MMS/MMU).
3-Version for painting; the text is printed and glued into the designated slots after painting.
-The helmet is available in two versions, with or without engravings.
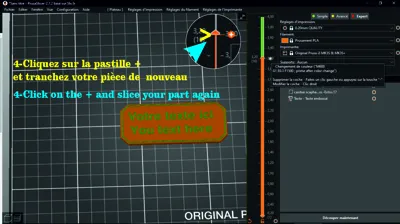
-Text of your choice can be added to the front plate (image tutorial for PrusaSlicer).
-Nightlight, bedside lamp, speaker, and other functions can be achieved using the rear tubing and upper porthole for cable routing (see cross-section view).
-In the base under the text plate, there is a 5 mm diameter hole for an LED if you are using an IR remote control.
Printing tips:
Helmet: organic support; for other parts, your choice.
The .stl files are placed on the build plate in the printing direction, but as this model is a decorative object, structural strength is not critical, so position the parts as you wish.
For the same reasons, 3 top, bottom, and perimeter layers (or 2 for the cheapskates) with a 5% 3D honeycomb infill will be largely sufficient.
For those like me who use hand-painted supports for the helmet, do not remove the supports in the two side holes, as the result would not be pretty.
For my English translations, I use a translator, and sometimes it gives me slightly odd translations. I'd be grateful if you have any corrections to suggest, thank you in advance.
If you have specific needs to modify this model and lack the skills, please let me know.
The printed version visible in the third photo is the engraved + glued text version (currently being printed; the photo will be updated as it progresses).
Happy printing
EN Translated with DeepL.com (free version)
V1.1 The E in Enchor replaced by an A in Anchor error in the window text corrected (thanks to
@jcjames_13009_134821 for his eagle eye)
Scuba helmet based on the visual of the real "anchor engeneering" helmet, with a few modifications to adapt it to 3d printing and the "deco" side (see photos of the original). The biggest modification is the size of the front porthole, which would have been suicidal when the first helmets came out.
Features and other info:
All assemblies are clamped and do not require glue, except for the text on the porthole.
-Helmet diameter 20 cm.
-Front porthole xxl.
-Hollow base for optional lighting or other electronics.
-Invisible double cable routing to upper porthole.
-All parts are printed separately to facilitate painting and minimize the use of
- the front window is available in three versions:
1-Without text (blank).
2-Bicolor version (use a pause to change color if no mms/mmu).
3-Paint version, with text printed and glued in the spaces provided after painting.
-The helmet is available in two versions, with or without engravings
-Text of your choice can be added to the front plate (tuto image for prusaslicer).
-Nightlight, bedside lamp, loudspeaker and other functions using the rear piping and top porthole for cable routing (see cutaway view).
-In the base under the text plate, there's a 5mm diameter hole for an LED if you're using an ir remote control.
Printing recommendations :
For helmet organic support, others as desired
The stl's are placed on the tray in the direction of printing, but as this model is a decorative object, structural strength is not important, so position the parts as you wish.
For the same reasons, 3 layers (top, bottom and perimeter, or 2 for the cheapskates) with a 5% filling of 3d honeycomb will be more than sufficient.
For those of you like me who use hand-painted brackets for the helmet, please don't remove the brackets in the two side holes, as the result wouldn't be pretty.
For my English translations, I use a translator and sometimes he gives me odd translations, so if you have any corrections to suggest, I'd be happy to hear from you.
If you have particular needs for modifying this template and don't have the skills, please let me know.
The printed version visible on the third photo is the engraving + glued text version (the photo will be updated as it is printed).
Good print
Translated with DeepL.com (free version)
Comment & Rating (0)