Search models, users, collections, and posts


Bio
i am brand new to 3D printing.. in fact, today (1/5/26) I just got lucky enough to get an alert that the P2S was briefly in stock at Best Buy and i grabbed it! can’t wait for it to arrive
Achievements
MakerWorld Guardian
Active more than 20 days out of last 30 days UTC time
Stellar Reviewer
Rate or Comment 272 different models
Pioneer Maker
Print successful 268 different models and 1,908 hours
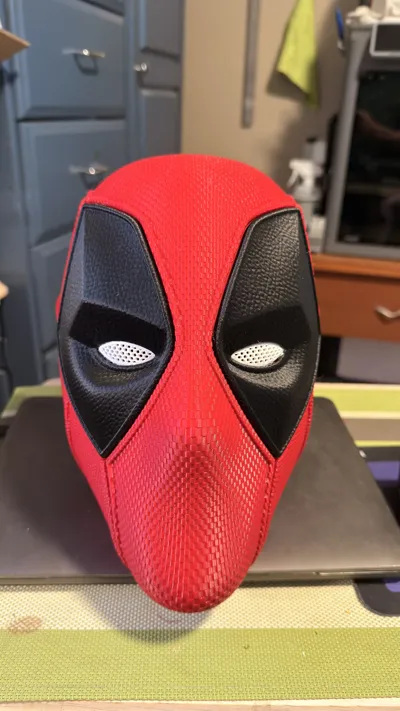
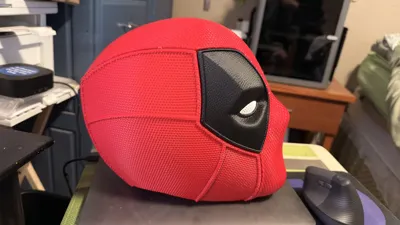
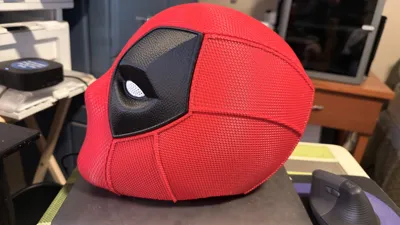
I printed the Budwin Deadpool helmet and was on the last plate when I looked into YouTube for some pointers. The video for this creator showed up so I watched it, during the video he introduced these magnet dispensers and mentioned how helpful they were for this helmet.. This Budwin helmet uses 100 8mm x 2mm magnets. So I printed it, it's 2 plates with the first plate the "plunger" and the body of the dispenser, the 2nd plate was just the plunger.. He recommended printing each plunger a different color so you can tell which polarity each one was, so I did that and cloned the tube and placed it on the 2nd plate so I have 2 full sets. I followed the instructions and glued a magnet onto each end of the plungers, one for each polarity. When the Deadpool helmet finished, I grabbed my hands magnet dispenser and my package of 160 magnets and went to work.. Took a very minimal few minutes to get this down pat, but MAN... what a helpful item this is! Installed 100 magnets in 15 minutes
Share
0
0
0
This helmet is AWESOME! Printed it in eSun Fire Engine Red.. I downloaded the 103% file and then bumped it up to 105% but probably should have left it at 103% as it seems a tiny bit large.. Looks great though! Did the 100 8mm x 2mm magnets using this magnet dispenser I saw on a Youtube video for this specific helmet and after a little practice with it, it was incredibly helpful.. When assembled, this individual parts fit perfectly!
https://makerworld.com/en/models/733909-magnet-dispenser-8mm#profileId-665672
Share
0
0
0
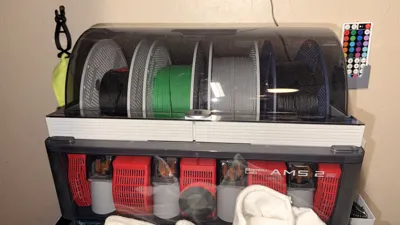
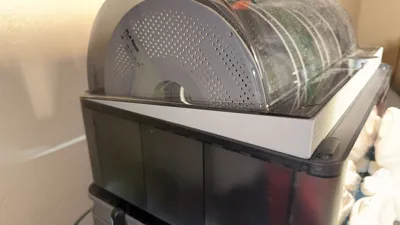
Printed this as a precaution as I purchased a spool of Elegoo filament that came in a cardboard spool. Read that the clearance might be an issue so printed this out just in case. Read the instructions which was super helpful in explaining how to insert the spacers into the bottom as the advice to insert them and then use a hard surface and tap the riser to seat it fully was a perfect piece of advice. Looks great and works great. Only note as expected is the 2 locking tabs on the AMS won’t work with this in place but since it’s super easy to add this when needed and remove it when not, this is not an issue at all
Share
0
0
0
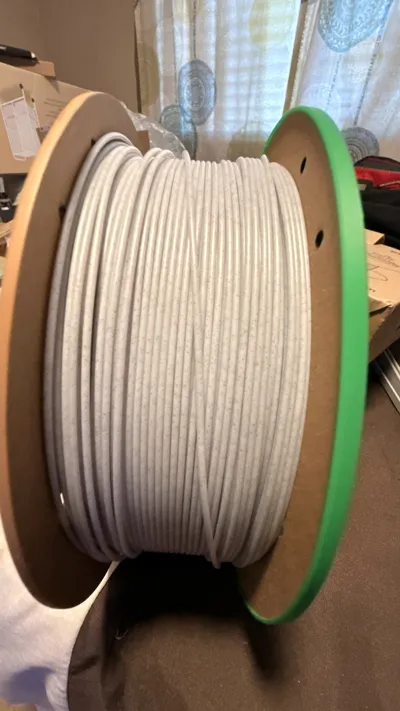
Purchased Elegoo marble filament to print a General Grevious bust and it comes on a cardboard spool. I’ve heard it’s not a good idea to run those in an AMS so I printed these (requires it to be printed twice). Really simple print, quick too! I measured my spool and found the 199mm flat print is best option for me. Worked perfectly! Fits perfectly! This photo was taken after printing 1 side while the other was printing.
Share
0
0
0
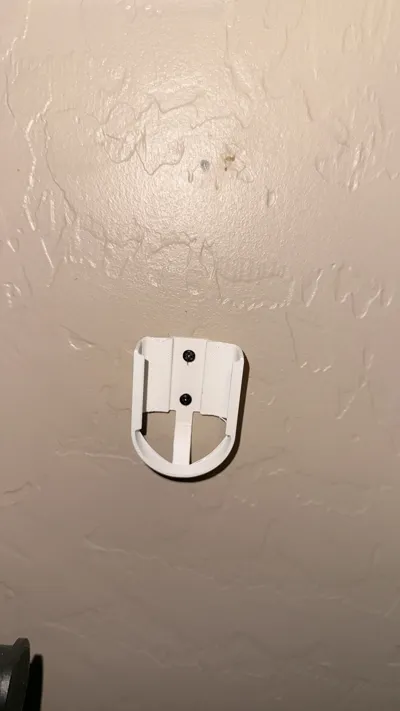
Just what I needed! I have this remote for one of my ceiling fans and have mounted the original bracket in my guest room by the door, but I have found when guests are here, they remove it from the bracket and place it on the night stand.. To me, that's just leaving open the chance for misplacement of the remote. I found this bracket doing a search, printed it out and it works/fits the remote perfectly! Thank you of the helpful file!

Share
0
0
0
I have just started my 3D printing journey along with purchasing an airbrush set (still haven't used it yet) and printed this upcoming projects. I used it already to spray primer filler on the Iron Man helmet I just printed. It worked perfectly! I printed the taller base.. Only thing I can suggest.. DO NOT try to force the screw in handle (especially when printing in PLA) as my first one broke off when I did this.. I was able to remove the broken piece, print another handle and then installed it turning it only until it was barely hand tight.. I didn't use any lubricant as mentioned in other posts and it's working perfectly as it is.. I can add that in the future if it seems to be needed at that time.
Share
0
0
0
Printed this for a surprise to one of my coworkers who asked about this lightsaber when I told him I bought a 3D printer.. It was a very easy print where all of the parts for each color are on their own specific plates. I had the colors of filaments needed (with minor modifications).. I used my gold PLA silk for the copper parts and for the green parts I used green PLA matte. Still looks really good.


Share
0
0
0
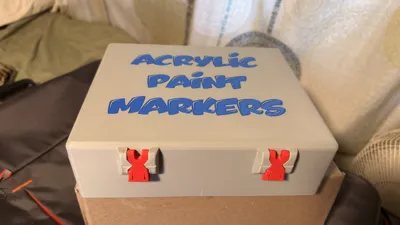
I gave it a 5 star rating even though I had a somewhat bad experience when putting the lid onto the bottom box. I'm calling it my error as I couldn't figure out to to get the hinges from the lid into the places on the bottom box and in my infinite wisdom, I used Hulk strength and one of the brackets on both bottom box broke off (I used PLA).. The box looks great, my markers are a tiny bit wider than the shelves but it works ok. The one bracket on each side still being in place allows the lid to stay attached. The front clamps work well too.. Only suggestion is if maybe I did the attempt to place the lid on incorrectly, to maybe add notes to the print on how to do it.. This breakage is totally my fault for trying to force PLA into a very tight fitting..


Share
0
0
0
Cool print! My daughter asked for this to have for some cash as a fun project. Printed well, only very minor issue was the slot for the lid to slide into was very tight. Took literally less than 2 minutes with a small 3D print hand file to get it where I needed it and it’s working perfectly
Share
0
0
0
Really fun print, printed in white then hand colored with acrylic markers. Looks great!

Share
0
0
0
printed this for my niece with tricolor filament. came out beautifully.
Share
0
0
0
just purchased a new airbrush kit and printed this to go with it. haven’t put it to use yet but it printer well and feels solid.
Share
0
0
0
printed these for my upcoming painting projects, they printed very nicely and can’t wait to put them to use
Share
0
0
0
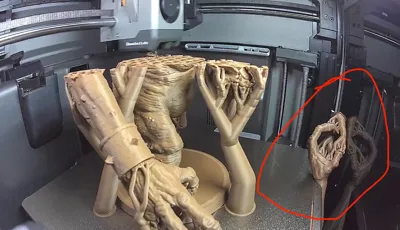
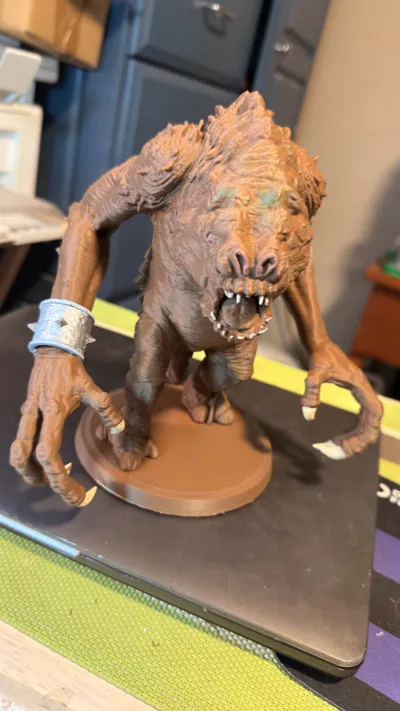
I’m only giving this 5 stars because I can’t give 10 stars! This was a great print and an even greater and product! The detail is crazy good and while I did have a minor “catastrophic event”, I was able to recover it. While I started the print overnight, I was up for work and sitting right next to the printer when his left arm came off and a little spaghetti started to form. I paused the print, removed the broken arm and cleaned up the spaghetti. It still had like 4 hours to go so I didn’t want to cancel the print. when looking at both the end of the arm and the part where it fell off the body, it looked like a clean break. Very straight and even ends on both. After the print completed, I used CA glue to reattach the arm, had a little bit of a clean up to do and can’t say how happy I am with the repair I was able to successfully do. it looks great and I absolutely love the Rancor! Did a little bit of hand coloring with acrylic markers and am very happy.
Share
0
0
0
Super funny print! My niece and her kids were coming to visit and haven’t been here since I got my P2S.. Figuring curiosity might get the best of the 4 year old, I printed this sign, found a stand to go with it and placed it on the stand in front of the glass door. When they arrived, I showed him the printer and told him not to touch it at all.. and went on to show him the picture on the sign and told him that would happen to him if he touched it. (Half joking, half serious 🤔).
Share
0
0
0
This was a life saver! I purchased a small stand for my P2S that has a drawer that I thought would be really helpful storing some tools and supplies for the printer. It’s very sturdy but everytime the printer is printing, the movement caused the drawer to open. It was frustrating me.. So I looked to Makerworld and found this print. Printer it and then attached it to the stand using command strips and it works perfectly! No more drawer issues.
Share
0
0
0
I printed this to surprise my 4 year old nephew who loves Pennywise (the character, he hasn’t seen the movie). At first I was concerned about the amount of really tiny parts, not sure I’d figure where they all went. I printed each set of colors on their own plate to save the waste. when it was all done printing, I went to assemble it (hoping for the best) and everything went together perfectly without any guessing. It looks great! The detail is incredible. Now I gotta toss around the idea of printing another one for me!

Share
0
0
0
I printed these in single color PLA, I have my snippets and 2 needle nose pliers that were stuffed in a drawer. I printed to free up the space and make these tool more quickly accessible. they look great and fit perfectly on the side of my P2S. Really helpful.

Share
0
0
0
this was a simple print and came out nicely, but it’s not something I can use. I bought an 8oz tube of super lube and this would require me to cut nearly the entire applicator off the tube all the way down to the threads. I didn’t want to do that and found another file that worked perfectly for me.
Share
0
0
0
printed this one to see if it worked better than the one I printed by a different creator. it was a simple print, and the only issue I had was when I cut my microfiber towel to fit, the dang towel had a bunch of loose pieces. got it trimmed down and put it together and it is perfect? very nice, simple print with really good quality
Share
0
0
0