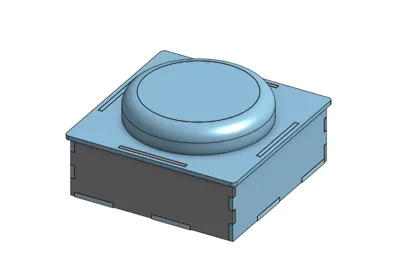
Reaction trainer/timer


Print Profile(1)
Bill of Materials

- 3mm MDF x 1: Not required but a nice addition to the walls and the top plate.
- Push button x 1: I used this button https://www.amazon.co.uk/Gebildet-Prewired-Waterproof-Momentary-Stainless/dp/B08L49F7DV/ref=sr_1_6
- Esp 32 x 1:
- Bread board x 1:
- 100 ohm resistor x 1:
- 10,000 ohm resistor x 1:
- Mosfet x 1:
Description
General overview:
This is a reaction trainer that I made for school work. It's a very simple design and requires minimal hardware. There are some required components like:
-Bambu lab COB LED strip 200mm
-A simple push button (https://www.amazon.co.uk/Gebildet-Prewired-Waterproof-Momentary-Stainless/dp/B08L49F7DV/ref=sr_1_6) I used this one.
-An esp32 controller
-A mosfet (preferably LB8721)
-A couple jumper wires and a 100ohm resistor and a 10k ohm resistor and a breadboard
Assembly instruction:
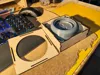
1.Wire the electronics using either a small breadboard or a prototype PCB board(either are fine).
Button:
GPIO13 ─ Button ─ GND
LED and mosfet:
GPIO27 ──220Ω── Gate
Gate ──10kΩ── GND
5V ─── LED +
LED − ─── Drain
Source ─── GND
2. Upload the code to the ESP32.
const int buttonPin = 13;
const int ledPin = 27;
unsigned long startTime;
unsigned long reactionTime;
// debounce
bool buttonPressed()
{
if (digitalRead(buttonPin) == LOW)
{
delay(20);
if (digitalRead(buttonPin) == LOW)
return true;
}
return false;
}
// flash LED function
void flashLED(int times, int delayTime)
{
for(int i = 0; i < times; i++)
{
digitalWrite(ledPin, HIGH);
delay(delayTime);
digitalWrite(ledPin, LOW);
delay(delayTime);
}
}
void setup()
{
pinMode(buttonPin, INPUT_PULLUP);
pinMode(ledPin, OUTPUT);
digitalWrite(ledPin, LOW);
randomSeed(analogRead(34));
}
void loop()
{
digitalWrite(ledPin, LOW);
// WAIT FOR START
while(digitalRead(buttonPin) == HIGH)
{
}
delay(300);
// wait release
while(digitalRead(buttonPin) == LOW)
{
}
// RANDOM WAIT
unsigned long waitTime = random(2000,5000);
unsigned long timerStart = millis();
while(millis() - timerStart < waitTime)
{
if(buttonPressed())
{
// FALSE START → rapid flashing
flashLED(10, 100);
return;
}
}
// GO SIGNAL
digitalWrite(ledPin, HIGH);
startTime = millis();
while(digitalRead(buttonPin) == HIGH)
{
}
reactionTime = millis() - startTime;
digitalWrite(ledPin, LOW);
delay(500);
// SHOW RESULT USING FLASHES
// convert ms → number of flashes (scaled)
int flashes = reactionTime / 50;
if(flashes > 20) flashes = 20; // limit
flashLED(flashes, 150);
delay(2000);
}
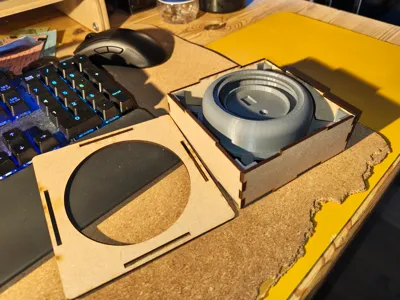
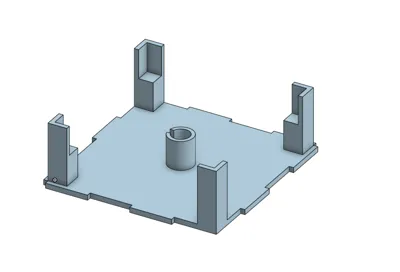
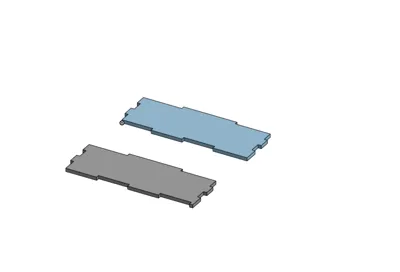
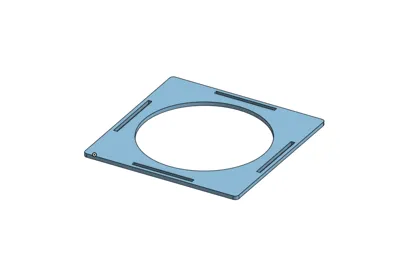
3. Assemble the reaction trainer.
Put all the 4 sides onto the pressing mechanism and screw the button into the circular cut out on the pressing mechanism.
Plug in the esp32 into a usb c cable and have fun training/timing your reaction speed.
Boost Me (for free)
I am a student who can barely afford any 3d printing filament. Any boosts help a ton for my school work and helps me out.
Comment & Rating (0)