


Print Profile(1)

Bill of Materials

- M5 Machine Screw 25mm x 1: It can be somewhat shorter
- M5 Heated Insert x 1: Any length will suffice
Description
Modern, Minimal, Designed to Last.
- This hook was designed with a clean, modern aesthetic that fits effortlessly into any space. Whether you’re hanging coats or bags, it keeps your walls looking sleek.
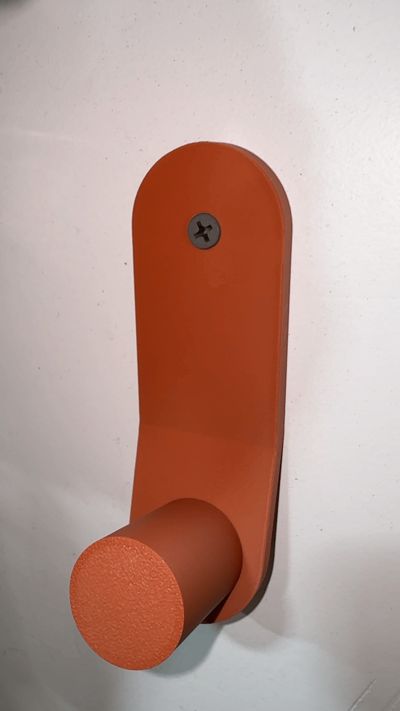
Added Strength with an M5 Screw
- At the core of the peg is an M5 machine screw, which gives the hook a significantly higher weight capacity than typical hooks. It’s strong, sturdy, and designed to handle great weight loads.
Magnetic Cover for a Clean Finish
- No one likes visible screws. That’s why the hook includes a magnetic cap that simply snaps into place, hiding the screw and giving the whole setup a sleek, finished look. It also makes it easy to remove or reposition the hook without any hassle or visible marring.
Flexible Mounting Options
- This hook was designed with drywall screws in mind—specifically ones with a bugle or countersunk head—but you can use whatever hardware works best for your wall type. If you prefer, you can even use adhesive backing or alternative mounting methods. It’s all about what works for you.
Optional Cap for a Customizable Look
- The magnetic cap is there for looks—the 8x3mm round magnet hides the screw for a cleaner visual, but it’s completely optional. If you prefer the industrial, exposed look or need to skip the cap for any reason, feel free. The design works either way.
Threaded Insert for a Solid Grip
- To keep everything firmly in place, the hook uses an M5 threaded insert—giving the screw a solid grip and making sure the connection is secure over time. It’s a small detail, but it makes a big difference in durability and reliability.
Need a modification? Feel free to ask
If you’re working with non-standard screws, unique wall types, or have a specific mounting setup in mind, please feel free to reach out. I’m happy to offer alternative designs, different screw sizes, modified caps, or anything else that can help this hook work better for you.
Assembly Instructions
🧲 Insert the Magnet into the Cap
- Use a standard 8×3mm round magnet.
- It should be a tight press fit into the cap.
- For extra hold, you’re welcome to add a drop of super glue before pressing it in—just to make sure it stays secure over time.
🔥 Install the M5 Threaded Insert
- Heat set an M5 threaded insert into the hook/peg piece (the one with the center hole).
- Make sure it’s seated straight and flush with the surface.
🔩 Add the M5 Machine Screw
- Take an M5 machine screw, ideally around 25mm in shaft length.
- Slide it through the back of the main body (the wall-facing side), then thread it into the hook piece with the insert.
- Tighten until snug—don’t overdo it.
Boost Me (for free)
If you have a boost to spare, consider giving this design a boost!
It helps my designs reach others and supports my long-term goal of improving my 3D modeling skills through tangible feedback. Thank you :)
License
You shall not share, sub-license, sell, rent, host, transfer, or distribute in any way the digital or 3D printed versions of this object, nor any other derivative work of this object in its digital or physical format (including - but not limited to - remixes of this object, and hosting on other digital platforms). The objects may not be used without permission in any way whatsoever in which you charge money, or collect fees.
Comment & Rating (0)