


Print Profile(4)


Description
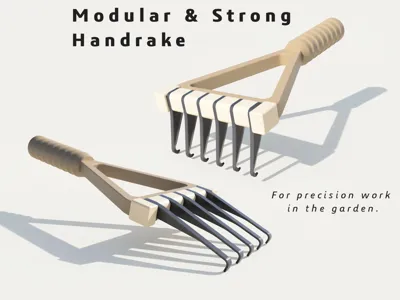
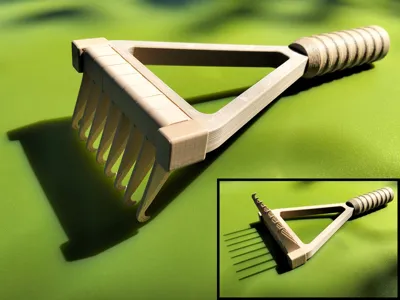
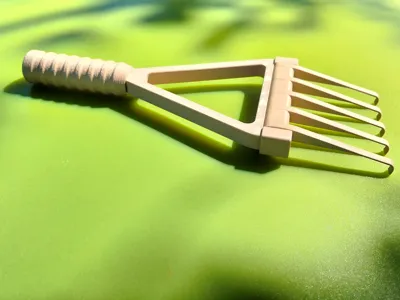
Build Your Own Modular Hand Rake
Imagine a hand rake that fits your exact needs—down to the number of tines and their thickness. That’s exactly what this modular hand rake offers. It’s designed for strength, durability, and flexibility, and you can print and assemble it entirely without glue or screws.
What Makes It Special?
The rake’s parts are printed with strength in mind. Each component is oriented for maximum durability. But the real standout feature is its modular design. You get to decide how many tines the rake has and how thick each one should be by adjusting the print height (Z-axis).
Two Tine Types Included
You can print two different kinds of tines, depending on what kind of yard work you’re tackling:
- Scrubrake Tines: These have hooks that are great for digging out weed roots. (standard thickness/width 2mm)
- Lawnrake Tines: A more traditional shape for clearing leaves and surface debris. (standard thickness/width 5mm)
What to Print
Start by printing the basic handle set, which includes:
- Handle
- Frame
- Bar
- Two endcaps
Then, print the tine sets and spacers of your choice. I have included three sample configurations to get started:
- Scrubrake: 8 tines (2mm each)
- Scrubrake: 6 tines (3mm each)
- Lawnrake: 5 tines (5mm each)
Assembling the Rake
Assembly is quick and tool-free. Here’s how to put it together:
- Attach the handle to the frame.
- Slide your chosen tines and spacers onto the bar, starting and ending with a tine.
- Insert the bar into the frame’s recesses.
Secure it all by adding the two endcaps.

That’s it—your (custom) rake is ready.
Fine-Tuning your perfect Rake
The stacked tines and spacers must fit within an 82mm space inside the frame. If your printed parts are just slightly too tall (this can happen due to minor print deviations), the fix is simple: reprint one spacer slightly shorter.
Here’s how to calculate the right spacer length for a different number or thickness of tines:
Spacer Length (Z in mm) = (82mm - (Tine Thickness × Number of Tines)) ÷ (Number of Tines - 1)
Round this down to the nearest 0.2mm (standard layer height).
For best results:
- Scrubrake tines: Keep them at least 2mm thick.
- Lawnrake tines: No thinner than 4mm (default is 5mm).
Scale all adjustments in the Z direction only.
p.s. the model with the lawnrake tines can also serve perfectly as a back scratcher!
License
You shall not share, sub-license, sell, rent, host, transfer, or distribute in any way the digital or 3D printed versions of this object, nor any other derivative work of this object in its digital or physical format (including - but not limited to - remixes of this object, and hosting on other digital platforms). The objects may not be used without permission in any way whatsoever in which you charge money, or collect fees.
Comment & Rating (7)