The process of developing a switch 2 Case.
- Creation of the controller model.
- Bringing the controller to the Switch 2.
- The Clip.
This is a guide to my design process for this assembly.
I want to emphasize that developing usable 3D models is my hobby.
The hobby itself is quite time-consuming due to the amount of prototyping required to ensure good quality.
But in the end, it all pays off when random people around the world are happy and entertained.
That’s my main drive.
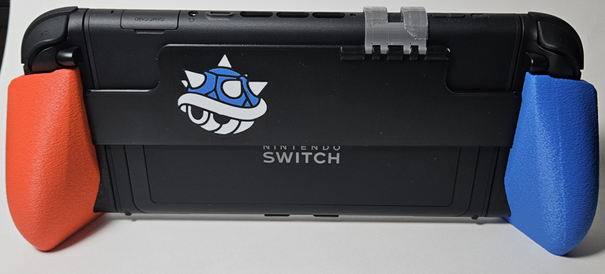
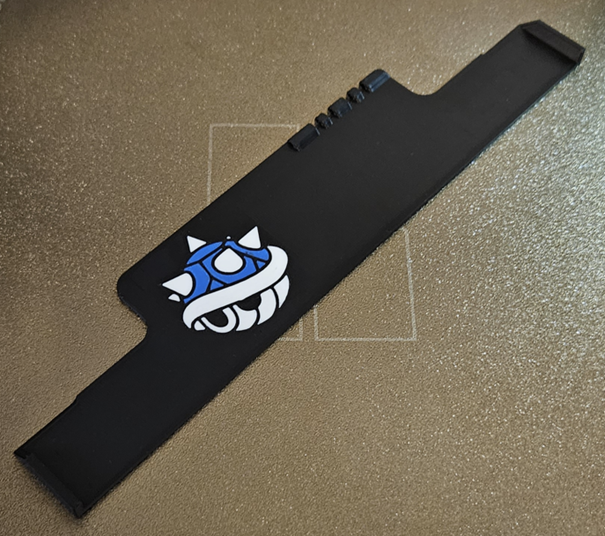
Here is the finished model on the Switch 2:
Creation of the controller model.
- Current and old model
- From old to new
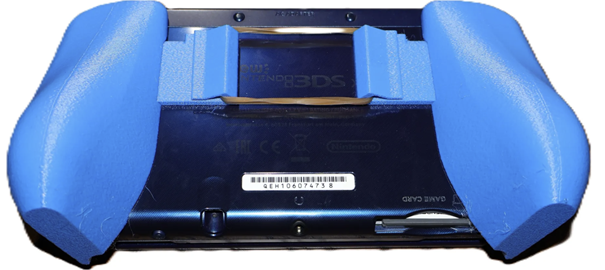
Current and old model.
To be honest, I already had the CAD files of the controller, since I had created them for an older project: the 3DS XL and New 3DS XL.
Here’s a photo of them below:
- They are quite similar.
- The Switch version has been adjustet to match its sice.
- both feel in my opinion, much better then without it.
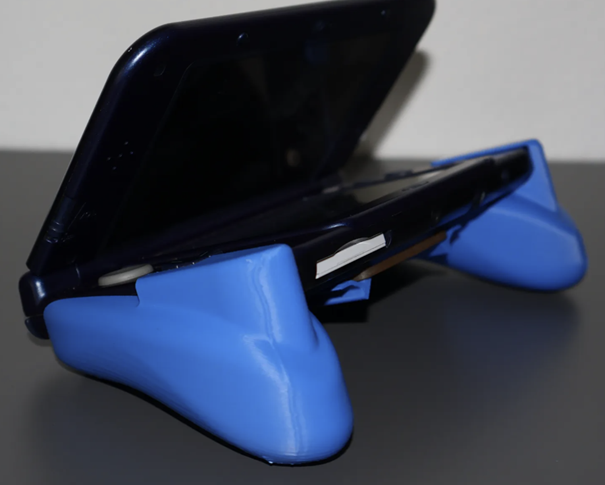
The shape of the controller wasn’t inspired by anything in particular, to be honest — I just printed and adjusted it until it felt right. In a handheld setting, however, it most closely resembles the Steam Deck controller due to its palm rest.
The first version, though, was inspired by the PlayStation 4 controller, as I really liked how it felt. But as you can see below, it ended up not resembling the PS4 controller at all.
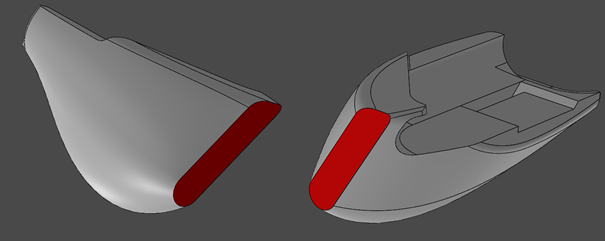
From old to new.
At first, I was pretty happy with my work, as shown in the picture above.
But after a while, I started receiving complaints about the slicing — the shape had no flat surface to stick properly to the build plate.
So, I had to create a new version using the knowledge I had gained from the previous one.
Although my goal was to improve it in every aspect compared to the last version:
- Better Grip (Fuzzy skin)
- No support (Some chamfers added)
- Modern design (improved surface modeling)
- More comfort (willing to print as many prototypes as it takes)
In my opinion, this model turned out to be a massive success.
My brother and some of my friends use it on their 3DS nonstop, which suggests to me that they prefer it over using the device without it.
Bringing the Controller to the Switch 2
The Switch 2 presented quite a few challenges that I had to overcome:
- Joycon Fit.
- Bridging the Joycons.
- Hinges
Joycon fit.
For the Joy-Cons, I used an app that I always rely on for reverse engineering.
It's called ImageMeter, and I’ve paid the one-time fee to unlock all its features.
Of course i measured some things with the ol reliable ruler.
Here are some snippets from the app you might find interesting:
(I’m not getting paid for advertising.)
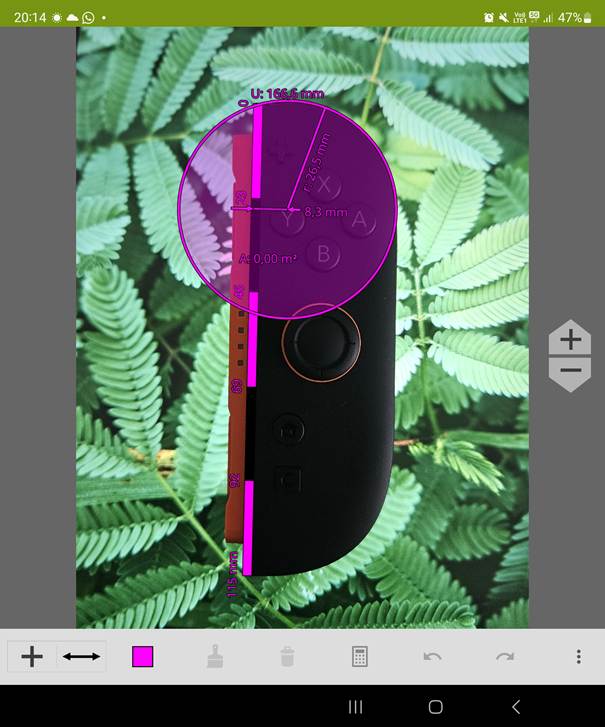
It basically lets you set a reference, and then add measurements based on it.
As far as I know, freedom units are not supported.
After measuring everything I needed, I created reference models of the Joy-Cons modeling just the bare minimum.
The Display of the Switch 2 was done exactly the same way.
After I had my reference, I adjusted my controller model and used Boolean operations to cut the reference model out of it.
The controller turned out very well — the fit isn’t too tight, but just right.
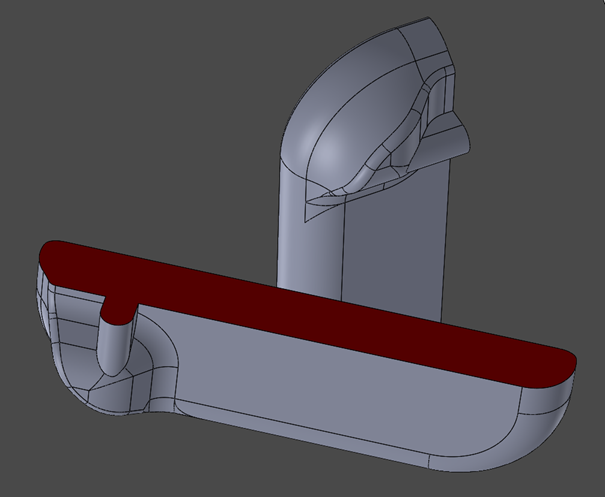
Brigding the Joycons.
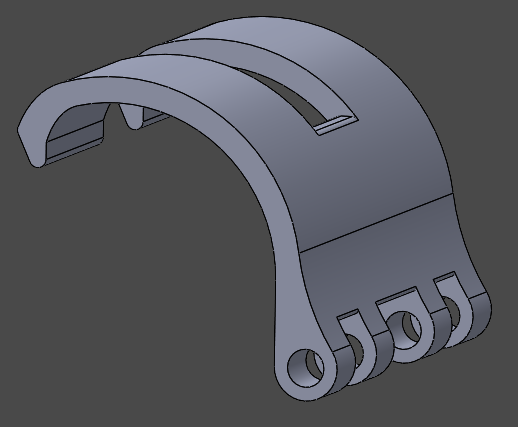
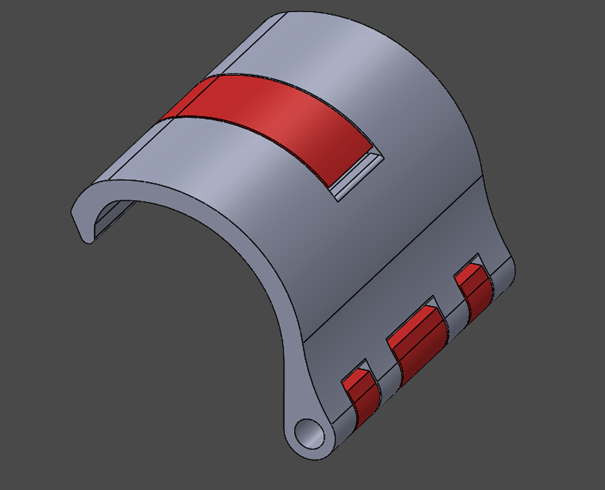
For the bridging, I used a simple cavity in the Joy-Cons, as shown below:
The cavity would have been challenging to print horizontally without support, since the ceiling was parallel to the print bed.
To solve this problem, I angled the ceiling at 45 degrees.
The bridge itself was simple to model, although I had to try multiple times to find the optimal fit.
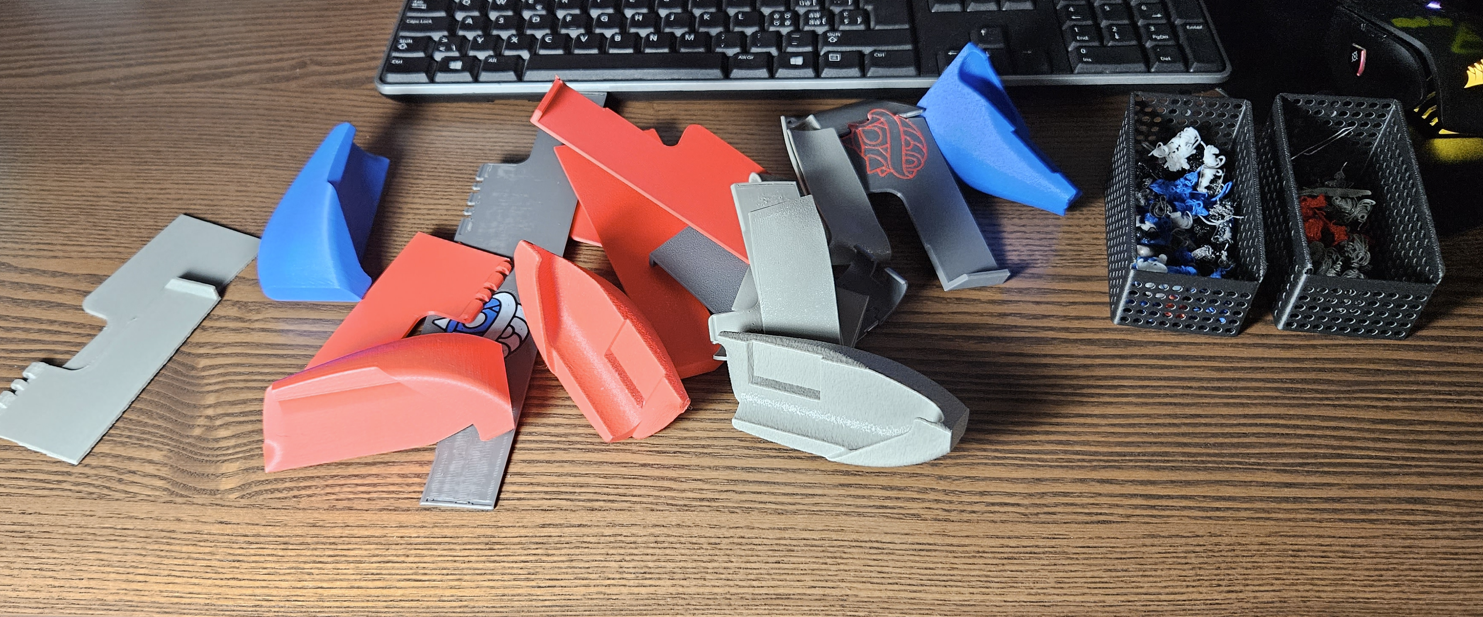
At the end of this article, I’ll show you a picture of how many attempts it took for each model to get it just right. You will be surprised.
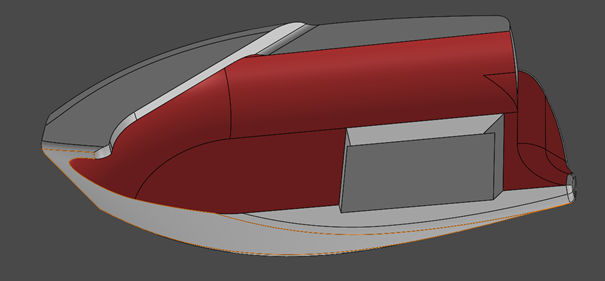
After the bridge was completed and all functions were modeled into it, I felt a sense of potential in the empty surface area.
So, I decided to add a creative touch — a blue shell from Mario Kart.
Hinges
I had to remove the supports to achieve the hinge geometry on the top right side of the model.
With supports, the material would never come out of the holes cleanly.
Since the part was printed horizontally, I modeled a 2 mm hole to fit 1.75 mm filament.
Using a 0.16 mm layer height, the filament passed through without any problems.
The Clip
The clip on top of the Switch screen was the scariest part.
I had to make sure I didn’t damage my own Switch while trying to perfect the fit.
- Build in support
- Scratching the switch 2
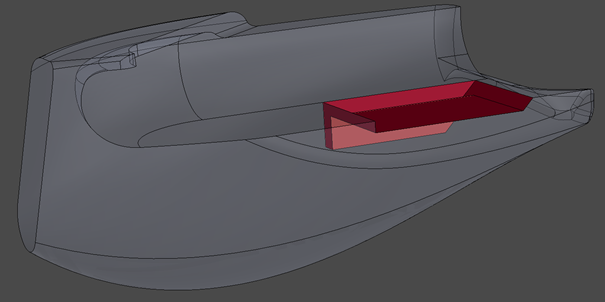
Build in support
The model was pretty basic — just a hole for the filament and a hook, as shown below.
Despite its simplicity, it had to be precise to ensure a secure hold without damaging the device.
But it seems there's no model without a challenge.
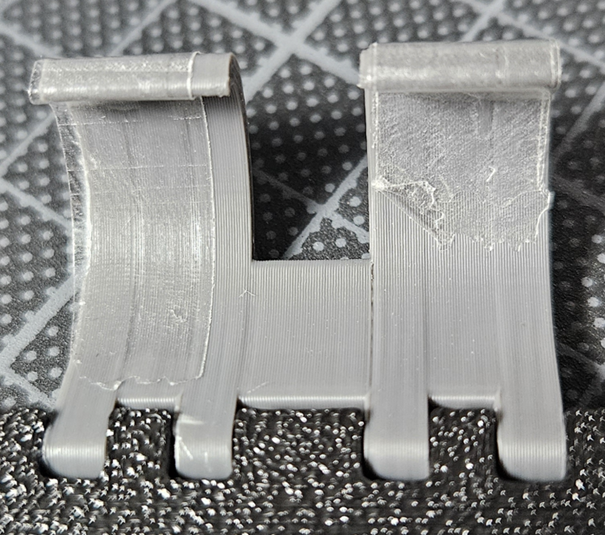
After the first test print, I realized that the support material had filled the holes, making it impossible to insert the filament — and practically impossible to remove the support from a 2 mm hole.
The solution was to integrate the support structure directly into the model itself.
With a layer height of 0.16 mm, I set the gap between the support and the model to 0.2 mm.
After printing, I was able to remove the supports easily using pliers.
Scratching the switch 2
After many attempts to get the clip to work, I noticed it was leaving marks on the Switch — not on the display, but just above it.
This was the final issue I had to solve, and it was crucial to me.
If I couldn't fix it, I probably wouldn’t upload the file at all. I simply don’t want anyone to risk damaging their Switch.
The solution was to cover it with multiple layers of tape.
(ideally, this would be done in a better way than I did.)
Conclusion:
This project required many iterations and careful design refinements. Every detail was improved step by step, from grip comfort to functionality, ensuring safe and enjoyable use for others.
Here is a Photo of the wastet prototypes:
Thank you for reading.