Simple TPU Boost Module

Print Profile(6)

Description
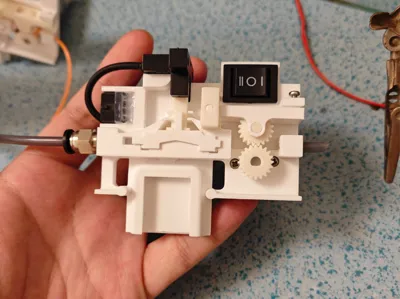
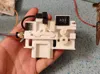
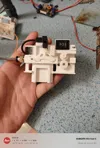
TPU Boost Module, an independently developed solution, no PCB required, highly modular, purchase and solder in one go, approx. 30 yuan, excluding printing costs.
Boost Me (for free)
thank you!
Note: printing strictly requires a 0.2mm nozzle. A 0.4mm print might affect assembly and operation, but you can certainly try it. Try using a minimum line width of 30% for the A wall, it might just work.
Can print TPU 85A-95A through the machine's feeder port (only tested down to 85A and up to 95A; you can test below 85A yourself, theoretically not suitable for assisting hard materials),
Can use Bambu Lab's official boost module bracket (H series requires printing the bracket in this profile),
Can use the Bambu Lab machine's 24V power supply,
Can feed, unload, and stop,
Can use the AMS HT external output port,
Can use the dry box external filament output,
Can place the filament spool relatively freely,
Self-tested printing shoes with no filament shortage issues,
Idles continuously when there is no filament,
Needs to be installed vertically.
Materials list:
Motor: https://e.tb.cn/h.RitzlLQNawGb5s8?tk=zVU7gb4ovut Specifications: 24V 55RPM
Optical sensor: https://e.tb.cn/h.R7WYAAqhZWroKhC?tk=E5TLgb4sFUM Specifications: WTX-SX671-WR PNP type
6pin/4pin connector: https://e.tb.cn/h.R7CvqR08MYojBQG?tk=vPR7gb4vEZg Specifications: MX3.0-6P (2*3)
DPDT switch: https://e.tb.cn/h.R7WfTPeVoovclpE?tk=i3HKgb4C8YZ Specifications: KCD1 6-pin 3-position
Electronic switch board: https://e.tb.cn/h.RiGTH2CB4oIOCqq?tk=rgWpgb4BRiD Specifications: Instantaneous 40A, continuous 10~20A
Pneumatic connector: https://e.tb.cn/h.R7yaRH86jHZvOXI?tk=oFL2gbfabOl Specifications: Black PC4-M6 (pass-through)
Wire: https://e.tb.cn/h.RiG8b6a4ajKl4p1?tk=JeKRgbf1cSW Specifications: 2P*26AWG 0.15mm²
International users need to find alternative parts themselves.
Has motor screw mounting holes, 20GA motors can be fixed with two M2.5*6 screws
25GA motors can be fixed with M3*8 screws.
X2D, P2S, etc. recommend right-in, left-out. H2D, H2S, H2C, etc. recommend left-in, right-out (requires printing the bracket in this profile). A1 A2 need right-in, left-out. Print the bracket in the profile, or print a custom bracket and attach it yourself.
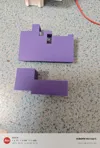
The casing can print the file in the profile.
Added screw holes for adjusting the driven rod position, use M2.5 screws, recommended length 6mm.
Installation tutorial: https://www.bilibili.com/video/BV1Ei7y6MEEp/?share_source=copy_web
Usage tutorial: https://www.bilibili.com/video/BV1MMEZ6ZEyo/?share_source=copy_web
When printing, be sure to ensure that the following settings are as shown in the image.

Comment & Rating (0)