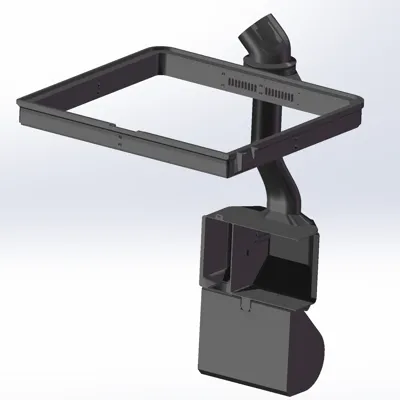
X2D Riser Exhaust Solution


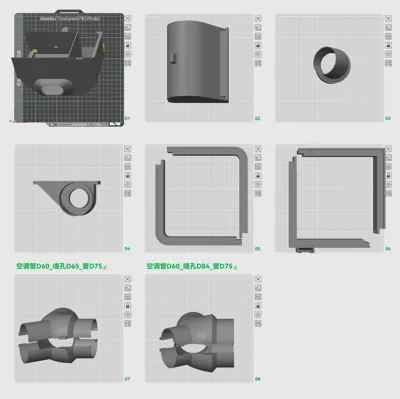
Print Profile(1)
Description
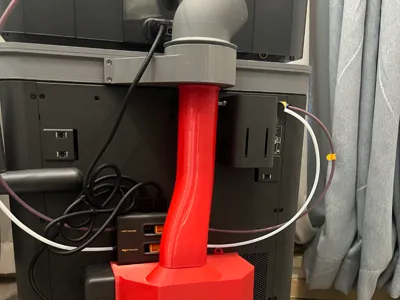
This is an exhaust solution that utilizes the air conditioning vent, directing the X2D's built-in exhaust through a ventilation duct to the AC vent and outside. Normal AC vents usually have gaps sufficient for ventilation.
I previously made a similar ventilation solution for the P2S, and it worked quite well for a period. This time, after switching to the X2D, I designed these components. To minimize airflow attenuation, the fan shroud is relatively thick, which allows the fan to exhaust odors even at low speeds and with low noise. I considered avoiding supports as much as possible during the design, and I have already printed and tested it. The structural dimensions and fit are all appropriate.
The riser uses the dimensions from a model previously released by “Printing King”. I rebuilt the model and made some modifications. For the small steps where the riser contacts the printer, you can apply a strip of 1mm thick foam tape. It's also best to apply a strip of foam tape around the top and sides where it contacts the glass. If you don't apply it, odors won't leak out, but the model's dimensions account for this tolerance, so it will be a bit loose without it. (Requires 1mm thick, 2mm thick, 10~15mm wide single-sided tape)
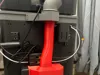
The fan shroud that contacts the exhaust kit has a buckle, making it very stable after installation. It would be even better to apply a 1mm thick foam tape around the contact area. For the only screw needed, just use the one above the Bambu Lab waste chute.
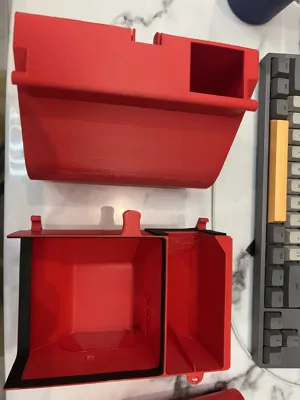
The Bambu Lab waste bin has a super large capacity and should only need changing every few months. The design is rather ugly, so if you have a better solution, you can redesign it yourself.
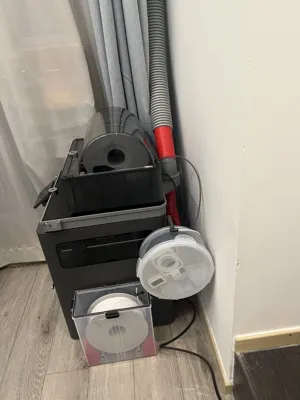
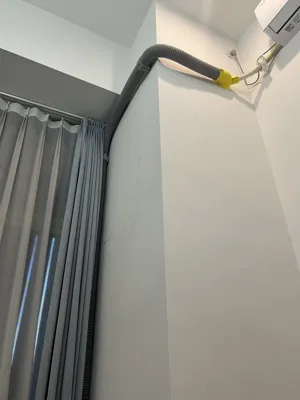
For the exhaust duct, I recommend buying PE fresh air duct, 75MM, and a few clamps (use a drill to make holes and expansion screws to fix them to the wall). The inner wall of this type of duct is smooth, minimizing impact on airflow.
Two sizes are provided for the AC vent opening: one with a diameter of 65mm and one with 84mm. The AC duct diameter is 60mm. This might vary for everyone, so use it as a reference and design your own. It's recommended to first print a few small rings similar to your measured size for actual testing, as a 1mm difference might prevent a tight fit. Finally, use sealing putty to fill any gaps.
License
You shall not share, sub-license, sell, rent, host, transfer, or distribute in any way the digital or 3D printed versions of this object, nor any other derivative work of this object in its digital or physical format (including - but not limited to - remixes of this object, and hosting on other digital platforms). The objects may not be used without permission in any way whatsoever in which you charge money, or collect fees.
Comment & Rating (1)