When planning my first crowdfunding project, I had one guiding principle: it should be over-the-top. A big part of that was packing in as many details & textures as possible onto the game board.
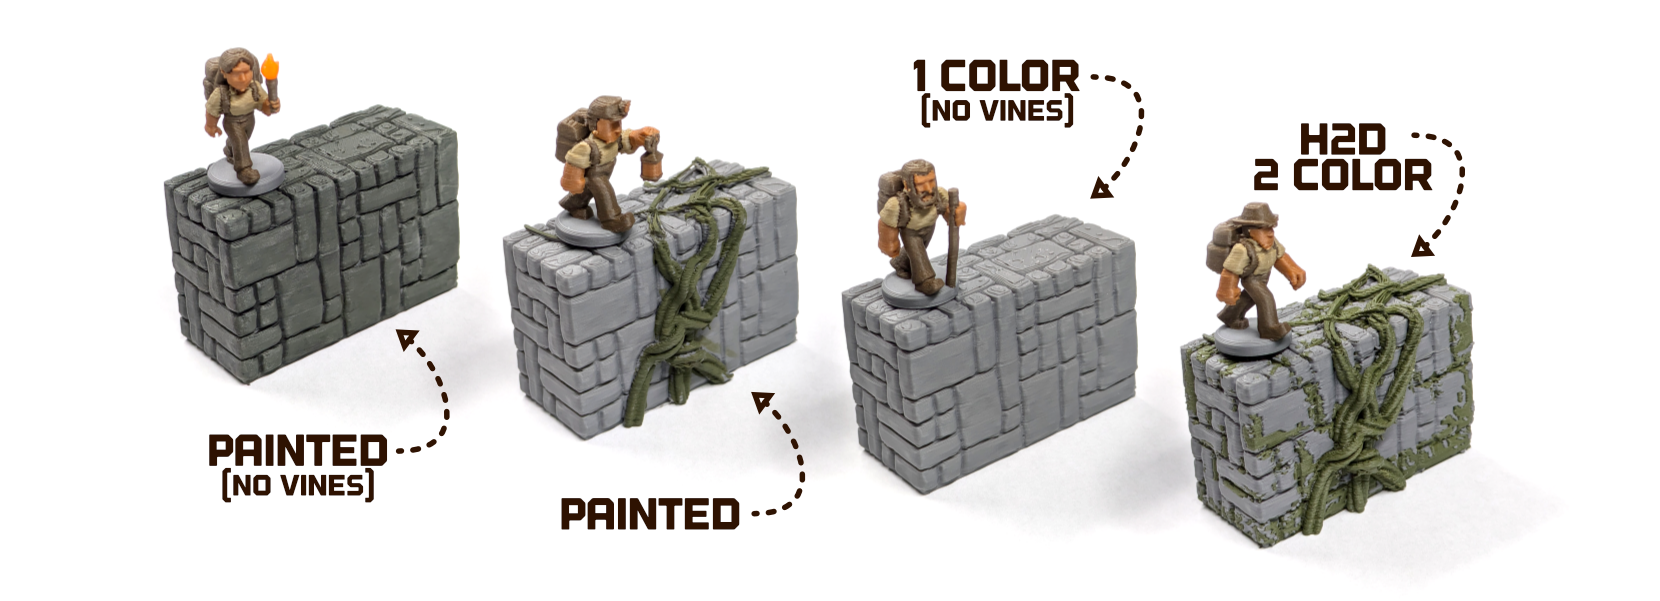
Recognizing that users have different devices and different levels of comfort with painting models, I wanted to provide options for single color + paint, AMS & dual nozzle printers along with variants in the amount of decorative vines (which would require painting for single color models).
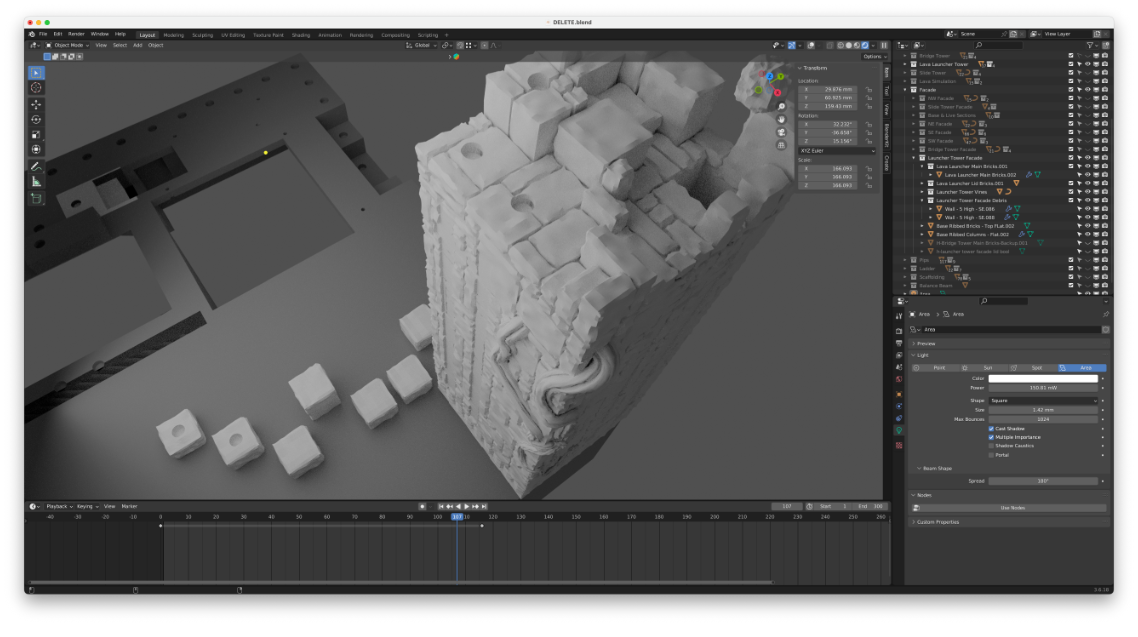
Through the process, I’ve learned quite a bit and wanted to share my process in case you’d like to give it a try. Below, I’ll outline 4 of the main techniques I’ve used so far along with some tips. I work in Blender but even CAD users can still utilize these tips through a model import.
Painted Textures
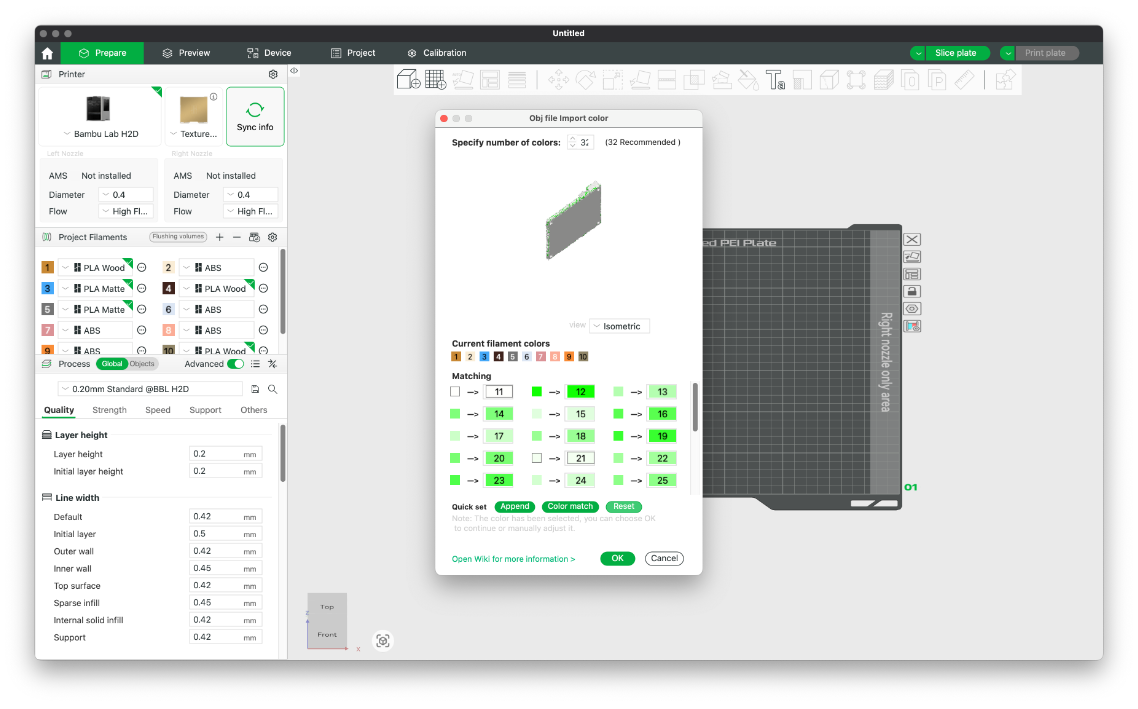
As an option for users with multi-nozzle printers, I wanted to use filament-switching to add colors to the brick surface of the game. With an H2D, this means that you can create detail with color while only generating minimal waste. However, I didn’t have a good way to do this in Bambu Studio that looked organic. To solve for this, I decided to UV paint the mesh and then import it into Studio to assign the colors.
Blender has UV painting but I haven't been able to figure out a way to create 'scatter' brushes that don't feel to uniform - I'm sure there's a way to do it but I haven't figured it out yet! Instead, I used this process:
- Import the OBJ into Nomad Sculpt.
- Create a brush with an alpha texture - I just used the triangle scatter image that comes with Nomad. It will take some experimentation to find brush settings that work for your project - I'm not yet experienced in nomad so I had to guess and check.
- Choose high-contrast colors - this will make it easier to differentiate them later when importing into Bambu Studio
- For areas with lower mesh detail, there may not be enough mesh vertices to contain the required brush detail. In these cases, you may need to enable Dynamic Topology. This will result in a larger mesh but should not significantly alter the surface structure.
- Export from Nomad as an OBJ with vertex colors set to RGB
Stamped Textures
For wooden surfaces, I used two techniques based on the scale of the part and how visible it would be in the final design.
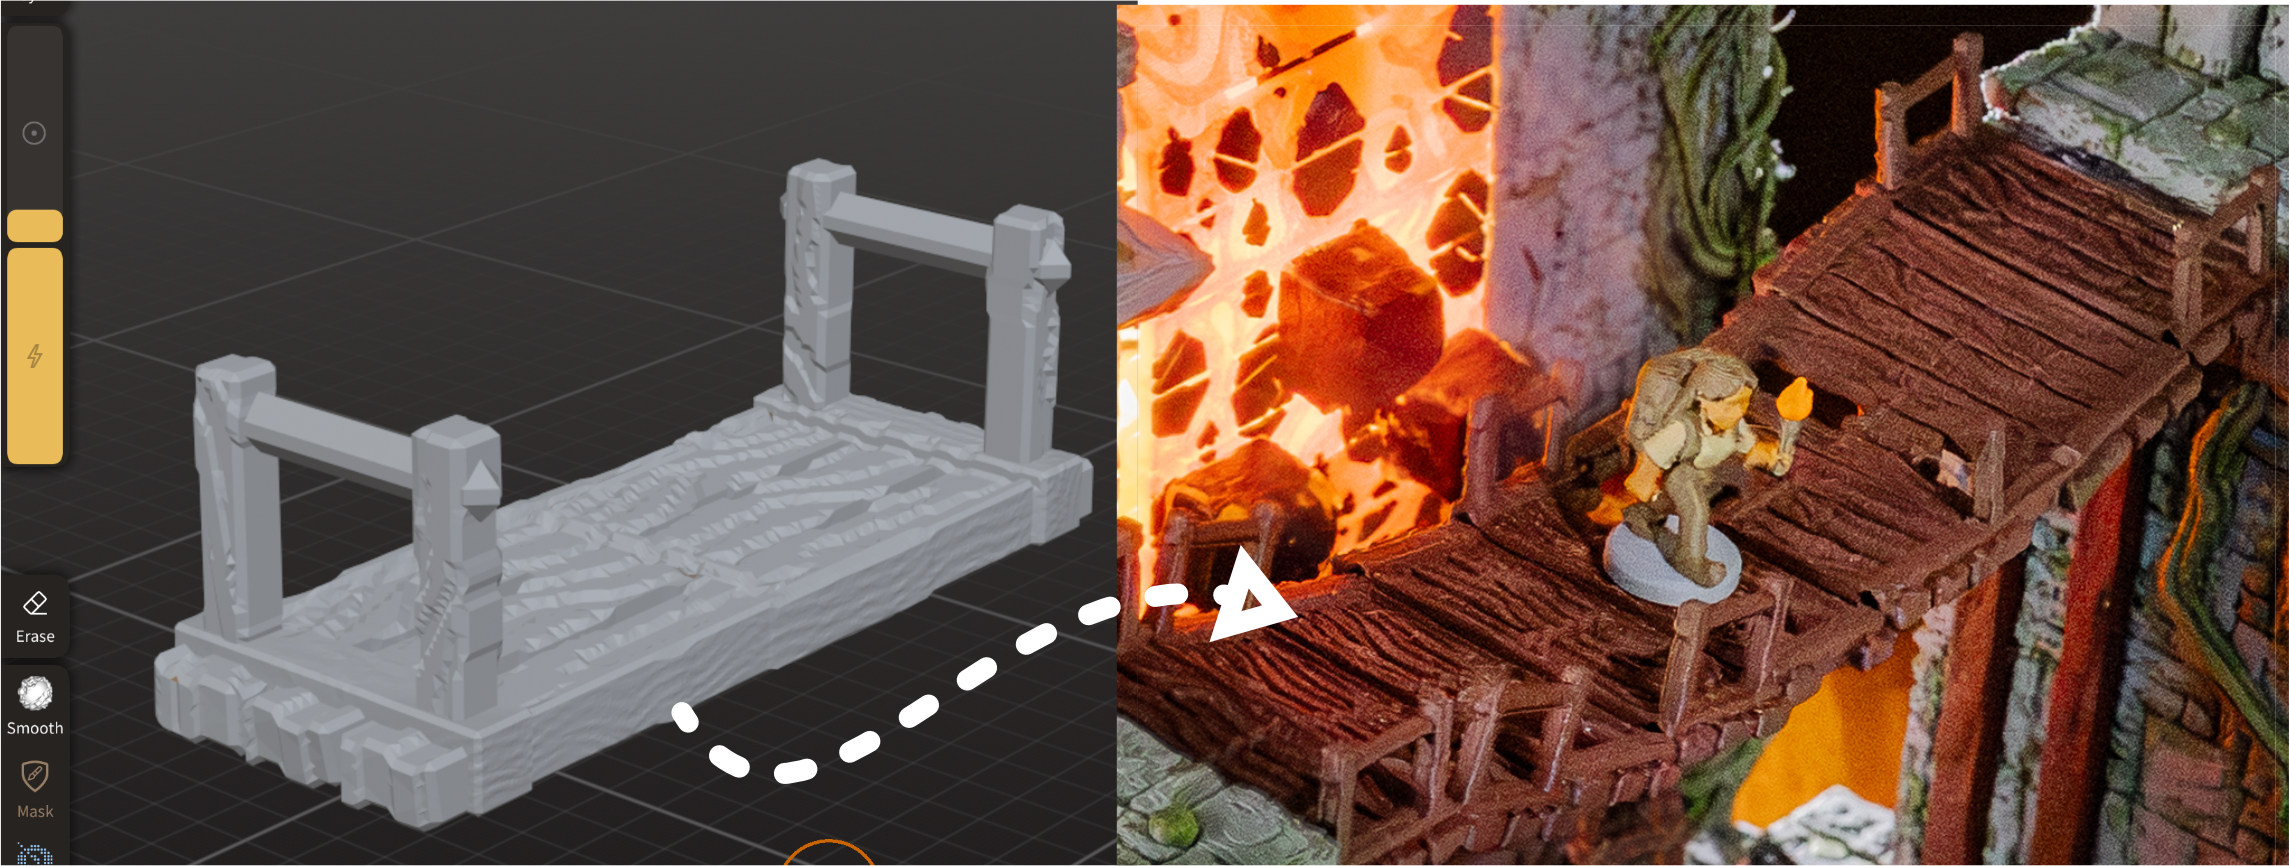
For the bridge, I created a mesh in Blender, exported an OBJ, imported into Nomad (using the process described above) and then used the Stamp tool to apply a woodgrain texture. You can import your own alpha image of a grain texture but I just used the included example. Alternately, you could use mesh deformation tools to draw individual grain lines.
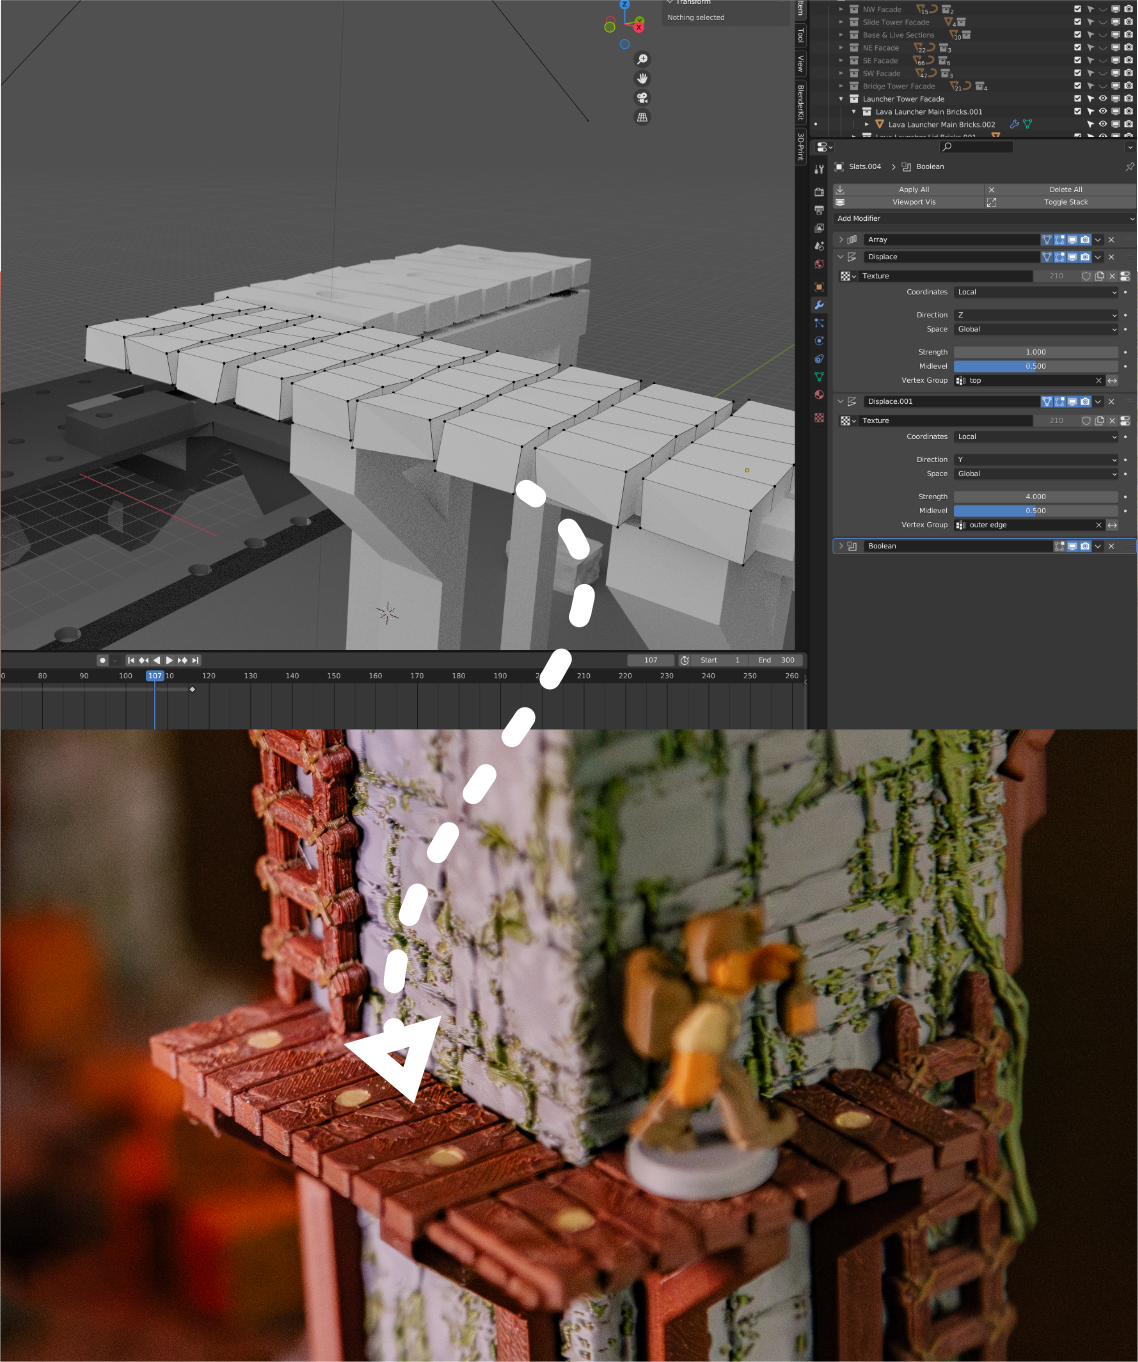
For smaller parts, I used a simpler process that works best on the Z axis. In Blender, I used modifiers to subdivide the mesh and then displacement modifiers to move the individual vertices using a noise texture - this adds random variations to the vertices. I used separate modifiers for each axis to control the severity of the effect. These minor height variations result in top surfaces that have a rough appearance. Although it doesn't have significant grain texture on close appearance, this 'roughs up' the surface so that it doesn't appear too smooth.
Extruded Textures
For the river and lava conveyor belts, my design required that they print face-down but I still wanted them to include texture. For each, I started with a vector drawing in Affinity Designer which I then extruded in Blender.
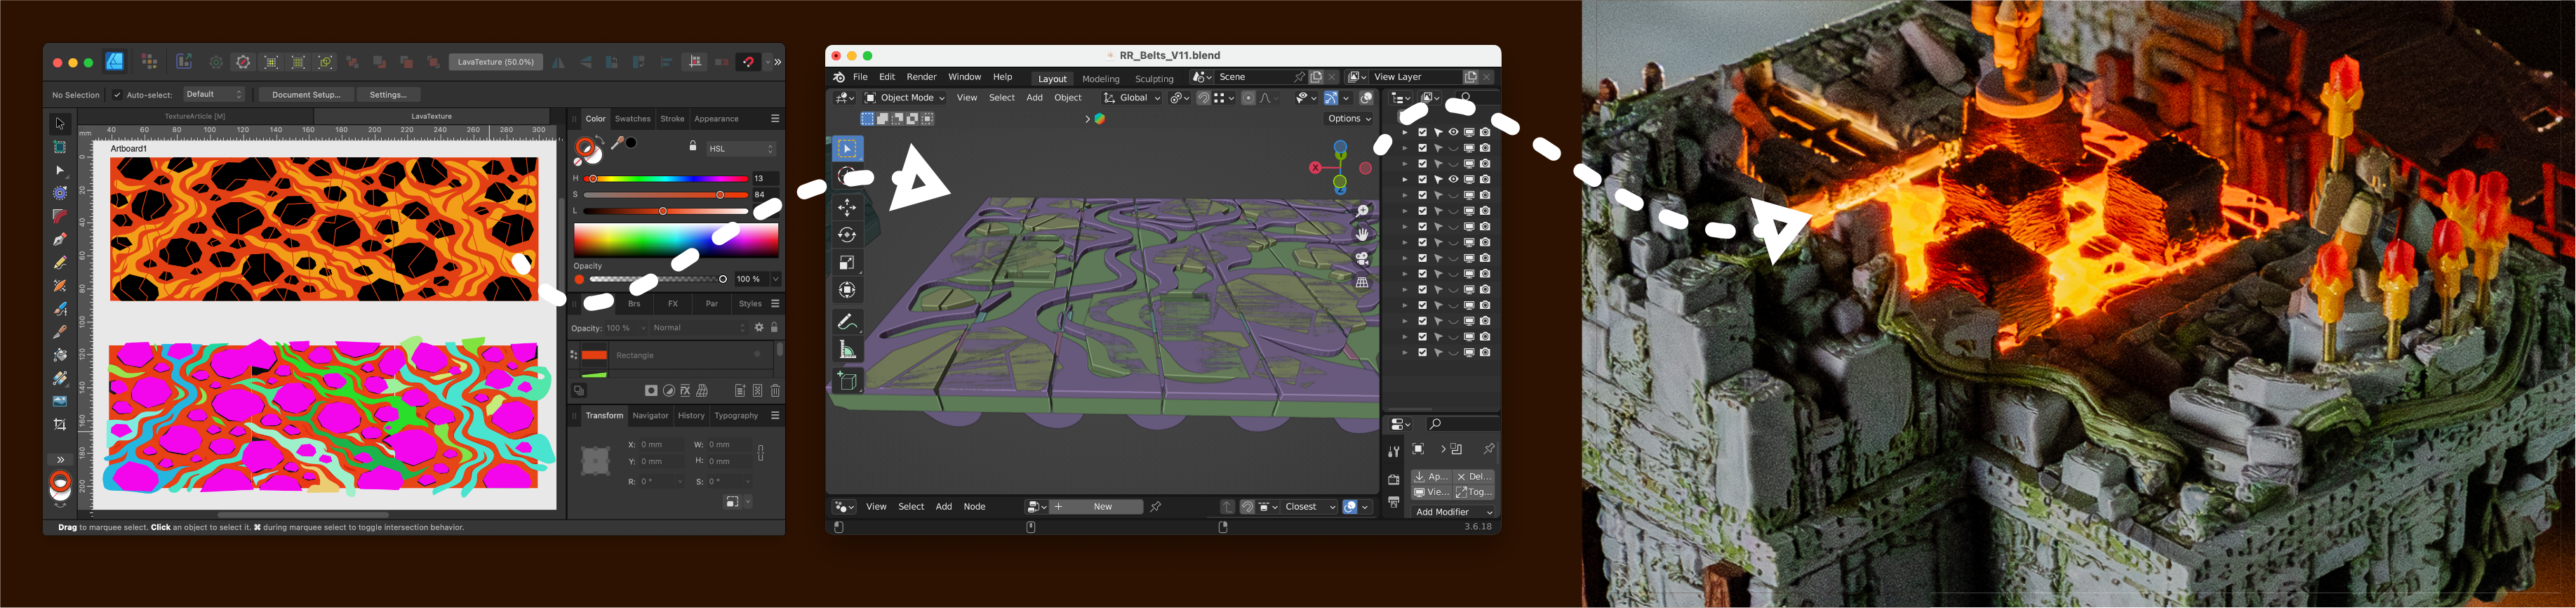
The river prints in a single color but for the lava I exported an individual mesh for each color, assigned filaments in Bambu Studio and then merged the meshes into a single object before slicing.
Slicer Textures
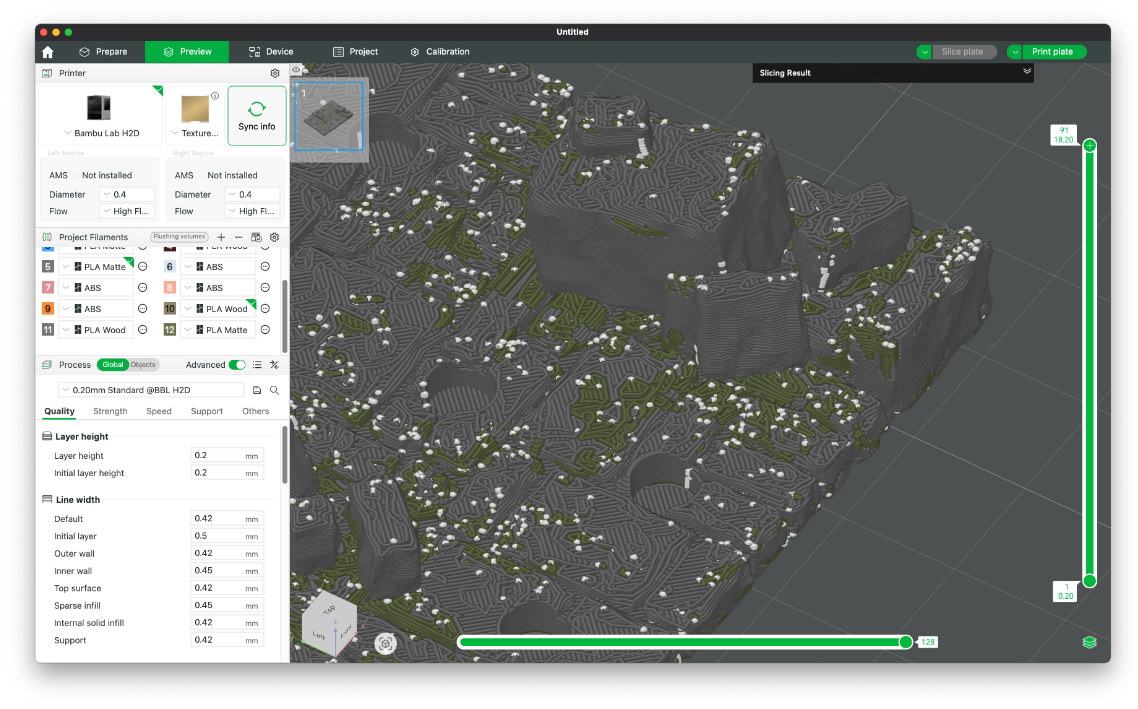
I wanted to include some additional, backlit lava on the board that 'flowed' around some of the movement spaces. To do this, I used a fluid simulation in Blender to generate a mesh. I then used this mesh as a template to cut out the brick textures so that it could be inset & exported as an STL.

Within Bambu Studio, I started with a transparent red PLA as the base color and then painted on black PLA onto the surface using the paint bucket. By adjusting the smart angle fill, I was able to generate some organic patterns quickly. There are many, more detailed ways to complete this part but this was a time-efficient method and I'm prettyhappy with the results.
Conclusion
These techniques were in addition to the brick and vine geometry which are the base of the model - I’ll be releasing a Creation Kit that include instructions and sample files so that users can release compatible expansions for Relic Rush. Look for that about a month after the campaign ends.
This project has been a good opportunity to experiment with new techniques - let me know if any of these seem useful or if you have a go-to method for adding texture to your models!
