Progress Bar Timer 3D Printed Part


Print Profile(2)

Description
Latest Version: V0.2
Changelog:
- Adjusted dimensions
- Added lithophane
- Added software features like flashlight, timer loop, timer settings, etc
- Added phone storage box
Project Introduction
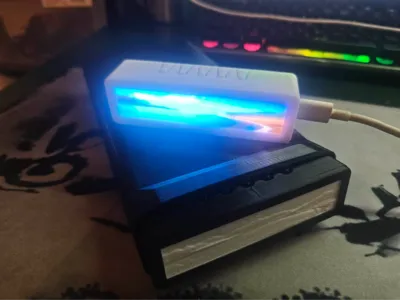
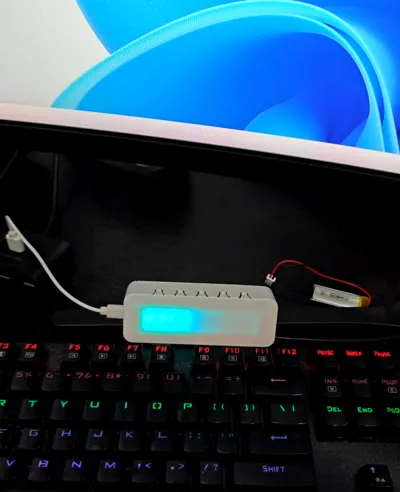
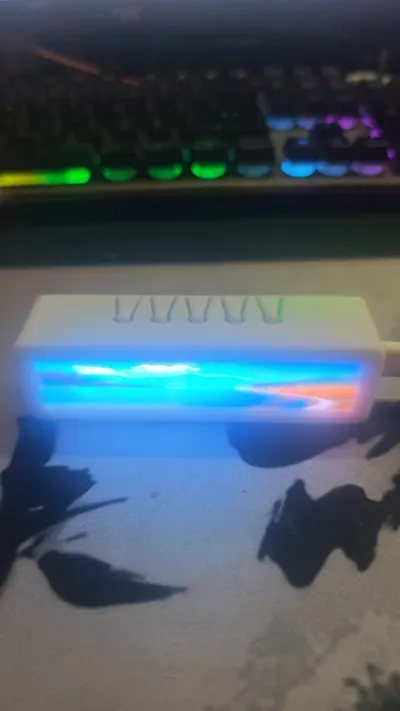
FocusBarTimer is a **full-stack open-source** minimalist timer. There's no urgency of digital jumps, only a progress bar made of 10 full-color LEDs, allowing you to feel time flow while concentrating. This page provides all files for the accompanying **3D Printed enclosure**
Use cases: Pomodoro Technique / Deep concentration / Anti-phone distraction / Minimalist desktop decor / Personalized DIY gift
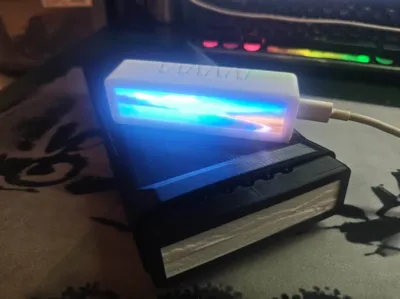
✨ Highlight: Replaceable lithophane panel
This is the most distinctive design feature of the FocusBarTimer enclosure—the **lithophane panel is held in place by the top cover, which can be removed by hand, allowing for quick panel changes**:
- Tool-free replacement — Remove top cover → Change panel → Replace top cover, done in seconds
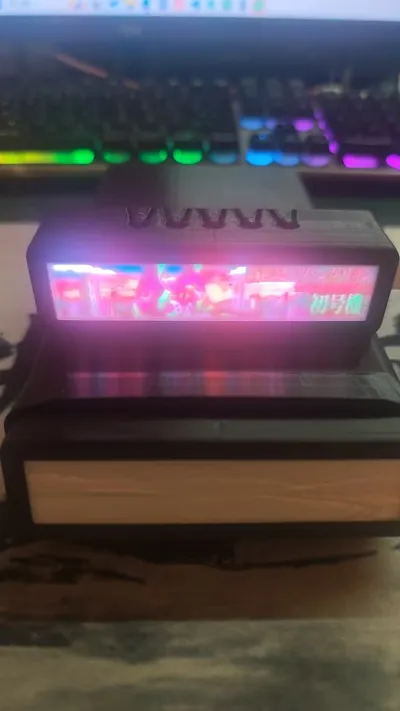
- lithophane glowing effect — Translucent PLA printed patterns, which glow when LEDs illuminate, creating a great ambiance
- Fully customizable — The lithophane pattern is generated from images; create anything you like: text, logos, geometric patterns, cute pets...
- Change panels to match your mood — Print a set of "Work / Study / Meditation" themed panels and swap them according to your state
💡 Welcome to upload your exclusive lithophane panel designs to MakerWorld and co-create with the community!
📐 lithophane Panel Creation Tutorial
The lithophane panel is a single-piece structure; the lithophane and lens frame are combined into one during printing. The production process is described below, based on Bambu Studio
Component description
Component Description Lithophane sheet The part that carries the pattern, generated by MakerLab from an image, with thickness variations creating the light-transmitting effect Lens, hollow The frame base of the panel, into which the lithophane is embedded to form a single piece Production steps
Step 1: Generate the lithophane sheet
- Open Bambu Studio, go to the top menu "MakerLab" → "Lithophane Generator"
- Upload your desired image (image source idea: you can have AI generate images with specific aspect ratios)
Set dimension parameters:
Parameter Value Width 94 mm Height 19 mm Outer Margin 0 - Click generate, export .3mf file
Step 2: Assemble into the lens frame
- In Bambu Studio, open the lithophane 3MF exported in Step 1
- Drag the **[Lens-Hollow]** model file provided in this project into the same project
- Align and embed it into the lens frame—the lithophane surface faces outwards (LED light illuminates from the back)
Step 3: Slice and print
- Slice and print according to the default parameters for lithophane
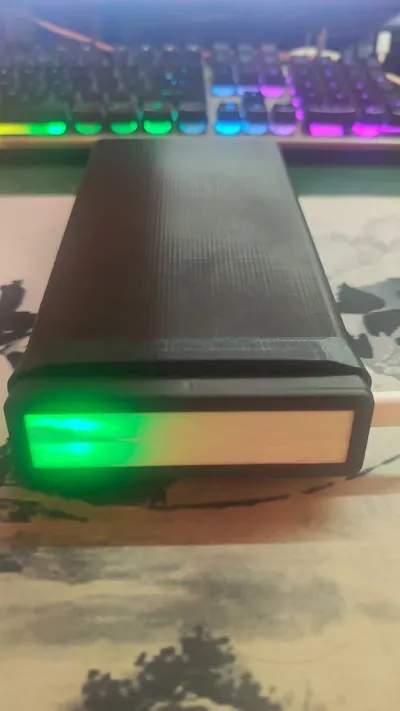
📱 Phone lock storage box
Insert the timer into the storage box, and focus automatically begins. Pull it out, and it automatically stops
Can't resist checking your phone while concentrating? This storage box acts as a **physical barrier** against that impulse
Usage is simple:
- Put your phone in the box
- Insert the timer into the storage box opening — All buttons are pressed down → **Pomodoro timer starts automatically** (default 25min+5min)
- When concentration ends, pull out the timer → **Automatically stops**
The back of the box has a charging port, allowing your phone to charge while "in confinement". Messages still pop up, but you can't reach your hand in
💡 It doesn't lock you in—it gives you a few extra seconds to hesitate, allowing reason to overcome impulse
Printing Recommendations
The model is optimized for low printing difficulty. Model files are included in the .3mf, allowing for one-click slicing and printing
Enclosure Features
- Precise fit — Custom-designed for the FocusBarTimer PCB, with accurately aligned button holes, LED windows, and Type-C interface
- Simple design — Straight-line flat design, takes up minimal desk space, and the LED progress bar is clearly visible
- Modular structure — Split design, including bottom shell, top cover, and replaceable lithophane panel; the top cover can be removed by hand, making panel changes very convenient
- no supports printing — Proper orientation, no support material needed, high printing success rate
- Material versatility — PLA / PETG both work; lithophane requires specific colored materials (PLA recommended)
File Description
This model includes the following files:
File Content *.3mf Pre-sliced file (Bambu Studio), includes recommended printing parameters, one-click printing *.stl Universal engineering format, can be imported into any CAD software for modification 📌 When creating the lithophane panel, simply use MakerLab to generate the lithophane sheet, then assemble it into the lens-hollow frame and print, see the creation tutorial above
Related Resources
This is only the **enclosure part** of this project; the complete project also includes:
Content Address 🔌 PCB hardware project LCSC EDA Open Source Community 💻 Firmware source code GitHub - ShixianLab/FocusBarTimer 🎬 Demo video Bilibili Demo For the complete replication tutorial, see docs/BUILD_GUIDE.md in the firmware repository
🛒 Don't want to bother yourself? You can find me
Printing the enclosure is just the first step; subsequently, you'll need to make PCBs, procure components, solder... If you want a ready-to-use product, you can contact me:
- PCBA (circuit board with all components soldered, battery not included) — Ready to use out of the box, just connect a battery and it works
- PCBA + Enclosure (battery not included) — Ready to use upon arrival, enclosure can be regular or with a custom lithophane panel
Lithium batteries are not included due to shipping restrictions; you can purchase a 3.7V lithium battery yourself (available on various platforms, approximately ¥5-15)
👉 Go directly to e-commerce platforms and search for the store **"Shixian Workshop"** to place an order
Main Functions (Complete Unit)
After printing the enclosure, purchasing PCB components, and flashing the firmware, you will have a timer with the following functions:
- 10 WS2812 RGB full-color LED progress bar — Lights up one by one, colors gradually change with progress
- 5 preset durations — 5 / 10 / 15 / 25 / 30 minutes, one-click start
- Pomodoro mode — Focus ⇄ Rest automatic cycle
- Colorful lighting effects — Breathing / Meteor, one-click switch during focus
- Buzzer reminder — End-of-phase sound effect, can be muted
- Flashlight mode — Double-click for full bright white light
- Ultra-low power consumption — Automatically enters standby after 30 seconds of inactivity, standby current ≈2μA
- USB + lithium battery dual power supply, with power indicator
- 📱 Phone lock storage box — Matching 3D printed storage box; the timer plug automatically starts when inserted, and stops when removed, providing a physical barrier against the urge to check your phone
Required Hardware (Complete Unit List)
Component Model/Specification Reference Price Main Control MCU PY32F002B (TSSOP-20) ¥1~2 RGB LED WS2812 5050 × 10 ¥2~5 Charging Management TP4056 Module ¥1~3 Lithium Battery 3.7V 300~500mAh ¥5~15 Passive Buzzer 12mm Piezoelectric ¥1 PCB Prototyping Minimum 5 pieces ¥5~20 Other Components Resistor/Capacitor/Button/Type-C ¥3~5 Total ¥20~45 Open Source License
This project (including the enclosure model) adopts the CC BY-NC 4.0 license
- ✅ Allowed: Personal printing, modification, distribution
- ✅ Allowed: Non-commercial derivative works (with attribution)
- ❌ Prohibited: Commercial sale (including sales of printed products)
Made with ❤️ by ShixianLab
License
You shall not share, sub-license, sell, rent, host, transfer, or distribute in any way the digital or 3D printed versions of this object, nor any other derivative work of this object in its digital or physical format (including, but not limited to, publishing derivative works outside the Makerworld platform or hosting on other digital platforms). The objects may not be used without permission in any way whatsoever in which you charge money or collect fees. Subject to the above restrictions, derivative works may be published only within the Makerworld platform, and all such derivative works must be licensed under the same SDFL‑C license, without modification or additional terms. You may download the digital versions of this object, 3D print it, and display images, videos, or usage demonstrations of 3D printed versions of the object on personal social media platforms or Makerworld official channels, provided that no digital versions of the object are shared or distributed.
Comment & Rating (0)