Mini e-spinner


Print Profile(1)
Bill of Materials
- stainless steel rod / 4 mm / 120 mm x 1:
- Bearing 4*13*5 x 1:
- Bearing 25*32*4 x 1:
- micro USB adapter (female chassis part) x 1:
- Step up converter (38mm * 17mm) x 1:
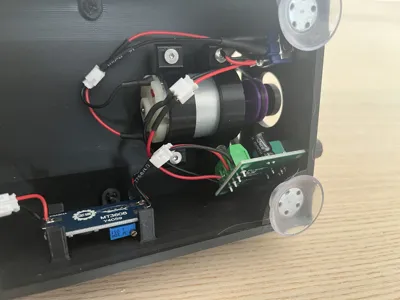
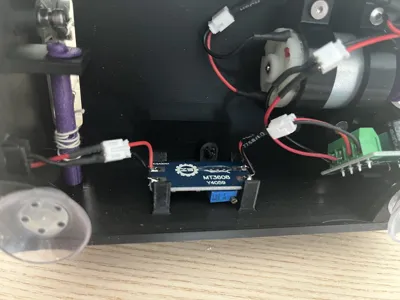
- speedcontroler (12V DC) x 1:
- 3 position switch 6 pin x 1:
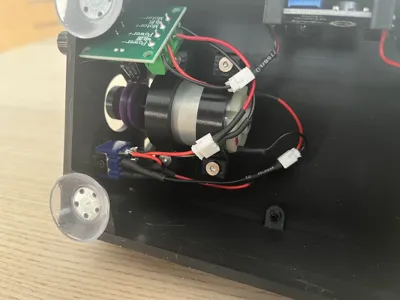
- DC Electromotor / RS-385 / +/-8000rpm x 1:
- Drive belt 125mm x 1:
- Brake spring (2 pieces) x 2:
- Rubber feet 25mm / M4 (4 pieces) x 4:
- M4 brass thread insert (4 pieces) x 4:
- M3 brass thread insert (15 pieces) x 15:
- M3 * 8 countersunk screw (14 pieces) x 14:
- M3 * 8 screw with nut and washer x 1:
- +/- 20cm cotton wire for the brake x 1:
- Magnet 6*2 mm (2 pieces) / optional x 2:
Description
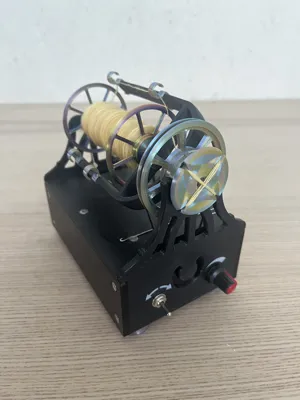
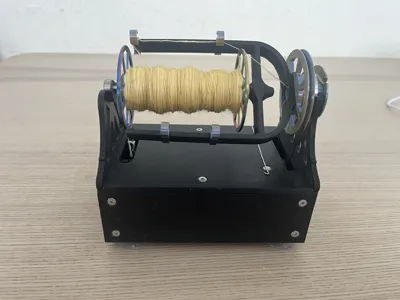
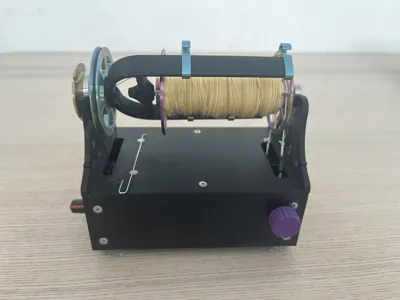
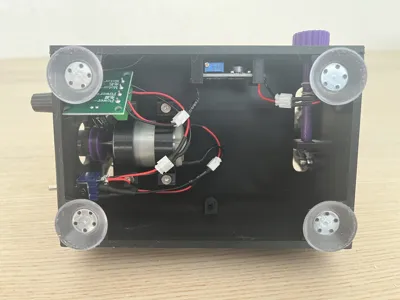
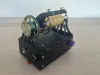
This is a design for a fully functional (mini) e-spinner.
Not all parts can be 3d printed.
Some parts will have to be purchased.
Also some electrical wiring needs to be soldered, and the voltage needs to be adjusted.
It is not difficult, but some technical insight and experience with a soldering iron is required.
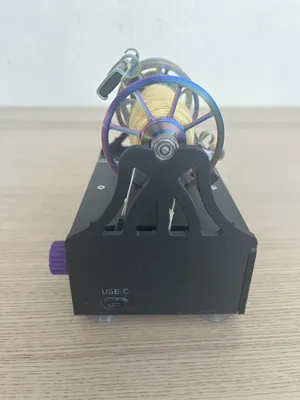
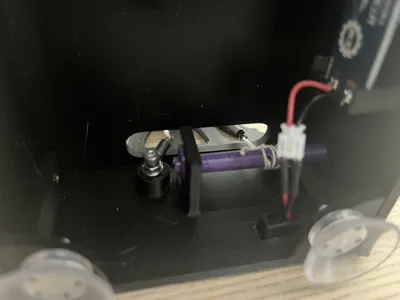
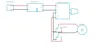
I opted for a USB-C connection because it is fairly common. This also gives the possibility to work with a power bank.
For this, the step-up converter is necessary to increase the speed of the motor with a higher voltage.
The wiring goes from the USB-C connector to the input of the step-up converter.
From the output of the step-up convertor to the input of the speed controller.
From the output of the speed controller to the 3 position switch (to allow both left and right rotation).
And from the switch to the motor.
I used 2 smal and light steel springs and a piece of cotton yarn for the brake wire.
But a little ruber band wil also work.
A nylon wire is not usable as a brake because it creates too much friction on the bobbin.
All materials can be used for printing, but I personally prefer PETG.
Almost all parts can be printed without support.
Only the front and back need support for the recesses where the bearings have to fit.
Yoy have to enable support there.
I printed with the 0.16mm Balanced Quality profile
nozzle diameter: 0.4 mm
Walloops extended to 5
Bottom and top layers: 6
infill: 15% / Gyroid
Layer height = 0,16mm
For the spinhole reducer 0,12mm (or even 0,08mm) layerheight is advised.
For better adhesion you can use a brim (outside) for the bobbin tube.
For a bobbin, you have to print one tube and two discs.
The bobbins must be glued together. And probably the hole for the axle needs to be drilled out a little (4 mm!).
The two magnets are not necessary.
But you can use a wire hook made out of a paperclip.
And that can be attached to the magnets.
Everything is seperated into different buildplates so this mini e-spinner can also be printed on a A1-mini printer.
The parts that have to be bought:
stainless steel rod / 4 mm / 120 mm
Bearing 4*13*5
Bearing 25*32*4
micro USB adapter (female chassis part)
Step up converter (38mm * 17mm)
speedcontroler (12V DC)
3 position switch 6 pin
DC Electromotor / RS-385 / +/-8000rpm
Drive belt 125mm
Brake spring (2 pieces)
Rubber feet 25mm / M4 (4 pieces)
M4 brass thread insert (4 pieces)
M3 brass thread insert (15 pieces)
M3 * 8 countersunk screw (14 pieces)
M3 * 8 screw with nut and washer
+/- 20cm cotton wire for the brake
Magnet 6*2 mm (2 pieces) (optional)
A picture withe the wire diagram is included.
Have fun printing and building.
Happy spinning!
Documentation (1)
License
You shall not share, sub-license, sell, rent, host, transfer, or distribute in any way the digital or 3D printed versions of this object, nor any other derivative work of this object in its digital or physical format (including - but not limited to - remixes of this object, and hosting on other digital platforms). The objects may not be used without permission in any way whatsoever in which you charge money, or collect fees.
Comment & Rating (8)